I’m someone who loves tinkering with whatever I can get my hands on, but I’ve never tinkered with circuits so I was really looking forward to see what I could do with this project. Arduino is a tool that I’ve always wanted to learn how to use, and I didn’t realize how many resources online there are, so I thought I might start there to help guide the direction I take with this assignment.
Ideas and Brainstorming
When I looked at the list of many parts, one that caught my eye was the screen. Unfortunately, when I began to look for this piece LCD1602 I realized it was missing from my kit. Then I realized that multiple pieces and sensors were missing from my kit. I thought about my existing options. Because I’m in the food waste group I had an idea that it would be cool to create a way to measure the temperature of a fridge environment and have LED light colors correspond to the temperature, with green being in the standard fridge range, yellow being a certain margin outside of this range, and red being any temperature below or above the margin outside of the fridge range. I decided to first reset the set up demoed in class for measuring the temperature. From there, I could follow a website I found and then make modifications to add my own twist to the project.
Choosing a Sensor
Originally, I wanted to choose a sensor that would relate well with the Food Waste project. I was hoping to take the example from the class slides and use this as a starting point to build upon my project idea of creating a system that would measure the temperature and while it was in range, the LED light would be green, but when it was out of range, the LED light would switch to red and the buzzer would be turned on. However, when I tried to use the DHT sensor, I realized there was an issue with the sensor itself. After carefully checking the wiring diagram on the slides and switching the position as well as restarting the program, the DHT sensor was still giving “nan degrees Fahrenheit” and “Failed to read from DHT sensor as shown in the Serial Monitor screen below.
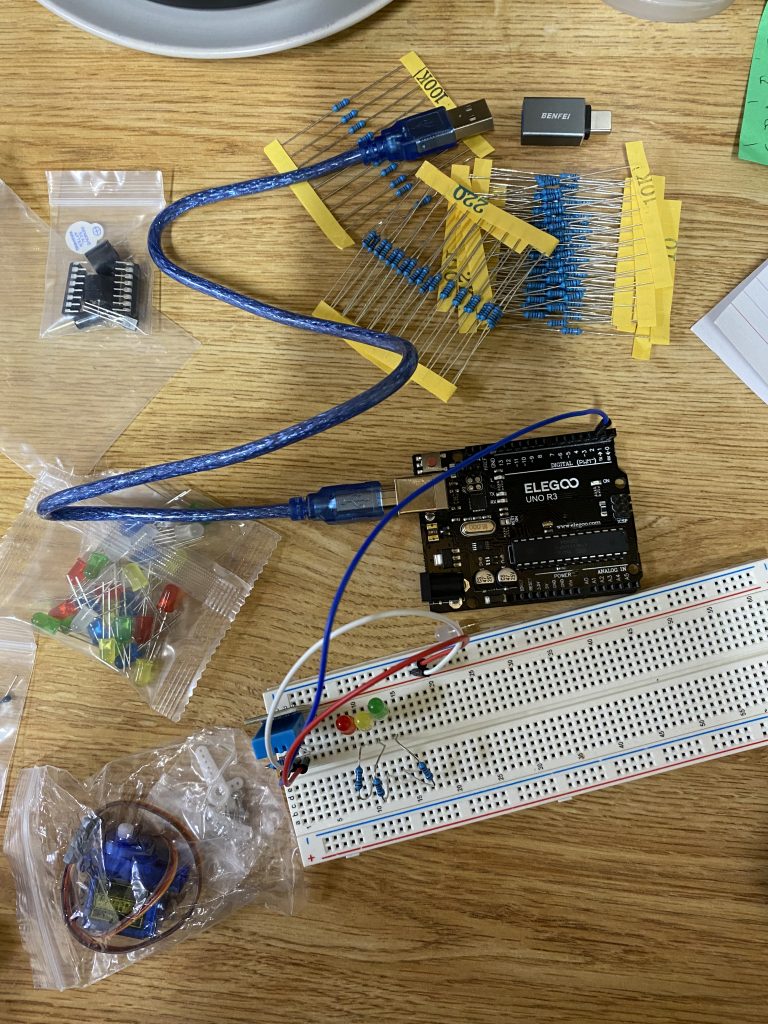
DHT Temperature Sensor with LED lights 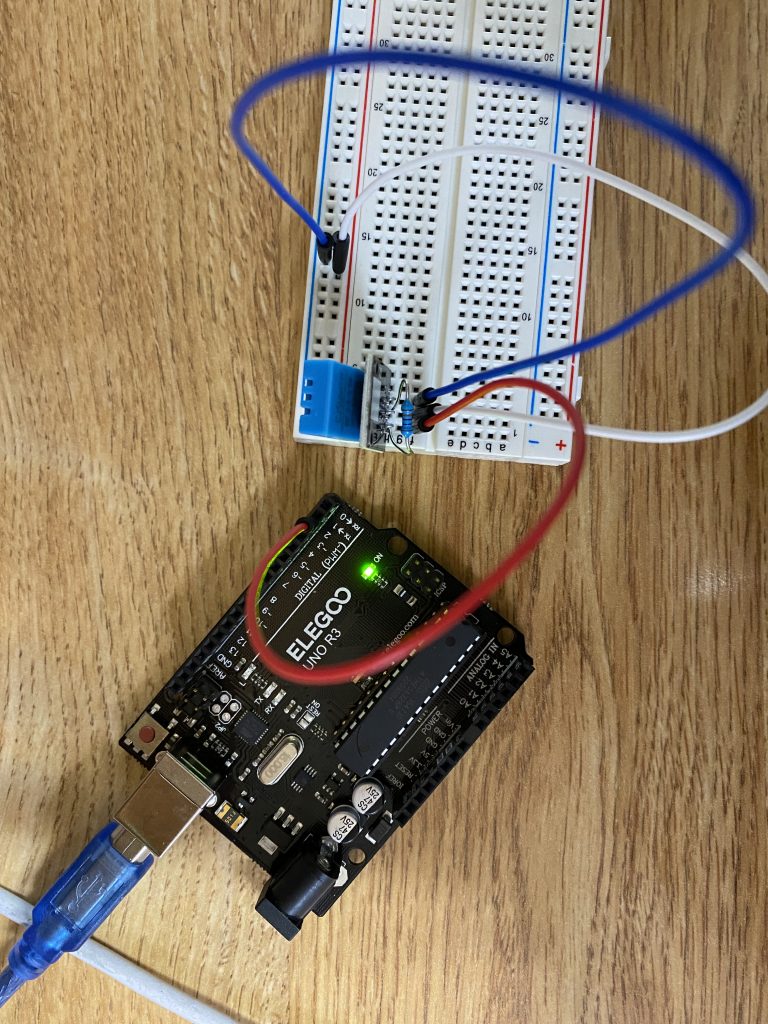
DHT Temperature Sensor Only

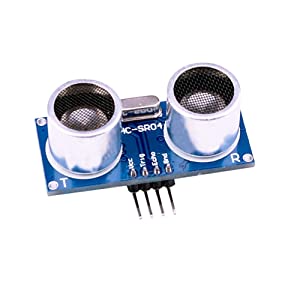
I eventually decided to go with the ultrasonic sensor, due to the many possibilities and wide array of creative content online. One that first stood out to me was the intruder sensor alarm, which I saw in a video linked down below.
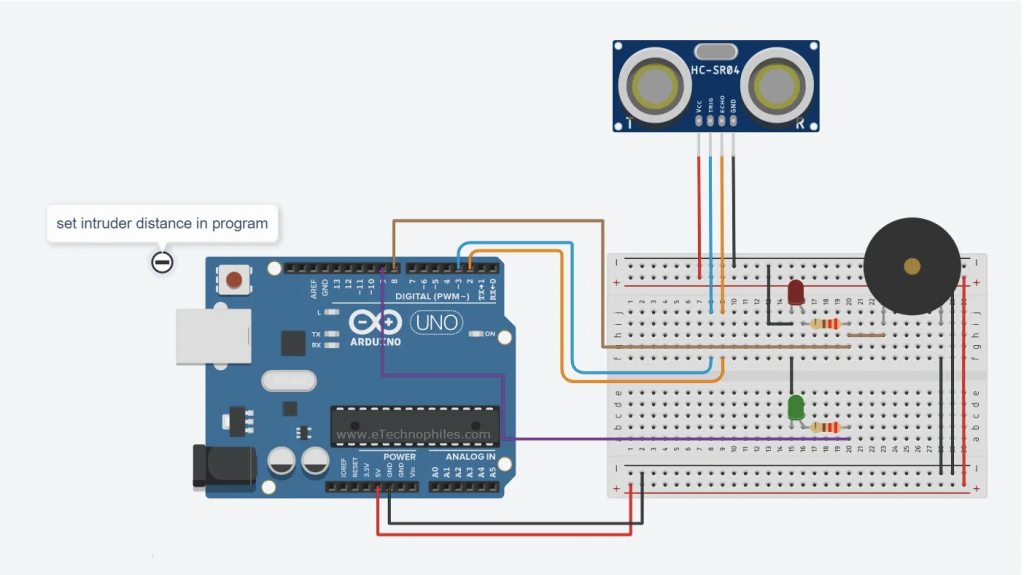
Wiring Diagrams
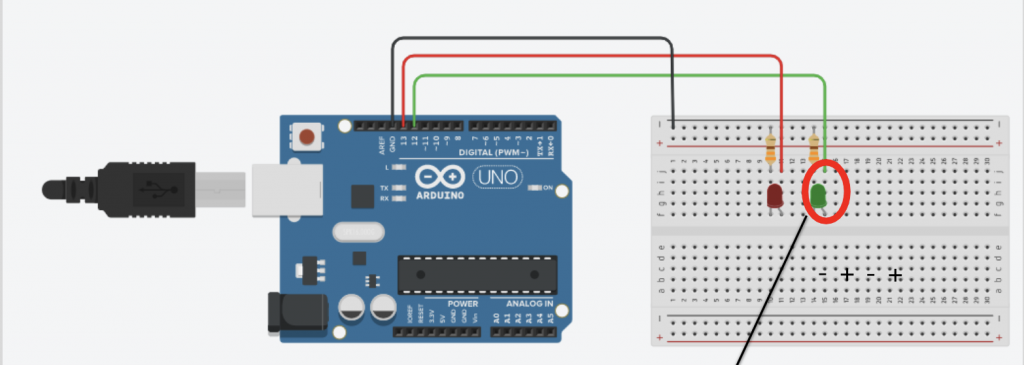
Relevant Data Sheets
The Data Sheet that was found to be helpful was the one for active buzzer, downloaded from the Elegoo website. There are two buzzers, passive and active and the one used for the project was the active buzzer.
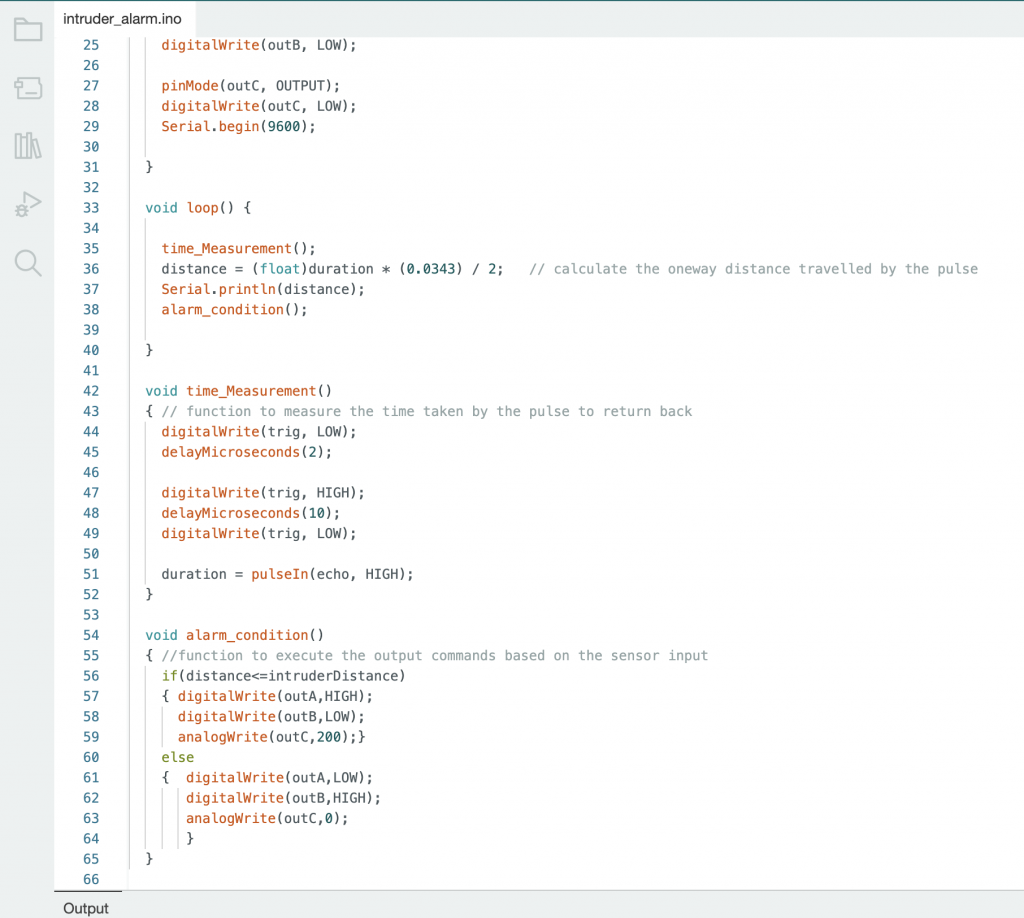
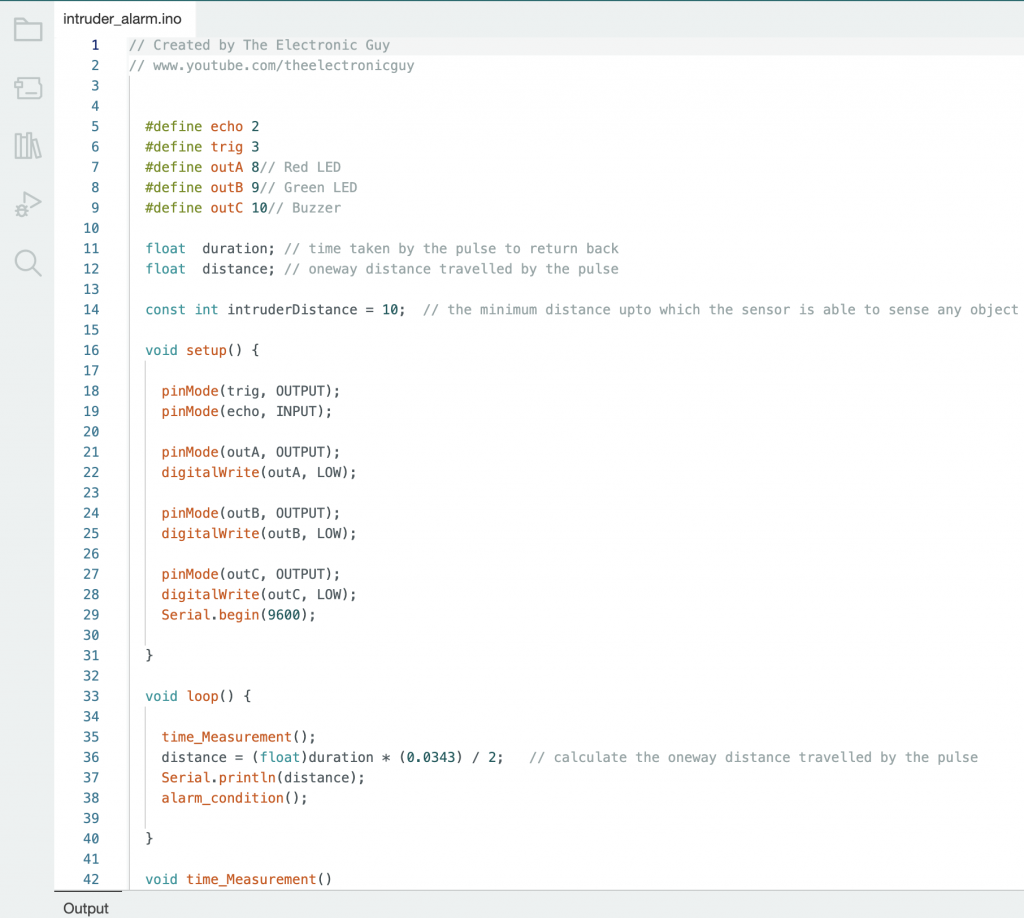
Final Project Design

Areas of Difficulty
Not all of the parts in the kit were labeled on the sheet of contents which was frustrating, because it was hard to identify which sensors were available for actual usage. The many small pieces in differently wrapped plastic bags were also not labeled, which made identifying pieces and components even harder. In addition, it was difficult matching up circuit diagrams from online to the actual bread board and Arduino because of unclear pictures and instructions. I also had trouble distinguishing the different values of resistors once they were removed from their packages because all of the resistors are the same blue color. Another difficulty appeared to be troubleshooting and debugging when the code or the sensors were not working with the desired effect. This made it more lengthy of a process than needed because I was not sure where to start for troubleshooting.
What I Learned
Overall, I learned basic functionality of the Arduino and it’s different parts. In addition, I’m more familiar with wiring and how to set up a code or new sketch. I didn’t realize how wide of a variety the uses for Arduino were until I really started to look into different ideas available on the internet. I also learned that the whole process took much longer than expected and had I known I would have started at least a couple days earlier. I learned more about the bread board orientation and how wires and circuit components are connected.
YouTube Video
Website Links
- BME-66 Lectures: Lecture 11 Arduino on Canvas
- https://www.elegoo.com/products/elegoo-37-in-1-sensor-kit
- 5 Arduino Ultrasonic Sensor Projects – Code, Circuit Diagram(2022)
Potential Real World Uses
Overall, there are many uses for this kind of project in the real world, such as alarm detection at night and in banks where the safes are kept, as well as in stores after closing hours (such as the jewelers and other high end places as well).