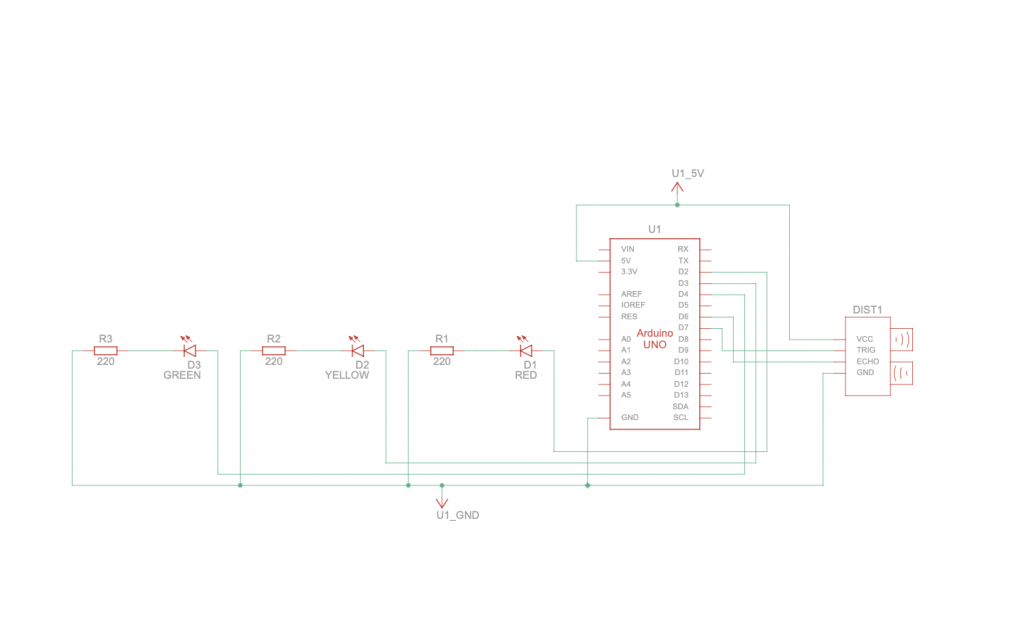
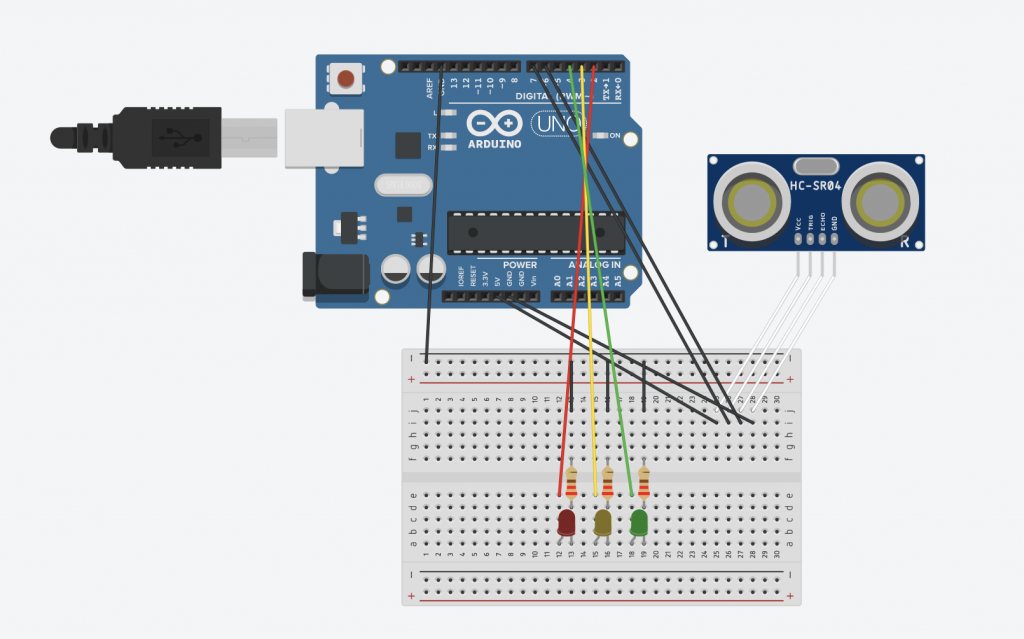
For this project, I wanted to create a traffic light system that incorporated a sensor. To begin, I started building a simple circuit with three LED’s (one green, one yellow, and one red), three 220 ohm resistors, and the power source of the Arduino. Here is a schematic of the circuit I made using Tinkercad:
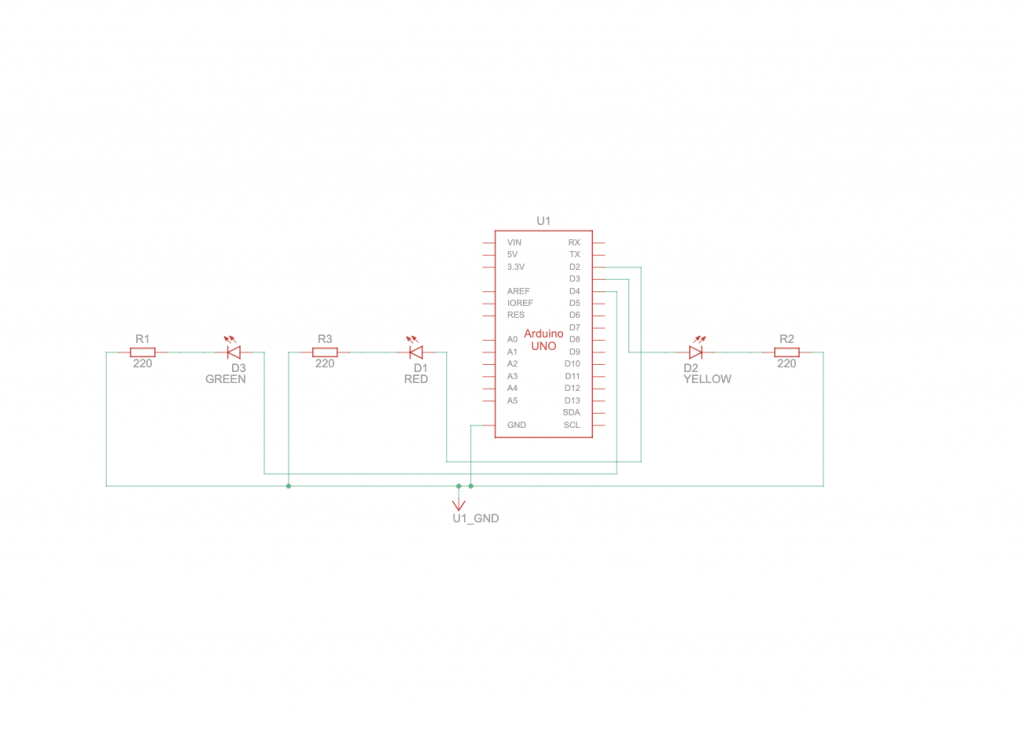
Schematic of simple LED circuit 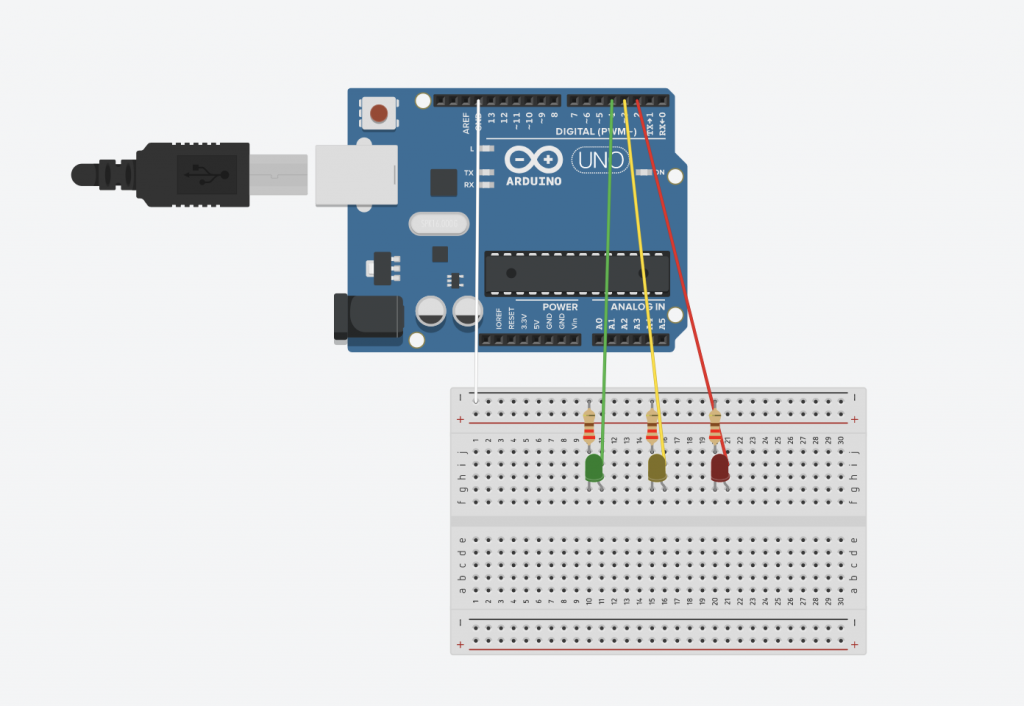
TinkerCAD of simple LED Circuit
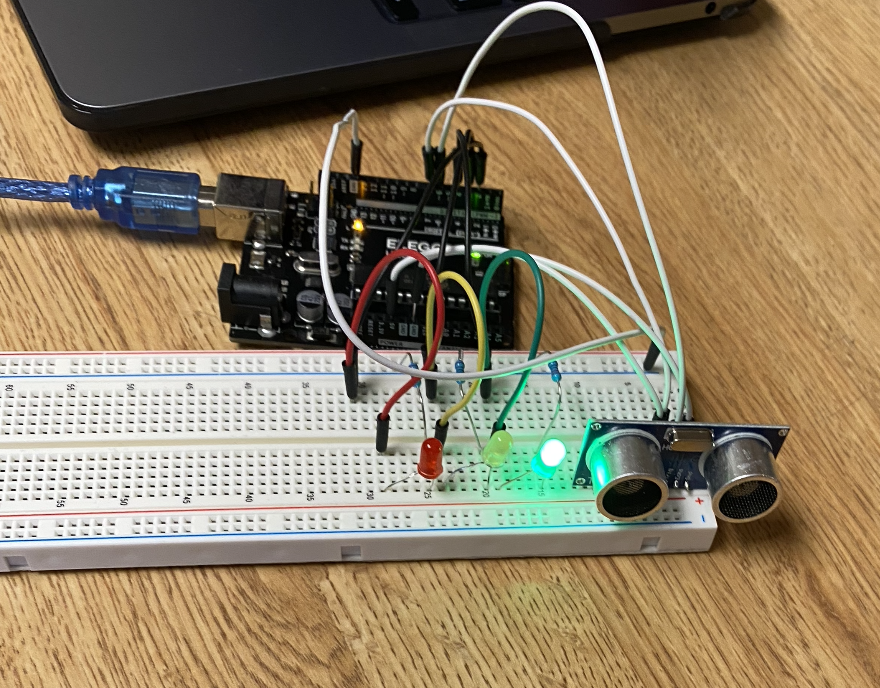
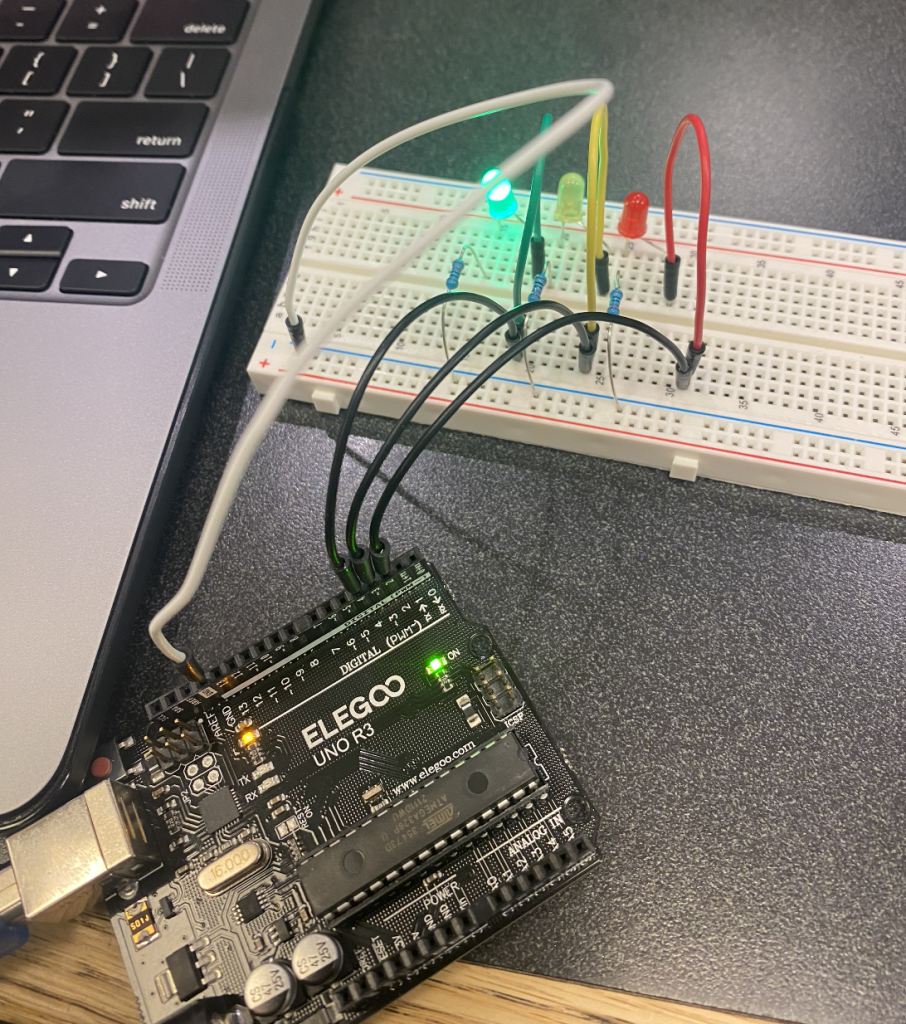
and here is an image of the actual circuit:
After this, I programmed the system to work like a normal traffic light. First I defined what each pin was (go, slow, and stop) and then I defined how long each of these states should last for (go for 8 seconds, slow for 3 seconds, and stop for 5.5 seconds). I then defined each of the pins as outputs, created a loop that cycles between three states where each LED is individually lit, then defined these three states. Here is a video of the circuit actually doing that:
traffic light!
For the next portion of this assignment, I needed to decide on a sensor. I chose to use the ultrasonic distance sensor. I chose this because I wanted a sensor that would be able to easily automatically trigger a change in the state of the LED’s. Here is a schematic of this:
It was easy to build this circuit, however, coding the Arduino to get it to do what you want is a bit of a different story. I first defined the trigger and echo pins for the sensor. I then redefined the pins used in the traffic light to correlate with whether or not there was something in front of the sensor (clear for green, warning for yellow, and obstructed for red). I defined everything except the echo pins as outputs.
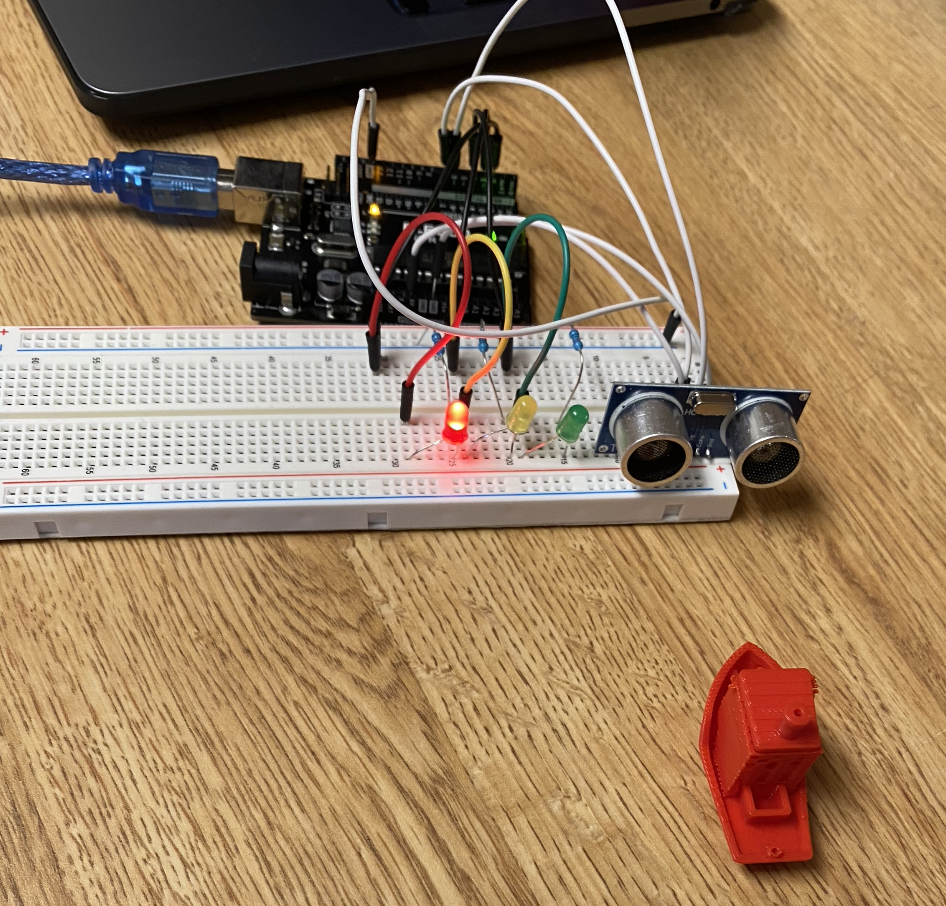
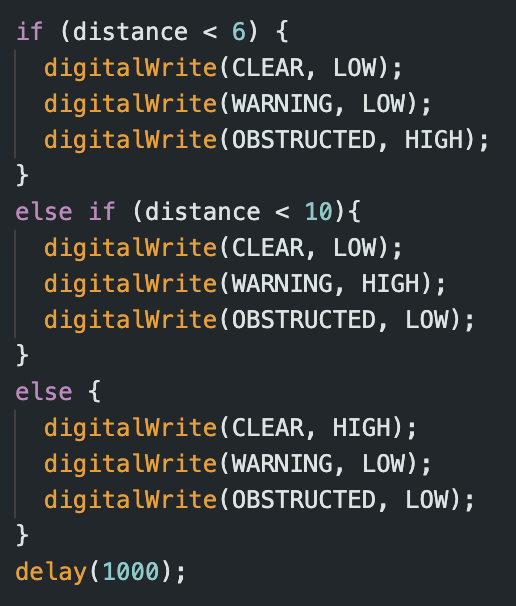
Now getting into the actual code, I needed to set up a loop that would continuously calibrate whether the path of the sensor is obstructed. I did some research to figure out how to actually get the sensor to calibrate distance. I then used these calculated distances as inputs for a series of if/else statements. If the distance was greater than 10 cm, the green LED only would be lit. If the distance was between 6 and 10, the yellow LED would emit light. And if the distance was less than 6, the red LED would be lit. However, this was not the case
first fail..
After this, I kept manipulating the if statements. I was finally able to get the if statement to work with an else statement and an else if statement. I also forgot to add a curly bracket for like 7 minutes and thought everything was broken but it worked out in the end. Here is a picture of the code:
And here is some pictures showing the final system actually working.
Here is a video better demonstrating.
Success!
And here is another video showing me do the same thing but reversing the boat this time.
Success! in reverse..
The most difficult part of this was relearning to code in C++. It seems like everything happens in backwards but it works more like an onion with layers. I learned that Arduino is actually kinda fun when it works.
If I were to take this to the next step, I would maybe do something similar to weighted traffic lights that only go when they feel the pressure of a vehicle. I would do this by making the red light the dormant one and once the ultrasonic sensor detects that an object is there, it will shortly turn green until the path is clear and then it will go from red to yellow.
List of sources:
– https://pimylifeup.com/arduino-traffic-light-project/#:~:text=Arduino%20Traffic%20Light%20Circuit,-The%20circuit%20that&text=It’s%20a%20fairly%20simple%20setup,have%20it%20go%20to%20GND.
– https://www.tutorialspoint.com/arduino/arduino_ultrasonic_sensor.htm
– https://www.hackster.io/blackpanda856/controlling-led-s-using-ultrasonic-distance-sensor-19f38f
– https://docs.arduino.cc/built-in-examples/control-structures/ifStatementConditional

