November 10, 2023
When it comes to molding and casting, my only first-hand experience was when my parents had me and my siblings make a plaster model of our hands/feet when we were young. Otherwise, the only experience I have with molding and casting (mostly casting) is by watching my older brother, who has melted aluminum cans and poured them into a sand mold with a styrofoam object and into steel molds to create little aluminum bears (our high school mascot). As for the rest of my group, we all had similar exposure levels with basic hand casts out of plaster. Unfortunately, one of my group mates, Chloe, was out of town for the long weekend during our normal meeting time, but she still video-called us and managed to help us remotely.
One Piece Mold
We spent most of our time prepping for our multi-piece mold, which is related to our design project, and we didn’t fully plan what we were going to mold for our one-piece mold. Luckily, Julia and I got to Nolop early and managed to find a simple 3D model of an elephant from Thingiverse. We scaled it down and reduced the density to speed up print time to complete it in time for our scheduled molding and casting time.
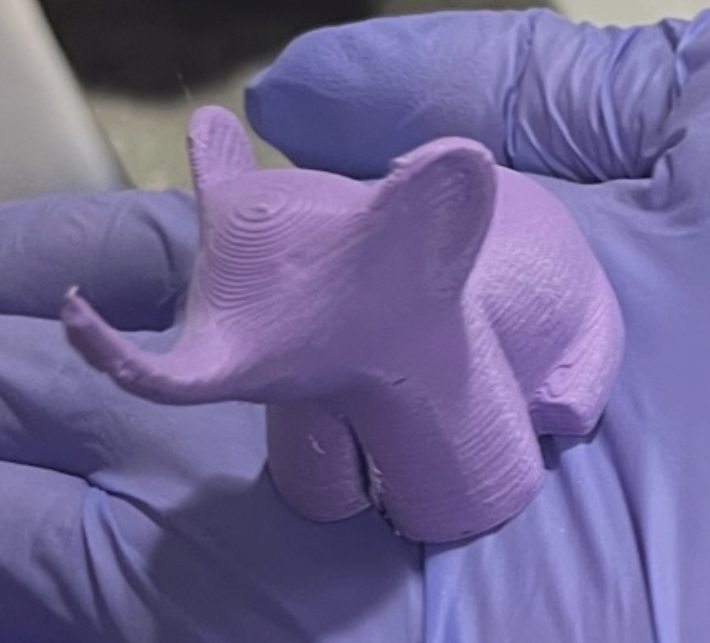
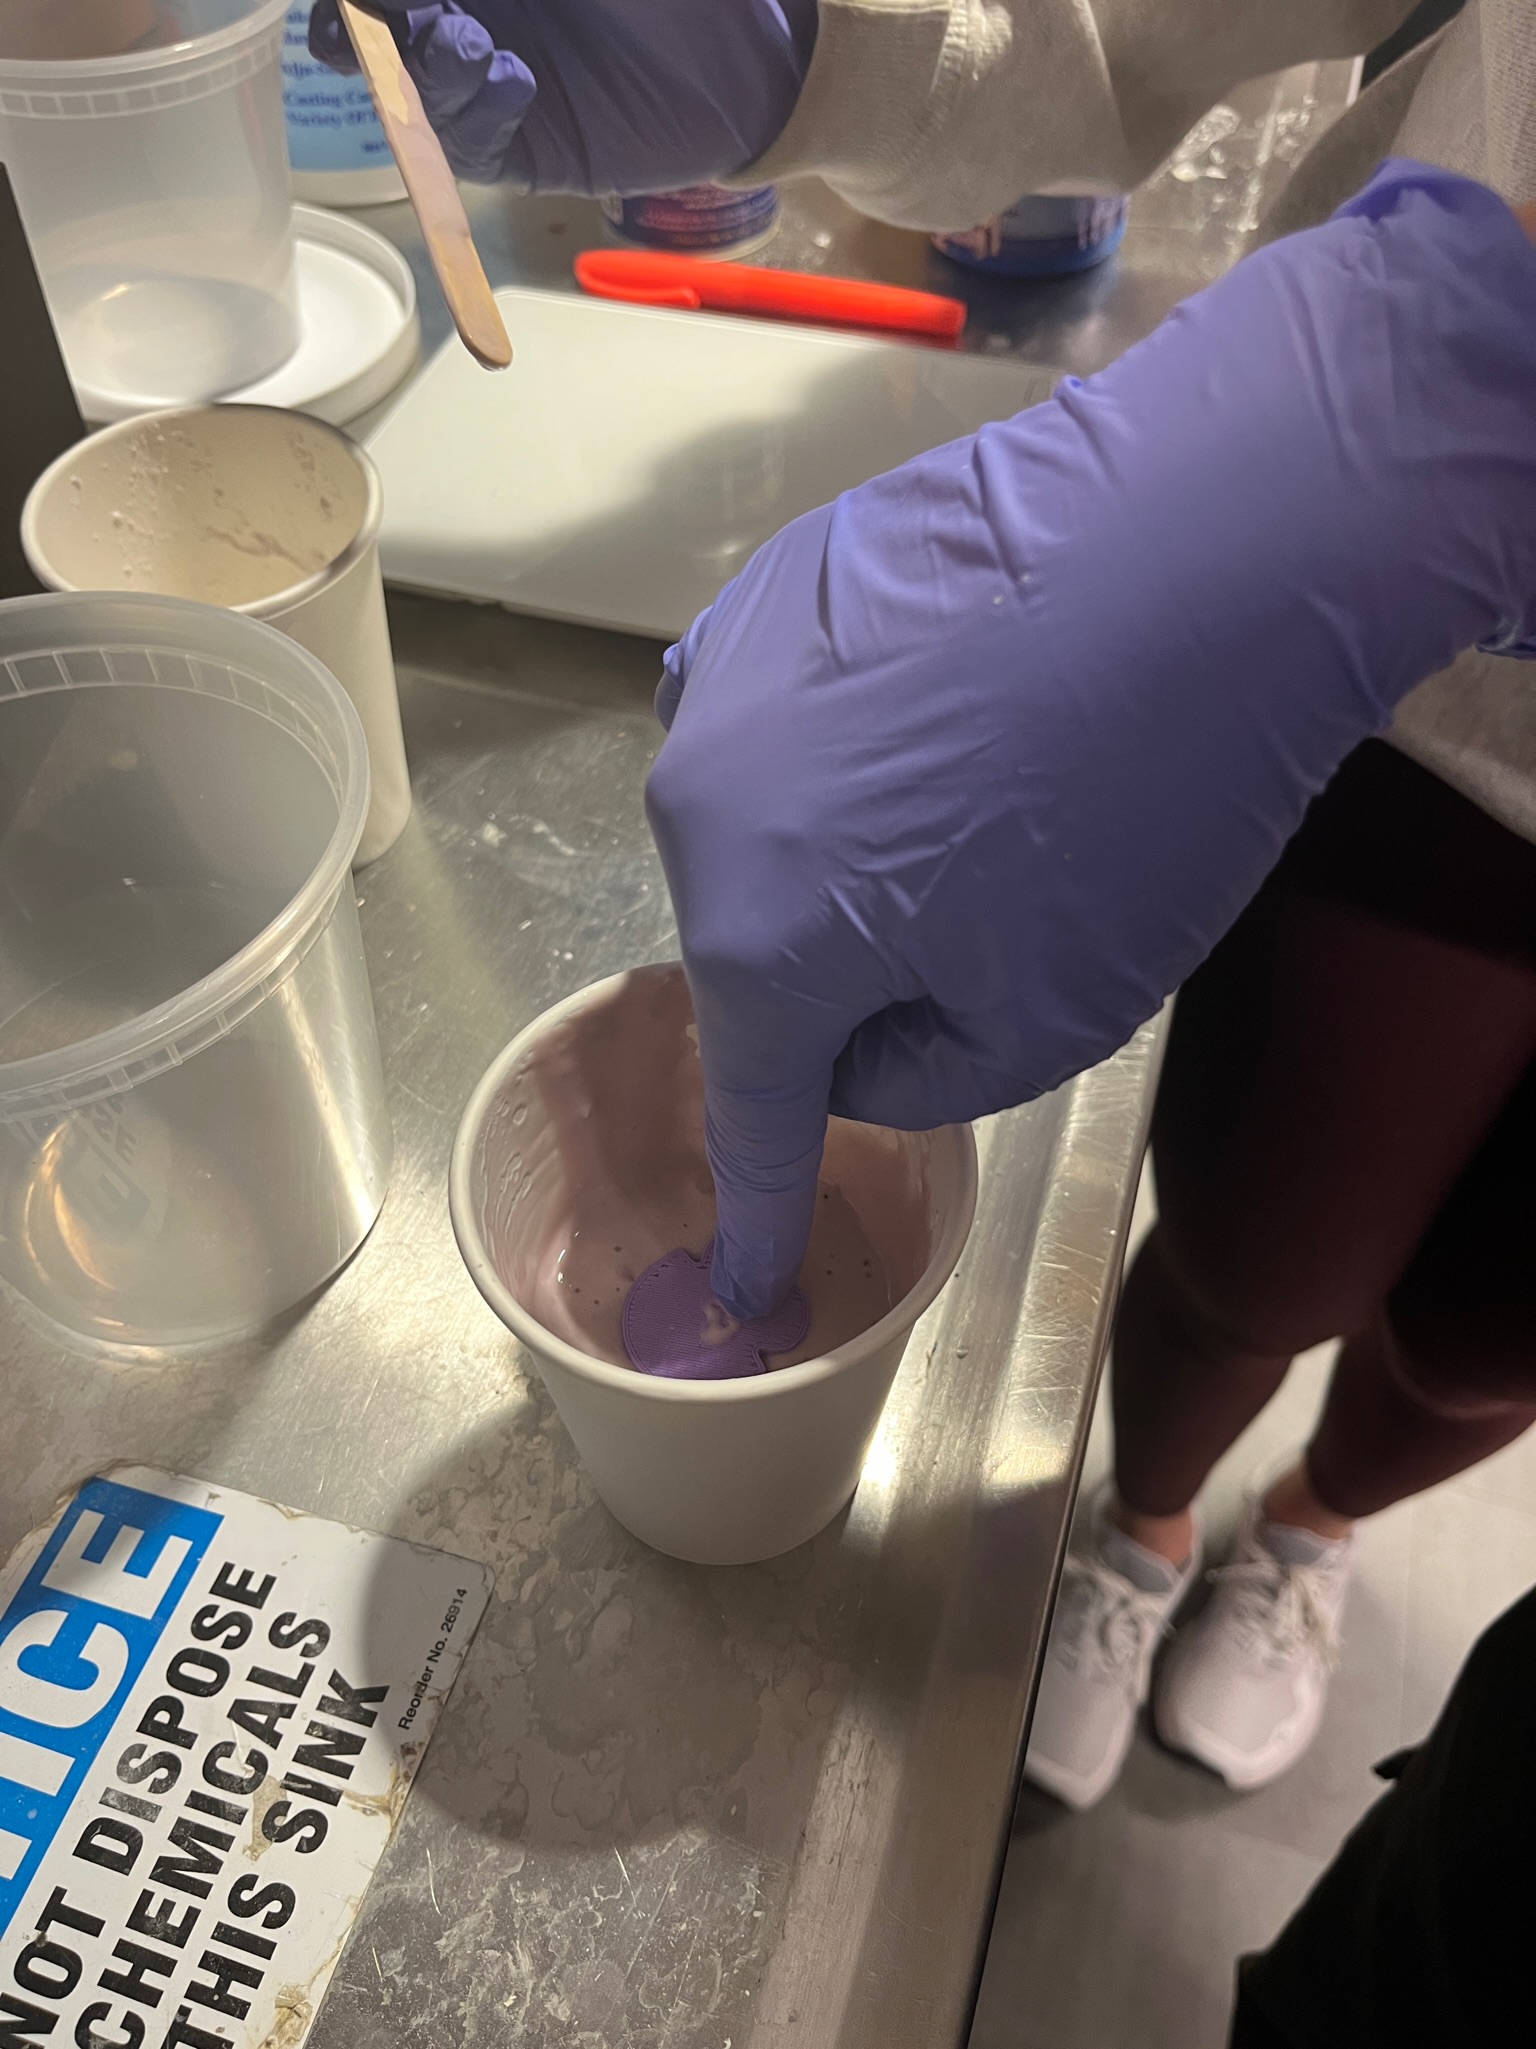
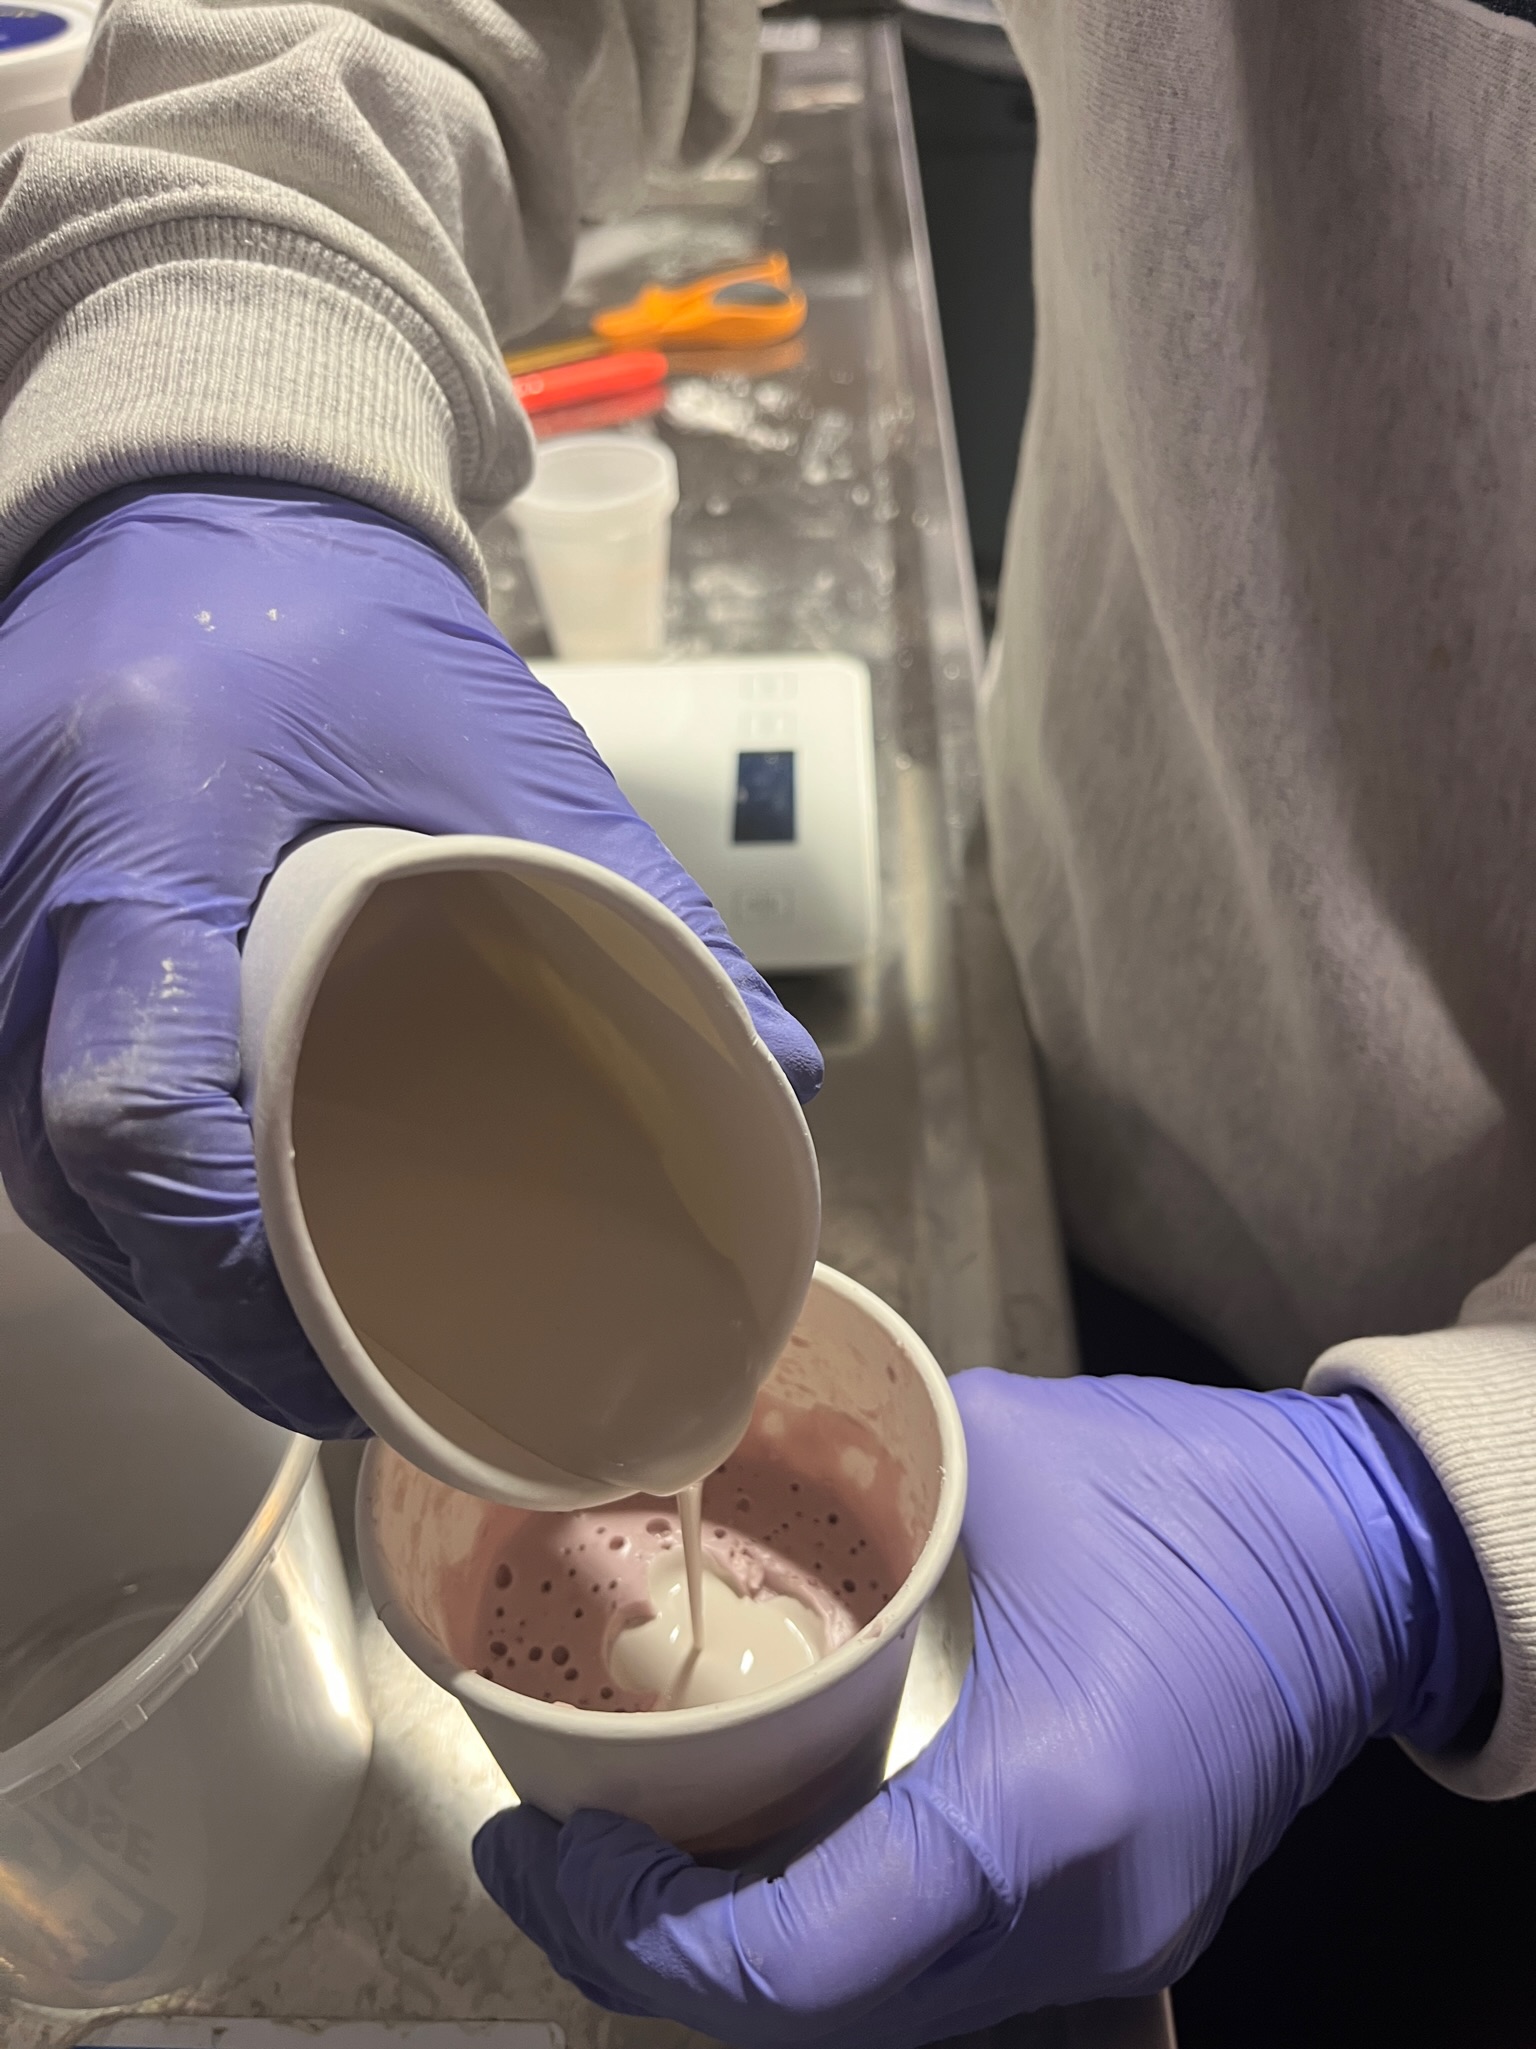
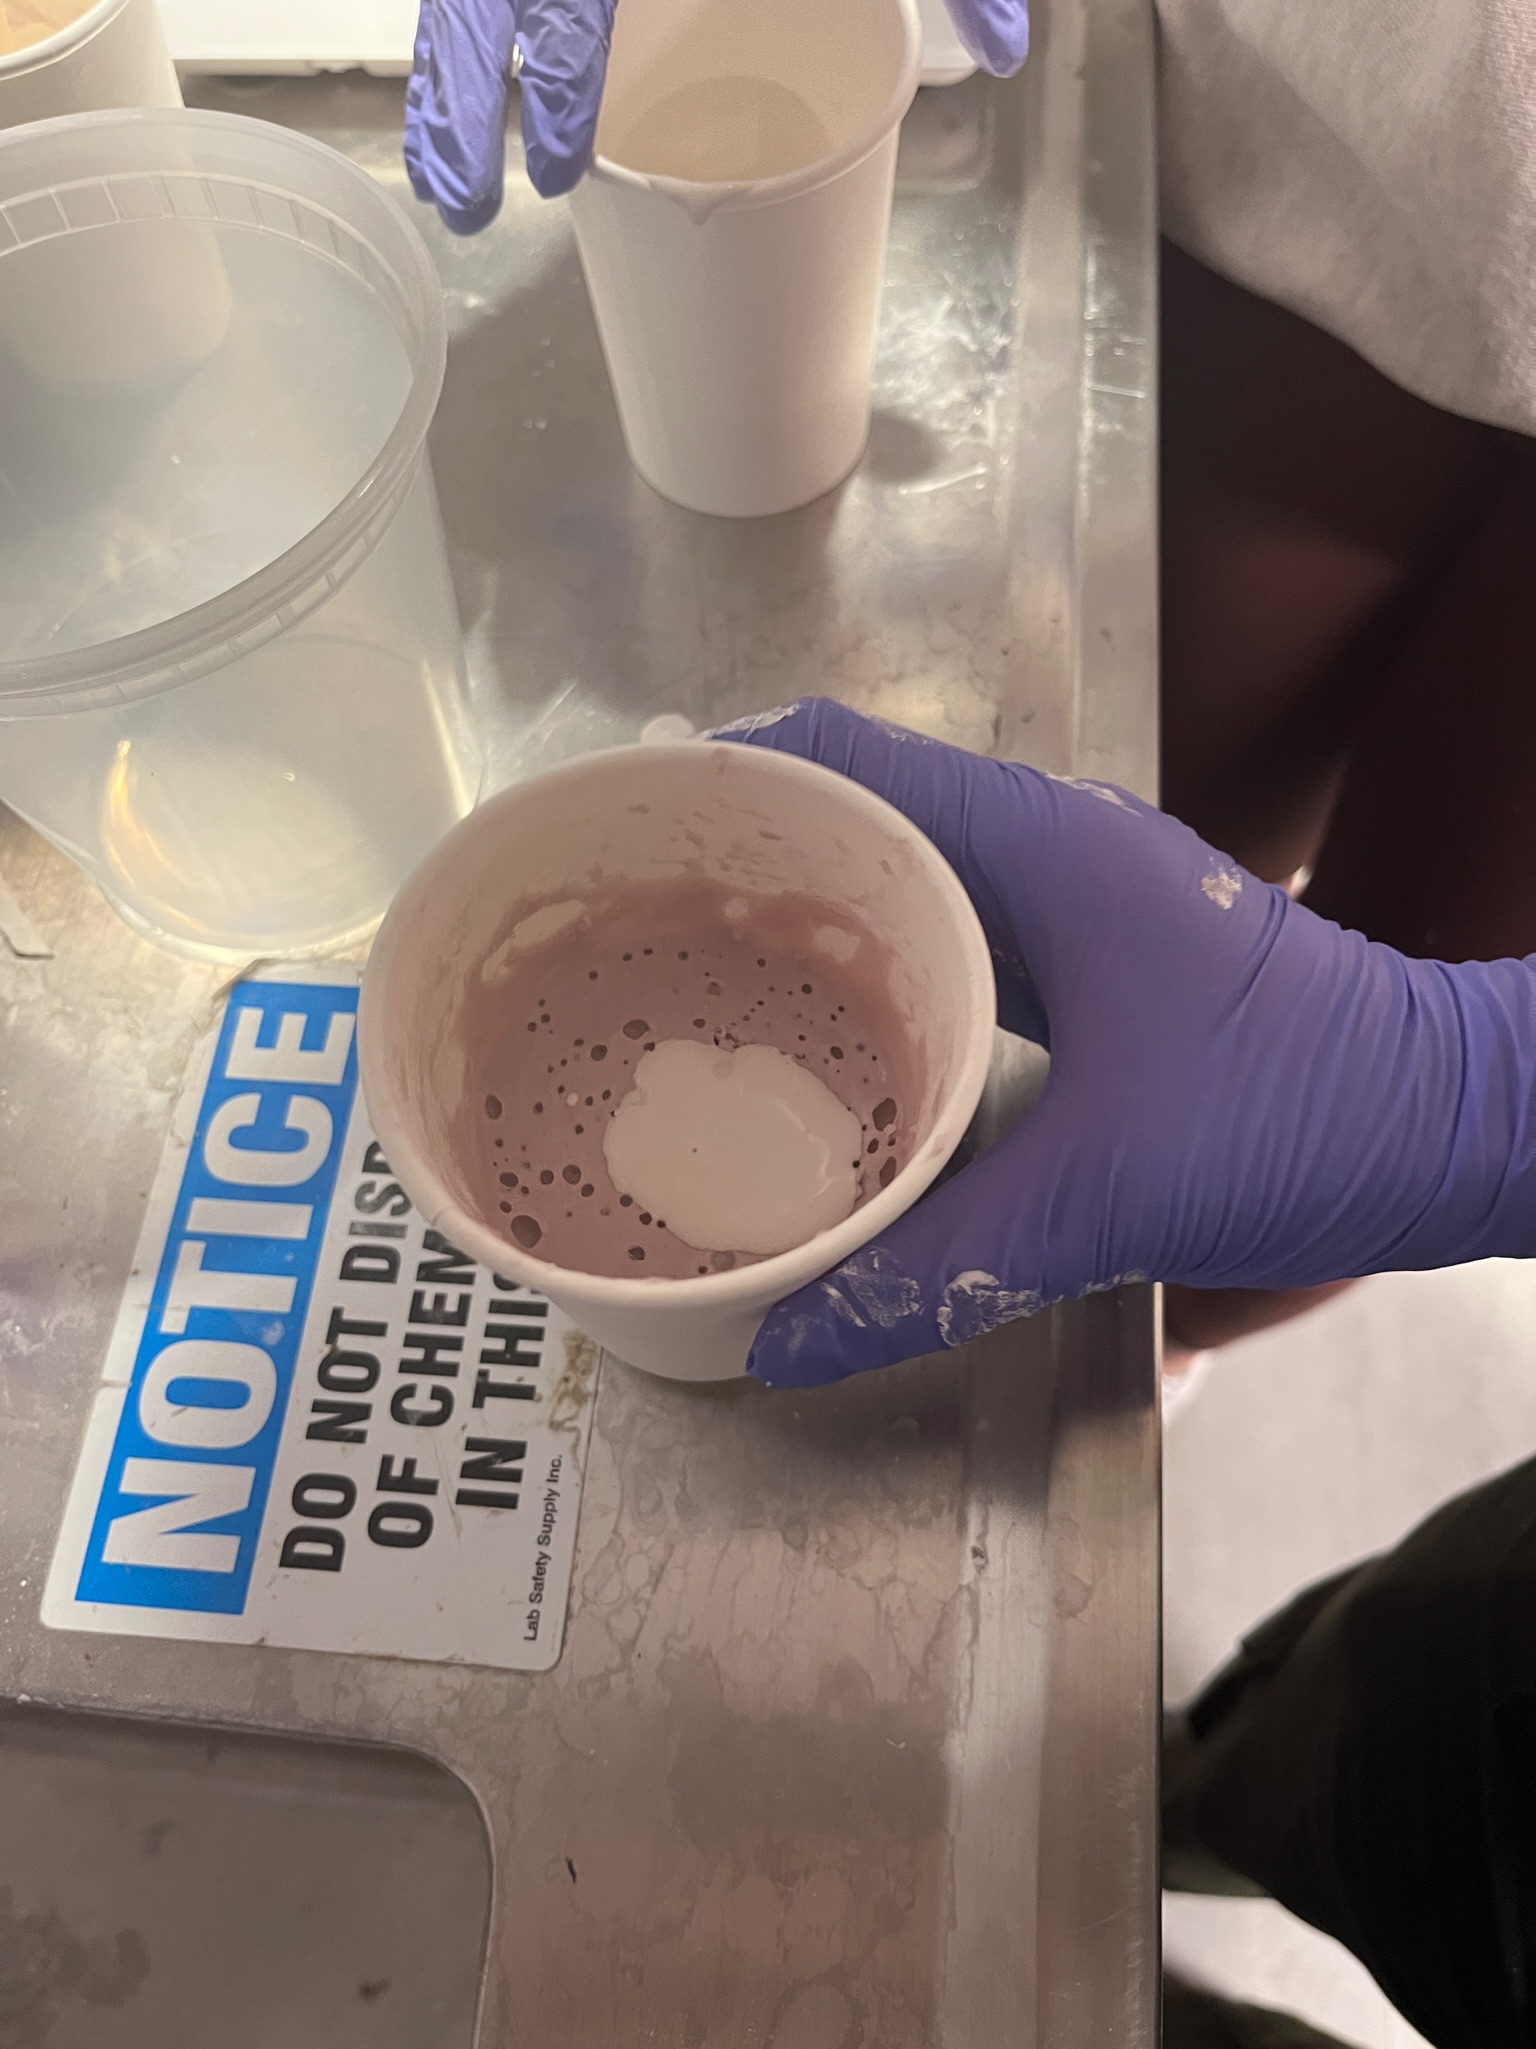
Julia had brought over our supplies from SciTech 252 to Nolop, including the Algi-Safe Skin-Safe Molding Gel kit. We followed the instructions by mixing the Algi-Safe and water in a 1:1 ratio by volume in a small cup (20 g of Algi-Safe). We immersed, slowly lifted up, then re-immersed the elephant downward into the cup and let that set for around 8-10 minutes. When removing the 3D elephant, it was a bit difficult to wiggle it out, and one of the ear canals ripped in the mold, which may produce a slightly altered ear with the cast. While the elephant was setting, we mixed the plaster in a 2:1 volume ratio according to the instructions and poured it into our mold. We tapped the mold to bring the air bubbles to the surface and let it set while we started our multi-piece mold.
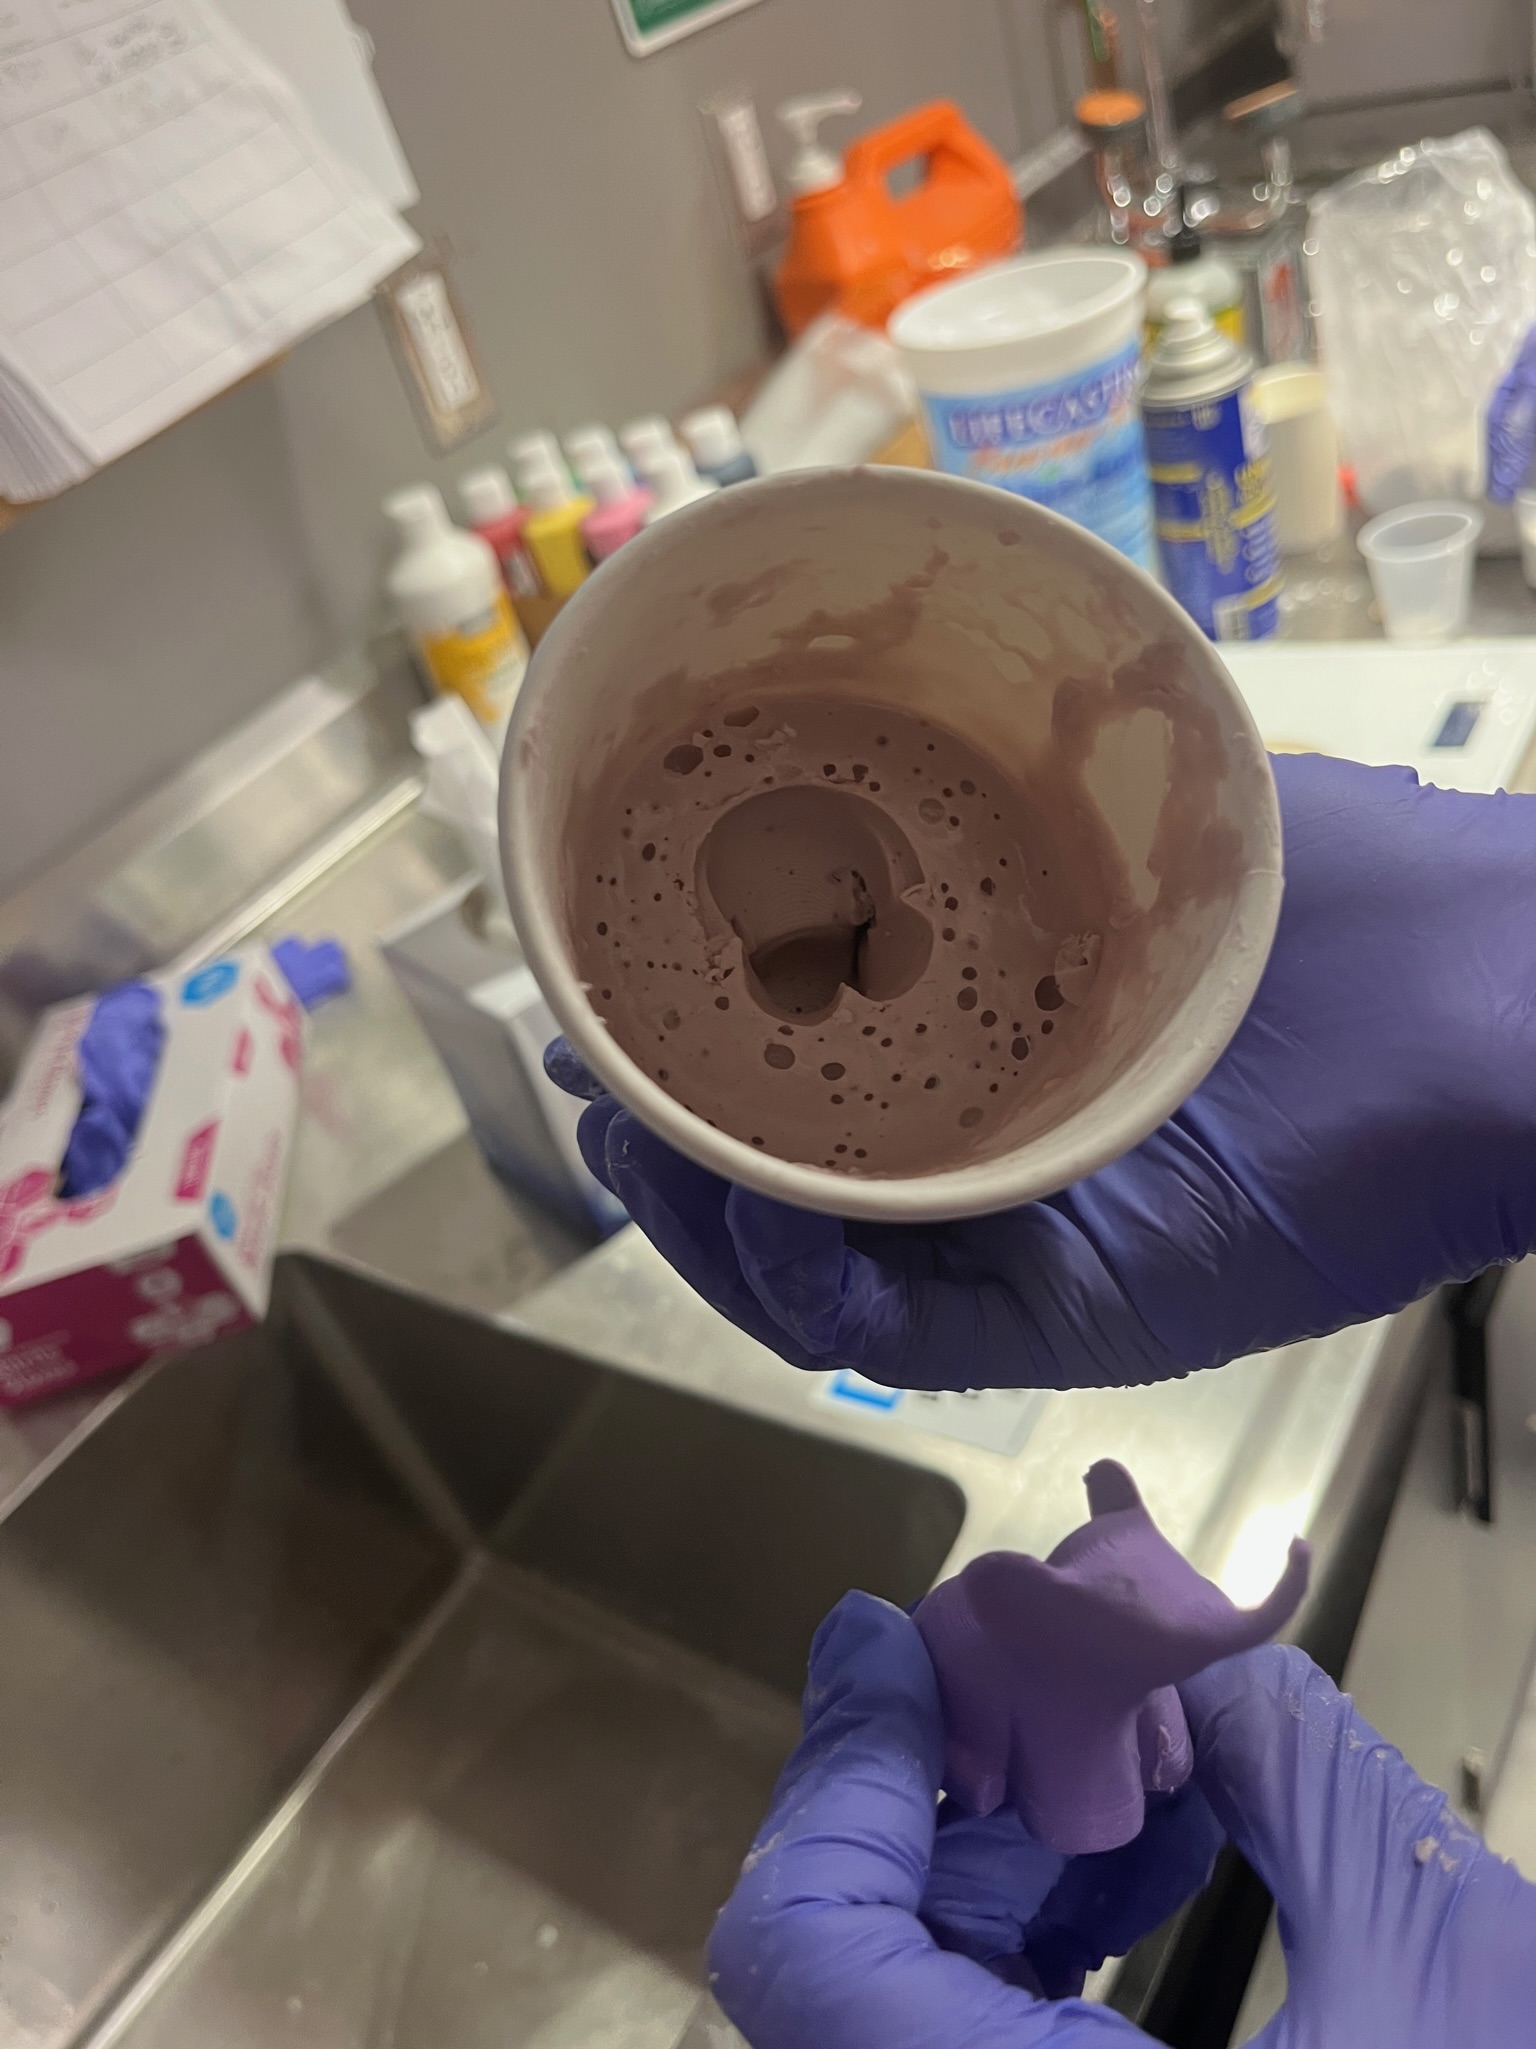
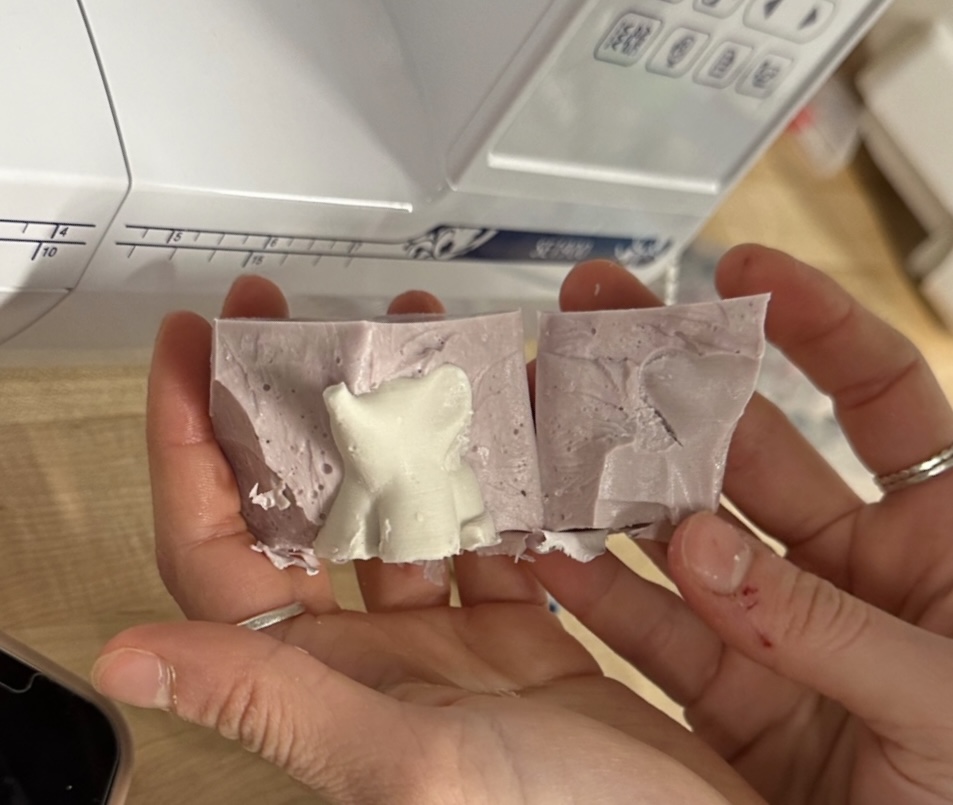
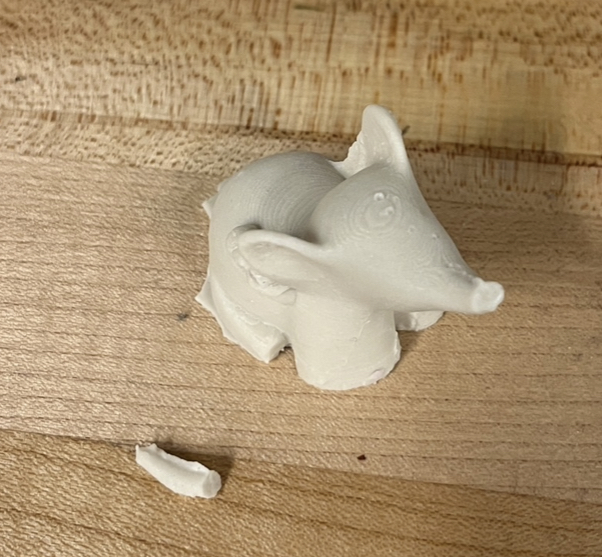
The plaster needed to be set for 3 hours, but we decided to de-mold both of our casts at the same time, 24 hours later. The de-molding process was relatively painless, with only a slightly cropping of the elephant’s trunk. In hindsight, the trunk was a delicate part of the mold and should have been made a bit thicker to increase the durability of the cast.
Regardless, we resulted in a plaster replica of our 3D-printed elephant!
Multi-piece Mold
Once we learned about the different casting materials from Professor Jonathan Zhang’s lecture, we instantly thought of using a 3D printed mold (PLA) and cast using a silicone, rubbery, material, similar to his artificial stoma example. Our design involves a flexible funnel that can be manipulated to fit into the top of a shampoo bottle. More details about the brainstorming and decision making regarding the design for our project can be found on our group project page. During one of my groups weekly meetings, we decided on measurements for the funnel, including the thickness of the funnel. Luckily, it was a light-workload week, so I was able to spend a few hours expanding my Solidworks skills and created a 3D model of our funnel and a mold. The resulting mold composed of three pieces: two side and one top piece.

When it came to printing the mold, I realized that this would be a larger print that would use a lot of filament. I reduced the fill density to about 15% but could not scale down the size without impacting the measurements of the funnel. I had to print each piece of the mold with three different printers. I started it on Tuesday night, with each piece predicting a 12-hour print time. One of my group mates, Chloe, was able to pick up the pieces the next morning but informed me that one of the side pieces had failed, so we only had two components of our mold. During the day, I reprinted the missing side piece, and Chloe picked it up the next morning when it was finished.
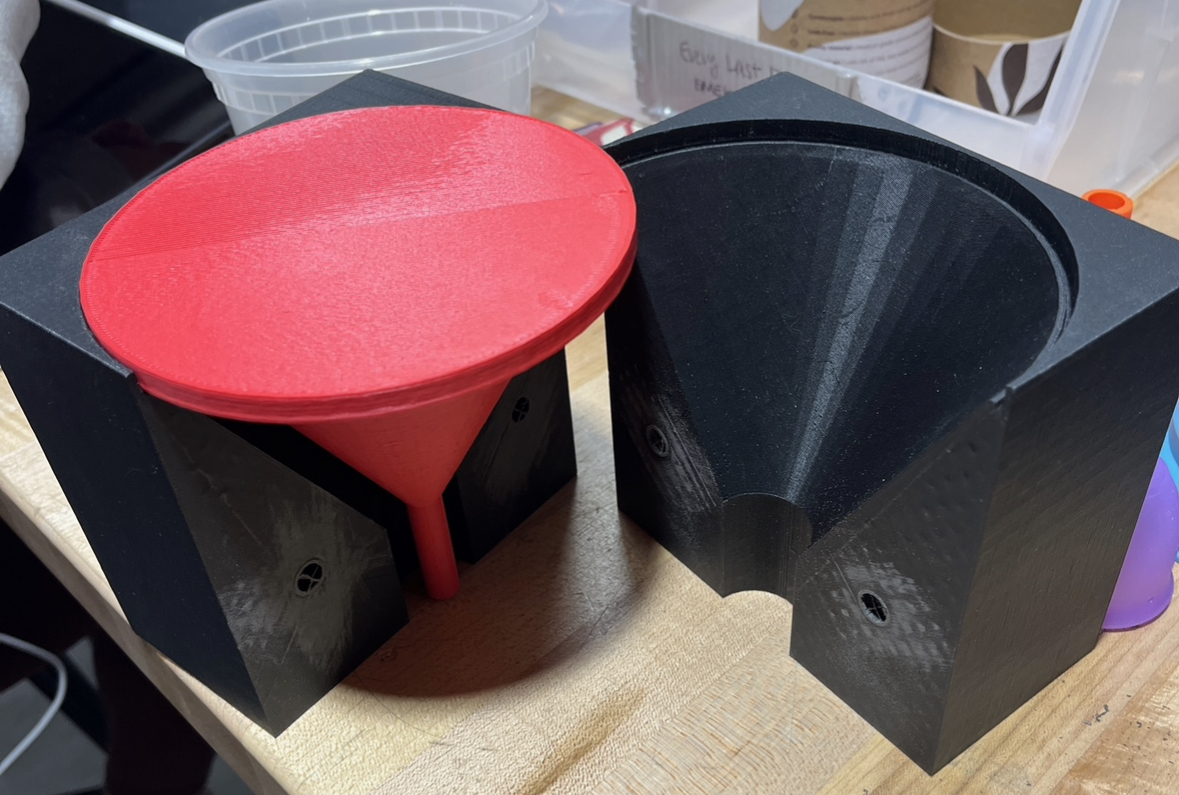
The top piece fit very well in both pieces of the mold, but the two aligning components were too snug of a fit. Julia and I started sanding down the circumference of the cylinder, hoping to reduce it enough for the two pieces to fit together. While the sanding did work, we didn’t sand it down enough for the pieces to come apart, resulting in the alignment pieces snapping. On the bright side, we could still use the top piece of the mold for alignment and tape the mold together during the casting process to secure the two pieces together.
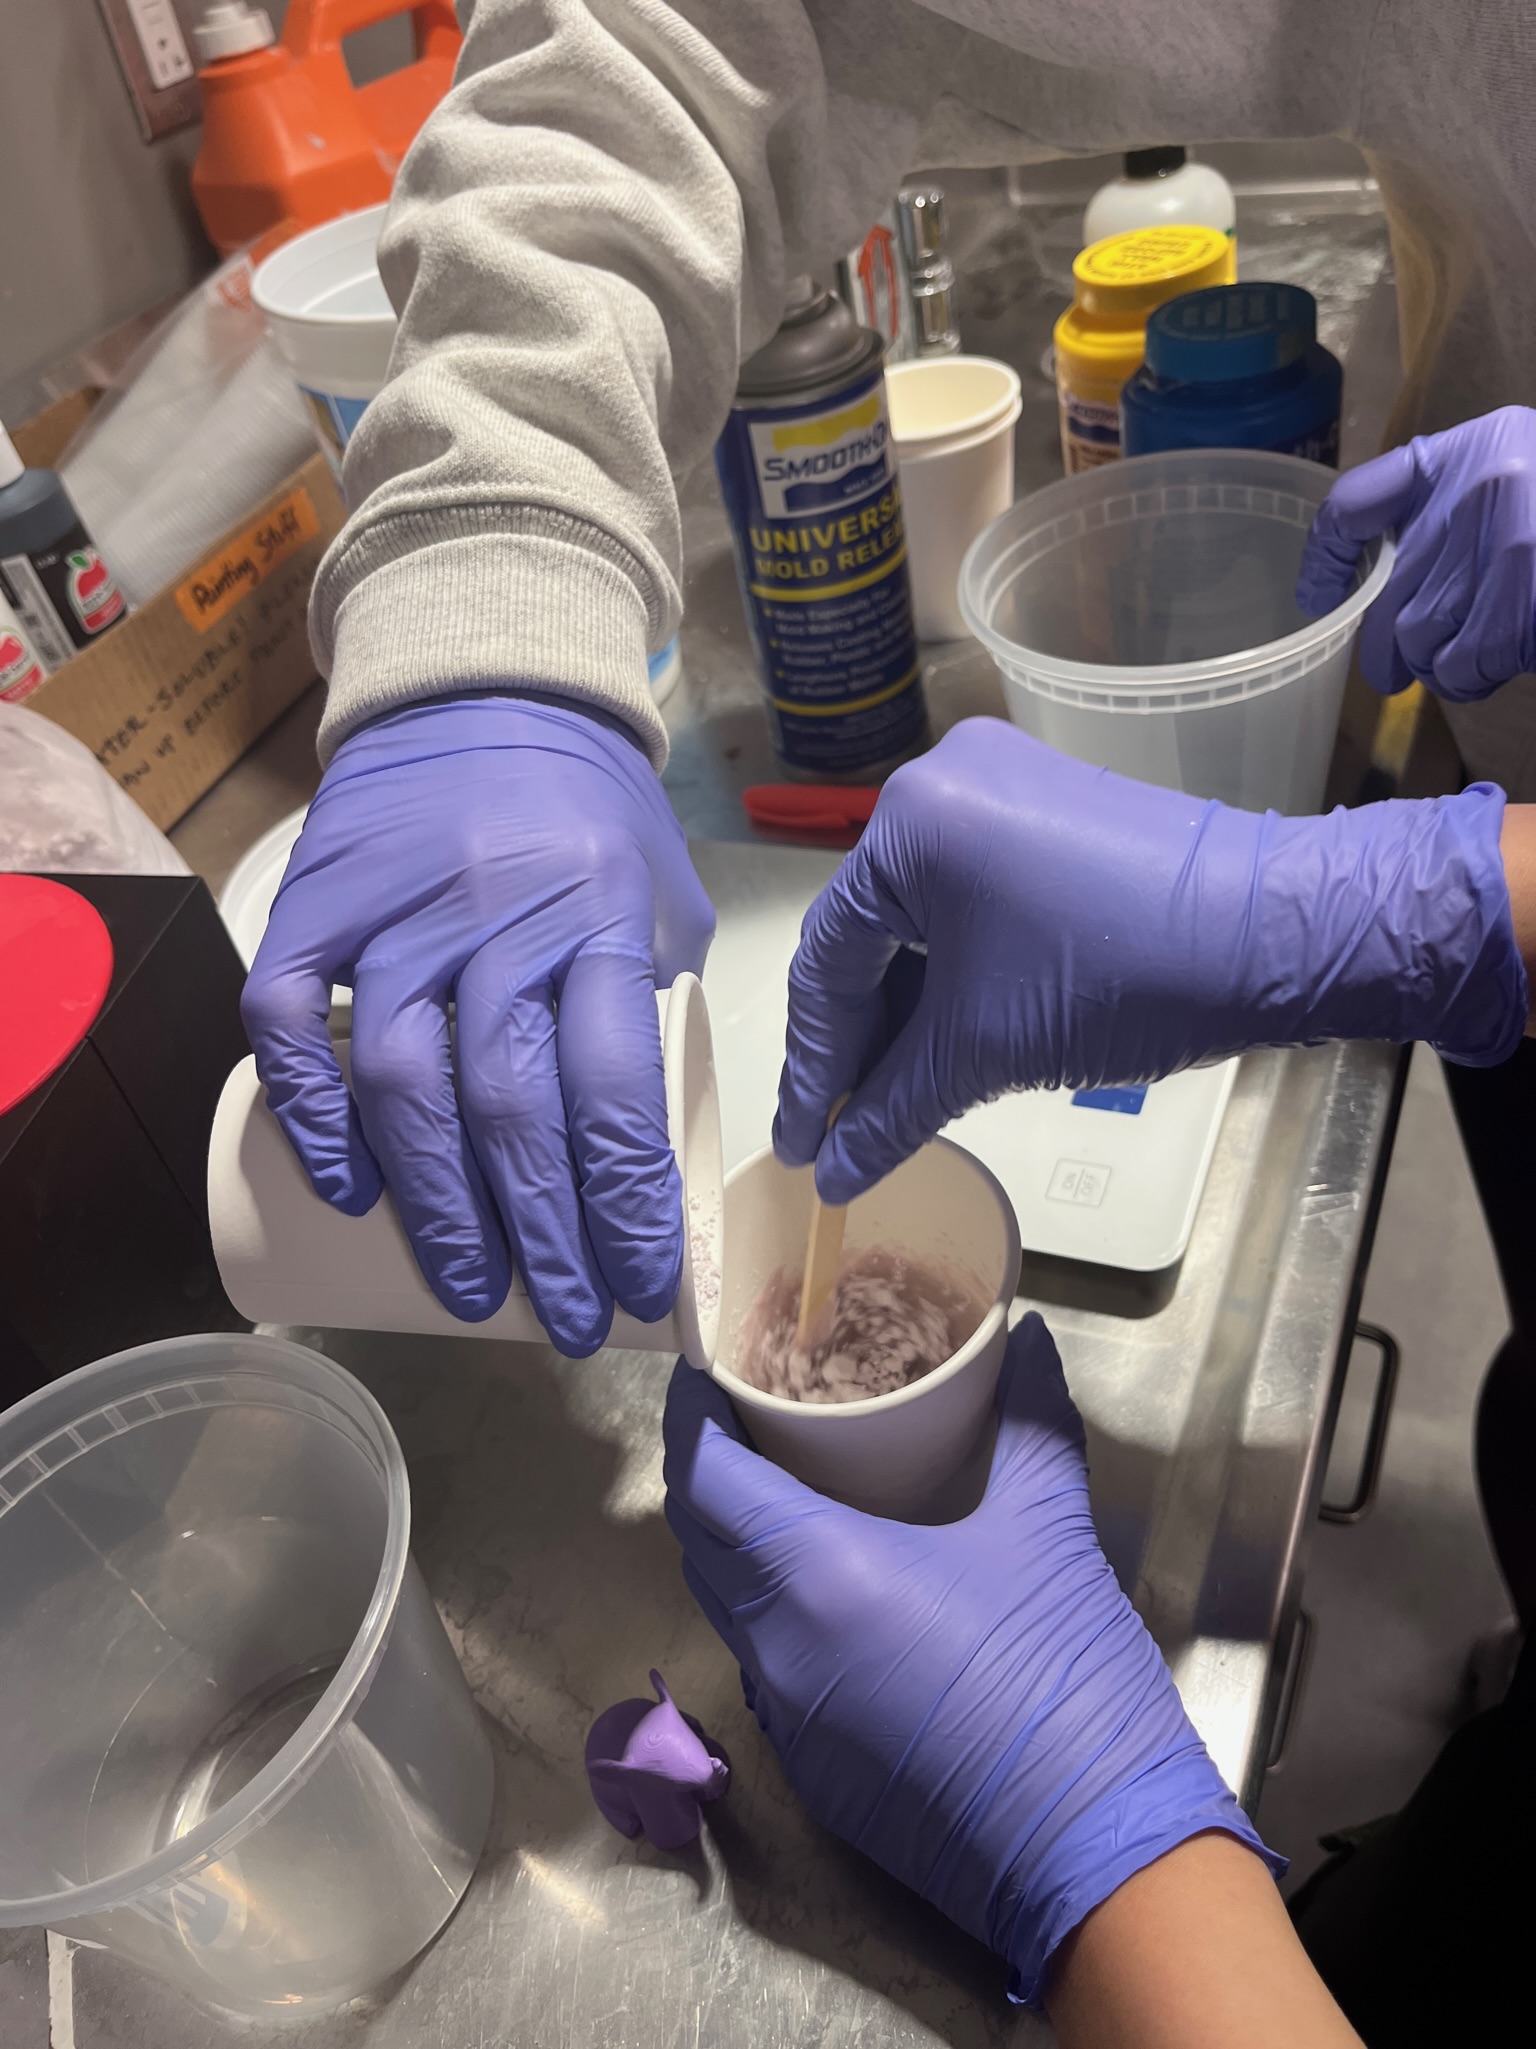
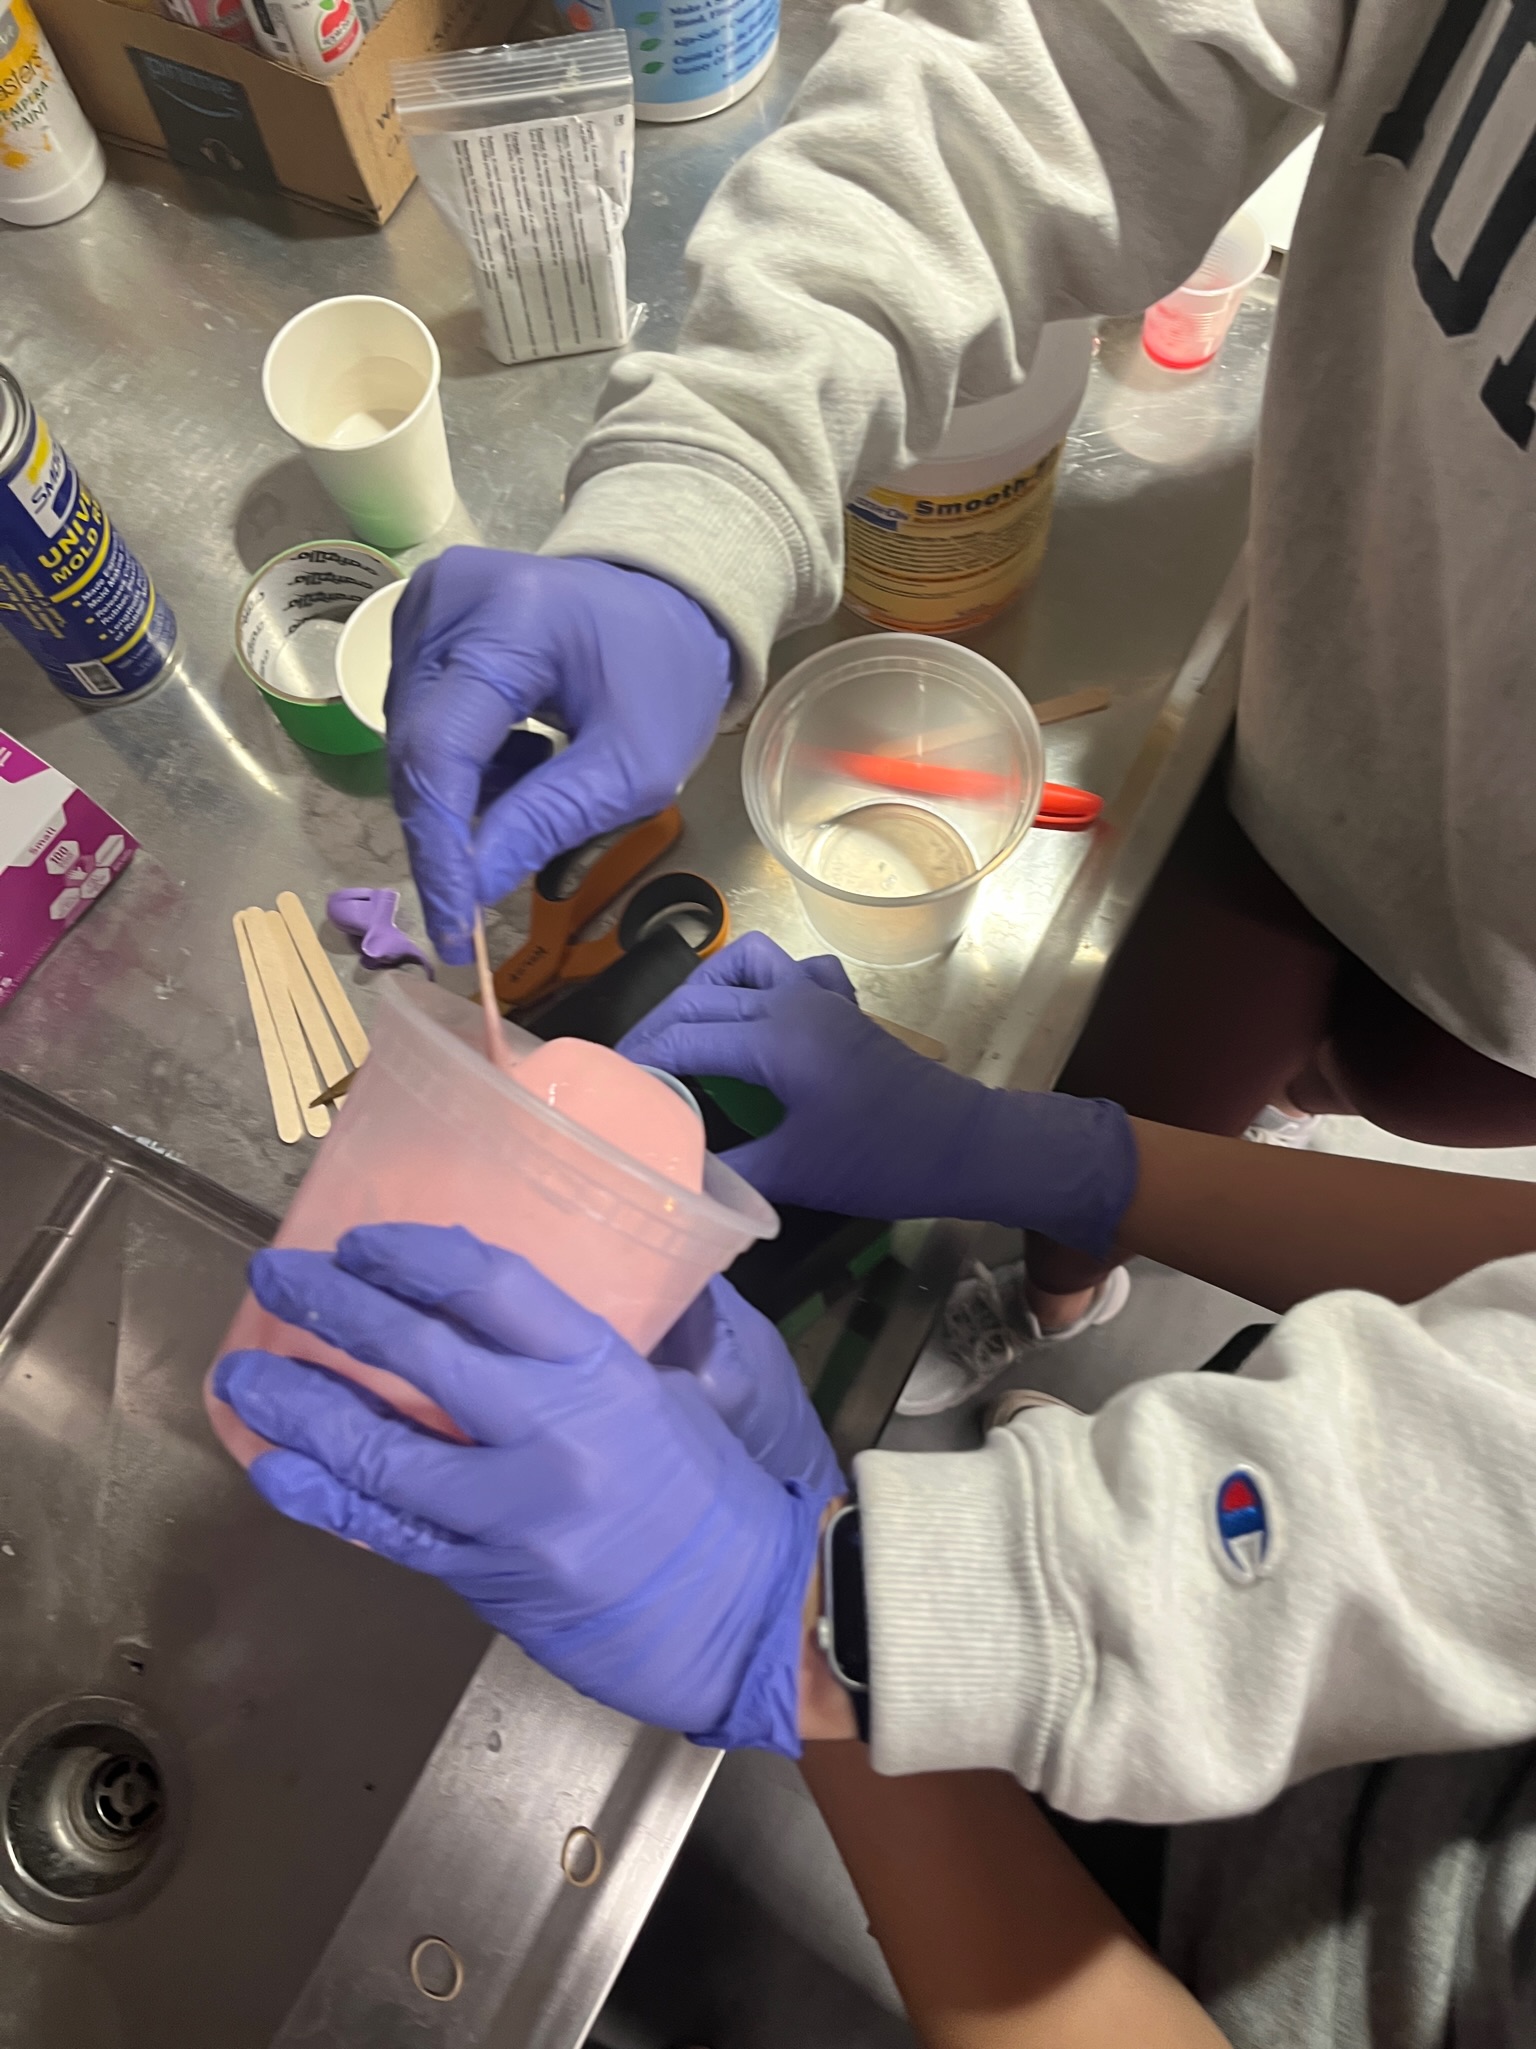
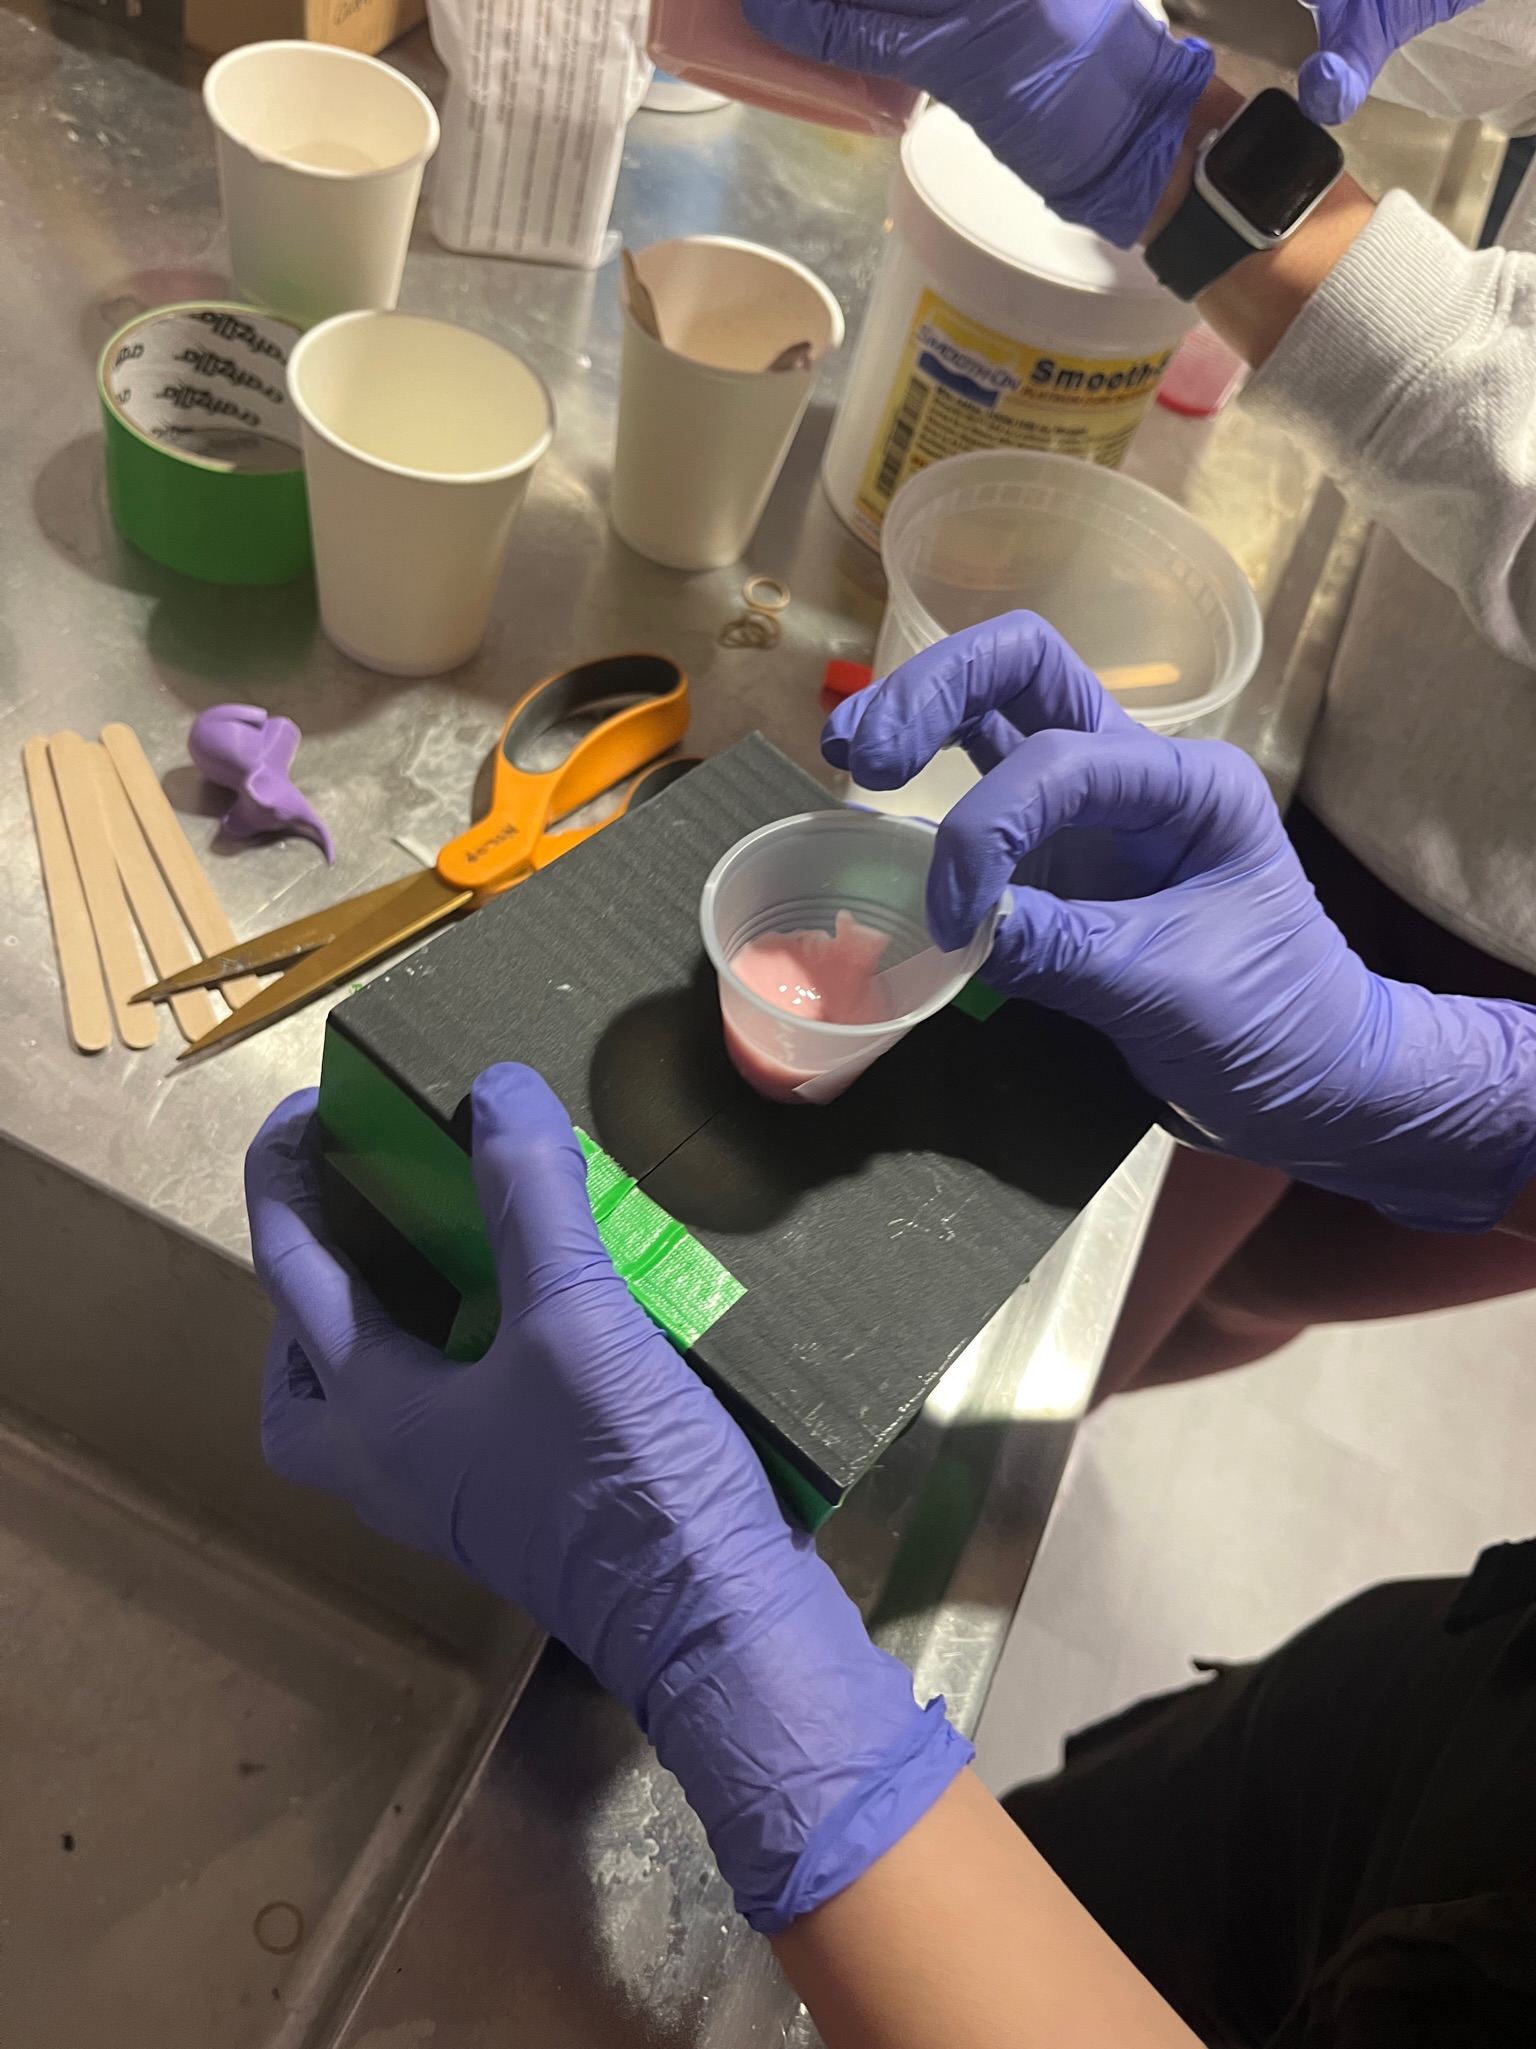
Initially, we were going to use Smooth-Cast 305, but then we realized that it isn’t compatible with PLA. While I had to step out for a 15-minute Zoom meeting, the others (including Chloe via Facetime) had researched more on the available casting materials and settled with Smooth-Sil 940, a food-safe silicone rubber. By the time I finished my meeting, our 3D-printed mold was securely taped up, we sprayed mold release, and we were ready to start mixing our casting material.
As per the instructions, we mixed Parts A and B in a 10:1 ratio by weight. At first, we used 120g of A and 12g of B, but we didn’t think it was enough to fill our mold, so we added some more and used 220g of A and 22g of B. After thoroughly mixing the parts together, the resulting mixture was extremely viscous, so I quickly cut up a small plastic cup as our funnel into our funnel (how ironic!). With lots of slow pours and tapping later, we ended up making the perfect amount of casting material. Unfortunately, we don’t have a vacuum to eliminate all the air bubbles (according to the video tutorials), so we tapped as much as possible and let it sit for 24 hours to cure.
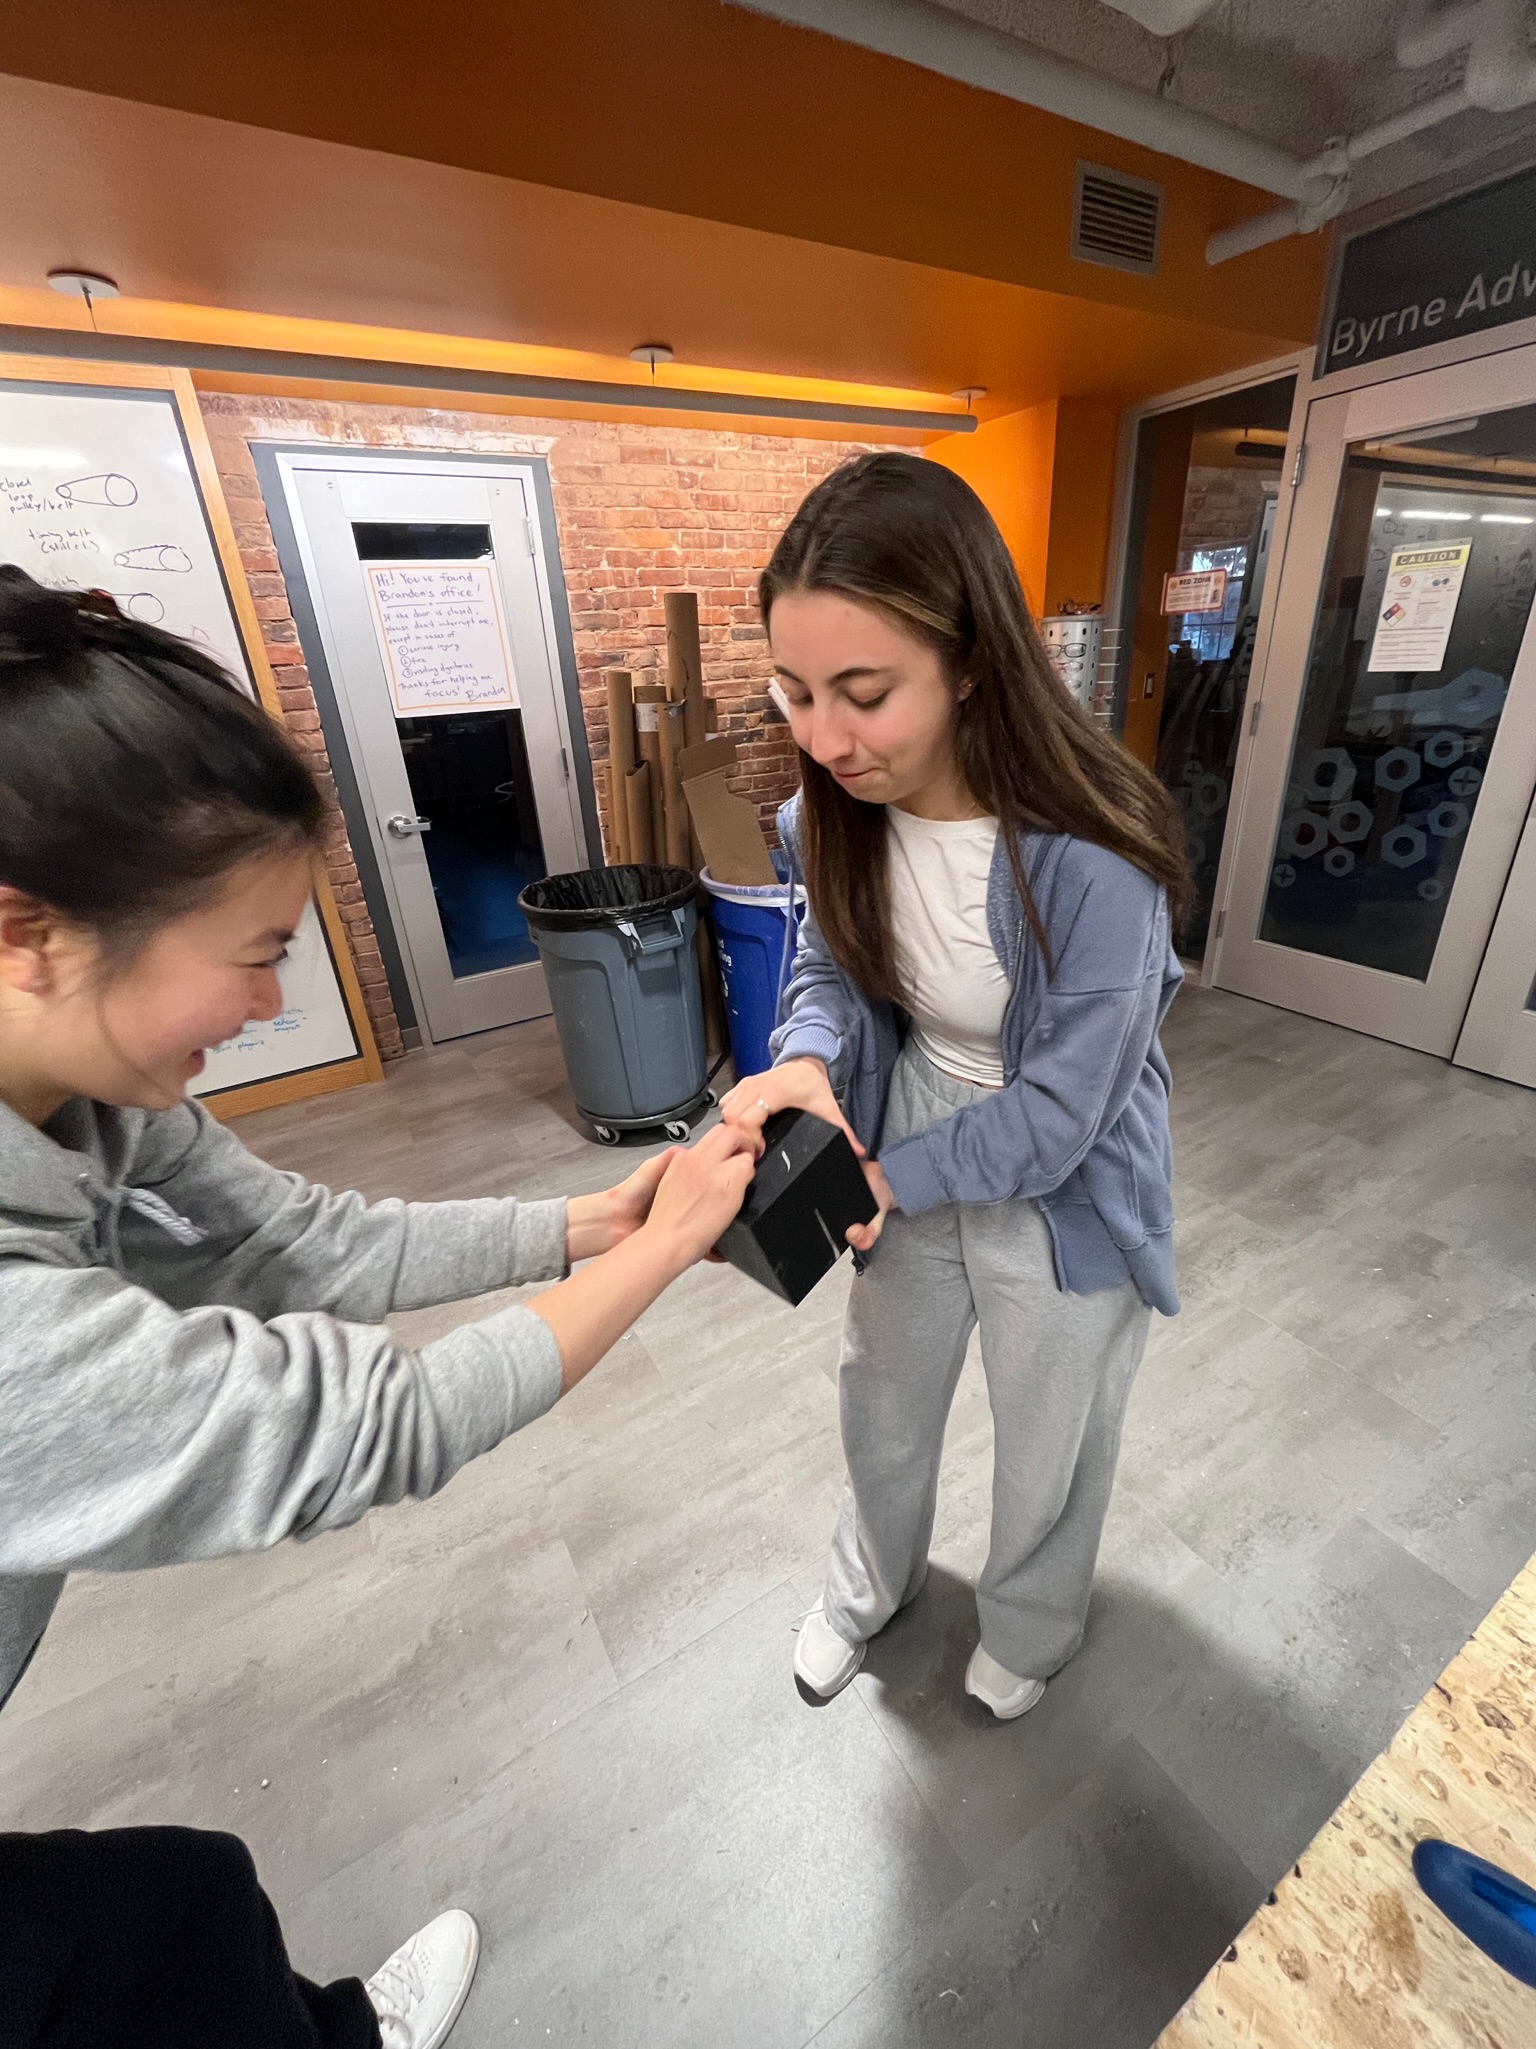
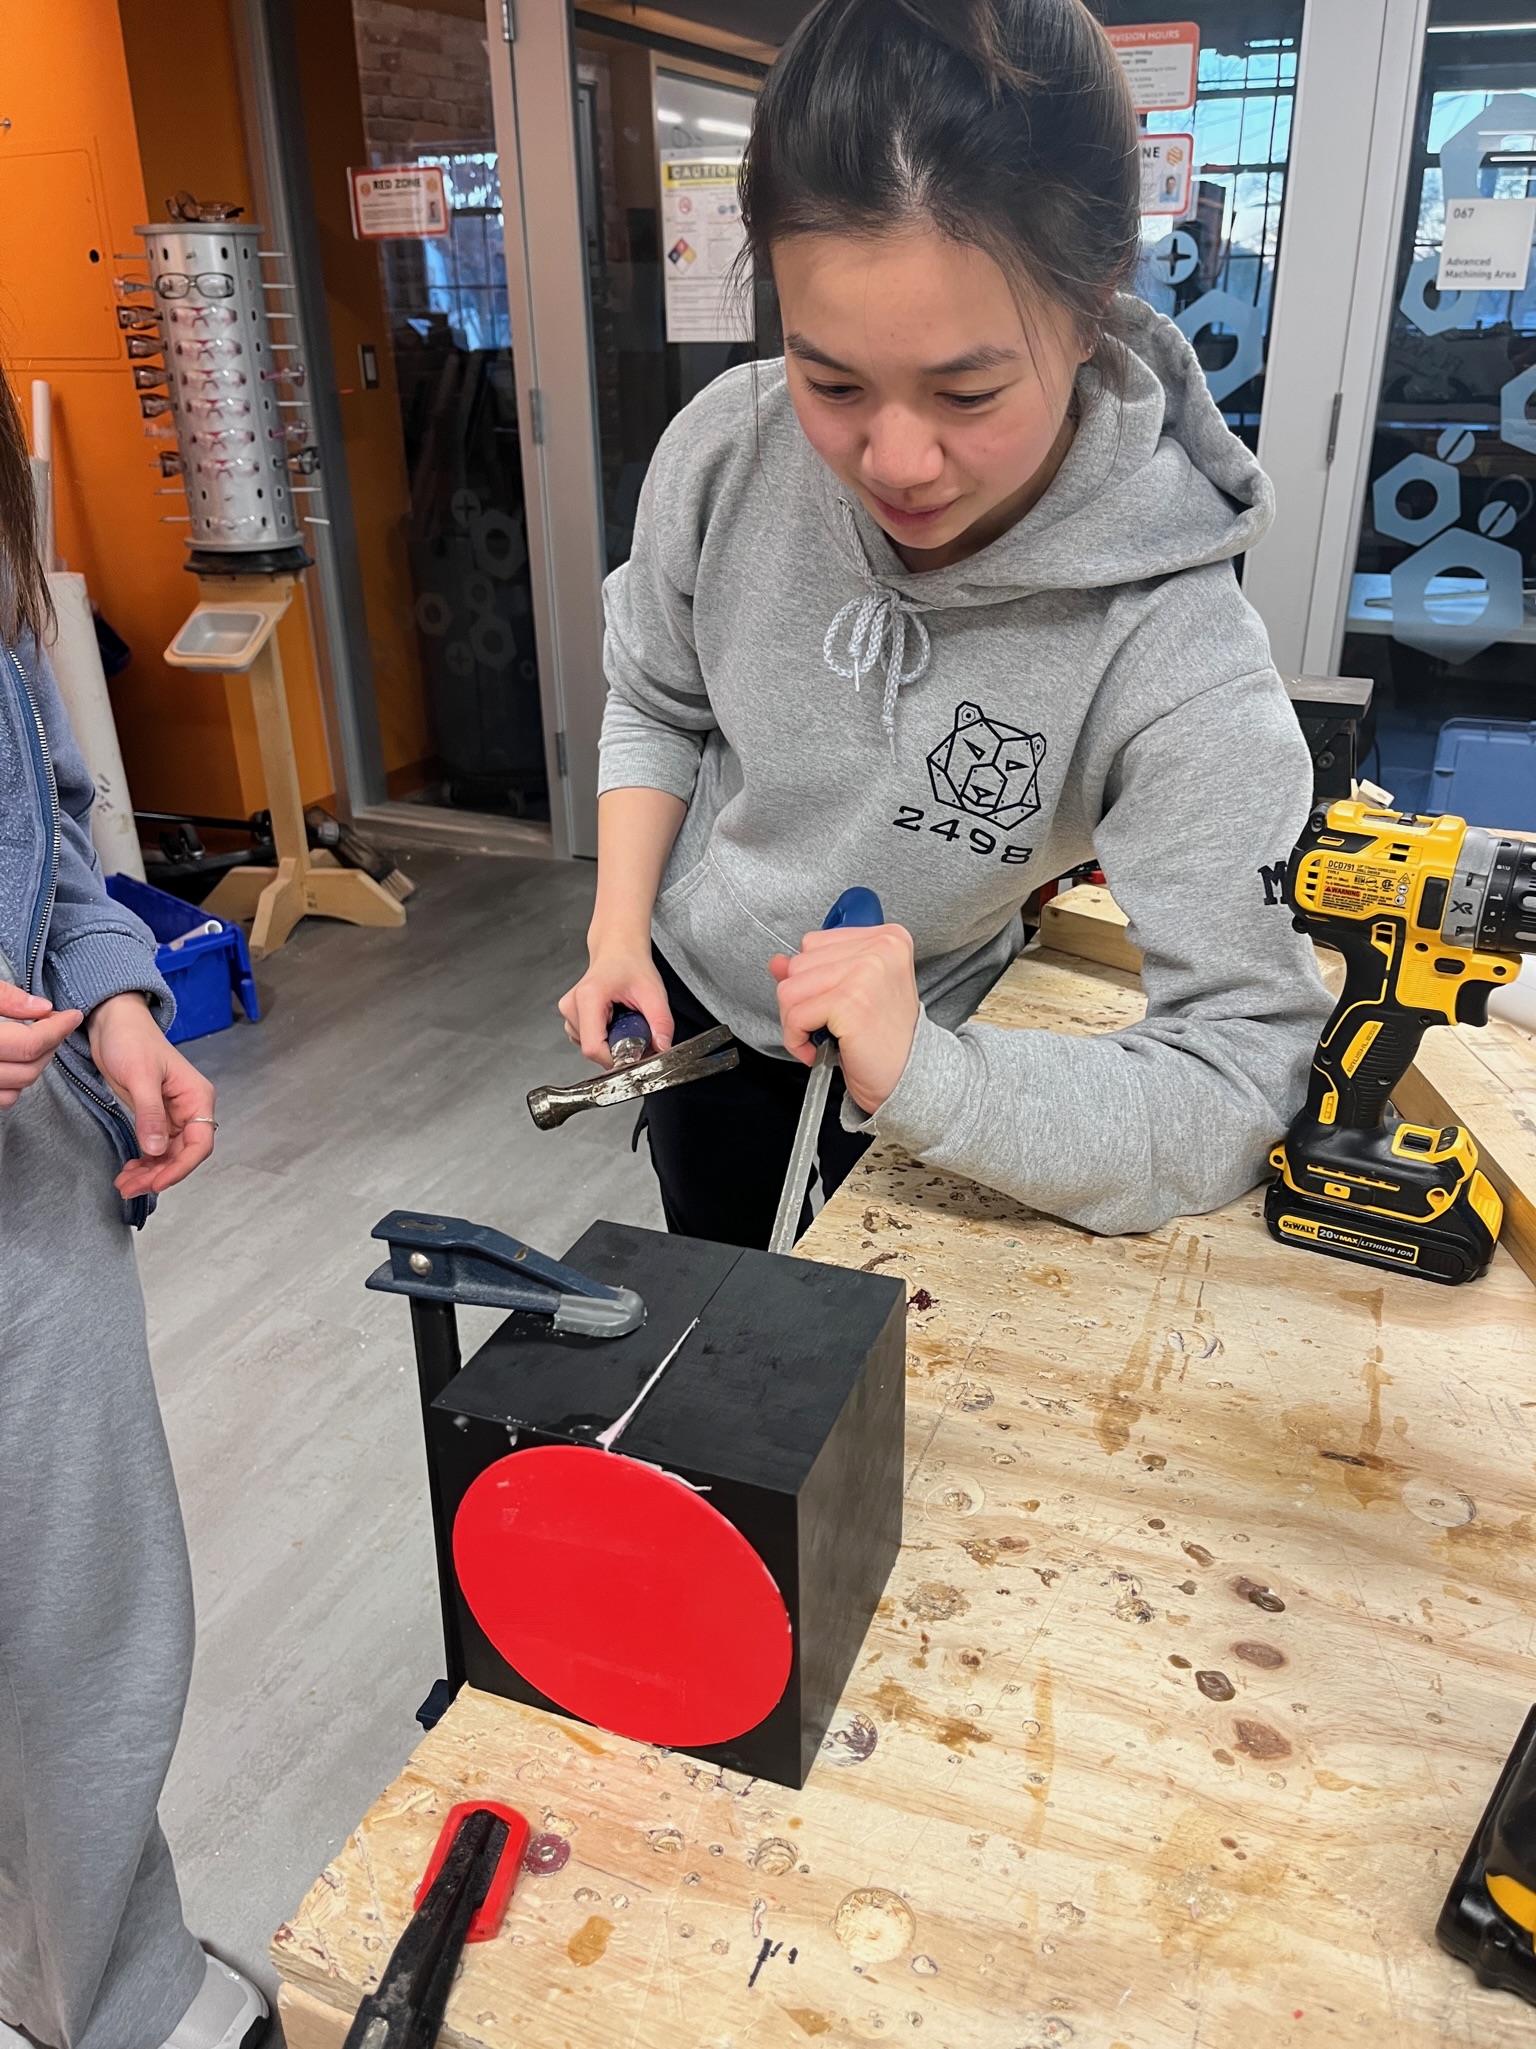
When we came back the next day, the rubber had shrunk a small amount (as expected), and we started the most difficult part of this process, the de-molding. Using an X-ACTO knife, we traced the edges of the mold and tried to pull it apart (did not work). When that didn’t work, I took a rounder file to use as a chisel against the bottom part of the funnel (where we poured our casting material), hoping it would push the red top out (moved a smidge). So, we decided to clamp it to the table and use torque to pull it apart. With lots of pulling later, we removed one of the side molds. We rotated the rest of the mold again and used torque to remove the other side of the mold, then easily slipped the casted funnel off the top piece.

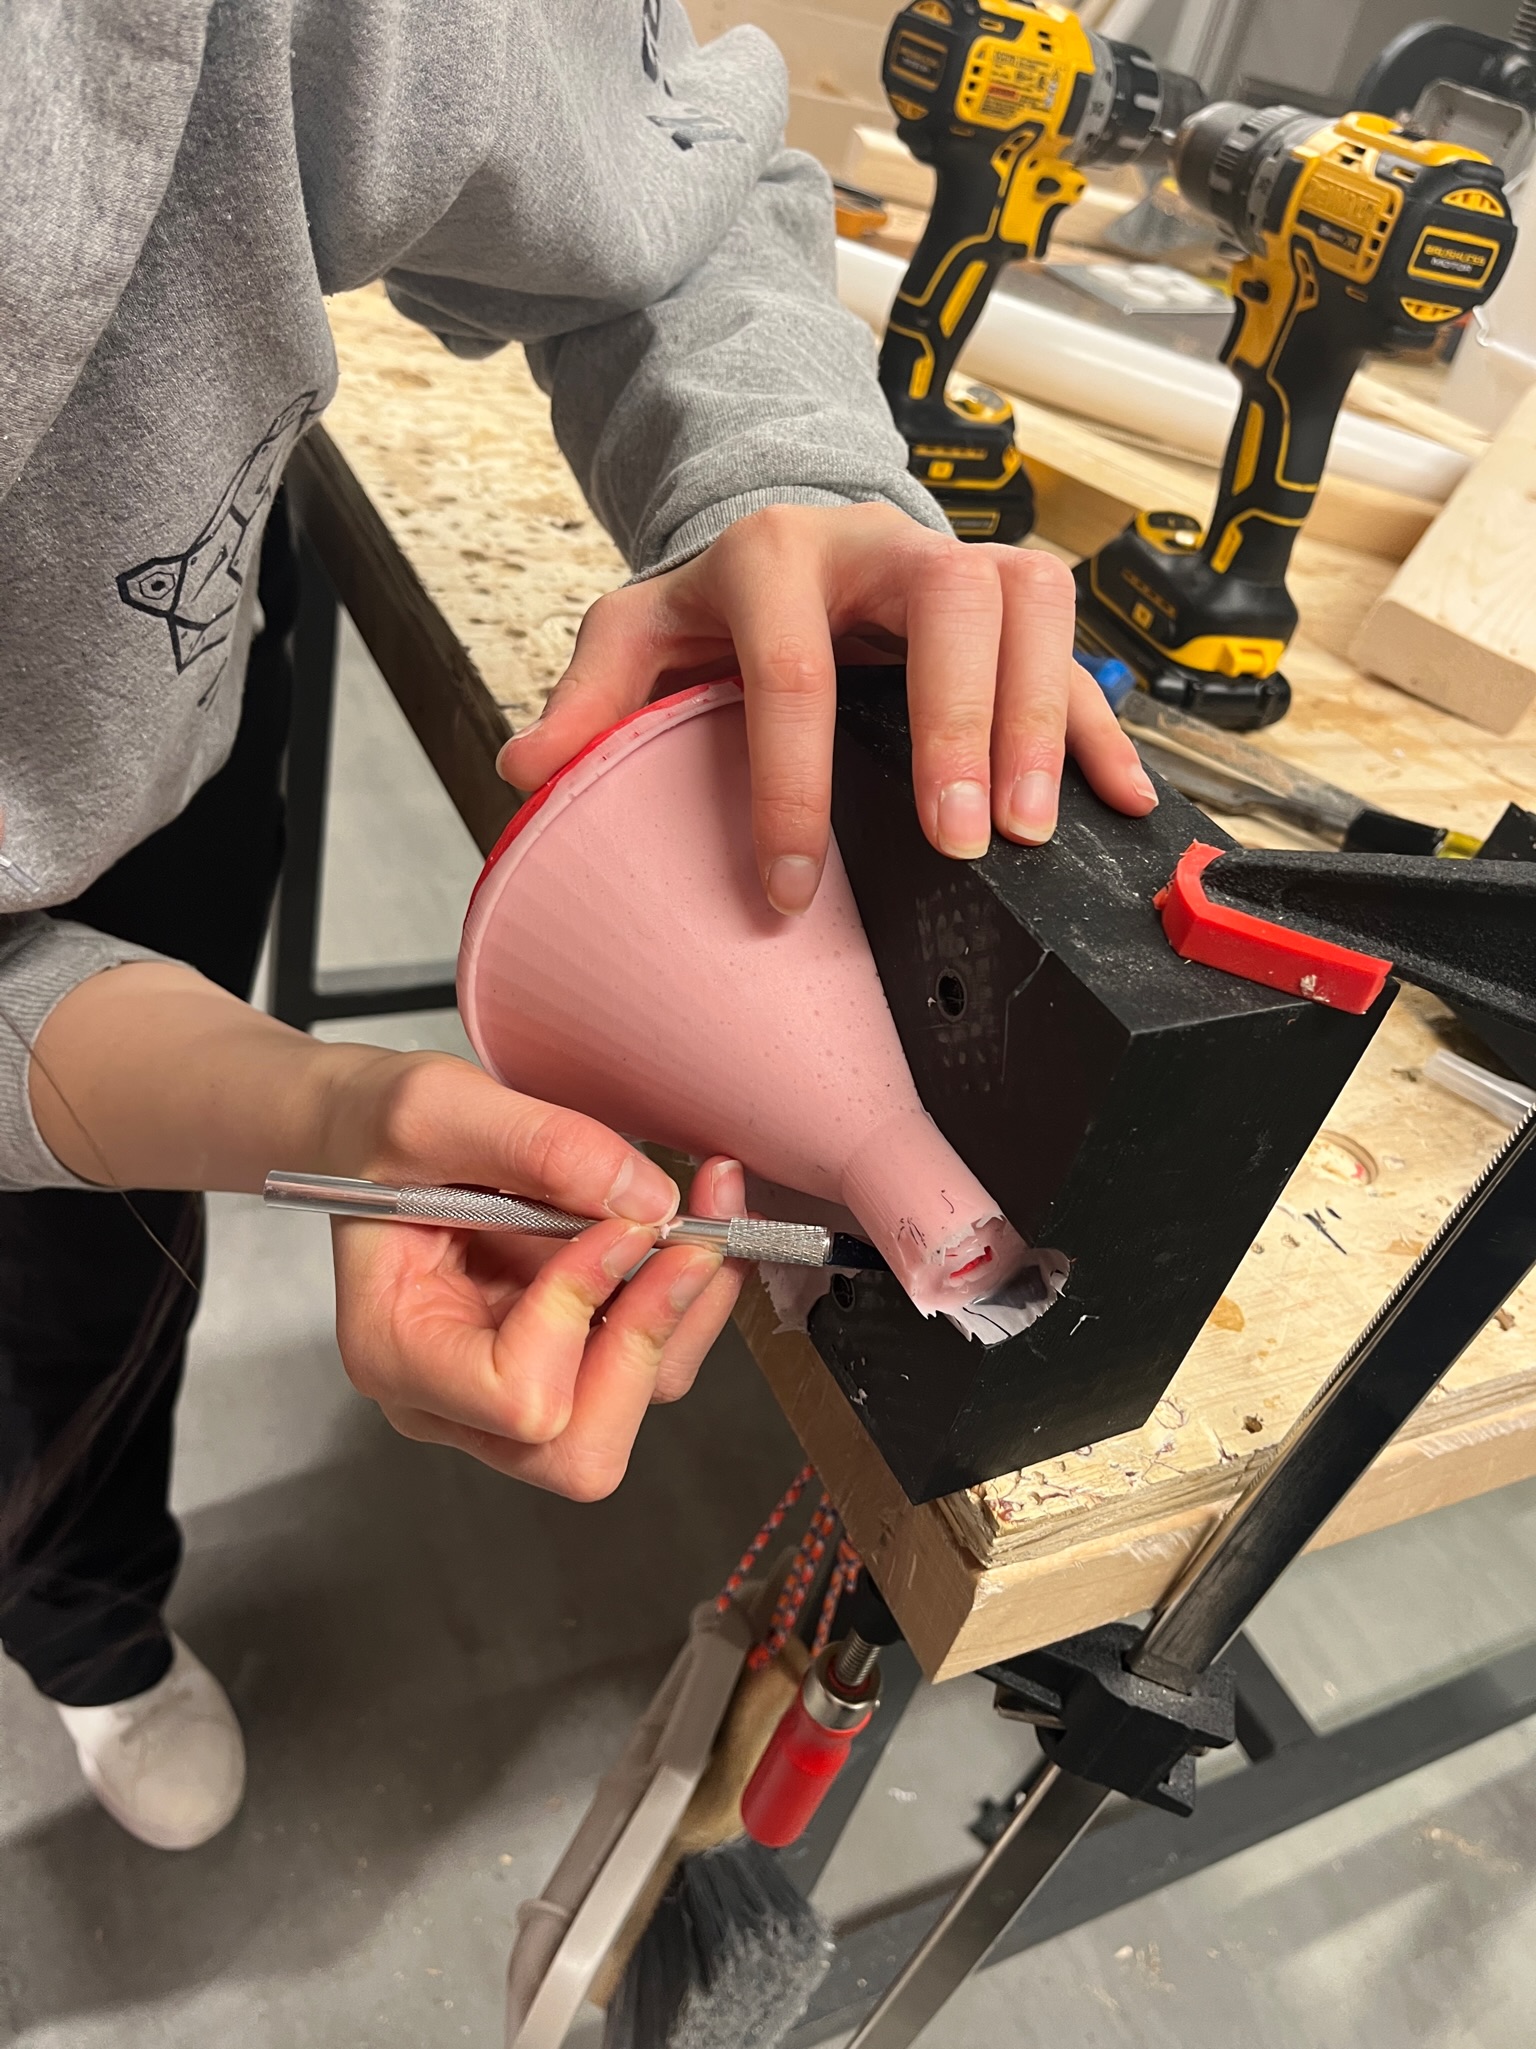
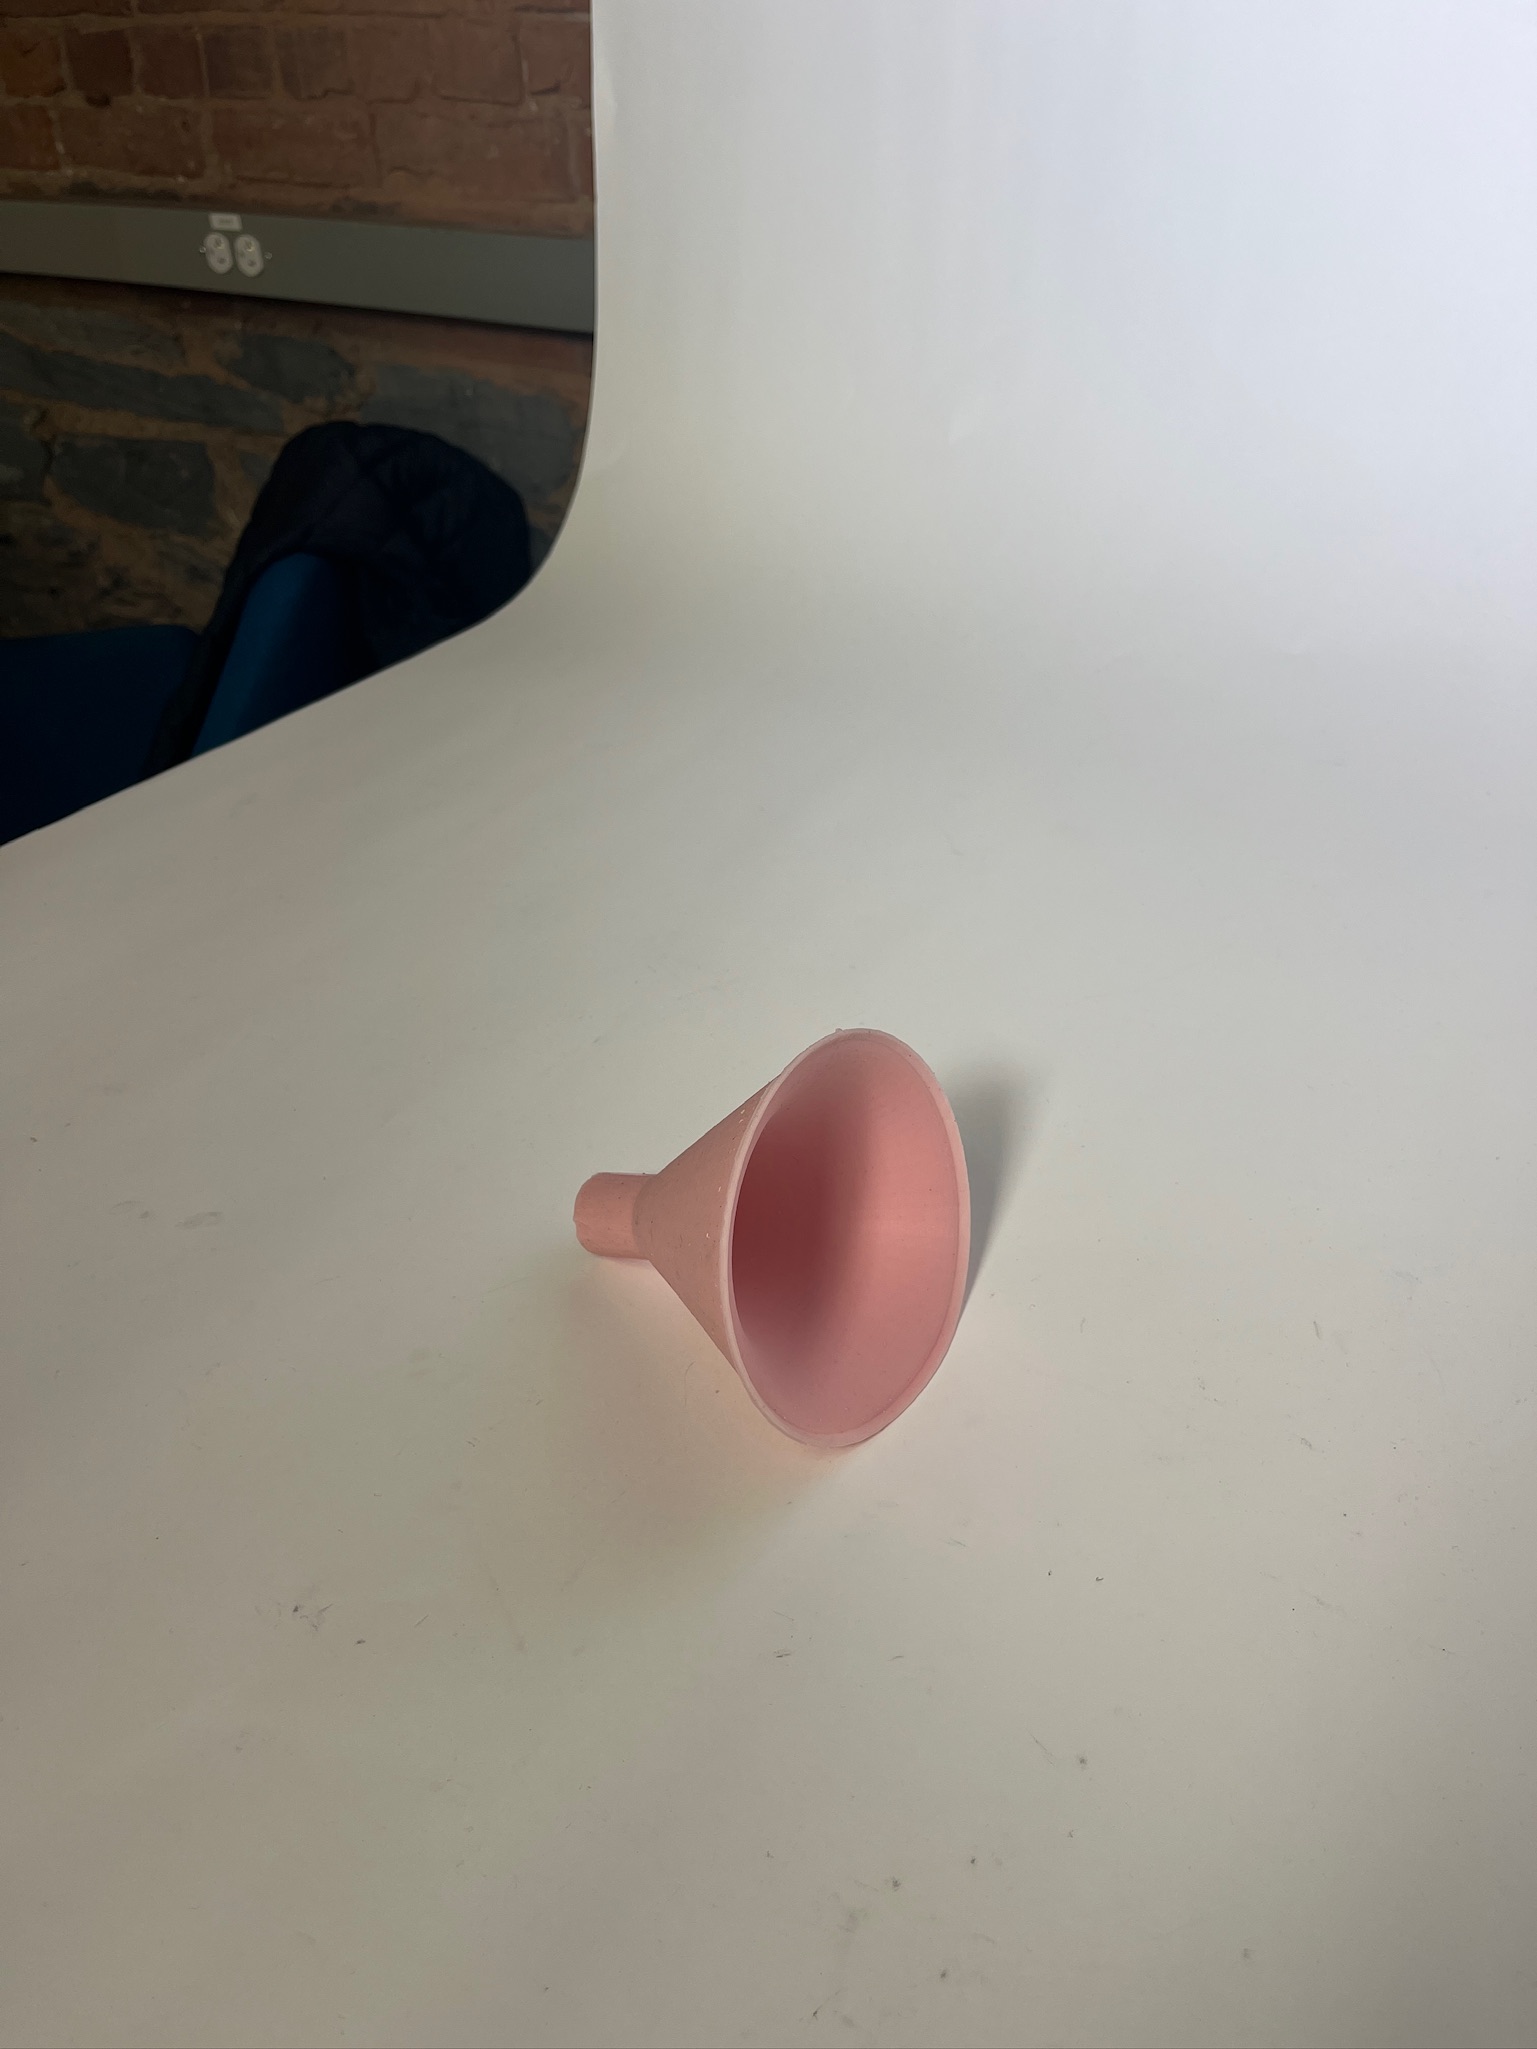
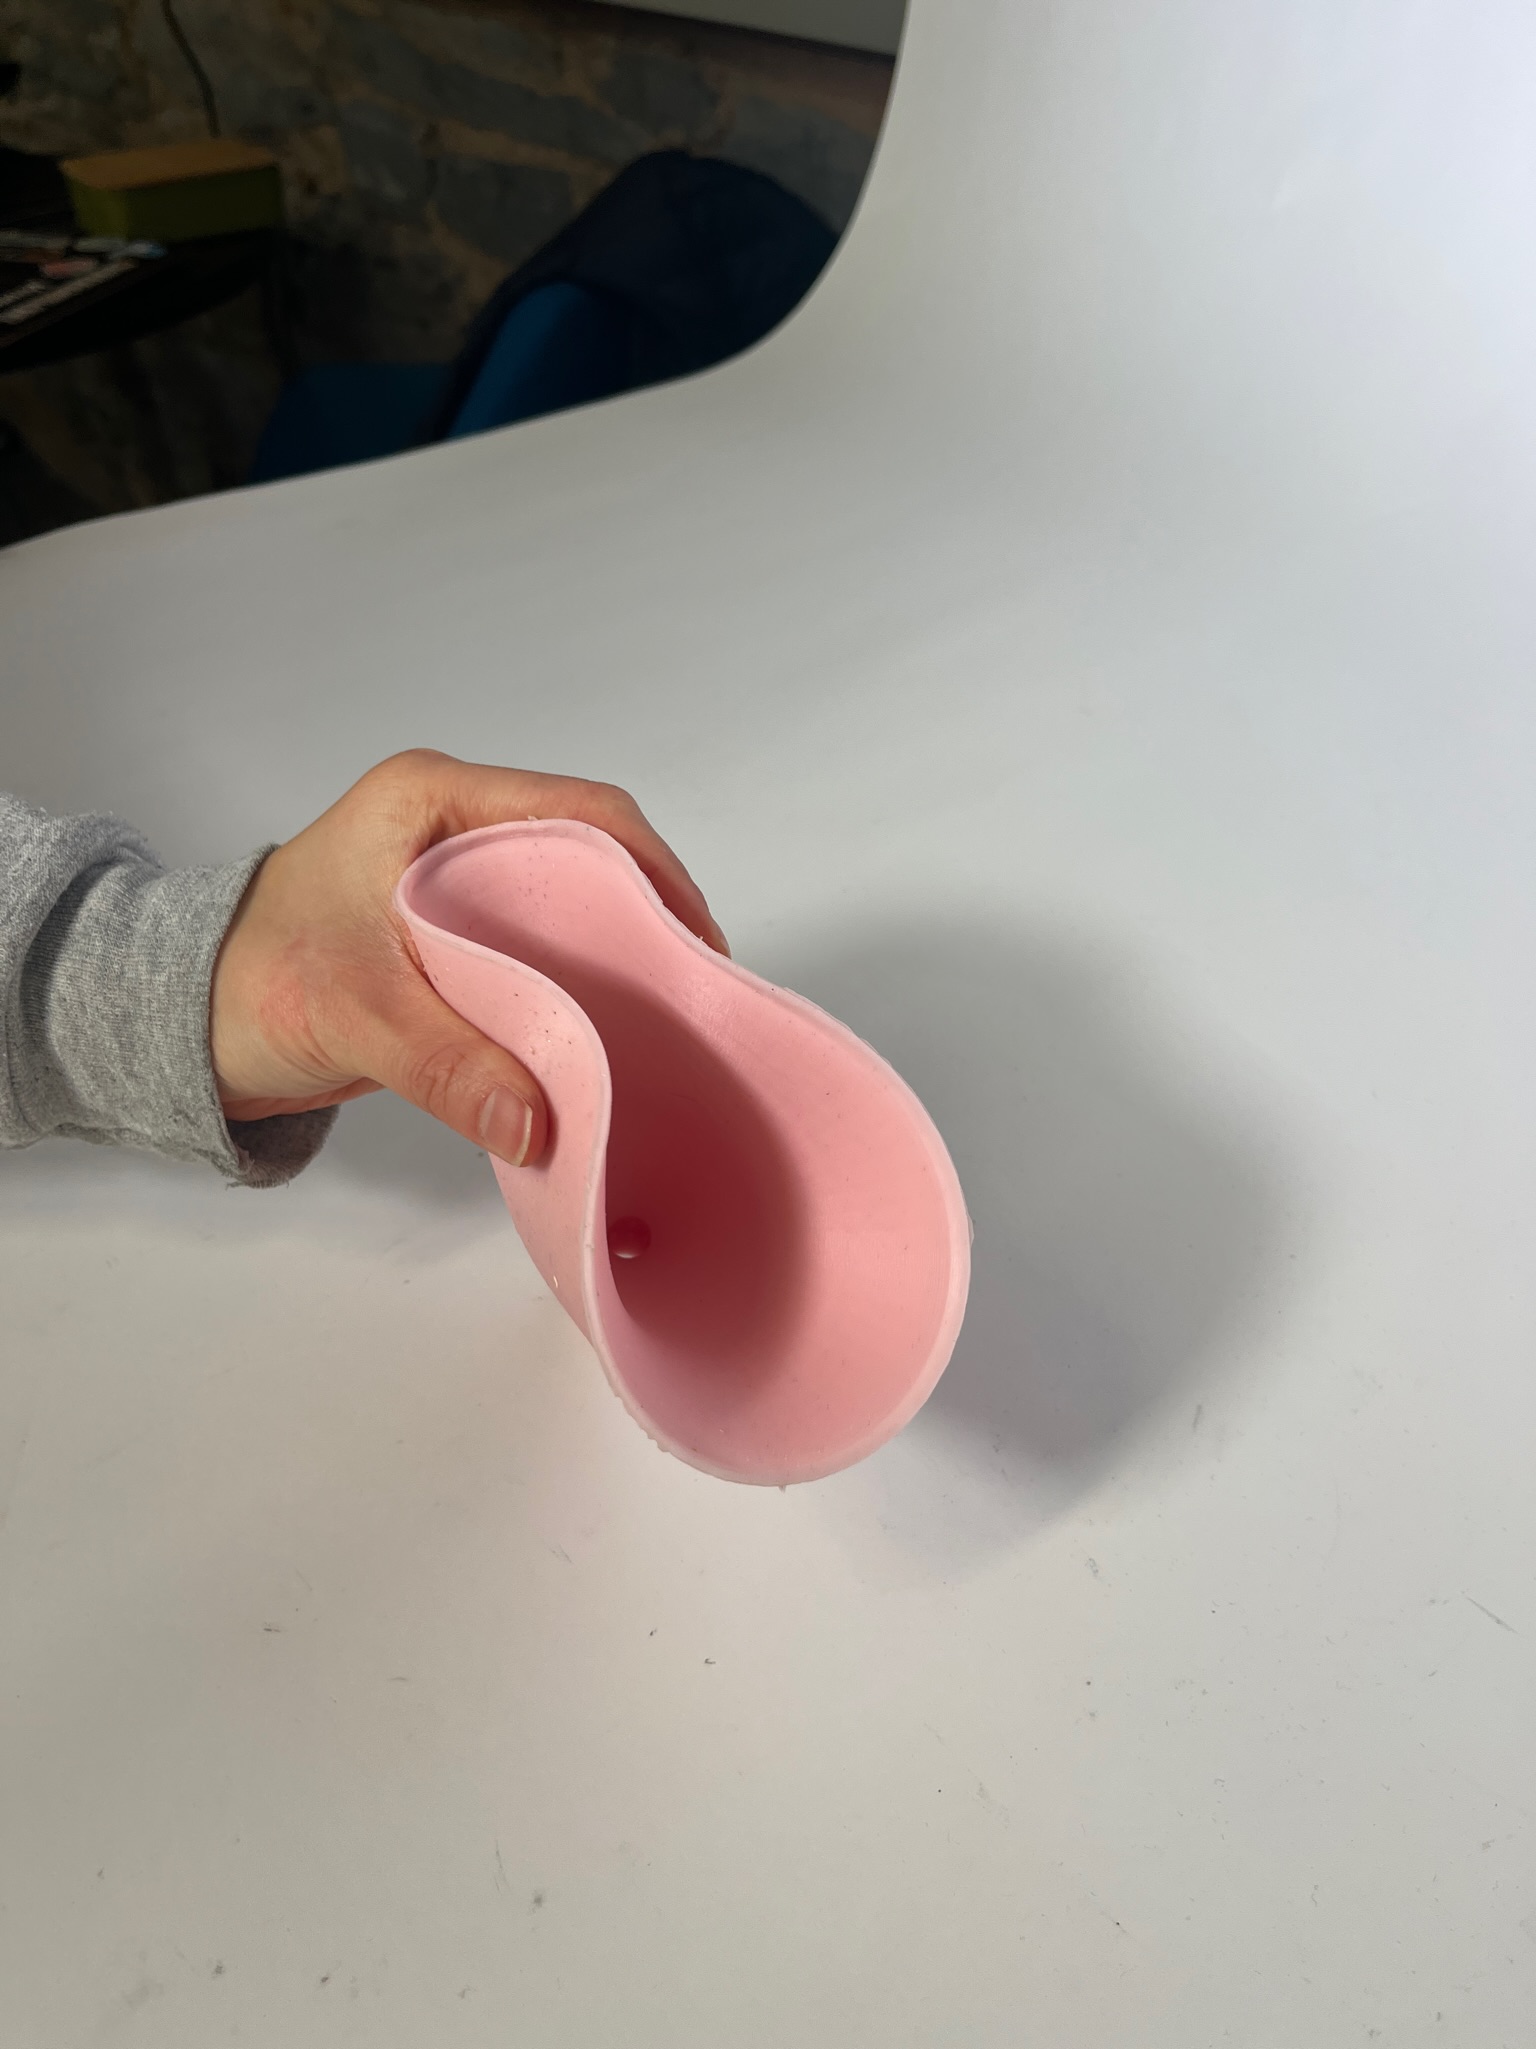
After some trimming, our casted rubber funnel was done! This was the top part of our first prototype, so we returned to the drawing board and started looking for improvements for the next cast. We decided to make the funnel thinner, since the Smooth-Sil 940 is durable enough, and shorten the overall funnel. With the design of our 3-piece mold, I can change the side of the funnel by adjusting the red piece dimensions so the next prototype will be shorter and thinner without needing to reprint the side pieces.

Despite having Chloe remote, our team worked quite well with this process, and everyone had a role. Barbara had recently cut her thumb, which needed stitches, so she could not comfortably wear a latex glove and handle the physical portions of the casting process. Instead, she took photos while our hands were dirty and worked with Chloe to jot down notes throughout our process. Chloe, while remote, was our main scribe with documentation, writing down the measurements we used and our process, which I am currently using to jog my memory for this write-up. Aside from documentation, Julia and I were mainly responsible for the actual mixing, pouring, and de-molding portions of this process. All in all, our group delegated the work in an efficient and effective manner that never had too many cooks in the kitchen while also keeping everyone involved.
We learned a lot about molding and casting and successfully produced a plaster elephant (with only minor defects) and a silicone rubber funnel for our first prototype. This fabrication assignment has challenged the way I think and look at casted objects, such as determining if a single or multi-piece mold produced that object and so on. I was a bit surprised to see the incredibly different materials that can be used when molding and casting, and my group and I are already thinking of modifications for the casting of our second prototype funnel!