
Hand Sanitizer Bottle
I meet with my group and we talked about what we wanted to mold and cast for our project. At first, we were going to do something pertaining to our project but after considering how it would be implemented…… we decided to mold a coconut-scented hand sanitizer bottle.
Part I : Two-Piece Mold
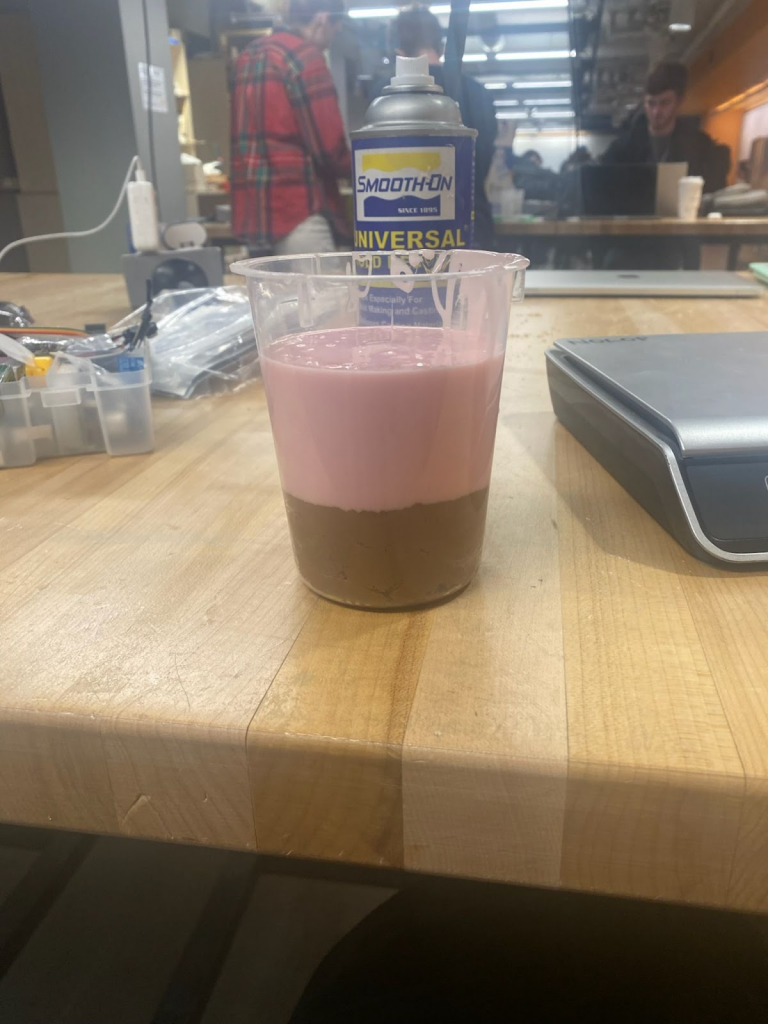
For this mold, we decided to use silicon and used the YouTube video “How To Make a 2-Piece Silicone Rubber Mold | Mold Making Model” which served as a tutorial, but we had some difficulties in setting up the mold so we asked the Professor for some help. They suggested using clay to support the hand sanitizer so that we could make the part of the mold. Prior to pouring the mold, the Professor informed us that we needed to use silicon in order for the mold to be solid enough. This was because at first, we were going to mix alginate, but stopped and added the silicone. Afterward, we were able to successfully produce the first half of the 2 piece mold.
Since we neglected to apply the mold release spray before it hardened, it was difficult to remove the mold from the plastic container. This caused us to remove the mold by cutting the plastic cup in half and using a new cup to form the remaining portion. Giang cut off the bottom of the new cup since we needed to pour additional silicon to build the bottom part of the mold.
In order to make a hold for the casting process, we had to place a dowel on the hand sanitizer bottle as stated in the video lesson. I then tried to use every type of glue available in NoLop to secure the dowel to the bottle, but none of them worked, so Giang made one out of clay and attached it to the bottom of the bottle. This worked, so we added more clay to the bottom to support the whole mold.
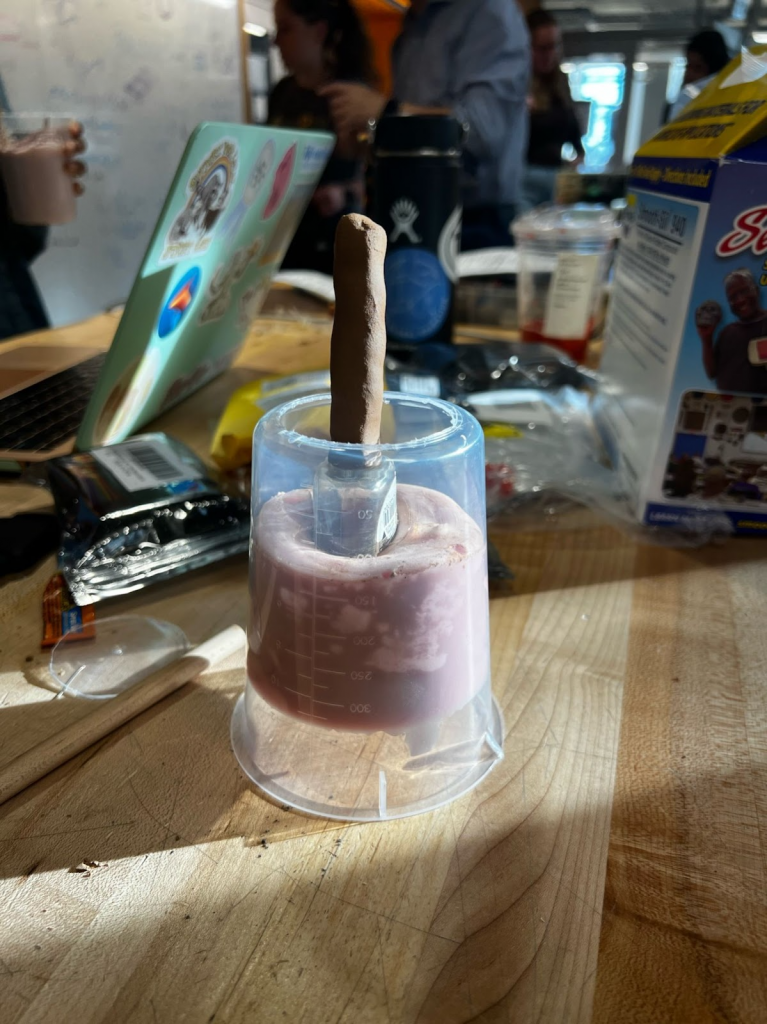
The entire mold was complete, so I and Giang removed it from the cup to create the casting process. Since the two pieces of the mold were stuck together even though we had used the mold release, we decided to use a knifer to cut it and separate the two pieces. Giang has to cut it a bit in order to separate the two pieces from one another.
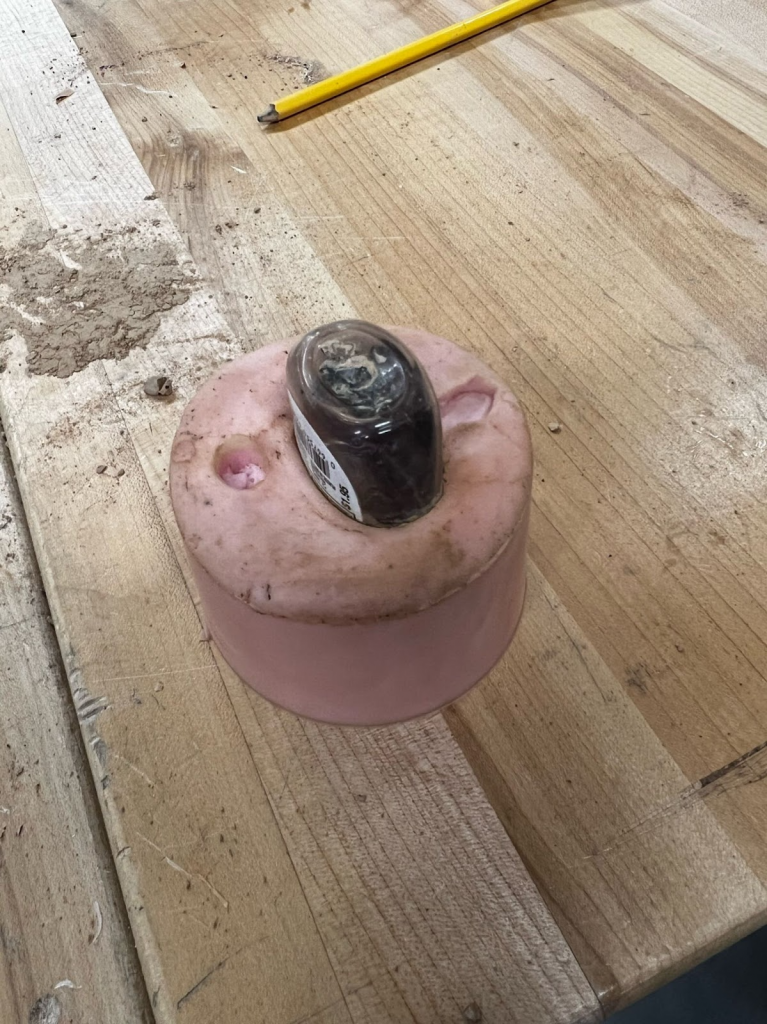
I have to use the knifer to remove the dowel-made holes that were previously made. In order to lock the two sections together for the casting, we attempted to insert new dowels, but we were unable to remove enough silicon from the holes that were designed for the dowel. This caused me and Giang to make the decision to reassemble the parts and start the polyurethane casting. We chose to utilize the remaining part B mixture despite the fact that it was running short.
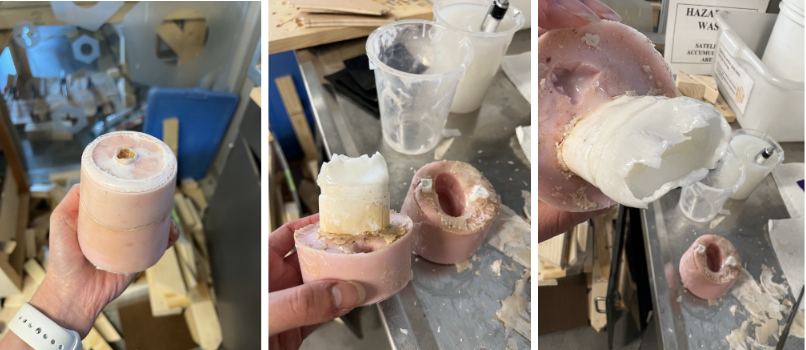
We later regretted the idea since there wasn’t enough the fill the mold. Also, part of the casting liquid spilled out of the mold since both of the sections were not able to be fully sealed together. In retrospect, before putting the casting material in, we should have utilized tape or other materials to ensure the mold was stable. Since I and Giang had the polyurethane mixture all over our hands, we couldn’t photograph the mistakes. Giang then tried to take out the mold after 24 hours and the mold was easily removed from the cup, but the casting mixture was dripping everywhere, which caused it difficult to separate the two halves from one another. Giange was able to expose the bast by scraping extra material with a small flat file but discovered that the top of the cast was still moist. Giange then put the mold back together to hopefully harden.
Apple Watch Model
Part II : One-Piece Mold
The one-piece mold was a little bit easier to create because both the mold and the cast can be made at once. We decided to create a mold of the original vein finder design, which takes the shape of the Apple Watch. I had already created the CAD design for the watch so I printed the object using the Prusa Printers.
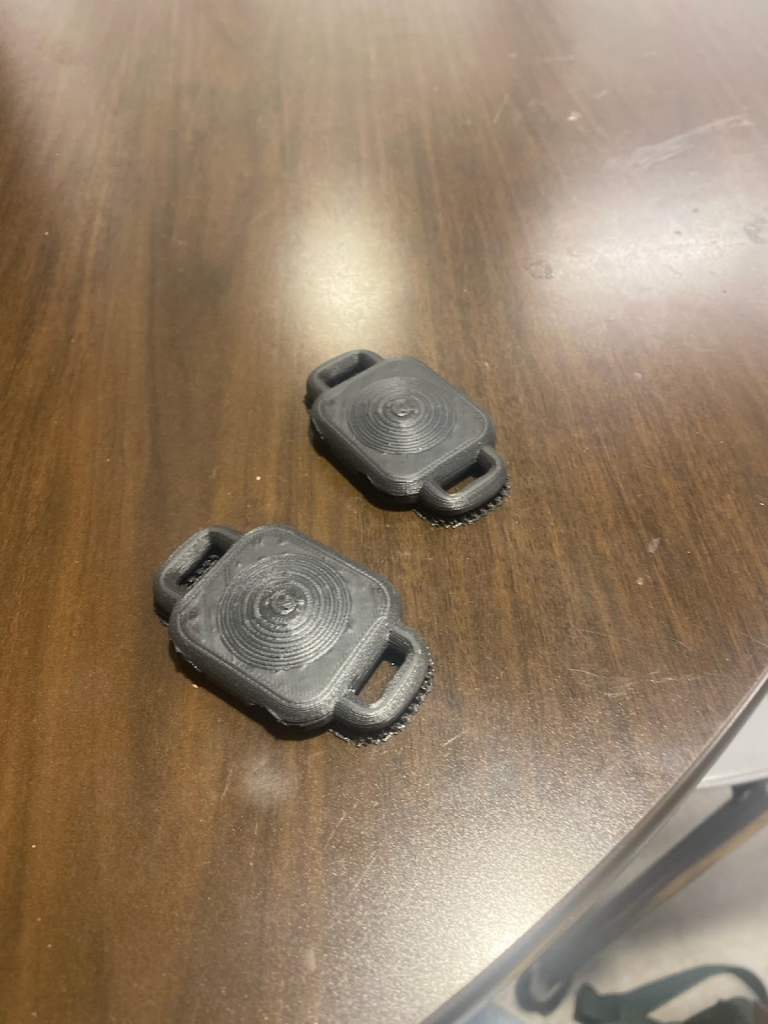
Since the design had two openings on each side (this was so the straps can be attached to the device) Zari had to stuff the holes with clay. Zari then created the mold with Alja-Safe Alginate and have it set. We later realized that the area where the class kept their materials was a little humid. Since the print is hollow, it floated to the top, and since clay was added to one side compared to the other, it floated at an angle.

Next time, we would need to add glue at the bottom of the cup, not use a hollow mold, or use as much Alginate to create the mold. Zari later returned to the mold two days later and it was still moist and water collected at the bottom. We should have used tape instead of clay because it was hard to take the mold out. After the print and the clay were removed, polyurethane was used to create the ast. Even though Zari measured Part A and Part B in 1:1 proportions, we felt the cast was slightly darker than it should have been. Also since most of the water had evaporated from the mold, the mold did not fit into the up, so some of the cast filled over the mold.
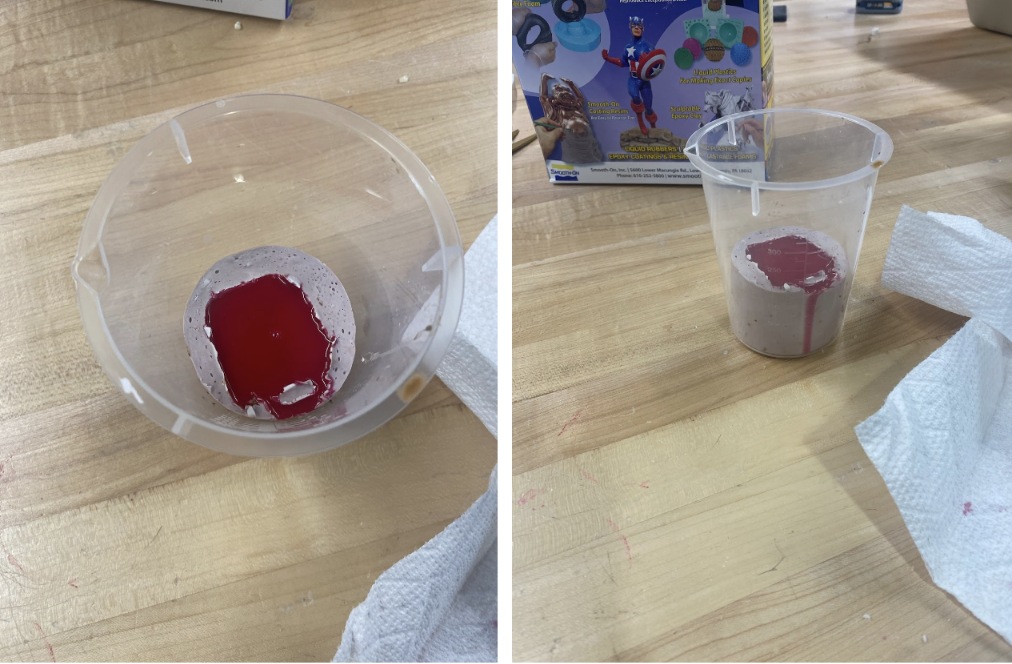
The cast was left to sit for three days, however, when me and Giange went to take the cast out of the mold, it was still wet and crumby. Due to time constraints, we decided to use it still for the final product. We feel that keeping the mold near the sink may have caused something to happen to the cast but we are not too sure.
