Summary of Major Design Changes
To recap, following our April 7th design update meeting with Professor Lai, our main objective was to add a rolling component to our device’s closing mechanism (using wheel bearings). However, we were having trouble deciding how to go about this, since 3D printed materials, like PLA, are incredibly hard to thread.
While we were discussing this issue, Brandon (the lab space manager for the Nolop Makerspace) overheard our conversation and gave us suggestions. He suggested implementing a shoulder bolt, with the threaded part nested into the body of the device. The shoulder bolt will be secured to the device with a hex nut. With the placement of the hex being in the body of the device (rather than at the end), we would also reduce the amount of compressive force on the 3D printed frame over frequent usage.
Materials
3D Printing
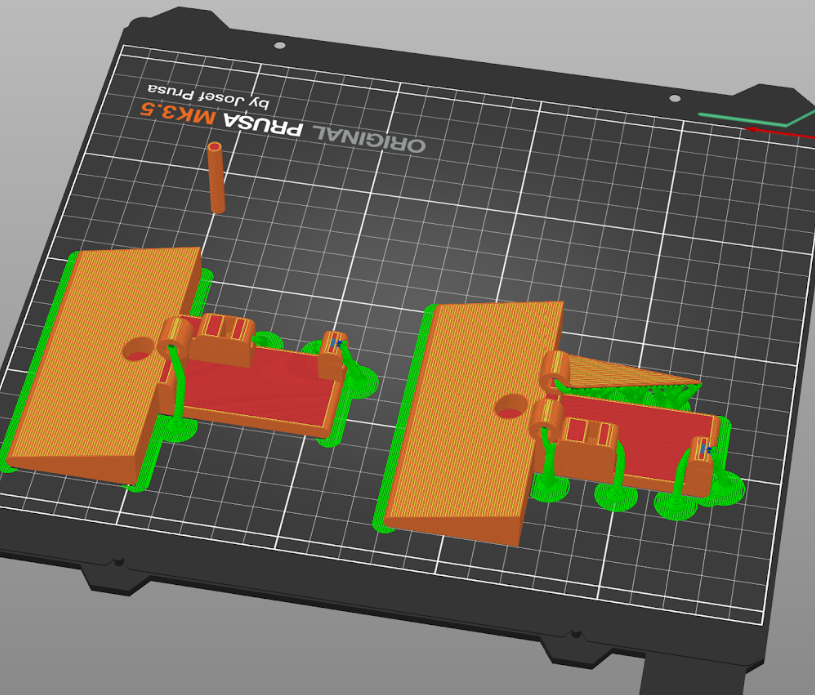
We printed this prototype using PLA using the Prusa MK3 printers in the Nolop Makerspace. We used 15% infill.
Hardware (Shoulder Bolts, Bearings, Hex Nut)
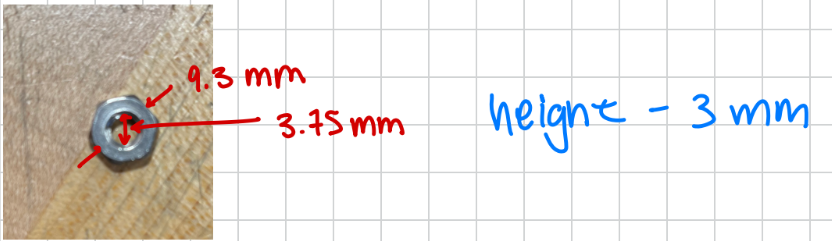
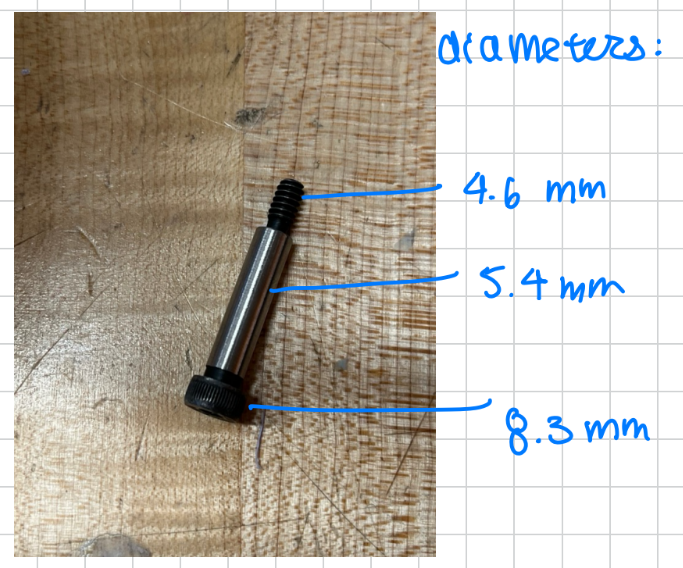
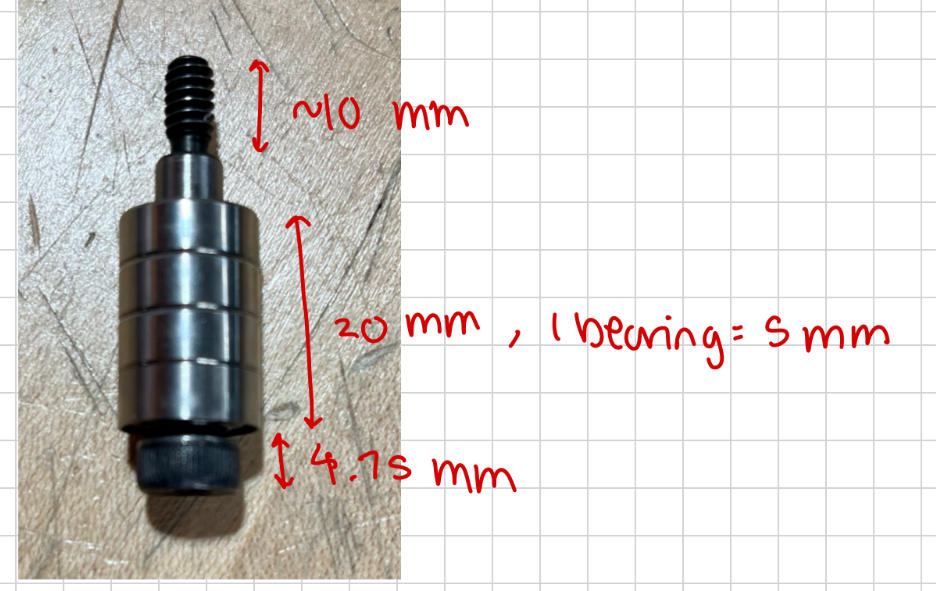
Following Brandon’s advice, we ordered shoulder bolts to fit the 0.25″ diameter wheel bearings we had, and used appropriately sized hex nuts from Nolop to secure the bearings. To accommodate these changes, Zahir used CAD to design an iteration that allowed four bearings to comfortably fit along the smooth length of the shoulder bolt in the allowed space. Below are the dimensions we obtained for the appropriate hardware.
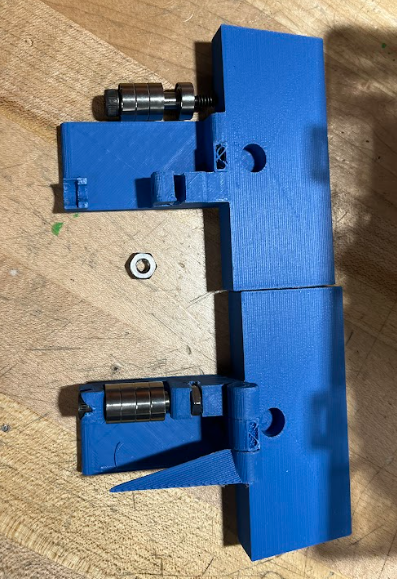
Assembly of Parts
We found that the 3D print surrounding the hex nut and threaded portion of our shoulder bolt were not wide enough, thus had to cut out some of the 3D printed material that was surrounding the hardware using small pliers. During this process, however, Vio also accidentally broke the wedge (the pointed part) of the device and had to glue it back on.
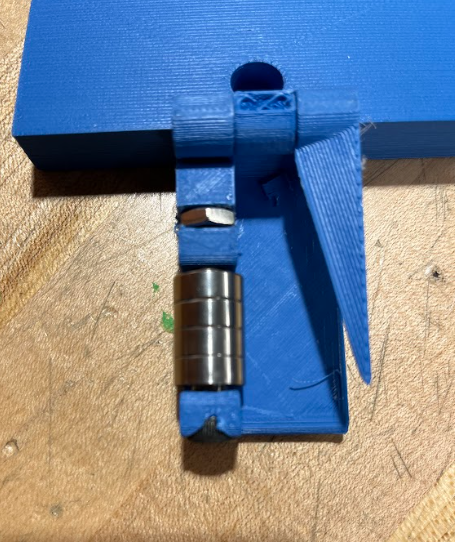
Although it looks like the bottom of our device has creep (at the point where the head of the shoulder bolt hits the device, that was actually an error caused by the 3D printer!
Feedback from Professor Lai & Moving Forward
Here is the feedback we received:
- Explore other manufacturing types (ABS, molding and casting polyurethane, etc)
- Reinforce delicate parts (like the wedge) of the 3D print prototype with triangular shapes
- Center the bearings on the device and make sure that only the sides of the bearings that touch the bag are exposed.
Here were our next steps:
- Send out more order forms
- Wait for metal hardware from Grainger to arrive (i.e., metal dowel rods for the hinge, additional bearings, and chip clip springs)
Unexpected Drop Test
Amanda accidentally dropped this prototype in Nolop after the team’s meeting with Professor Lai, causing the prototype to break. Interestingly, parts that we had not previously thought were susceptible to breaking broke. For example, the 3D printed dowel had more strength than the casing / hinge around it.
On the other hand, some parts that we knew were weak also broke. For example, in the photo below, you can see the part that is supposed to hold the head of the shoulder bolt is broken off!