Molding and Casting – Stage III


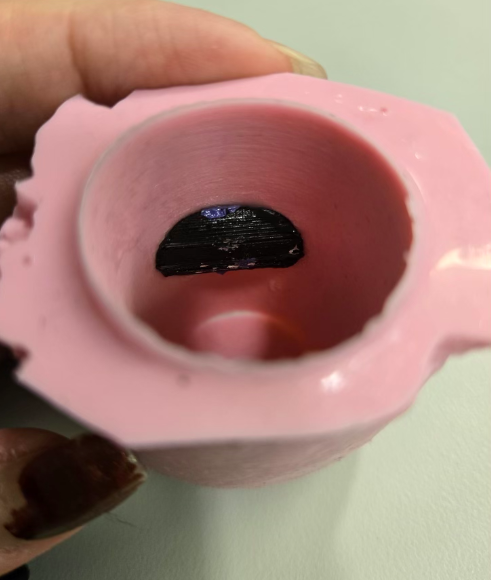
After noticing that squeezing the cast became easier during our last iteration — when the bumps from the insert were included — we made additional versions that held together more effectively. However, the previous cast was split into two parts and we only held it together with a rubber band, so we decided to assemble the plastic mold piece as a two-part mold. By holding the two halves together with clay and securing them inside a plastic cup, we were able to create casts using different-sized inserts. To prevent the insert from floating and to keep it centered during casting, we experimented with several methods, including taping it in place and weighing it down with heavier objects.


After adding bumps and achieving a cast that held together, we realized the bumps helped, but they weren’t strong enough to provide the necessary pressure points. We began brainstorming ways to reinforce them, considering materials like wood. Eventually, we realized we could CAD a piece that fits precisely over each bump. After taking careful measurements from the insert, we 3D printed PLA shells that we then super glued onto the bumps. Although we were initially concerned about adhesion — since silicone is difficult to bond to — the shells stayed firmly in place even after repeated squeezing and movement, so we decided to move forward with this solution. However, we encountered a new problem: the additional thickness from the shells made it harder to fit the eye drop bottle into the mold. To fix this, we redesigned and reprinted the insert. The first adjustment, adding 2 mm to the insert’s diameter, made the fit too loose. After refining it to only a 1 mm increase, we achieved a snug, perfect fit for the eye drop bottle with the shells attached.
The size insert below worked well in the sense that it gave us a good size to fit both the bottle easily and the 3D printed shells that we super glued over the bumps in order to make pressure points that will help with the squeezing motion.


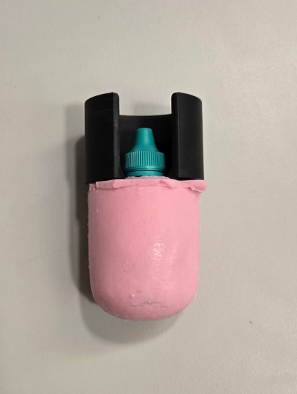
We did a final round of casting, focusing on better stabilizing the insert, as it was still floating during previous casting iterations. This time, we used a variety of methods to ensure it stayed securely in place. The last three photos show a successfully cast squeezing component with the PLA shells glued onto the bumps. The final image shows both parts of the device fitting together properly while securely holding a 15 mL eye drop bottle in place.
Recent Comments