For this project, my team split up into two groups to create the molds. Rola and Kara worked on the foot molds and the bottle molds while Farsin and Macy worked on the chocolate mold. For the bottle and foot mold, clay was used to stamp the objects. Then, the clay was set while the wax was melted. From there, wax was poured into the clay mold to create the shape. For the chocolate, it was melted and poured over the three objects we chose – a plate, a cup, and a tin. This assignment allowed us to explore different molding types and materials. From this we were able to experiment on what types of molding are most advantageous for different applications.
Originally, we chose to cast a foot for our first object. The rationale behind this was that it would be relevant to our team project as we can test our bunion aligning prototypes on the foot model. This would greatly help us visualize how the device works and make adjustments on a size accurate model. For the material, we decided to use clay since it is skin safe and easy to maneuver. Kara set her foot in clay, then cut the piece in half to create our two-piece mold.
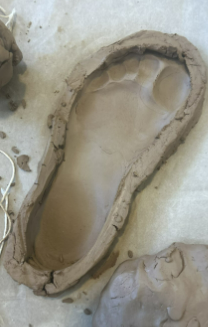

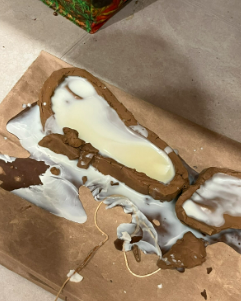
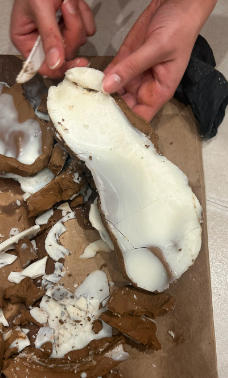
Afterwards, I melted the wax and poured into the foot mold. Upon attempting to break the clay away from the wax, I quickly realized that the clay mold was not deep enough to properly contain the wax. This resulted in a thin wax that easily broke into tons of pieces (very sad!).
Frustrated, we decided to mold and cast a smaller object – a small flavoring bottle!
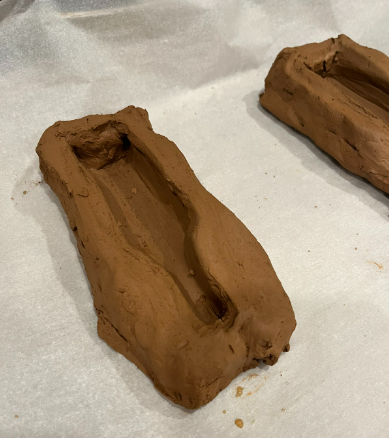
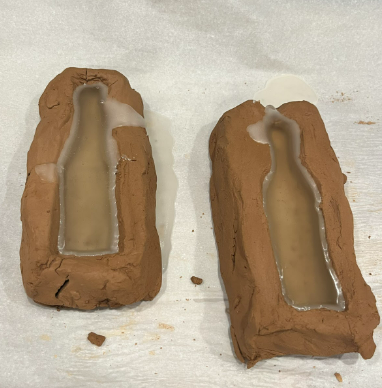
Learning from our past mistakes, this time around, I made sure to create molds that were sufficiently deep to properly contain a greater amount of wax that would be durable and not easily breakable. To do this, I made two separate blocks of clay and firmly implanted the bottle into it to create a deep enough impression.

Given that we were short on time, rather than weight for clay to air dry, I placed them in the oven at 270 degrees for roughly 15 minutes to expedite the hardening process. This resulted in a few cracks in the mold which were easily fixed through smoothening the clay with some warm water.

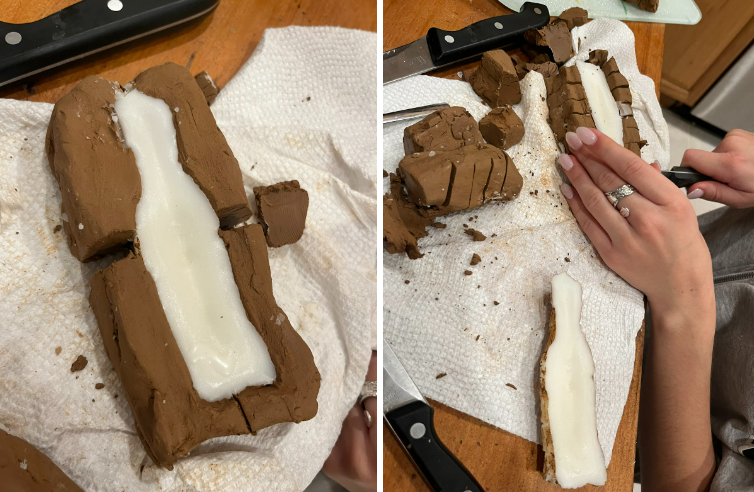
Afterwards, Kara melted wax and poured it into the molds. To expedite the cooling process, Kara placed the molds in the fridge.
After the cooling process was completed, Kara made small cuts in the molds to carefully remove the solidified wax shape.
Afterwards, me and Kara used a metal spoon that was heated using the stove to melt the surface of the casted wax bottle shape so that they may be fused together.
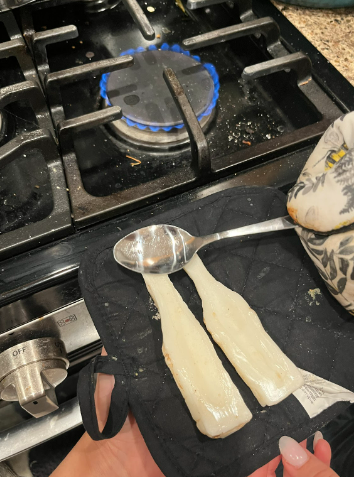
With that, the first part of our molding and casting project was complete!

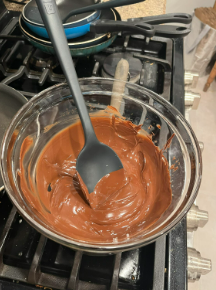
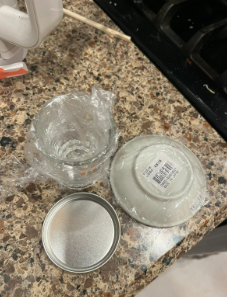
For our seconf mold, we decided to use chocolate! This material is vastly different from clay, as it is liquid and thin. This allowed us to have a large contrast in the materials to examine the differences in molding and its difficulties (and have a tasty treat afterwards!). First, Macy melted the chocolate in a bowl over boiling water. For our molds we used 3 different objects – a plate, a cup, and a tin. This was originally done with the intention of trying how chocolate will adhere to vastly different mold types.
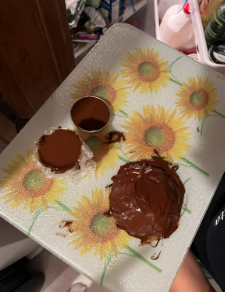
With these molds, Farsin had successfully made a plate using the tin and a dome using the cup. The chocolate, on the plate, however, broke slightly given its thin nature.
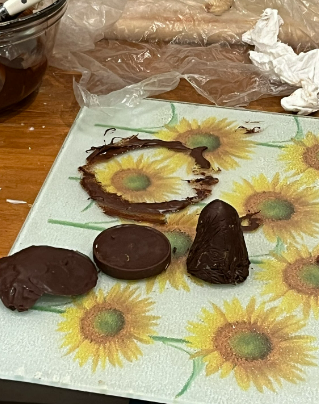
From there, we collectively decided to combine all the pieces together to create a unique piece! To combine the pieces, we used the rest of the melted chocolate to act as glue. From these pieces we created Jumbo the Elephant, featuring the plate as a base, the dome as the head, and the broken plate as the ears and trunk!
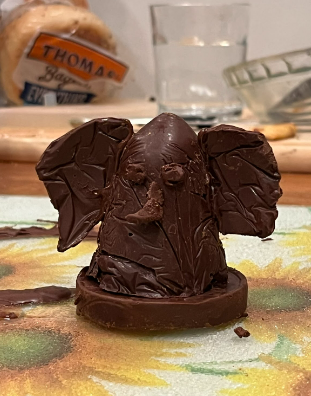
Using chocolate was successful as a molding ingredient. In addition, it was a one step process, and the mold did not need to be fabricated. However, the chocolate was extremely thin and fragile. Therefore, if we were to use chocolate in the future to mold, we would need a very solid mold and a way to carefully transfer the material.
Overall, in this assignment, we were successful in creating two molds with two different materials. By using clay to create the base, we were able to press the flavoring bottle down and create a cast. This was a fast and effective way to create the shape. By using two different bottles, me and Kara were able to combine the pieces using melted wax. This resulted in a one-piece, three-dimensional bottle made out of wax. In addition to the two-piece mold, Macy and Farsin created a one-piece model using chocolate. The chocolate molding was also successful by creating three separate pieces and combining them together using melted chocolate. Chocolate was a vastly different material than clay and wax, so it gave us a large variety to work with and better expand our experience with molding and casting agents!