
This next fabrication assignment involves Arduino, yet another program that I have absolutely no experience with, but I am excited to learn and try! This assignment seems particularly daunting to me, as I have no hands-on electrical engineering experience (and none at all besides the circuits class I’m currently in) and very little coding experience in programs that seem very different to the Arduino code interface.
Therefore, if I’m going to have any chance to succeed, build something cool, and learn something in the process, I probably need to start with and build off of a few tutorial videos. We did a tutorial in class involving programming a temperature sensor, and while that was cool, a lot of the reasoning behind doing certain things to make certain other things work didn’t make any sense to me.
I wanted to look at another tutorial, so I followed an LED sequential control tutorial on Youtube, and started to understand why certain things happen and how they are affected by the code. After following the steps in the tutorial and downloading the sample code provided, I was able to create the sequential LED program.
I wanted to use this as a base, and build off of this in any interesting way that I could. I saw the joystick, and wanted to find a way to integrate that into the program. I followed this Youtube tutorial and used the code there to connect my joystick.

After playing around with the joystick for a while, I wanted to find a way to integrate control of the joystick to the LED lights. For example, do something like make the red LED light up when I pushed the joystick left. However, as I started to work on that, the joystick program suddenly went haywire. I tried to disconnect and reconnect everything, but nothing would stop the info in the serial monitor from working for 5 seconds, and then just spitting out a bunch of gibberish.

So after working for a while to try to resolve this issue and return the joystick to normal working order (like it was before, weird), I solemnly decided to scrap the joystick and return to the blinking LEDs. I decided to stick to this foundation that I understood, but try to add to it as much as I possibly could with related information from online and extending the knowledge I had.
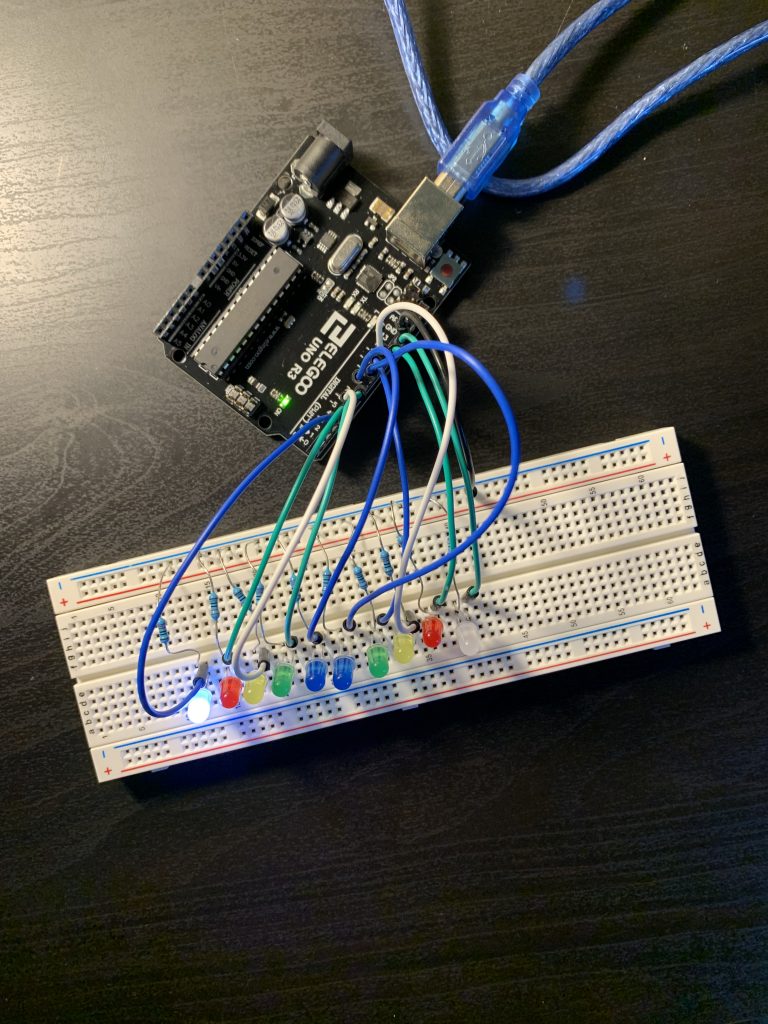
After going back to the blinking LEDs, I decided to add more LEDs, move them closer together to give off a more sequential appearance, and play with the timing to create a cool “light show.” After rewiring the Arduino and editing the code, I came away with a cool product.
I spent a while looking through ways to improve this on Youtube and the Arduino project hub. Side note: the Arduino project hub looks super cool! There are certainly a few things on there that I want to try out in the future, and that seems like another great way to learn about more aspects of this program.
To extend on this project a bit further, I played around with the code and created a whole bunch of different sequential light shows. I jumbled up the order, timing, on/off settings- you name it, I played around with it. I was able to create a few more cool light shows, seen below.
This is really cool! I’m very happy with the outcome of this project, especially with the limited amount of time I had in this very busy week. This is only scratching the surface of all the cool possibilities of Arduino, especially given all the cool stuff I saw online.
The most difficult part of this project was tackling such an unknown (for me) program with so many possible accessories from scratch. I tried to use circuito.io to work out an optimal wiring for both the LED setup and the joystick setup, but I couldn’t get what circuito.io was telling me to do to work in practice on my board.
Through playing with the Arduino, the code, and all of the pieces in the starter kit, I learned how many cool things could be done with this technology, and I am excited to look into more projects in the future. For example, I am deaf and sometimes like to hang out in my room while hearing nothing. This is quite enjoyable, but I can’t hear if someone’s knocking at my door to get my attention. Therefore, I could code some sort of flashing LED light response that would let me know when someone is outside my door. I could use a microphone that would pick up the sound of someone knocking, or use a push button that mimics a doorbell. There are just so so so many possible ways to tackle this problem with just the materials in my starter kit and the resources available online!

Appendix (this is the code I used specifically for the “Moving Light” light show, although all of my light shows used similar code)
Credit to the youtube tutorial linked above for the base of this code, although I expanded it by a lot.
/* A simple program to sequentially turn on and turn off many LEDs */
int LED1 = 13;
int LED2 = 12;
int LED3 = 11;
int LED4 = 10;
int LED5 = 9;
int LED6 = 8;
int LED7 = 7;
int LED8 = 6;
int LED9 = 5;
int LED10 = 4;
void setup() {
pinMode(LED1, OUTPUT);
pinMode(LED2, OUTPUT);
pinMode(LED3, OUTPUT);
pinMode(LED4, OUTPUT);
pinMode(LED5, OUTPUT);
pinMode(LED6, OUTPUT);
pinMode(LED7, OUTPUT);
pinMode(LED8, OUTPUT);
pinMode(LED9, OUTPUT);
pinMode(LED10, OUTPUT);
}
void loop() {
digitalWrite(LED1, HIGH); // turn on LED1
delay(100); // wait for 100ms
digitalWrite(LED2, HIGH); // turn on LED2
delay(100); // wait for 100ms
digitalWrite(LED3, HIGH); // turn on LED3
delay(50); // wait for 50ms
digitalWrite(LED1, LOW); // turn off LED1
delay(50); // wait for 50ms
digitalWrite(LED4, HIGH); // turn on LED4
delay(50); // wait for 50ms
digitalWrite(LED2, LOW); // turn off LED2
delay(50); // wait for 50ms
digitalWrite(LED5, HIGH); // turn on LED5
delay(50); // wait for 50ms
digitalWrite(LED3, LOW); // turn off LED3
delay(50); // wait for 50ms
digitalWrite(LED6, HIGH); // turn on LED6
delay(50); // wait for 50ms
digitalWrite(LED4, LOW); // turn off LED4
delay(50); // wait for 50ms
digitalWrite(LED7, HIGH); // turn on LED7
delay(50); // wait for 50ms
digitalWrite(LED5, LOW); // turn off LED5
delay(50); // wait for 50ms
digitalWrite(LED8, HIGH); // turn on LED8
delay(50); // wait for 50ms
digitalWrite(LED6, LOW); // turn off LED6
delay(50); // wait for 50ms
digitalWrite(LED9, HIGH); // turn on LED9
delay(50); // wait for 50ms
digitalWrite(LED7, LOW); // turn off LED7
delay(50); // wait for 50ms
digitalWrite(LED10, HIGH); // turn on LED10
delay(50); // wait for 50ms
digitalWrite(LED8, LOW); // turn off LED8
delay(100); // wait for 100ms
digitalWrite(LED9, LOW); // turn off LED9
delay(100); // wait for 100ms
digitalWrite(LED10, LOW); // turn off LED10
delay(100); // wait for 100ms before running program all over again
}