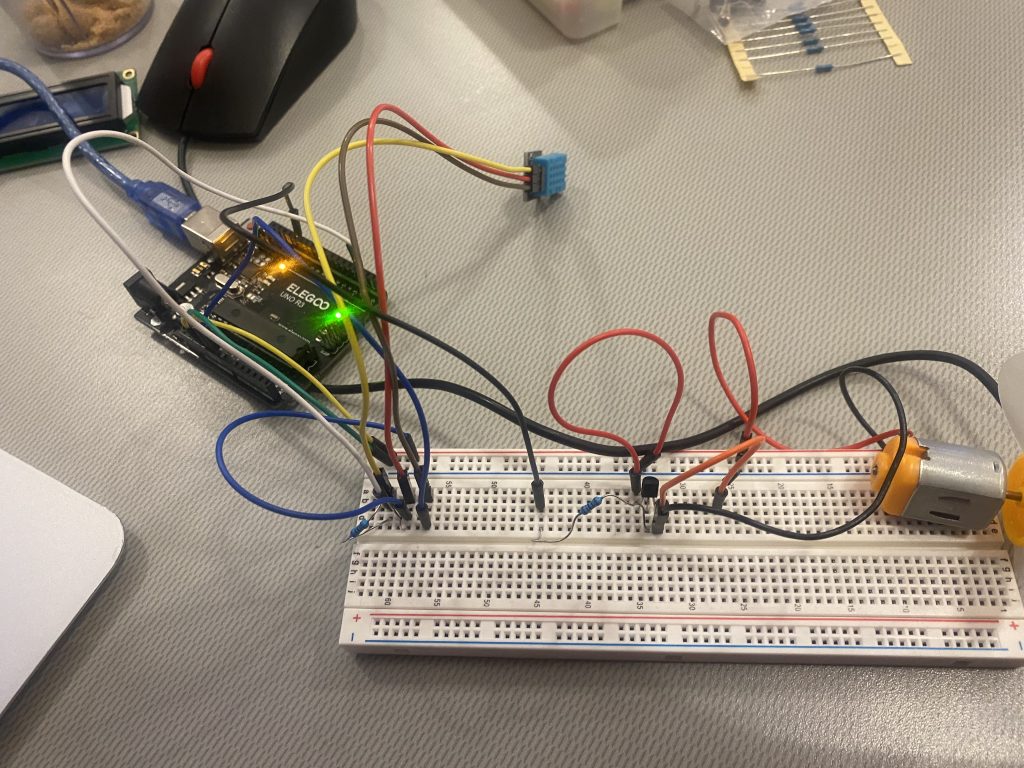
As a beginner in using microcontrollers, I explored the idea of building a temperature-controlled fan system. My initial plan involved using a DHT11 temperature sensor to measure the temperature and automatically turn the fan on if the temperature exceeded 79°F and off if it fell below that threshold. To enhance the project, I considered using an LCD1602 display to show the current temperature. This would allow me to build on the code provided in class while using additional components (Fan + LCD).
However, I quickly encountered challenges with implementing the LCD. Due to the complexity of integrating the display with the microcontroller, I decided to drop that aspect and focus on the fan control system. I used the UNO R3 Controller Board and a breadboard to put the circuit together. Unfortunately, when I tested the setup, the serial monitor consistently reported a failure to read from the DHT11 sensor. Despite thoroughly checking all connections, the issue persisted.
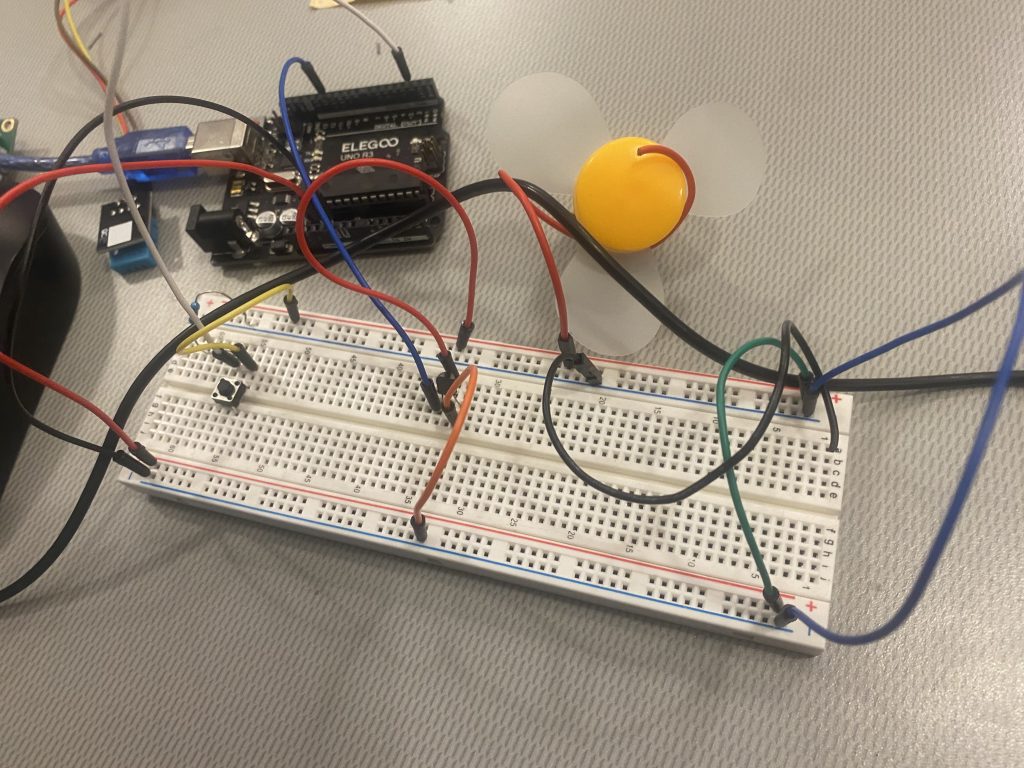
To troubleshoot, I double-checked the wiring and the code but could not resolve the problem. In an effort to try to work around this issue, I decided to switch to a simpler button-based fan control system. I found sample code from the Arduino website and adapted it to control the fan. However, even during this stage, I faced additional issues—most notably the board repeatedly disconnecting from my laptop. I suspected that a faulty cable was causing the problem, as the issue continued even when I switched to another laptop. Additionally, the fan motor became detached from the wires, making it harder to manage (having to use both hands to hold it together).
Despite the setbacks, I learned valuable lessons throughout this project. I discovered that microcontrollers are powerful tools for controlling systems through code, serving as a bridge between digital instructions and physical actions. I also learned that selecting the right components is crucial and sometimes involves dealing with unexpected challenges, like needing transistors and diodes that were not initially mentioned. Figuring out how to connect the transistor was also a challenge since it required looking at several data sheets to determine the correct configuration.
In the end, I did not achieve a fully functional system. The temperature sensor did not work as intended, so it could not influence the fan, and the fan continued running regardless of the button state. Although the project did not yield the desired outcome, it gave me insight into how microcontrollers can be used to control real-world devices.
Some potential applications of microcontrollers in everyday life include smartphones, cars, refrigerators, washing machines, and smoke alarms. This experience has motivated me to continue learning and improving my skills in microcontroller programming and circuit design.

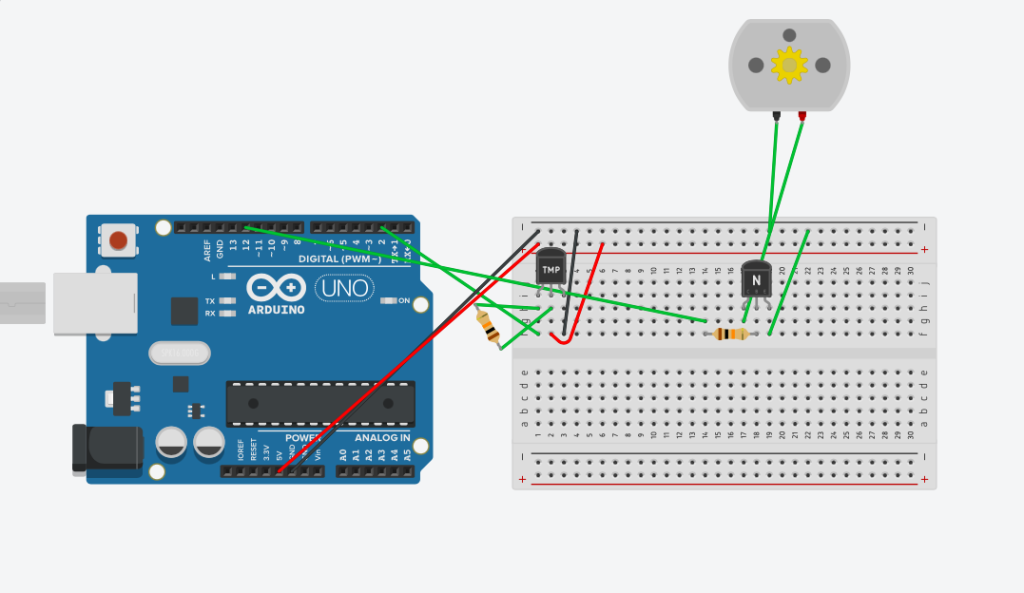
The TinkerCAD model for the Press Button is essentially the same with the DHT11 replaced with the press button. A wire goes from digital pin 2 to one leg of the pushbutton. That same leg of the button connects through a pull-down resistor (here 10K ohm) to ground. The other leg of the button connects to the 5 volt supply.
Sources and Relevant Data Sheets Used:
-Arduino Slides from BME66 Class: https://canvas.tufts.edu/courses/63492/files/8699505?module_item_id=1642576
-GeeksforGeeks. (2024, April 5). Real Life Applications of Microcontroller. GeeksforGeeks. https://www.geeksforgeeks.org/real-life-applications-of-microcontroller
–How to Wire and Program a Button | Arduino Documentation. (n.d.). Docs.arduino.cc. https://docs.arduino.cc/built-in-examples/digital/Button/
–Switching Using Transistor. (2019). Arduino Project Hub. https://projecthub.arduino.cc/SBR/switching-using-transistor-18cb61
–Transistor Controlled Fan. (2017, December 12). Arduino Forum. https://forum.arduino.cc/t/transistor-controlled-fan/496435
–Transistor Motor Control | Arduino Documentation. (n.d.). Docs.arduino.cc. https://docs.arduino.cc/learn/electronics/transistor-motor-control/