Homework 4: Laser Cutting
Assignment Overview
In this assignment, we were tasked with laser cutting a 3D object. For this assignment, I used a Universal VLS 3.60 Laser Cutter found within the Nolop Makerspace.
Prior Experience
I do have experience laser cutting in the past, however, I have only laser cut 2D shapes! For one of my scene painting projects, I had to paint a wallpaper decal design onto the set, and so I needed to cut my own stencil. Traditional stencil fabrication methods often involve tracing a design and manually cutting it with utility knife blades (i.e., Exacto knives), but I wanted to laser cut my cardstock paper to save time.
When it comes to vector illustration programs, I have experience in Adobe Illustrator (which is what I used last time I laser cut my stencil), but no experience using Inkscape, which was the program I used in this project!
Making a Tabbed Box
For this project, I was very indecisive so I just made a tabbed box using the tutorial that was linked with the Laser Cutting module. Overall, the designing process was very intuitive and Inkscape was very easy to navigate!
There were some things that I struggled with in the vectorization process while using Inkscape. Firstly, I could not figure out how to get the drawing to snap to the grid lines, as shown in the tutorial. The guy who recorded the original tutorial used a very old version of Inkscape, so the UI has changed significantly since then. I Googled to find the snap to grid drawing option, but could not locate it in the version of Inkscape I had, because the tool menus on the right side were so condensed and so many features were hidden away in other menus.
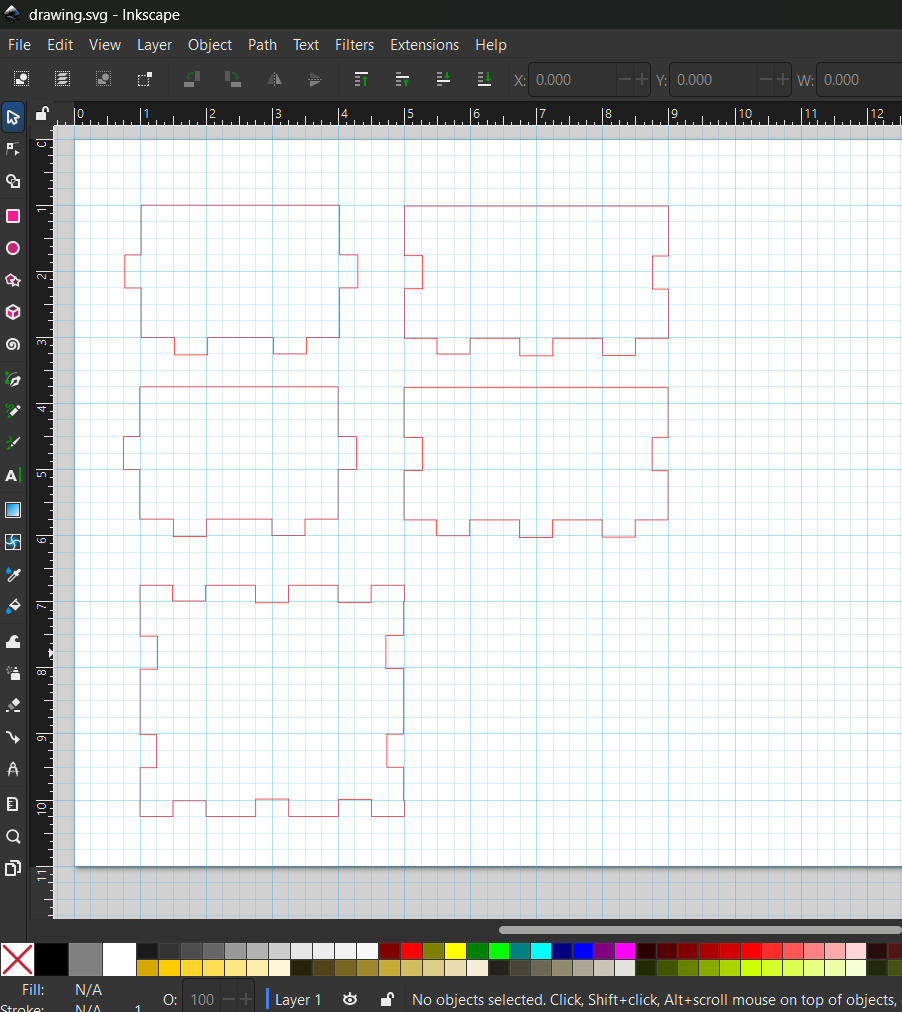
Because of my inability to properly snap to grid lines, there are parts where the red outlines of my vector are slightly offset from the blue grid squares (as shown above).
Secondly, I was struggling with using the “difference” tool to subtract the slits needed for the tab slots. I was able to use the “union” feature to unite all of the parts fairly easily, but when I used “difference” to subtract the overlap between a blue shape (RGB: 0, 0, 255) and a red shape (RGB: 255, 0, 0), it would often subtract the difference of a random area of the shape. I ended up discovering that the best way to ensure the correct part gets subtracted consistently is by moving the red shape (or the color of the shape you want to subtract) to the layer directly above the shape you are subtracting from.
In my case, I believe the blue shapes I was drawing was on Layer 0, or the base layer of the canvas, and I needed to move all my red shapes to Layer 1.

Finally, this is an INCREDIBLY silly mistake that I made because I simply didn’t think critically enough about the product I was trying to make. I should’ve drawn my vector such that the slits were the size of the actual material I was trying to assemble. In this case, I should’ve made slits 3.0 mm wide to match the width of the birch plywood scrap that I was using. I was following the tutorial to a T, so I did the quarter-inch slits, which resulted in significant overhangs with the tabs (as you will soon see).
The Cutting Experience
Since I did the vector illustration on my personal laptop, I emailed myself my finalized .SVG file and downloaded it onto the Nolop laser cutter desktop. I then opened my file in Adobe Illustrator and used the print command to send the file to the UCP Laser Control Software.
For a whole 5 minutes, I could not figure out why I kept getting error messages, saying that my .SVG file was empty. I made sure the vectors were actually in the .SVG and that they were colored in pure red (RGB: 255, 0, 0), but wasn’t until I read the laser cutting manual that I realized that I had my vector stroke width set to 0.01 inches, rather than 0.001 inches. The very subtle typo I made in Inkscape transferred over to Adobe Illustrator. I was surprised the UCP program was so specific with its recognition feature! Once that was fixed, it was smooth sailing.
I made sure to set the material profile to birch wood and the depth of the material to 3.0 mm. For the laser cutter I was using, I needed to set the laser to 100% power and 15% speed.
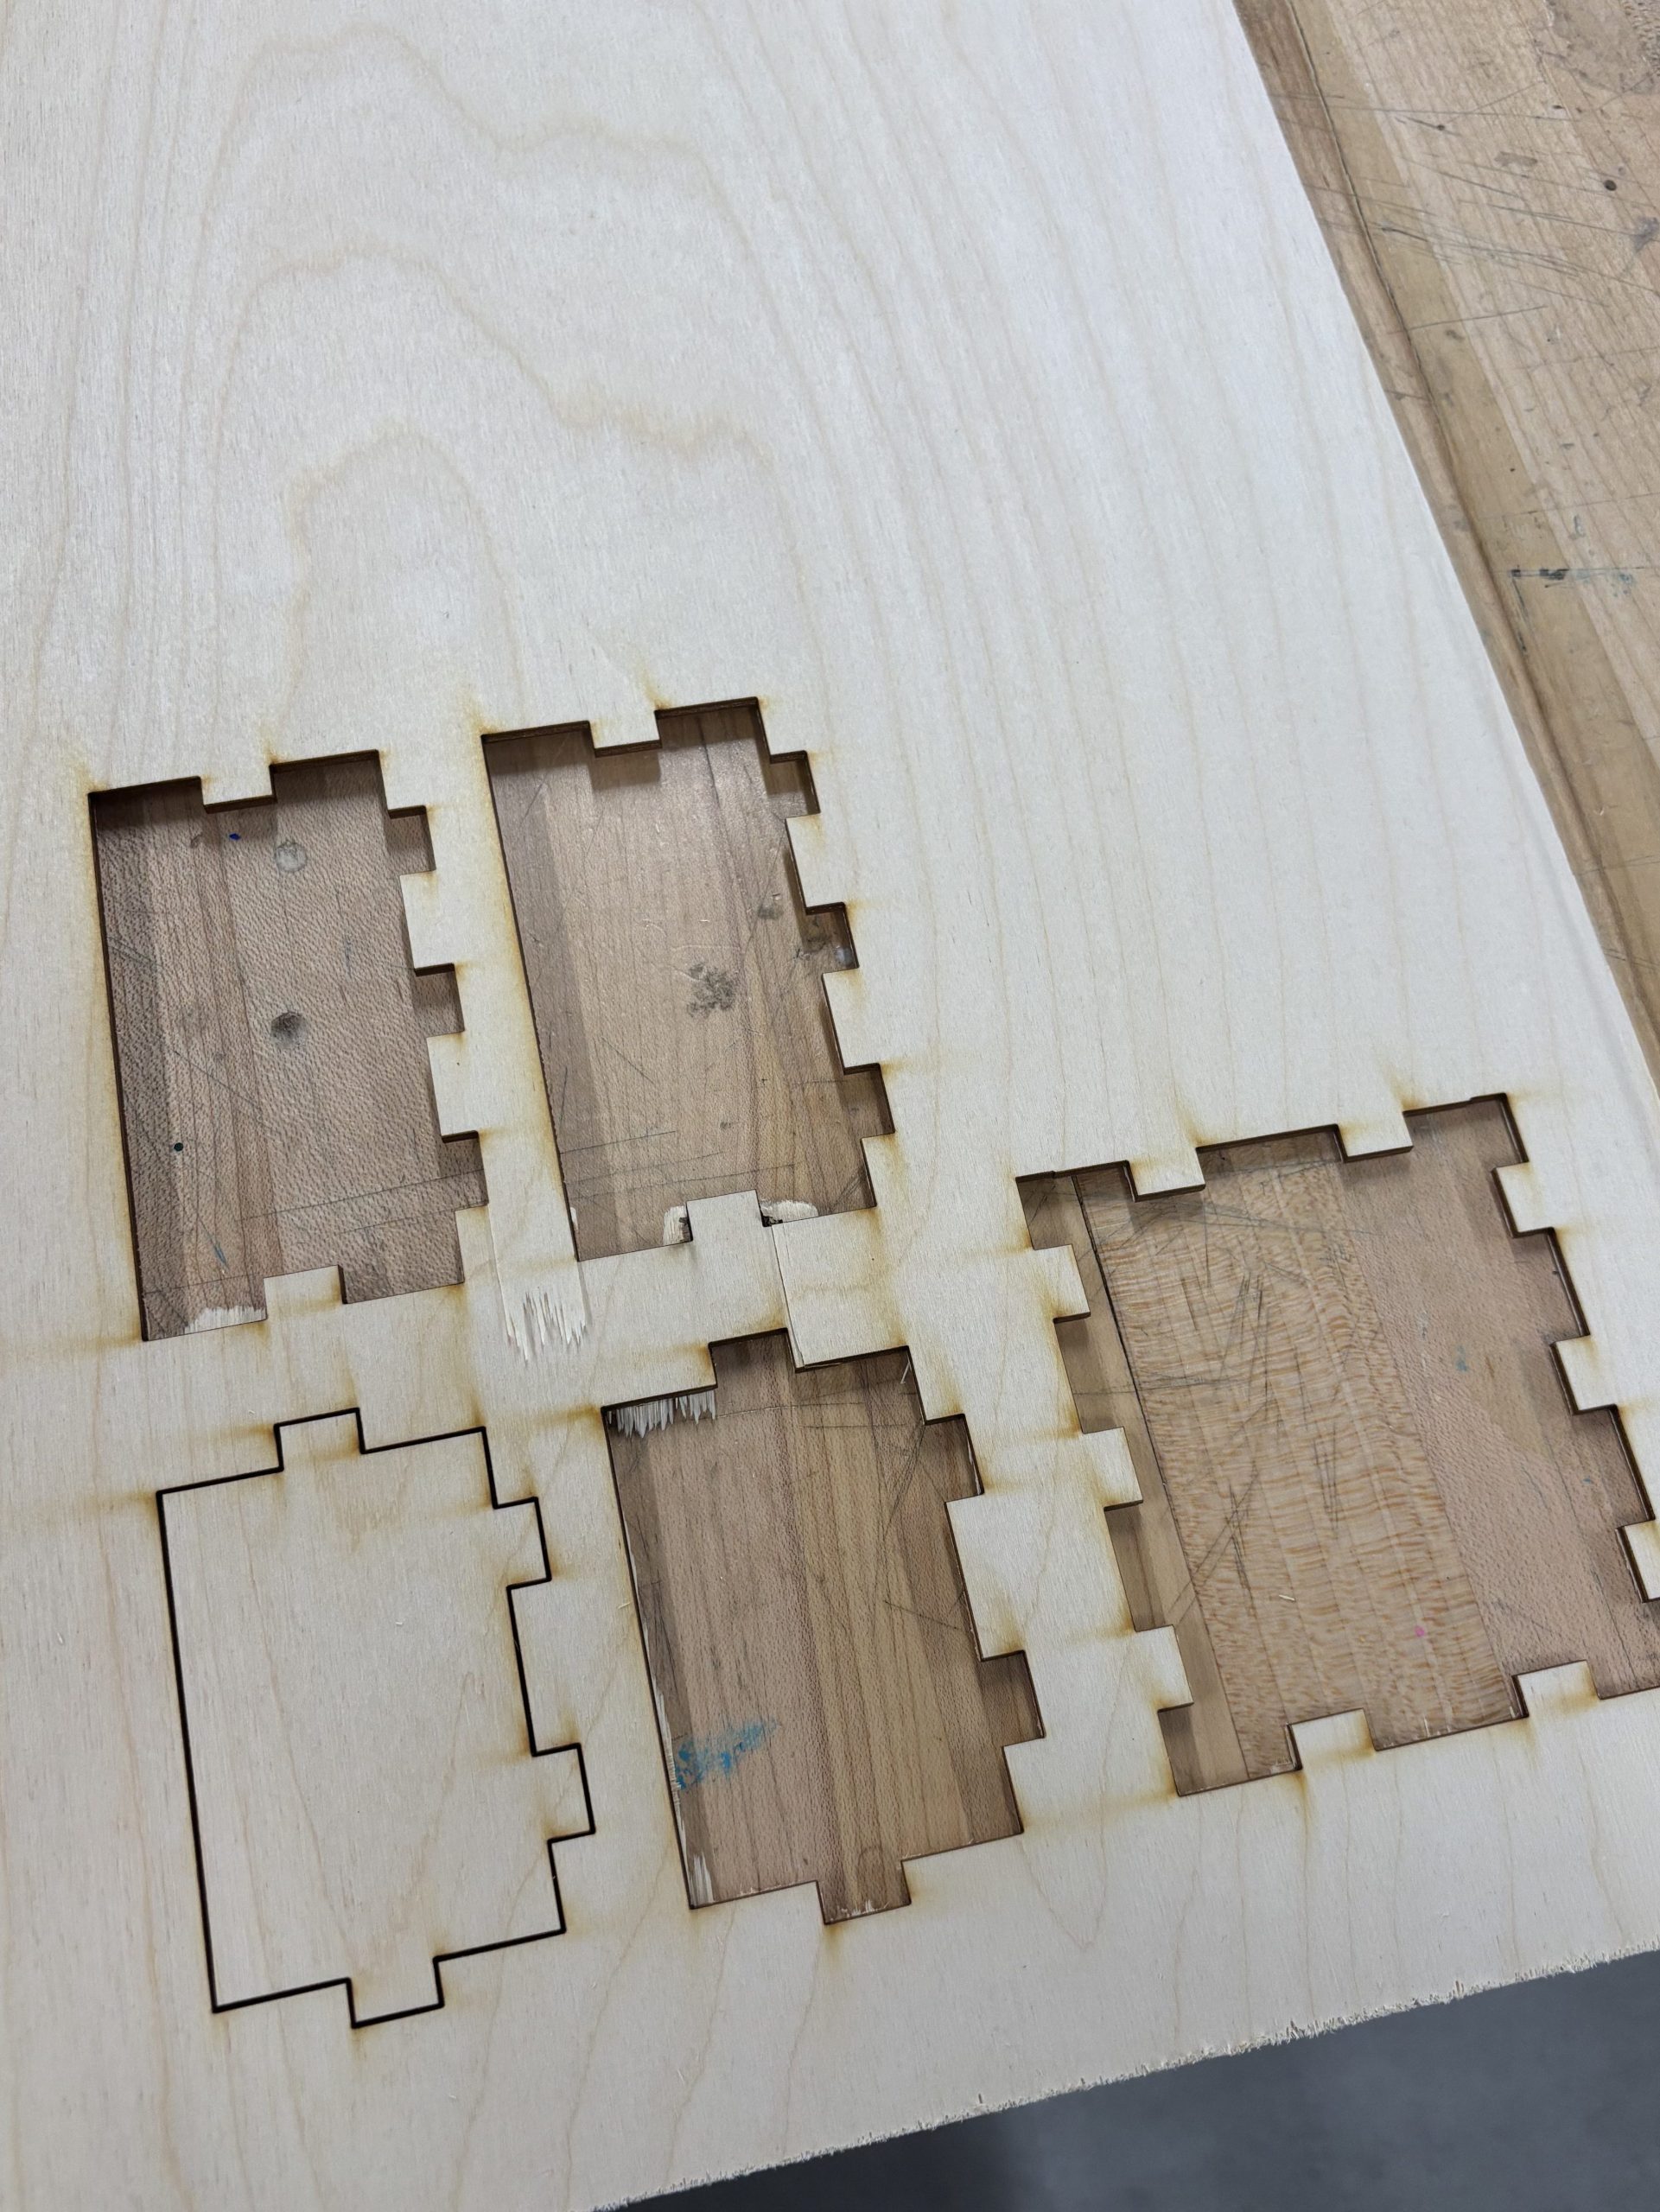
One of the challenges I ran into while printing was the laser not cutting through the entire material, despite me making the vector red to indicate a “through cut” (as opposed to a shallow cut, which was blue). Because of this, the laser cut pieces were incredibly hard to extract from the plywood. When I went to force the pieces out from the rest of the plywood, it often split the wood between the layers of the natural wood fiber, as shown below.
The first piece that the laser cutter traced was so difficult to pop out, that I eventually decided to leave it there and cut another identical piece somewhere else on the board. You can also see the outline of it in the image shown below.
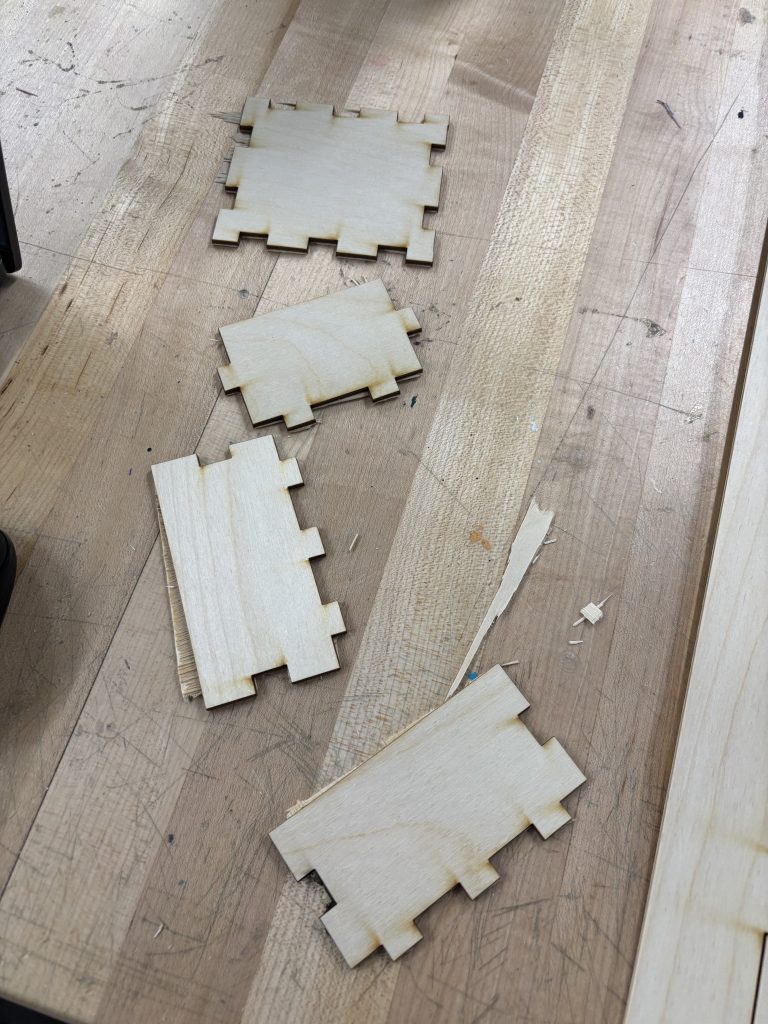
The split wood layers are even better visualized on the pieces that were cut from the ply. As you can see, there is a bit of overhang at the edges of the laser cut from where the laser didn’t successfully pierce the entire wood.
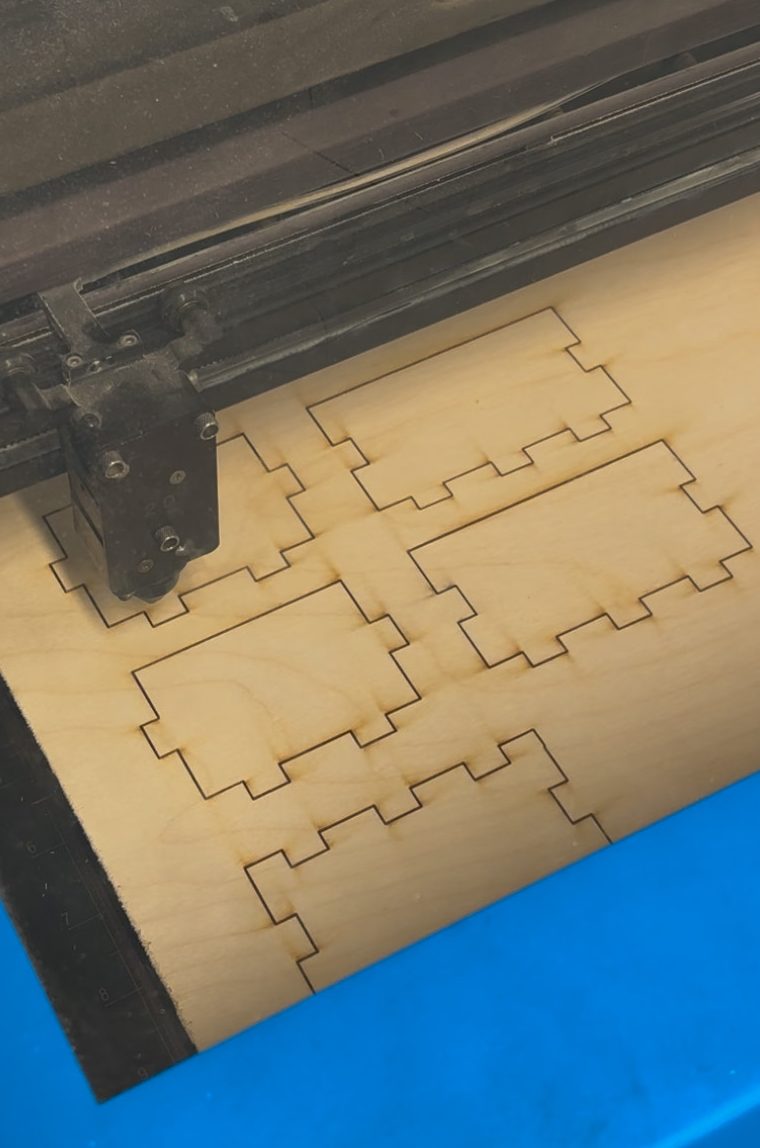
When I went back to re-cut the one piece that I couldn’t successfully pop out, I decided to set the material thickness to 3.1 mm (which was listed as the default in the UCP Laser Cutting Control) to see if that did anything. Despite doing this, I didn’t notice any major changes compared to my previous pieces.
I have some potential theories (that I brainstormed with my friend Amanda) as to why the laser did not successfully cut through the entire plywood. My first thought was that since it was only the first piece that couldn’t be popped out, maybe the laser power wasn’t as focused at first, but reached a higher intensity over time. This is relatively unlikely, because there’s no reason why the laser would have a lower photon energy just to start out. My second theory was that the piece of plywood I got was slightly warped. Because I was too lazy to find tape to fully tape down the corners, the piece in the corner wasn’t laying as flat as all the others, causing the cut to end up being shallow. Finally, I didn’t adjust the laser to the correct height with the alignment tool prior to the cut, and the distance away from the plywood. The increased working distance of the laser decreased its numerical aperture, thereby lowering its intensity.
Assembling the Parts of the Box
This part was pretty straightforward!
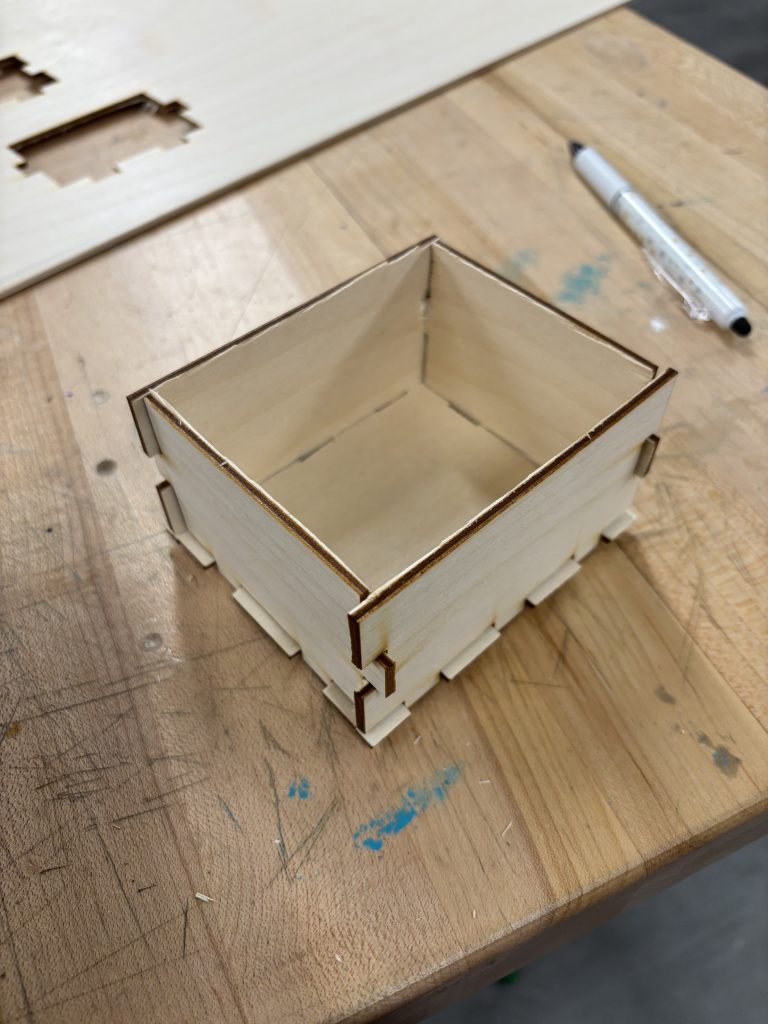
Here is a picture of the final box. Personally, I think the slits being larger than the thickness of the wood adds a bit of charm to the design, however I might also consider going back to Nolop and trying to sand them down at a later point in order to make them flush with the sides of the box. The joined areas would have also been more precise and cohesive if I was able to get the vector to snap to grid when I made the vector in Inkscape.
When would laser cutting be useful?
Laser cutting would be more efficient than traditional methods of hand sawing when you are trying to make very intricate cuts that often don’t involve straight edges. For example, if you are making something with a lot of round curves and pointed edges, you could potentially do a rough cut using a chop saw/miter saw and go in with a band saw to create a refined, rounded edge. However, you lose a lot of precision through this technique!
Through my experience with cutting using band saws for theatrical carpentry and sign making, I have learned that you have to cut very slowly across rounded edges, as any sudden movement can lead you to shaving off more of the wood than you anticipated. If you are cutting intricate shapes, band saws are very inefficient–especially in a project like this where the intricate parts need to fit together (like a lock and key).
It is also hard to adjust the position of a band saw if you’re currently positioned in the middle of a piece of wood. Band saws cut with one degree of directionality (meaning you can’t push the blade the opposite way to get it to cut backwards). A laser cutter doesn’t have this limitation, as the laser can move freely and cut anywhere within a material.
Some applications where laser cutting would be particularly helpful is cutting puzzle pieces, tabbed boxes (that reduce the need for glue and screws), gears, or any project that would need fun engravings (since laser cutters can also burn/engrave designs into materials)! Laser cutters, however, can be limited to certain materials. There might be some materials that cannot be burned using a laser due to their flammable or toxic chemical composition or thickness.
Key Takeaways — Where do I go from here?
In the future, I would love to try cutting materials that are not cardstock paper and birch wood, such as acrylic or other plastics! I also have yet to use the rasterize features in Adobe Illustrator and Inkscape engrave a design using a laser cutter. This should not be too challenging, since I have a lot of graphic design experience.
I am currently working on a potential gift for a professor and my plan was to engrave the new Tufts Biomedical Engineering Society logo on something for them. If/when I get to it, I will link it under the projects tab on my website!