From the Take a Break Tuesday Destress and Focus Hackathon, 13 Dec 2022
Materials:
- About 40 pony beads
- About 3’ of satin cording
- Optional keychain, clasp, or bracelet links
How To Make It
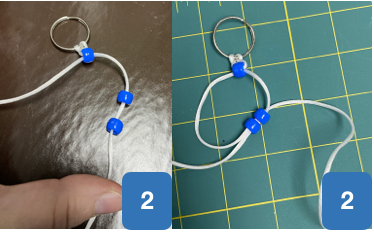
(0) Setup
Start with either one bead in the middle of your length of cord, or a larks-head knot on your keyring. This will give you two working pieces of cord.

Step 1
Lace a single bead on one cord. Then lace the other cord through that bead in the opposite direction. Pull tight to the keychain or starting bead.
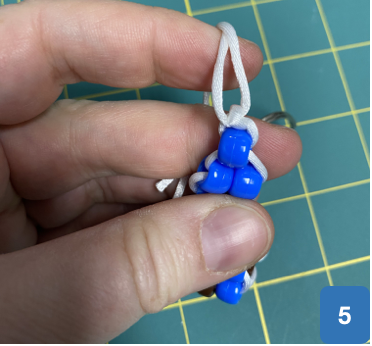
Step 2
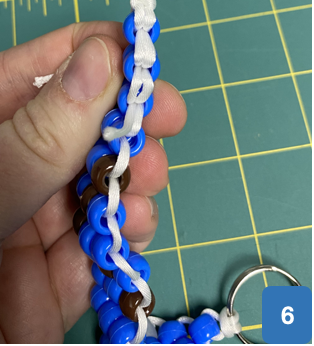
Lace two beads onto one cord. Lace the other cord through both beads, again in the opposite direction from the first cord, and pull tight to the first row.

Step 3
Continue with a row of 3, and additional rows of 3 in the same way. If you want the “snake” to have eyes, add them as the outer two beads of row 3. Add patterns as desired by changing the colors of beads in the rows.

Step 4
If the rows feel too loose, tighten one row at a time starting at the top by pulling on the loops below the loose row. Continue tightening as you go down until the slack is all at the bottom with the free/working ends of the cord.
Step 5
When you get to the length that you want, you can make rows of 2 or 1 to finish. Tie a square knot with the two pieces or cord.
Step 6
If desired, you can weave the tail (end of cords past the knot) back into the prior rows of beads to make a neat finish
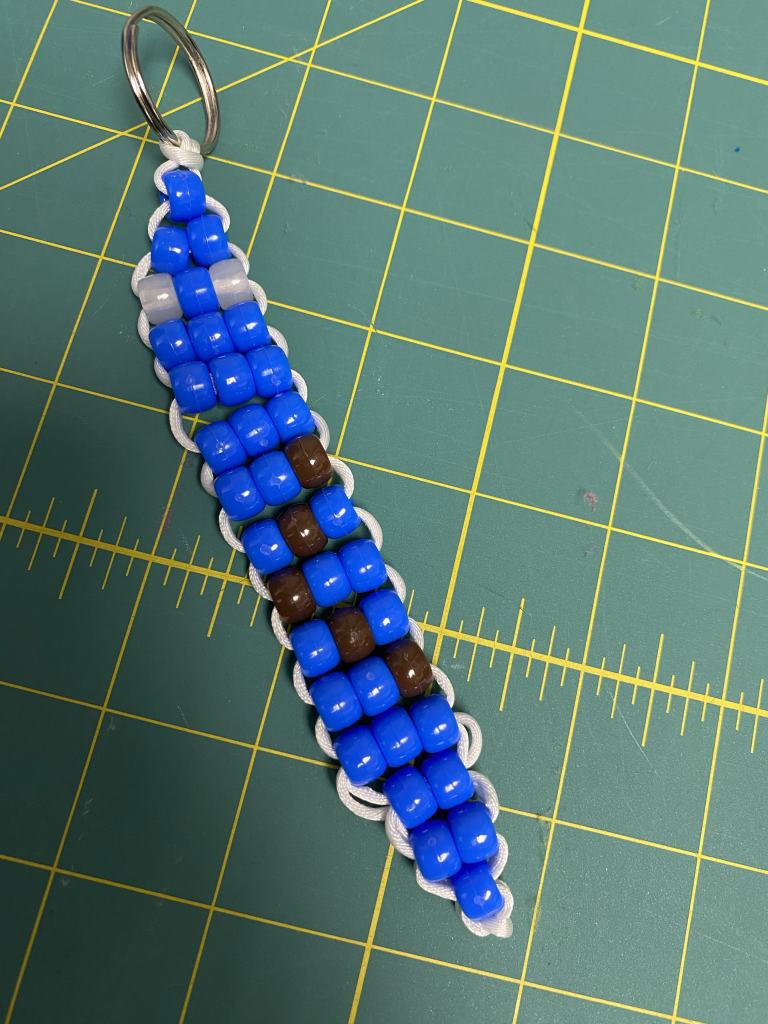
Now your bead snake is finished! You can roll the beads for a fine-motor fidget, jangle the beads for an acoustic fidget, or just admire them for a visual sensory input!

