Why save seeds?
- Save money
- Build resiliency in your garden
- Sustainably grow and maintain your garden
- Learn more about the life history and science behind your garden
- Create a community – makes for thoughtful gifts to a fellow gardener or aspiring grower
Seed saving is one of the best ways to save money on home gardening and build resilience into our growing spaces. Mature seeds can be collected from flowers at the end of the growing season, saved, and then planted in the following year. Using seeds from plants that grew successfully in your yard or neighborhood means your seeds are already adapted to the local weather and soil conditions.
I have seeds – now what?
How to sow seeds
Sow your seeds in pots or flats that are at least 3” deep and 4-10” across (we use 5”x5” flats). Make sure to label the pots with the species name and sow date. Fill the pots with compost-rich soil, moisten, and sprinkle the seeds on top of the soil. For small, dust-like seeds it is often required that they are sown on the surface as they don’t have the energy to dig through soil to germinate, so avoid covering (refer to the spreadsheet below to determine which seeds must be surface sown). For seeds that don’t need to be surface sown, cover with a thin layer of soil (approximately the thickness of the seed) and a layer of coarse sand. The sand helps to keep the seeds in the pots despite wind and water. Keep the seeds moist by watering every few days, as needed.
Stratification – what is it?
Some seeds require additional steps before they can be sown in pots or in the ground. Native seeds that you collect from your garden or that you received from the Little Free Seed Library often require a series of conditions that lead to germination, such as a cold winter snow cover, acidification from an animal’s stomach, or scarification*. When starting seeds yourself, it is important to know the conditions a seed needs in order to start the germination process. Many native perennials require cold-moist stratification for varying amounts of time (between 10-90 days depending on the species) in order to start germinating. This consists of placing the seeds in moist, cold conditions (40F or below) for the designated amount of time or longer. The simplest way to cold-moist stratify is to sow seeds outdoors in the fall or early winter after collection, leave them outdoors for the winter and germination will begin as the weather warms up. However, this is not the only way to stratify seeds and we will go over several different ways to prepare your seeds for germination.
*Scarification is the process of breaking down, softening, or otherwise weakening the hard outer shell of a seed. Some seeds require scarification to germinate. Stratifying seeds outdoors can often lead to natural scarification as seeds are exposed to the elements and weaken over time. You can mechanically scarify seeds by gently rubbing seeds together in sandpaper. If you mechanically scarify seeds, you must plant them immediately. Many native flowering plants do not require scarification, so be sure to check the requirements of your seed.
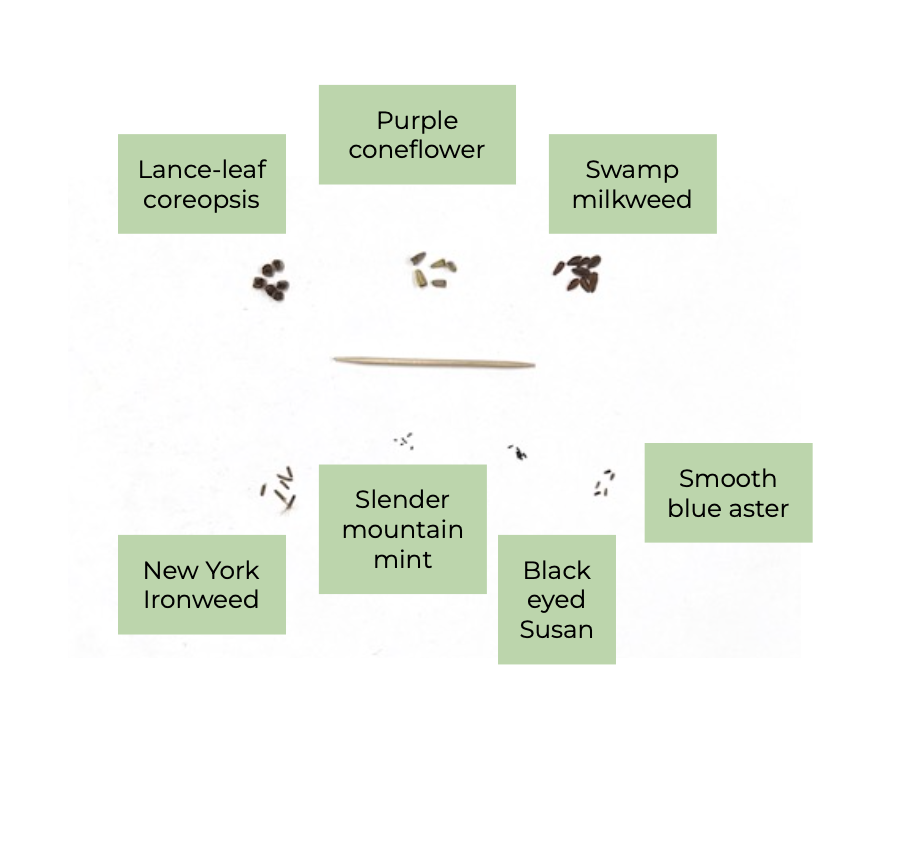
Stratification needs for popular native plants
Please note that plant needs might differ in different regions.
Outdoor stratification
Sow seeds in flats, pots, or garden beds (see sowing instructions above) and place outdoors in the late fall/early winter. Cover the flats with chicken wire or Reemay to allow the seeds to be exposed to natural elements while preventing rodents and birds from eating your seeds. If germinating indoors, bring in the seeds after the designated stratification time requirement. If germinating outdoors, the seeds will start to germinate once stratification requirements are met and the weather starts warming up.
Milk jugs are also a great outdoor vessel to stratify and start seeds in, as they form an artificial greenhouse for the seeds to start growing in. See a tutorial here on how to cut a gallon milk jug to use for seed stratification and germination.
Indoor stratification
If you are starting your seeds in the spring, it is best to artificially stratify your seeds indoors to mimic winter conditions. This can be done by placing seeds in the refrigerator for the given stratification time. There are two popular methods to indoor stratification: the pot method or the plastic baggie method. For the pot method, sow the seeds as you would normally, moisten the soil lightly, and wrap the flats in plastic. Place the wrapped flats in the refrigerator, and take them out after the stratification period is over. For the plastic baggie method, place seeds on moistened paper towels or coffee filters, fold over, and seal in a ziploc bag. This can also be done using other moistened seed starting mediums, such as sand, vermiculite, or peat moss. For any indoor stratification, make sure to check your seeds every few days to monitor for mold and make sure the seeds remain moist.
My seeds are germinating – now what?
Congratulations! The seeds can remain in the flat they were sown in until they are ready to be transplanted in their future home. If the flats are getting crowded, the seedlings can be gently separated and transplanted into individual containers once the roots are coming out of the bottom of the flats.

Where can I get some new seeds?
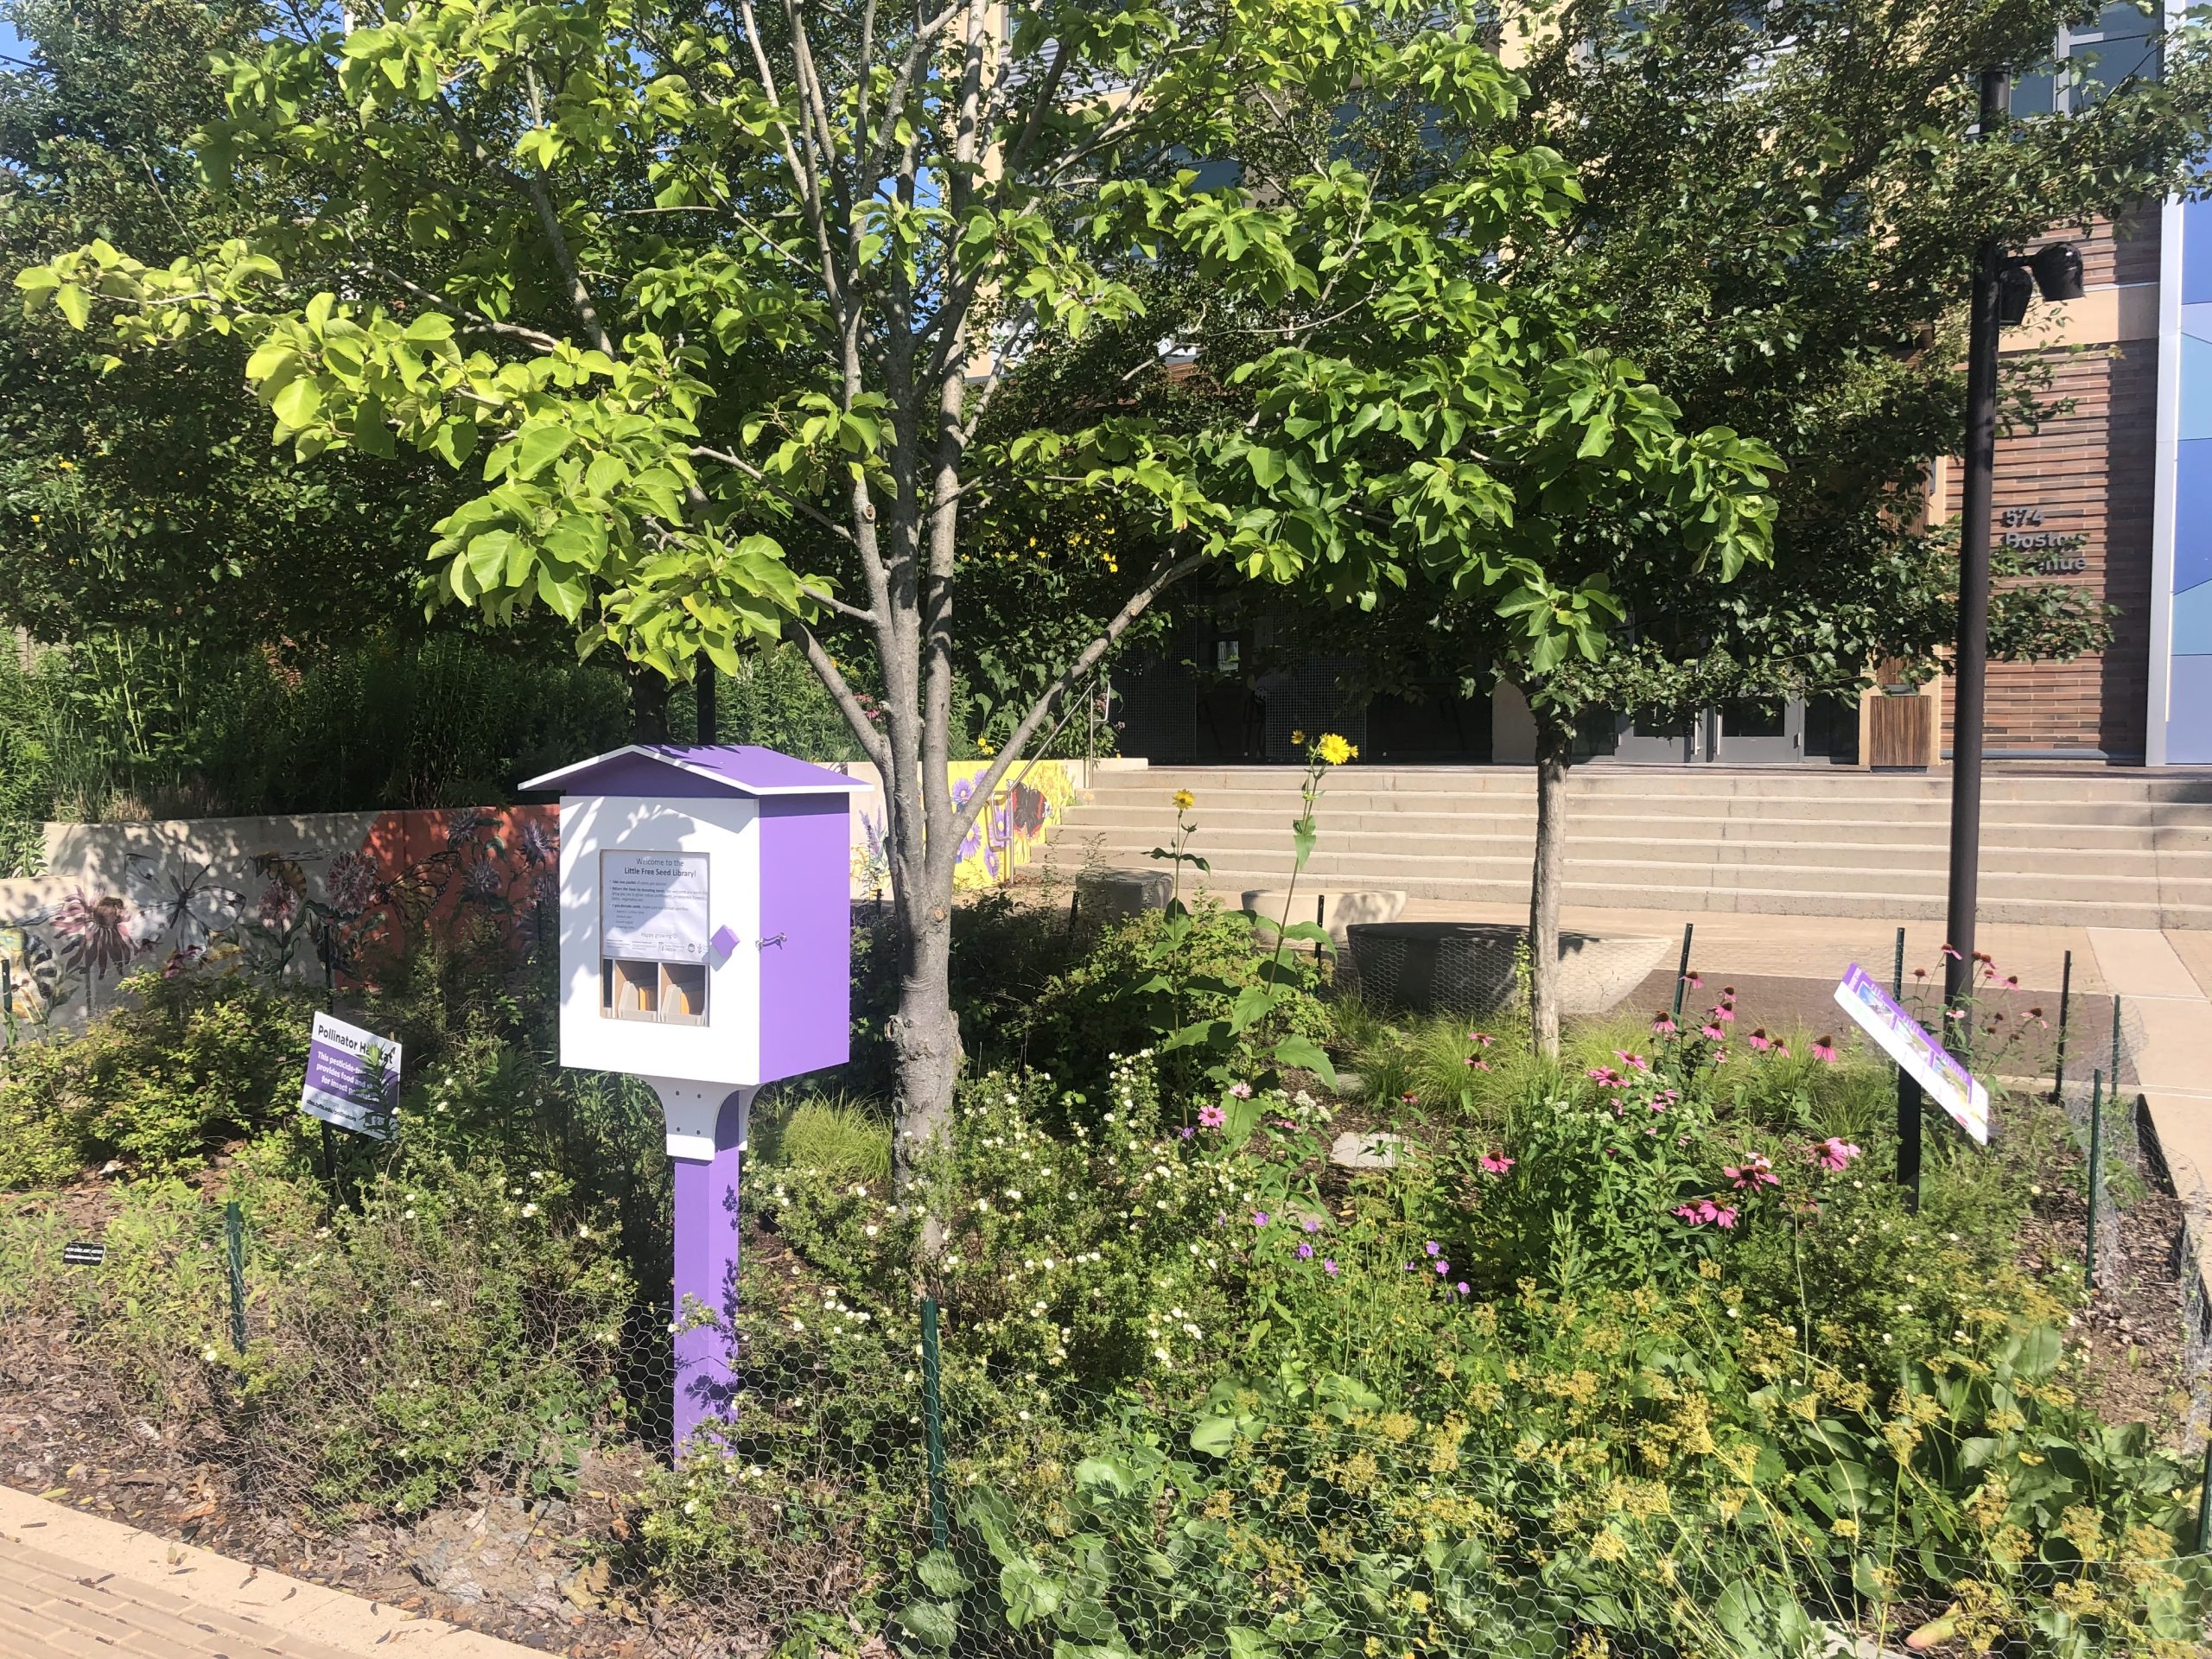
TPI has their very own Little Free Seed Library on campus at the pollinator gardens at 574 Boston Avenue. The seeds we stock the library with are collected from our very own gardens, so they come from plants that have thrived in our local environment. Please note these seeds have not been stratified yet but details about their stratification requirements can be found on the seed packets. The seed library works best if users take a pack and leave a pack of their own seeds. We just ask that you write the species, date collected, and collection location. There are also other local seed libraries, which can be found on this map under ‘miscellaneous’.
We encourage you to save seeds for your own garden, to build community, to save money or to learn more about the natural world. Whatever your motivation, saving seeds is a great decision, but also has a deep-rooted cultural significance and importance. If you’re interested in reading more about the sovereignty of seed saving and why it matters, we provide a few resources below.
Resources
TPI handouts
Seed information
https://wildseedproject.net/how-to-grow-natives-from-seed/
https://www.prairiemoon.com/PDF/Germination-Codes-and-Seed-Starting-Basics-22-Dec.pdf
Cultural importance of seed saving
https://appvoices.org/2022/06/02/communities-seed-saving/
https://www.hungercenter.org/blog/the-right-to-seed-food-sovereignty-and-indigenous-autonomy/