Flip-Cut (2 Sided Milling) Instructions
Note: These instructions are following the dowels technique which uses four dowels to keep the material in place and centered during the flip cut. It is called flip-cutting because the top of the piece is milled and then flipped over to mill the bottom. This allows the mill to create an object with designs on both the top and bottom of the piece.
Designing the object:
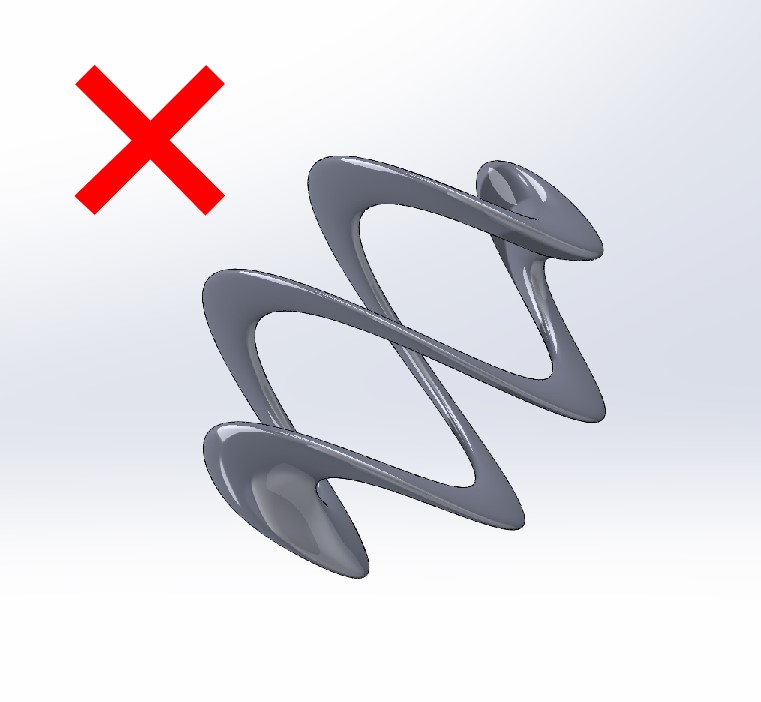
Make sure your design can be flip-cut — it cannot have any geometry that folds over itself (undercut).

Software Setup:
- Open VCarve.
- Select ‘Create a new file’.
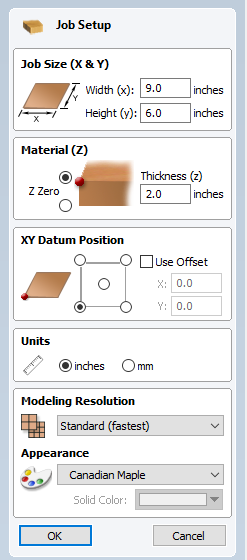
- Measure length, width, and height of your raw material. Enter dimensions under ‘Job Size.’
- Zero Z to top of the material.
- Set XY datum to bottom left corner.
- Check units!
- Import file into VCarve:
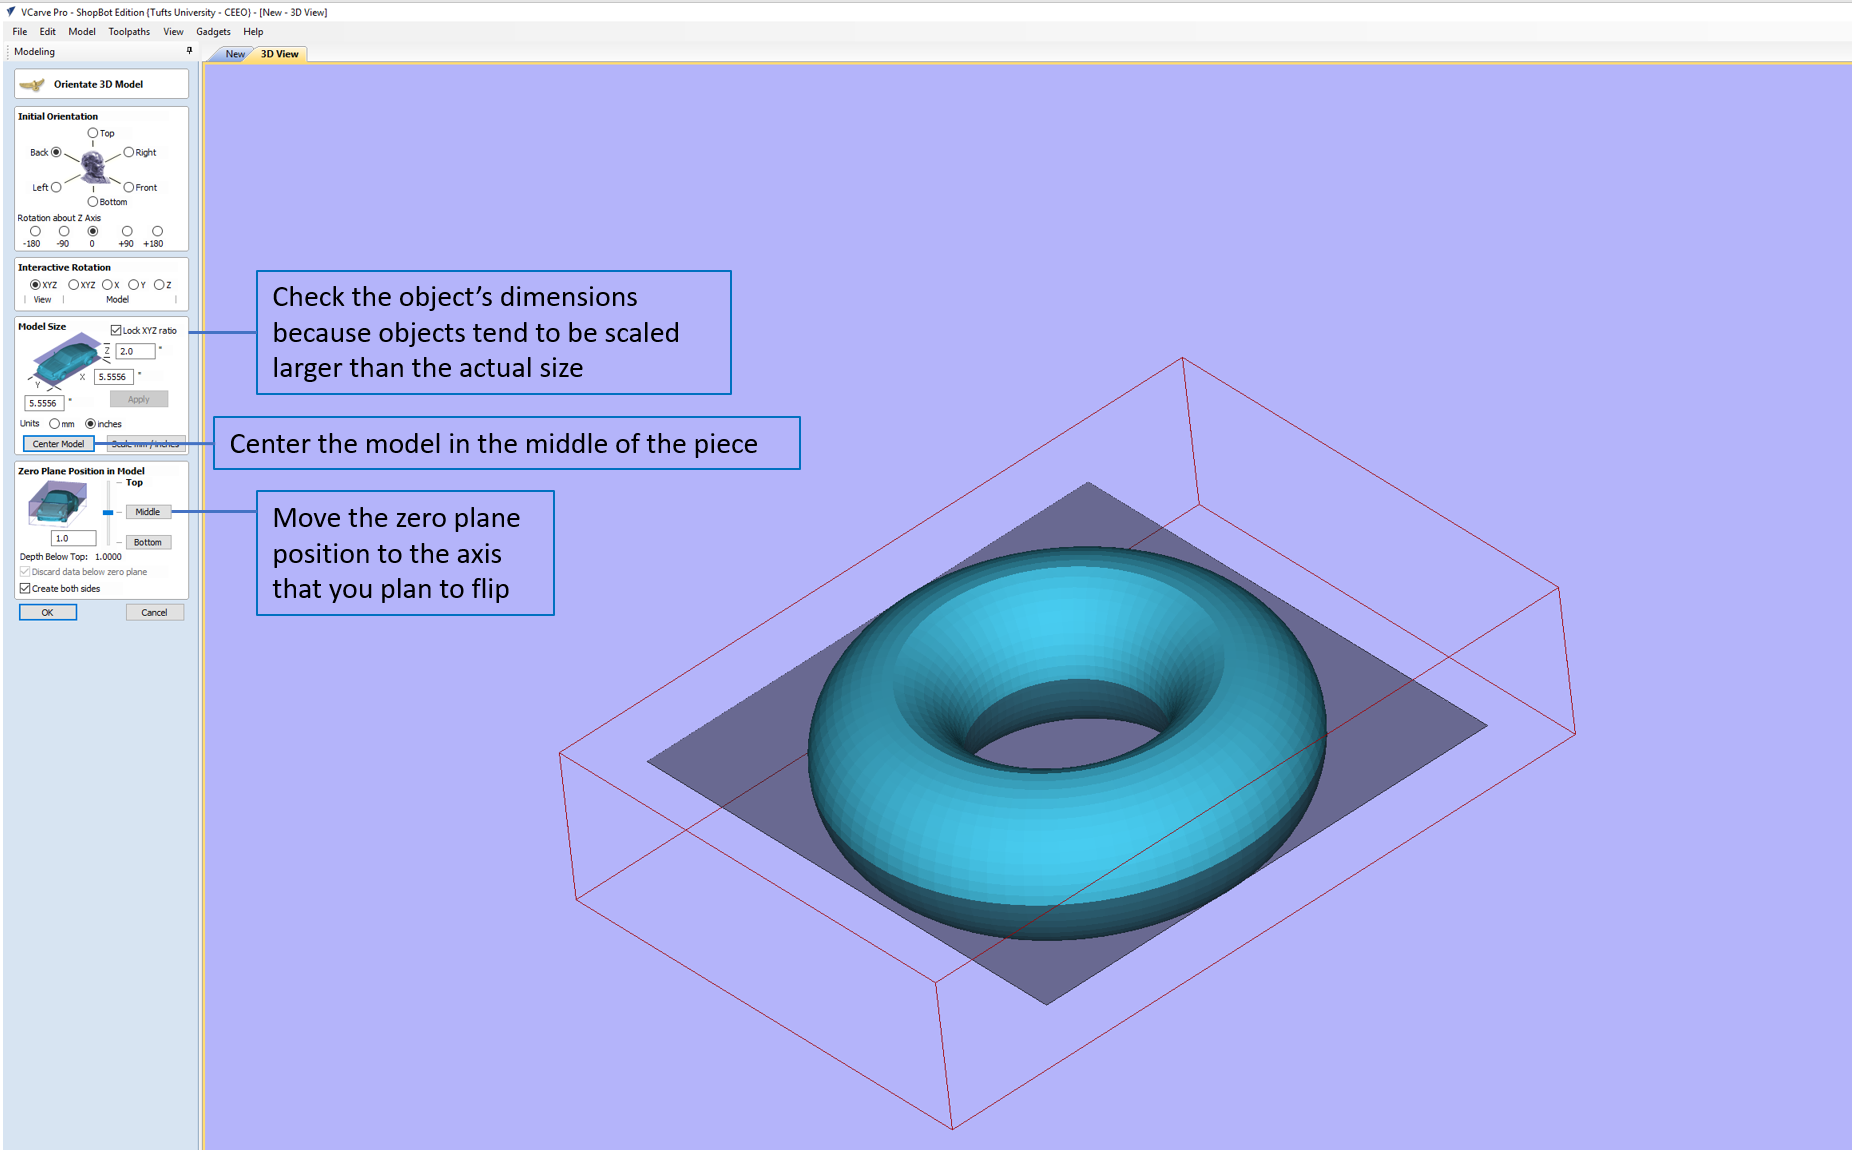
- Create a 2D outline of the 3D file.

- Create a box with dimensions divisible by 3 that is located at the center of piece (this will help place the dowels that will keep the flip-cut in place).
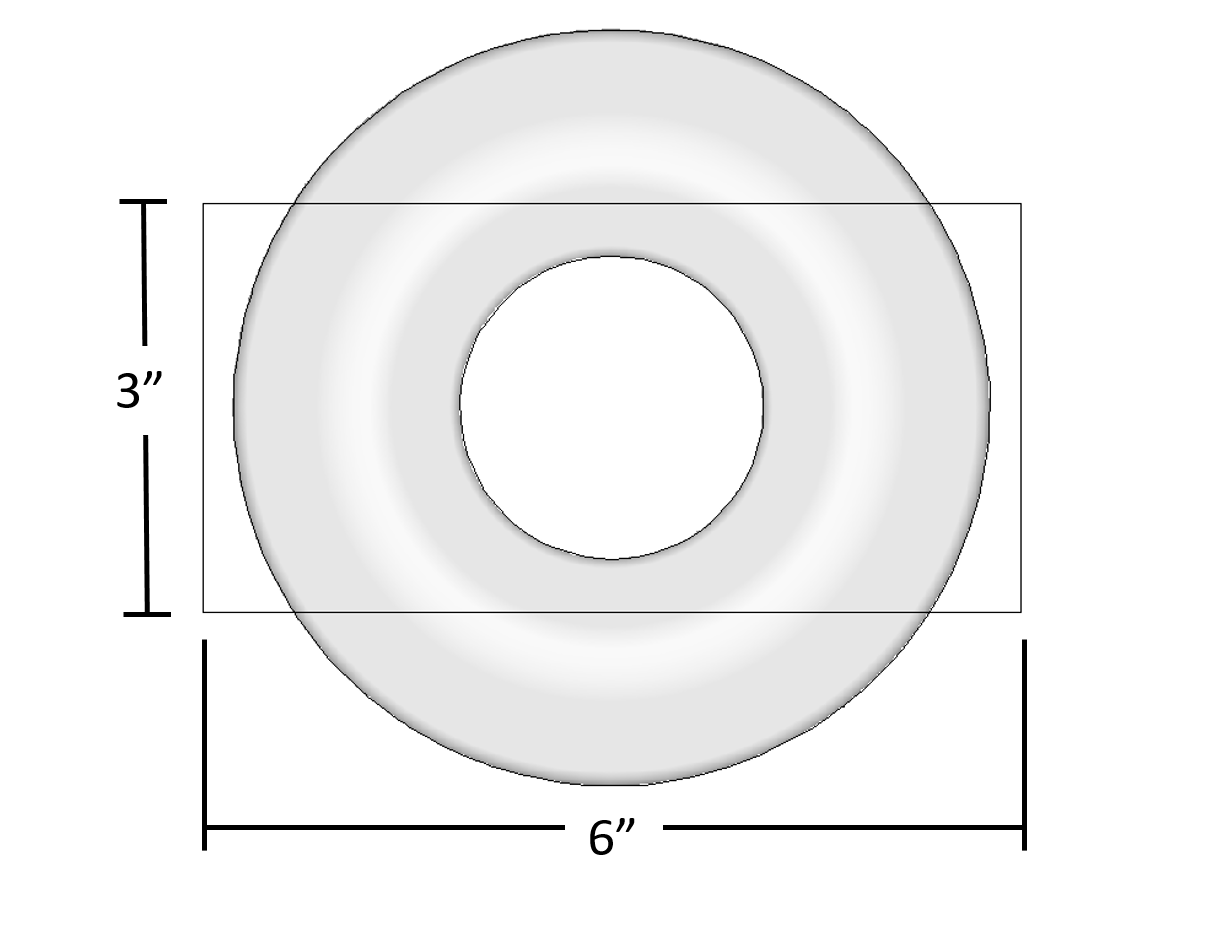
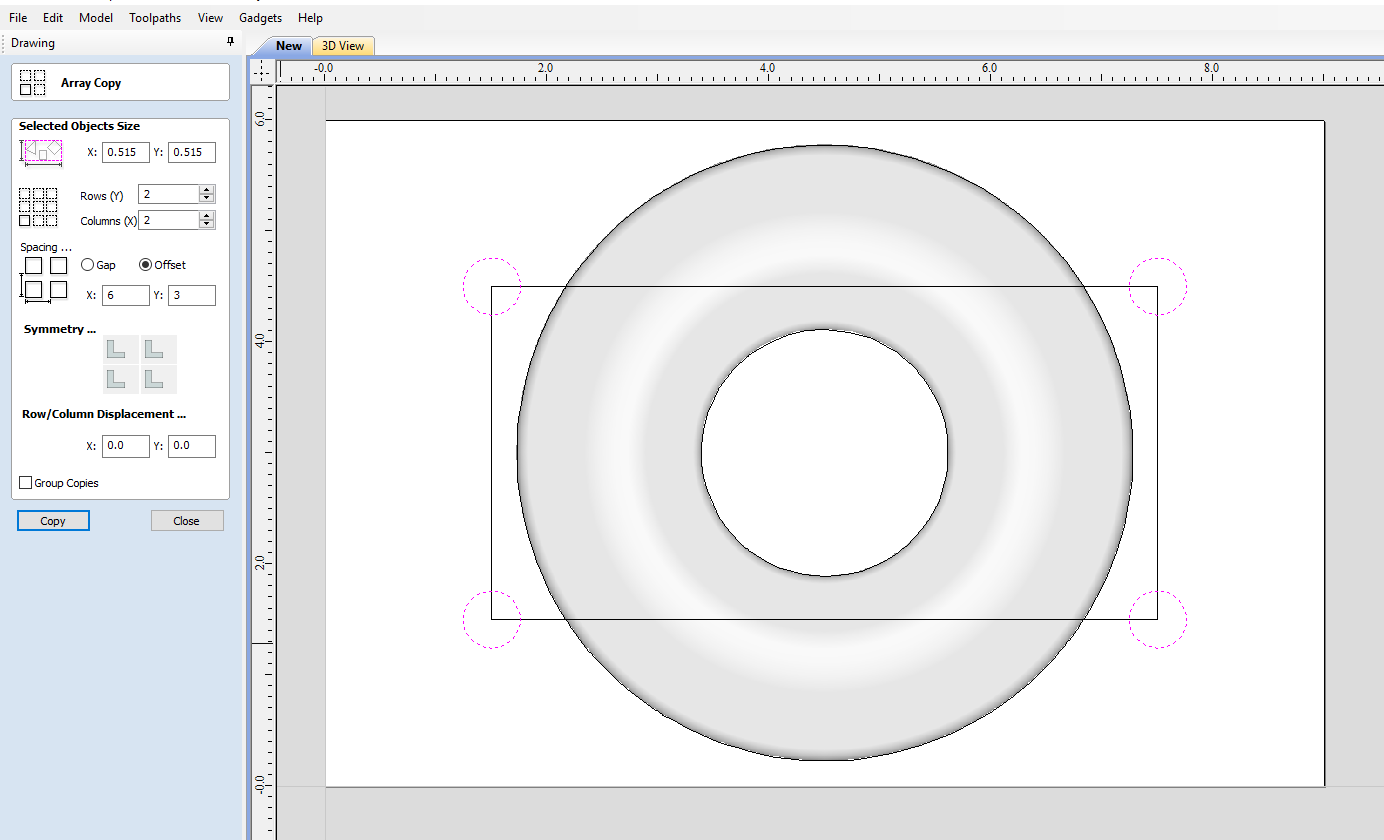
- Create a circle centered at the corner of one of the points of the rectangle with a diameter of 0.515 (which will hold the dowels) and use the linear array tool to add 3 more circles at the corners of the rectangle.
Toolpaths:
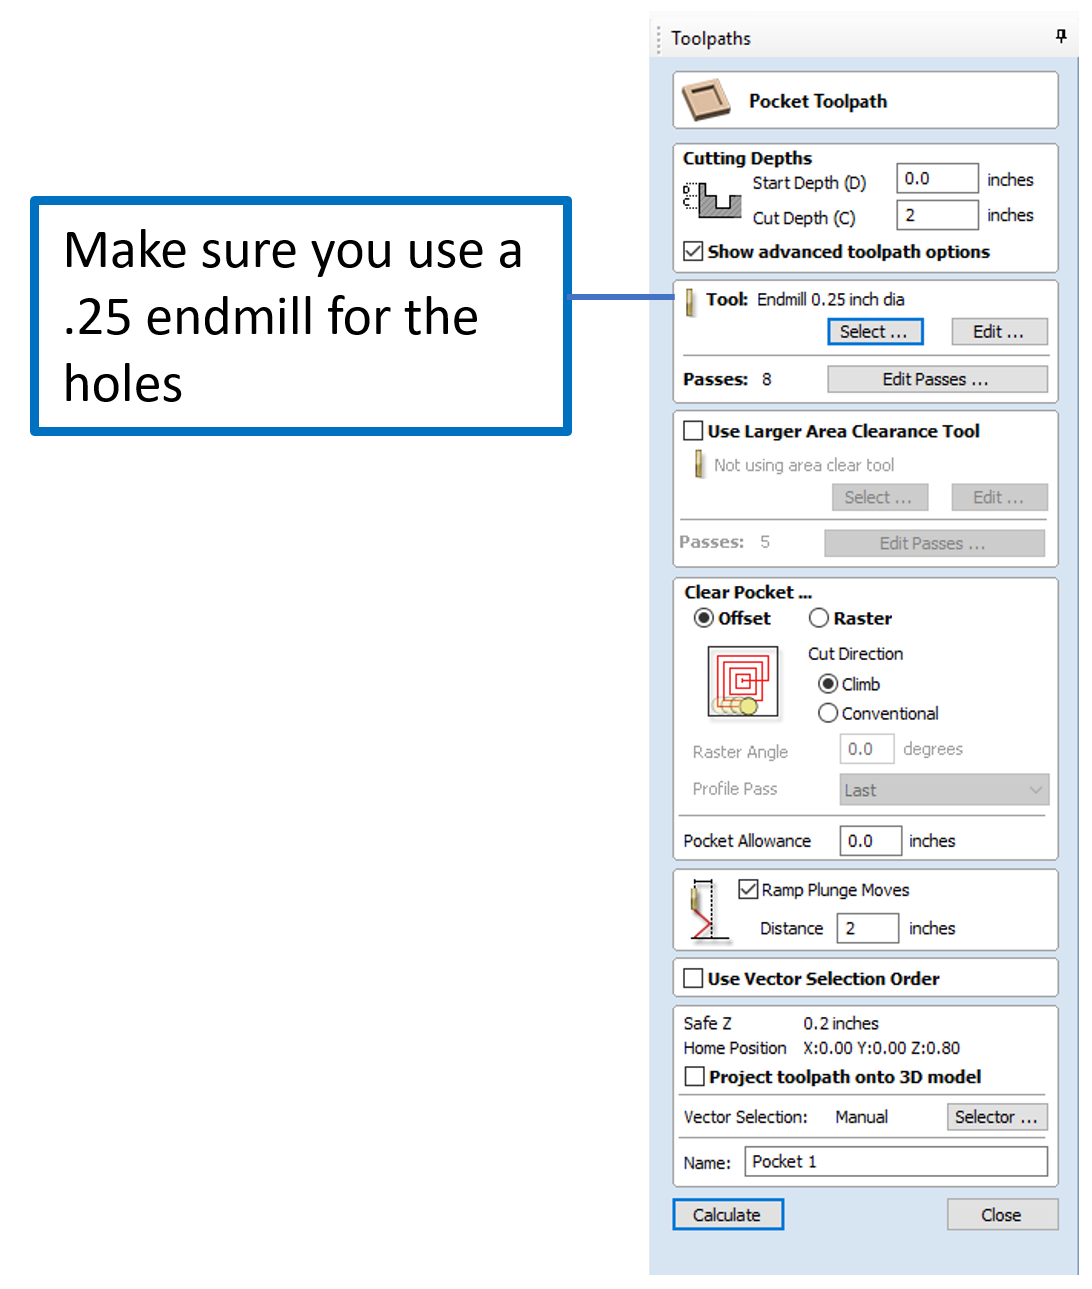
- Use a pocket toolpath that goes all the way through the material for the circles.
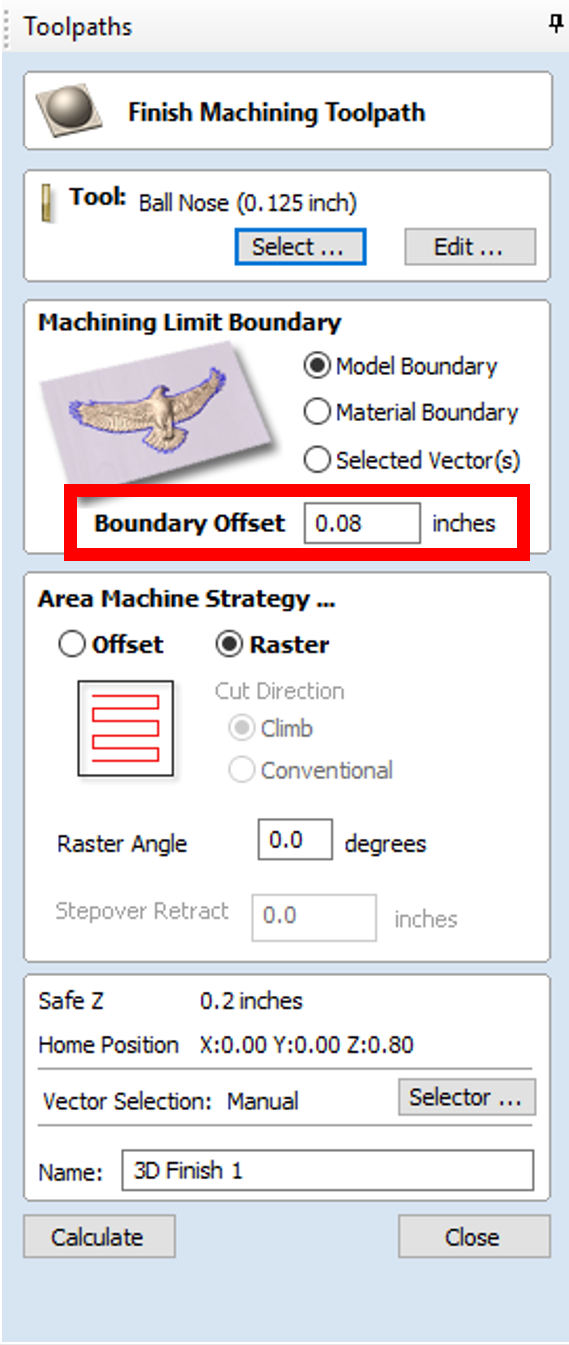
- Use the roughing and finishing toolpaths for the top side of your piece.
- Make sure that there is a boundary offset of 0.08! (This will allow for enough material to be taken away for the finishing toolpath, and it will ensure that once you flip the piece it will not cut through it.)
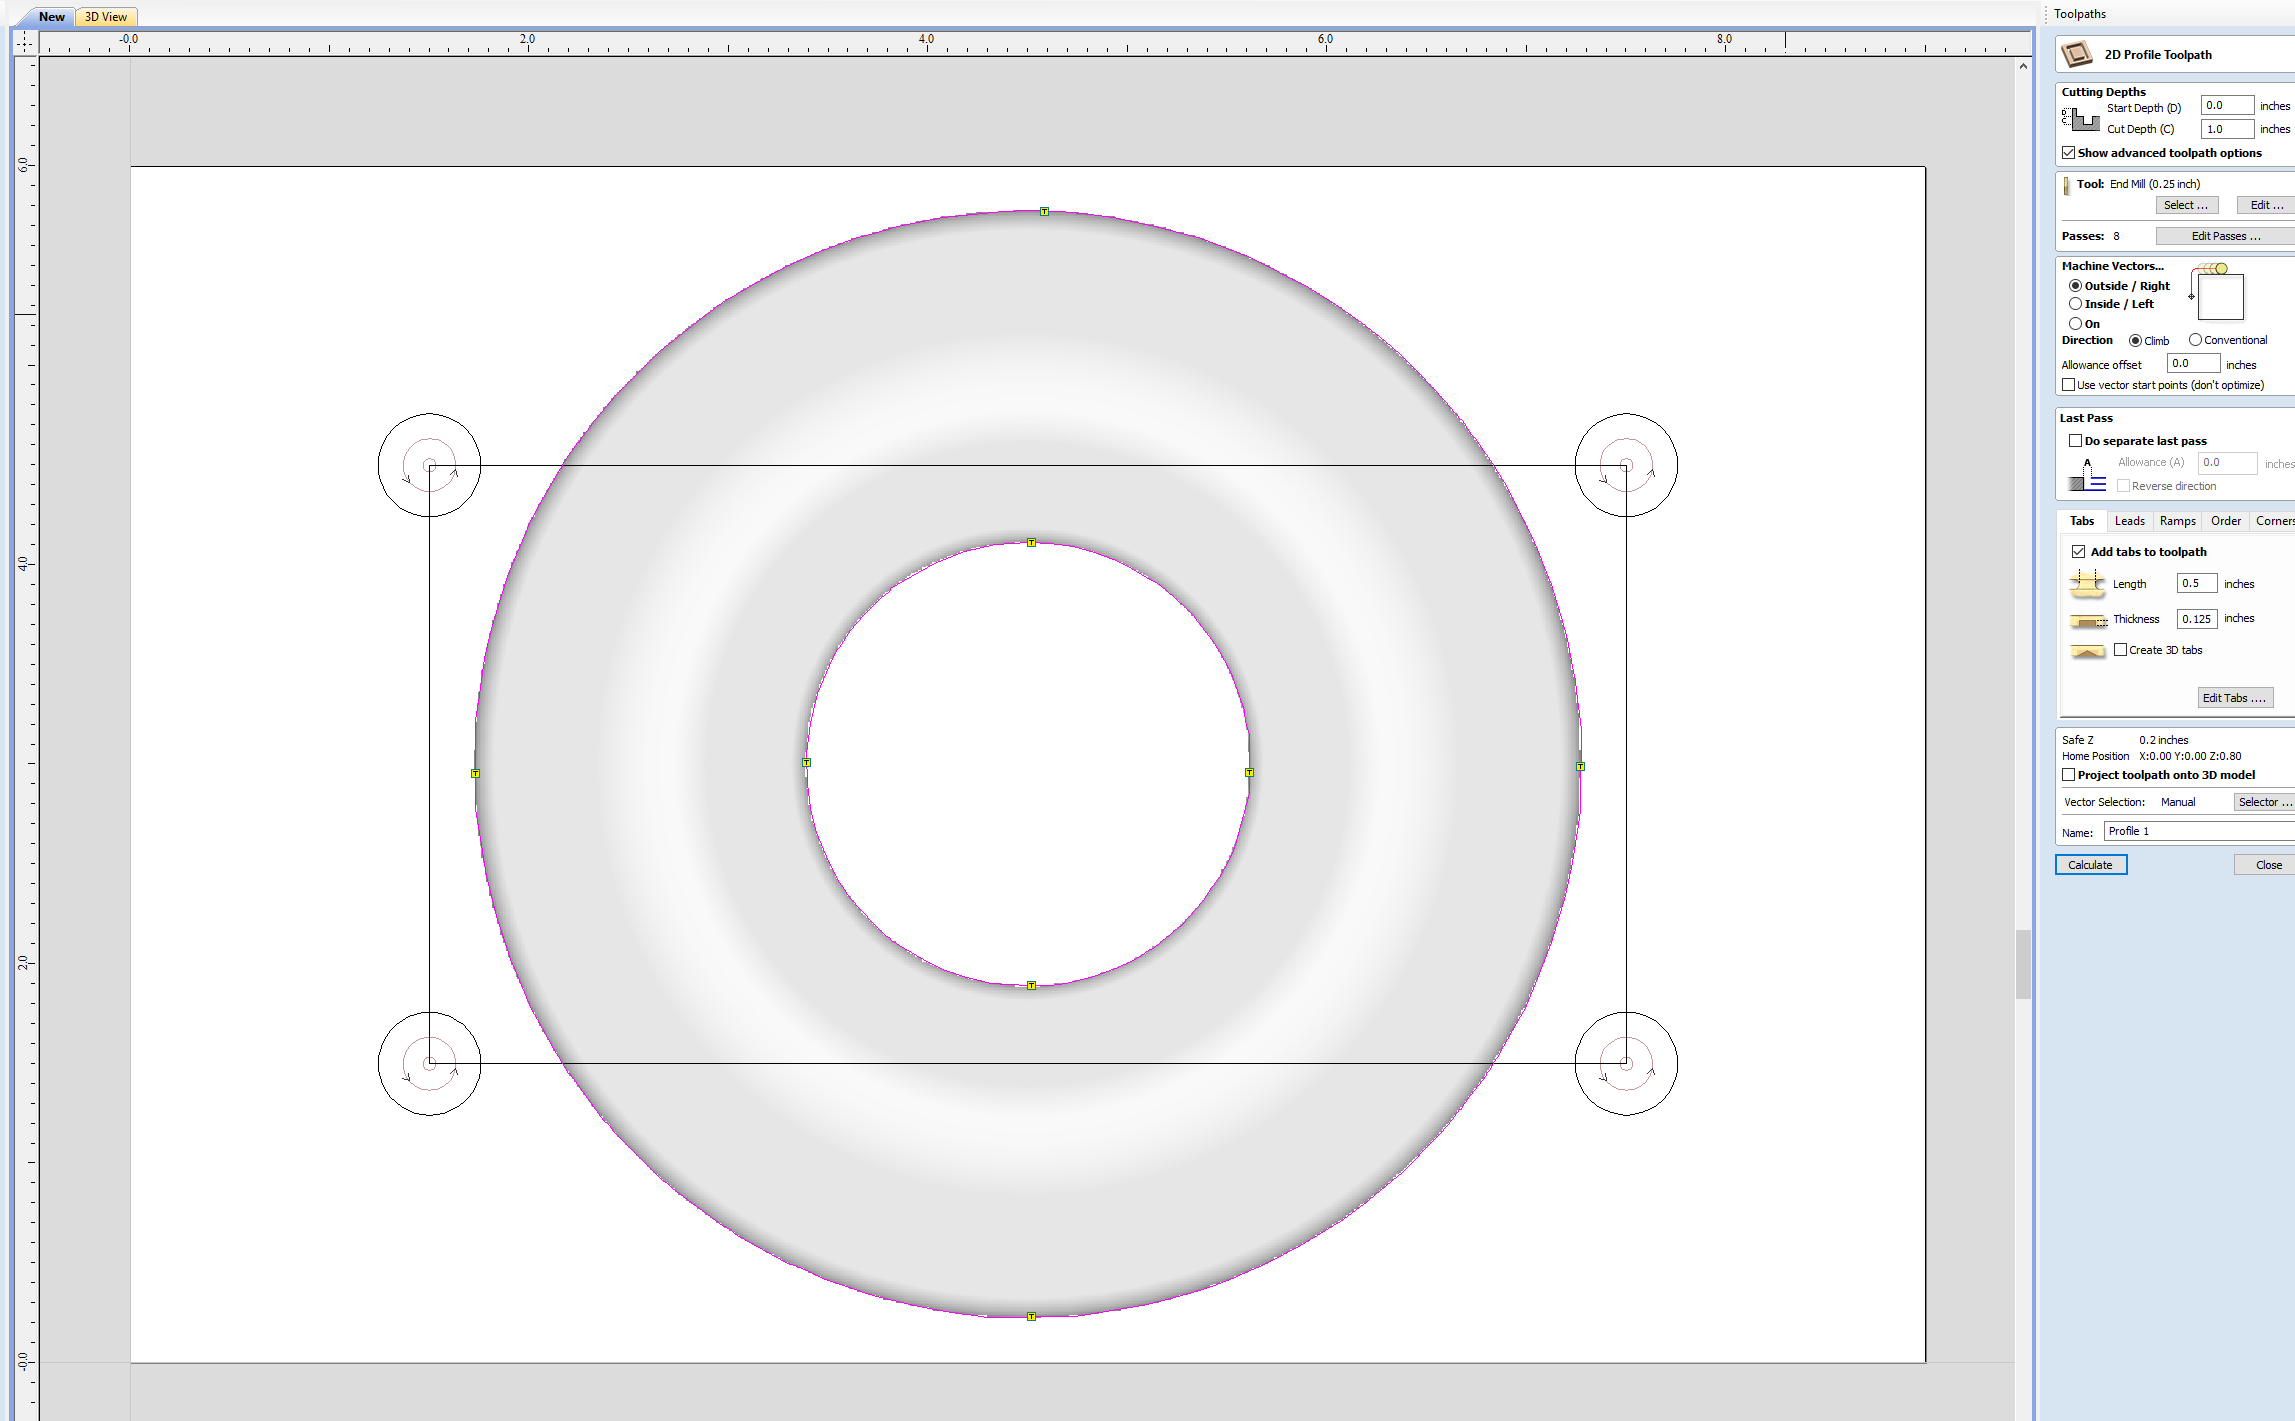
- Use a profile tool path for the edge of the piece, using tabs so the piece will not fall out. Make the profile cut as deep as the bottom depth of the flip-cut plus the tab size (Ex: if the flip cut goes down 1″, the profile cut should go down 1+.125 = 1.125″)
- Repeat these steps for the bottom half of the piece and save the toolpaths (with the pocket cut tool path saved separate from the others).
Machine Setup:
- Milling the holes:
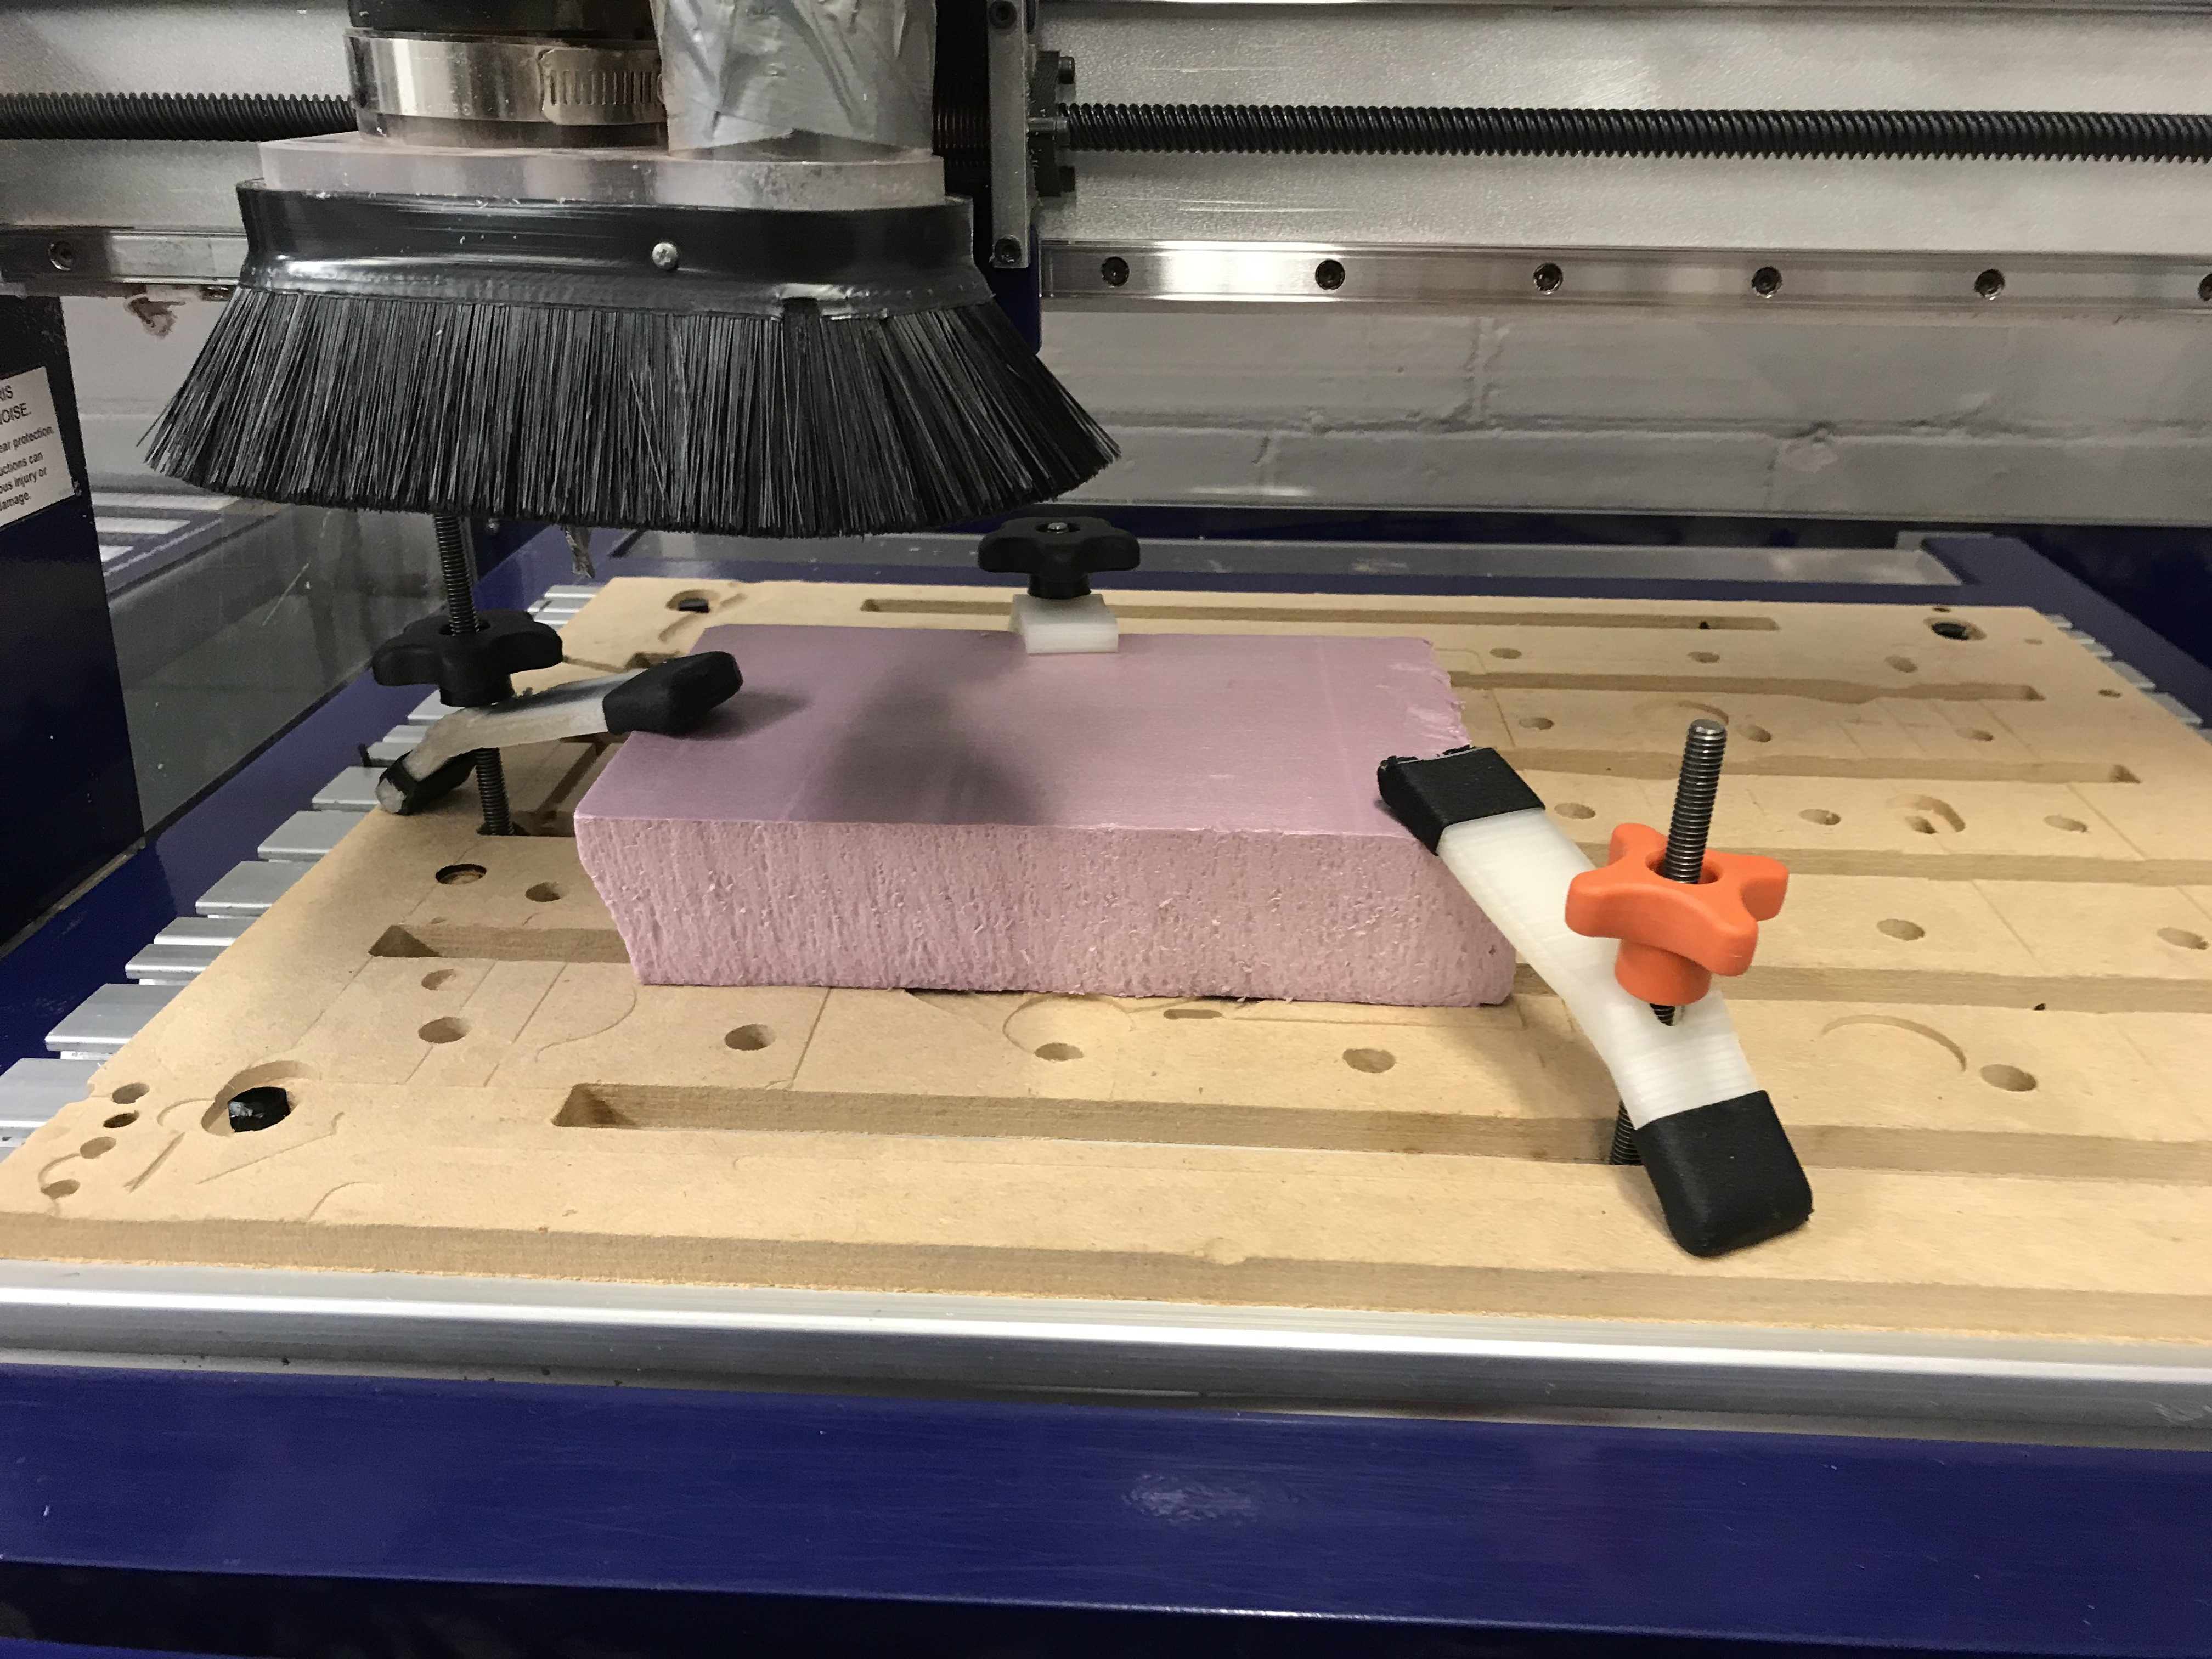
- Clamp work piece.
-
- Make sure the .25 endmill is in place, and if not change the bit.
- Mill the pocket toolpath for the four circles.
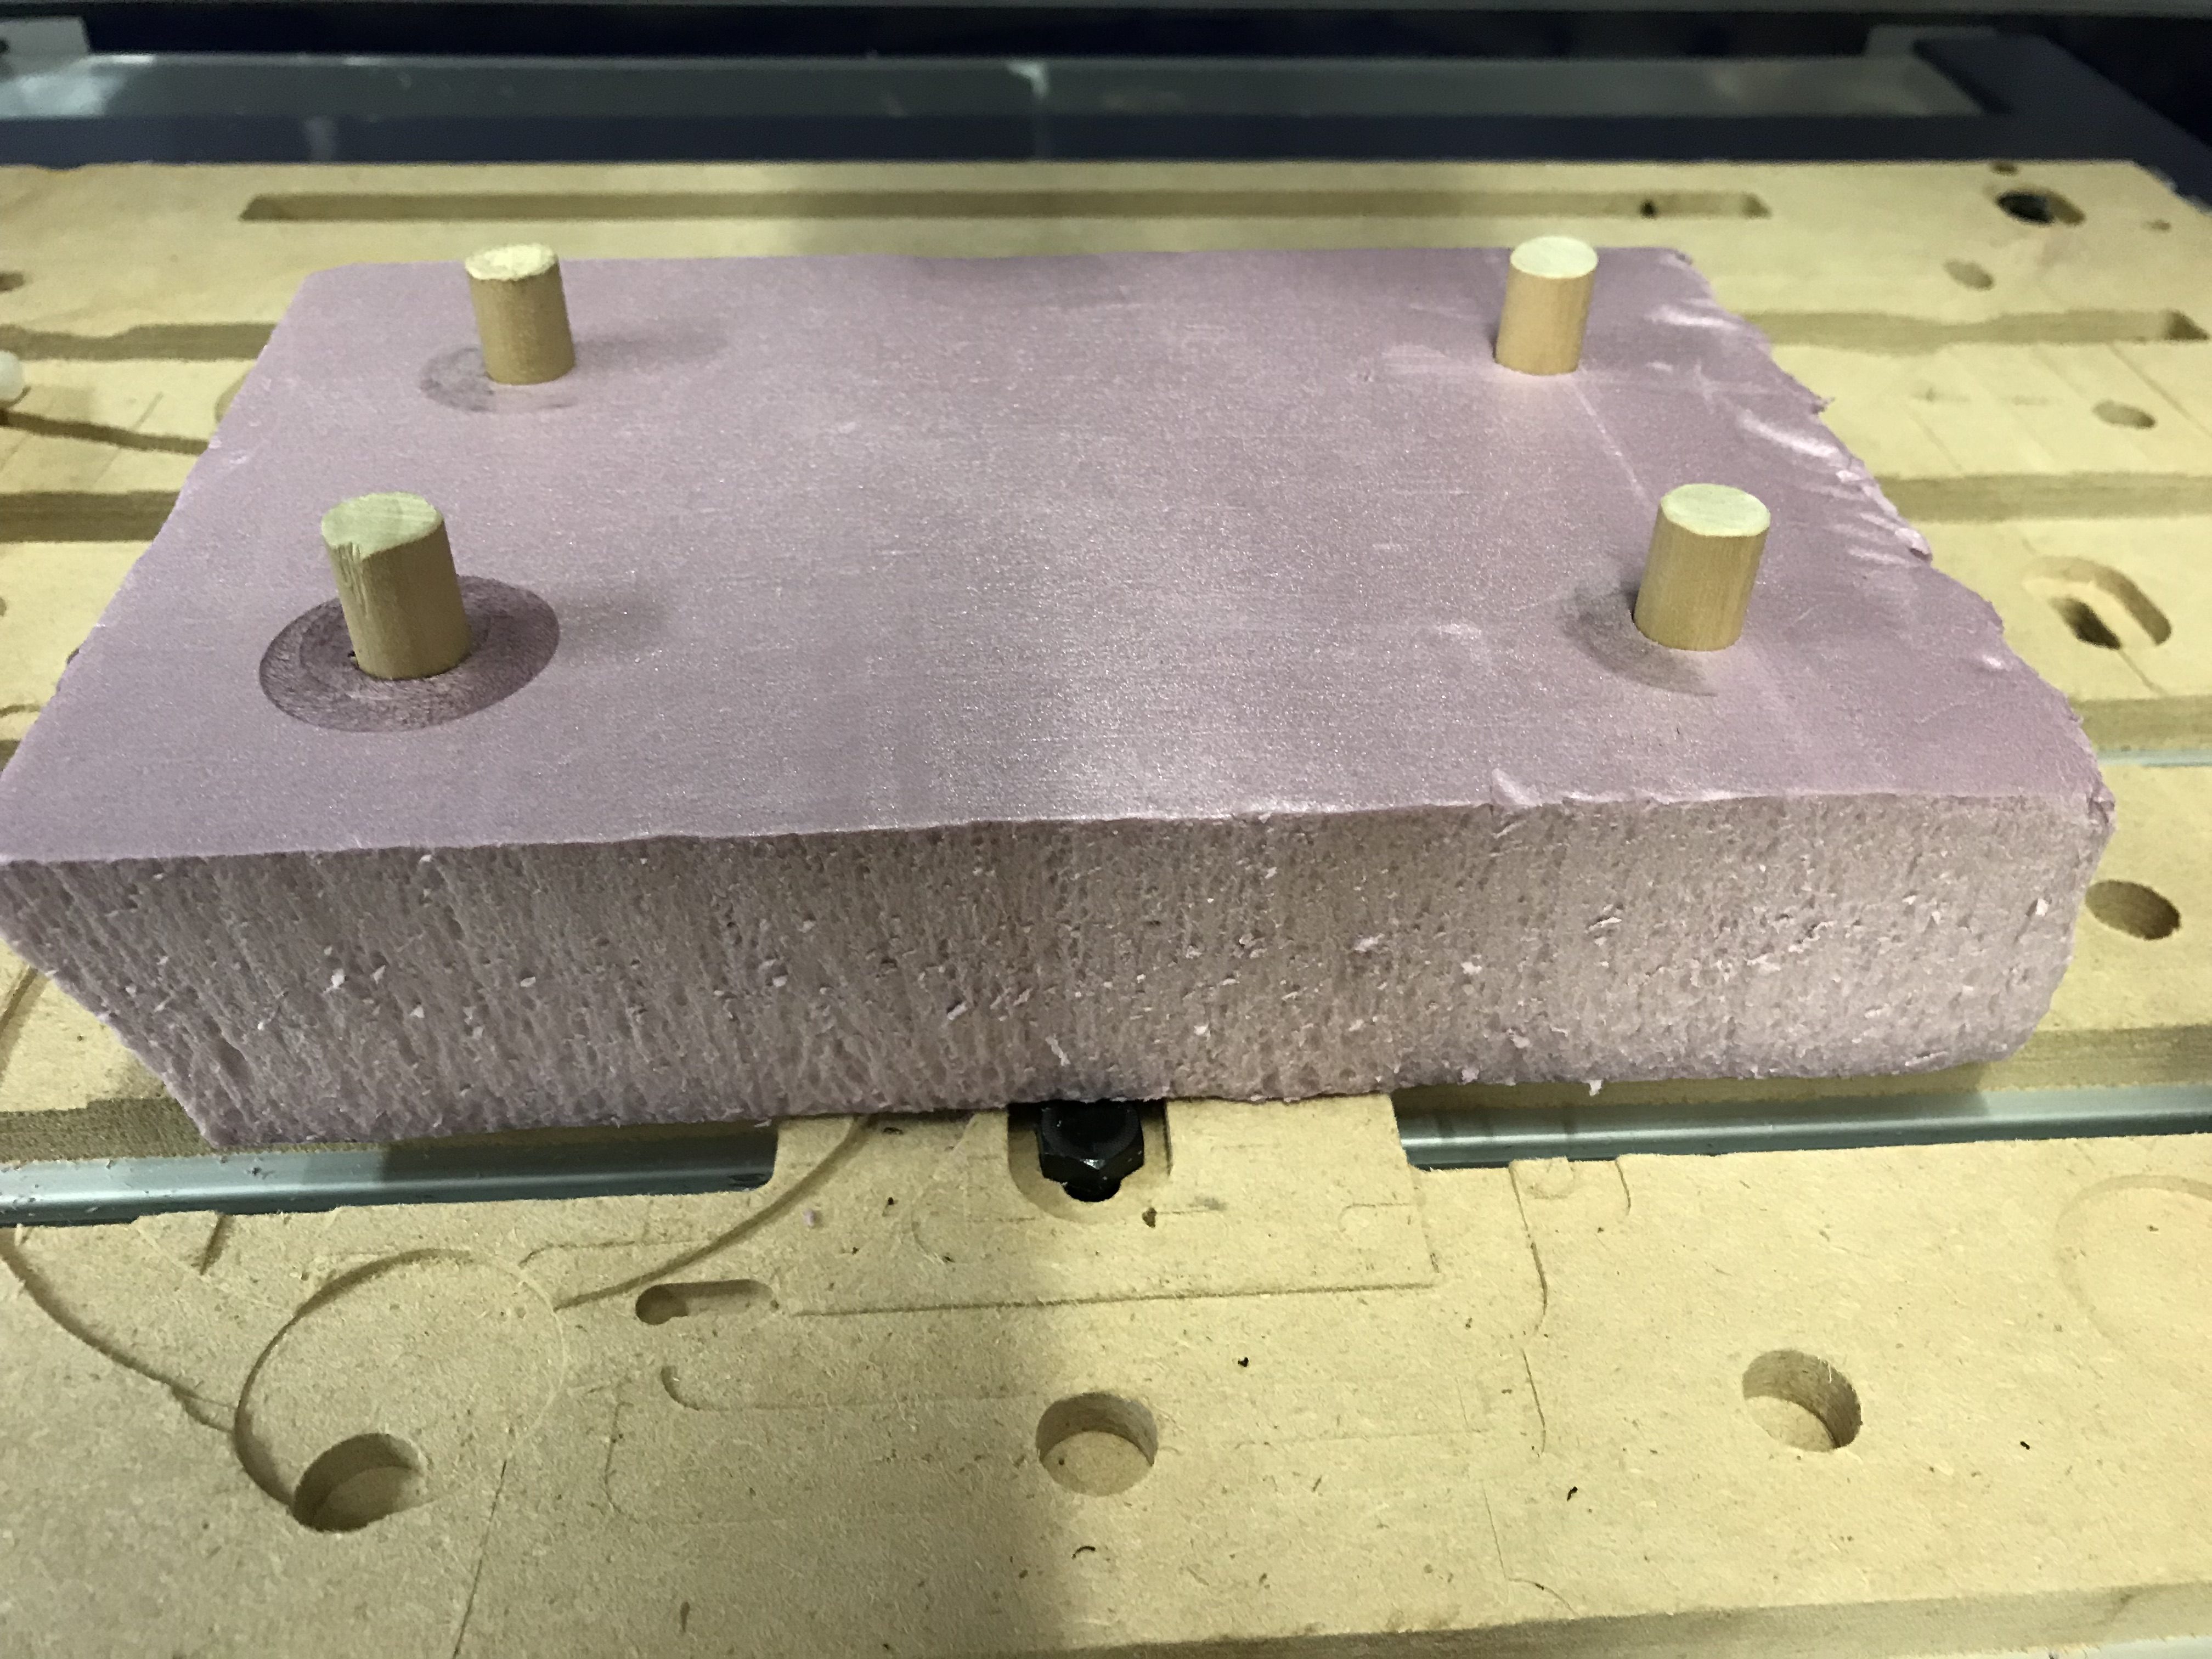
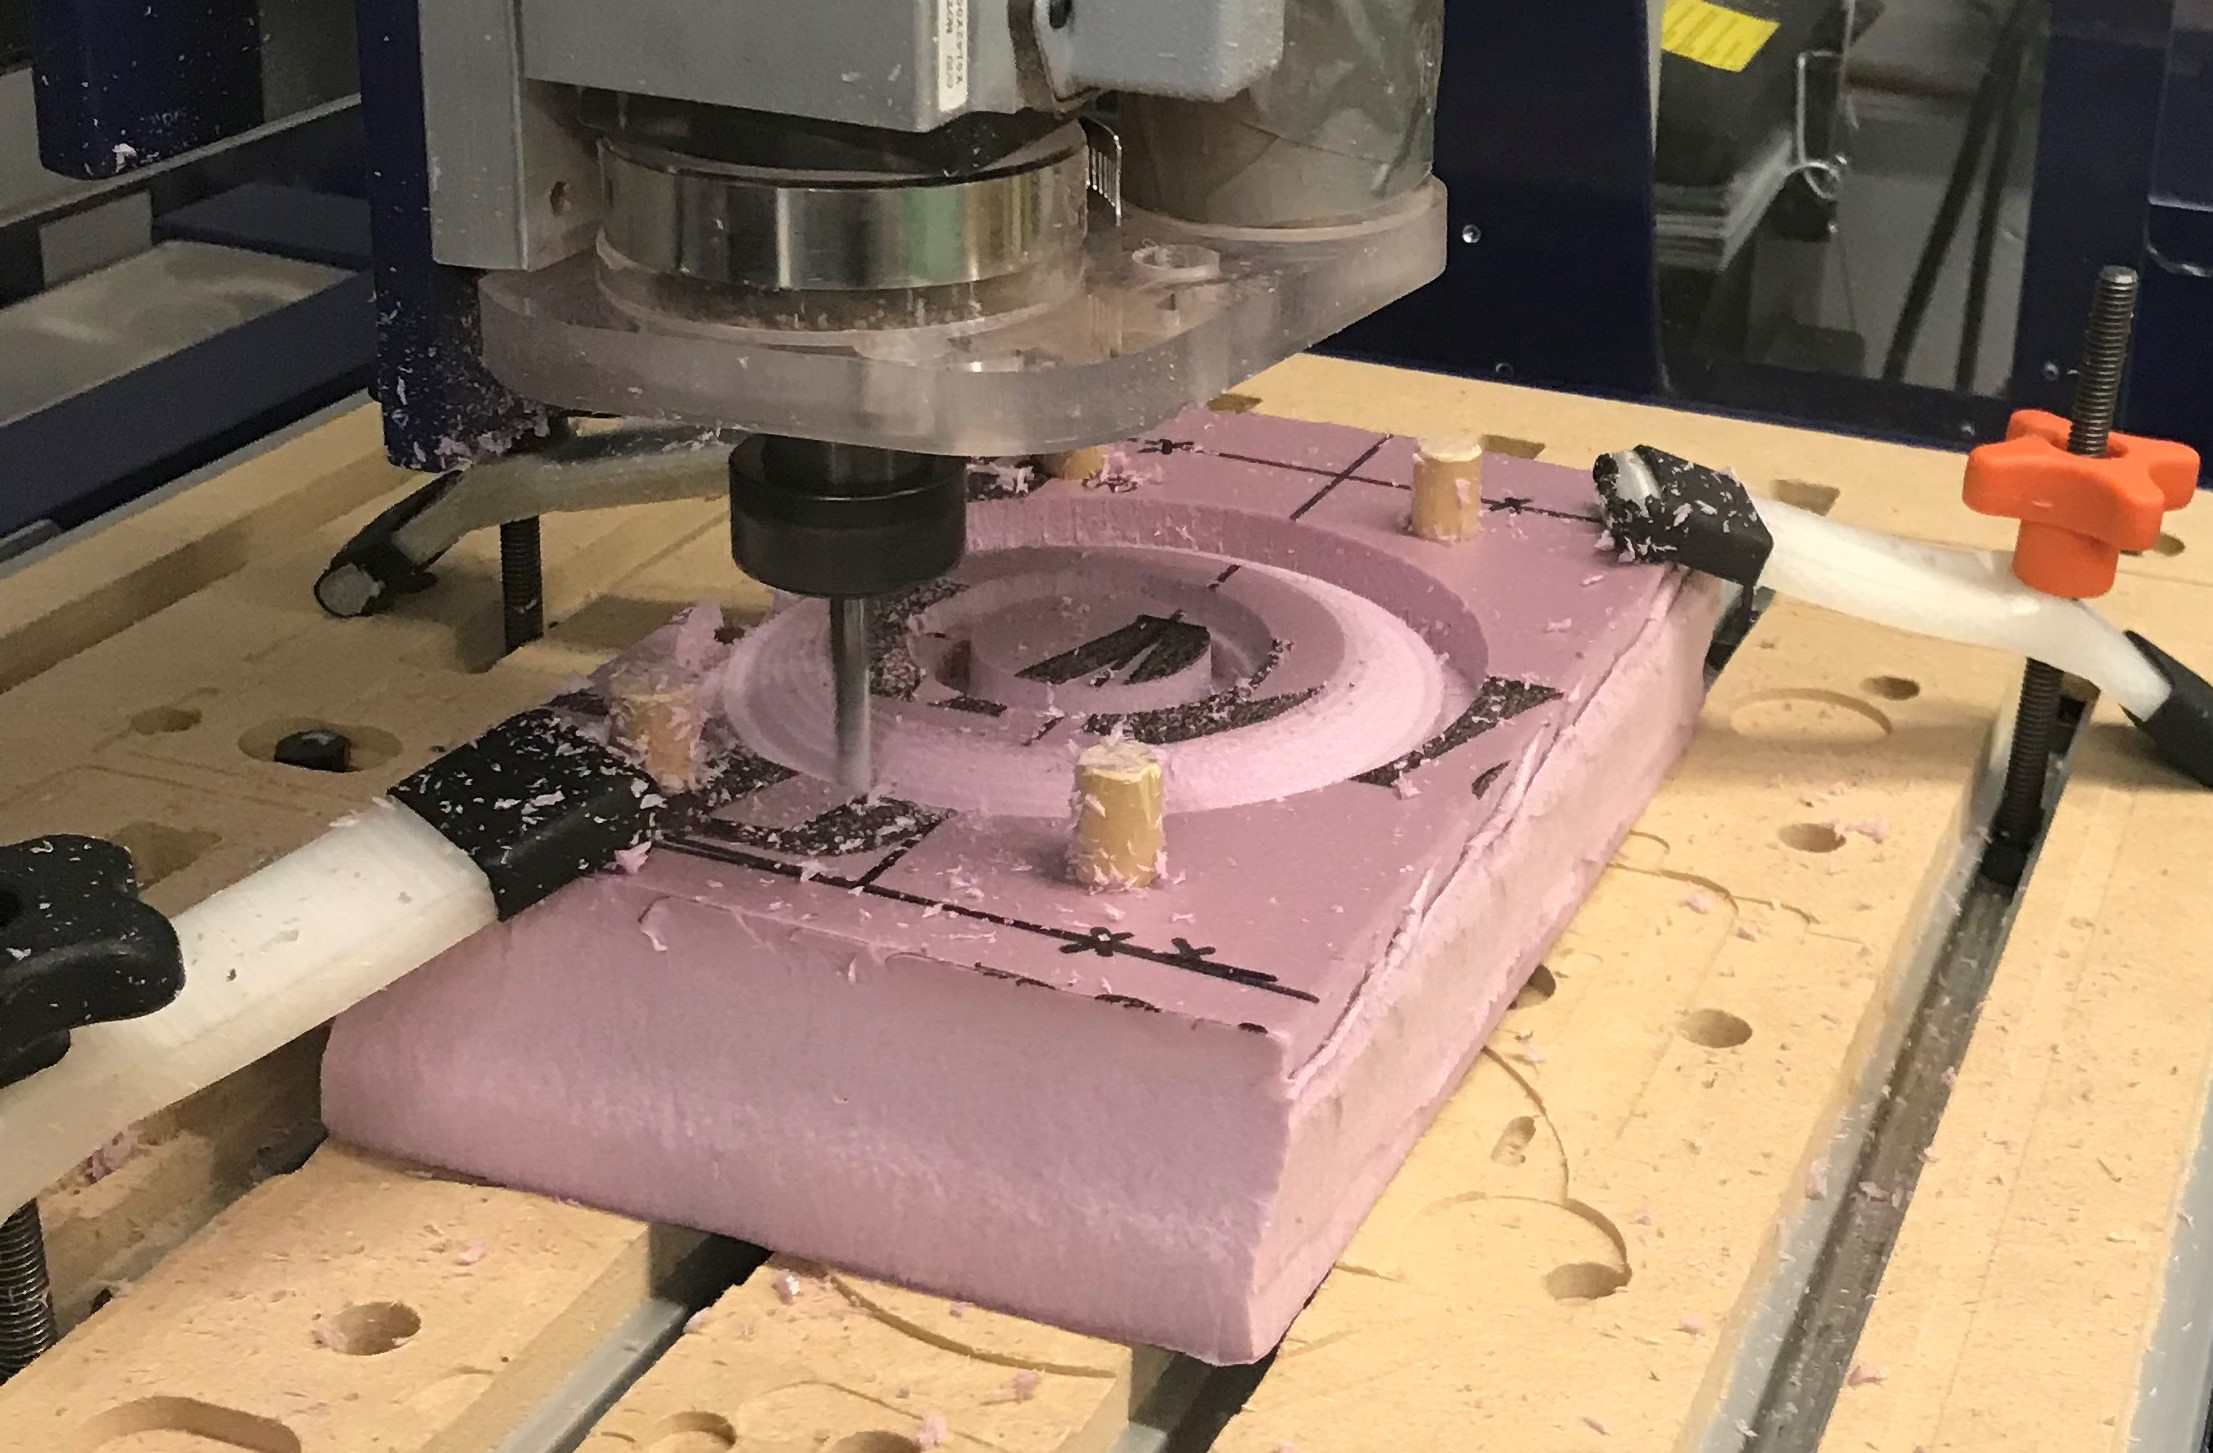
- Unclamp piece and place wooden dowels on the spool board.
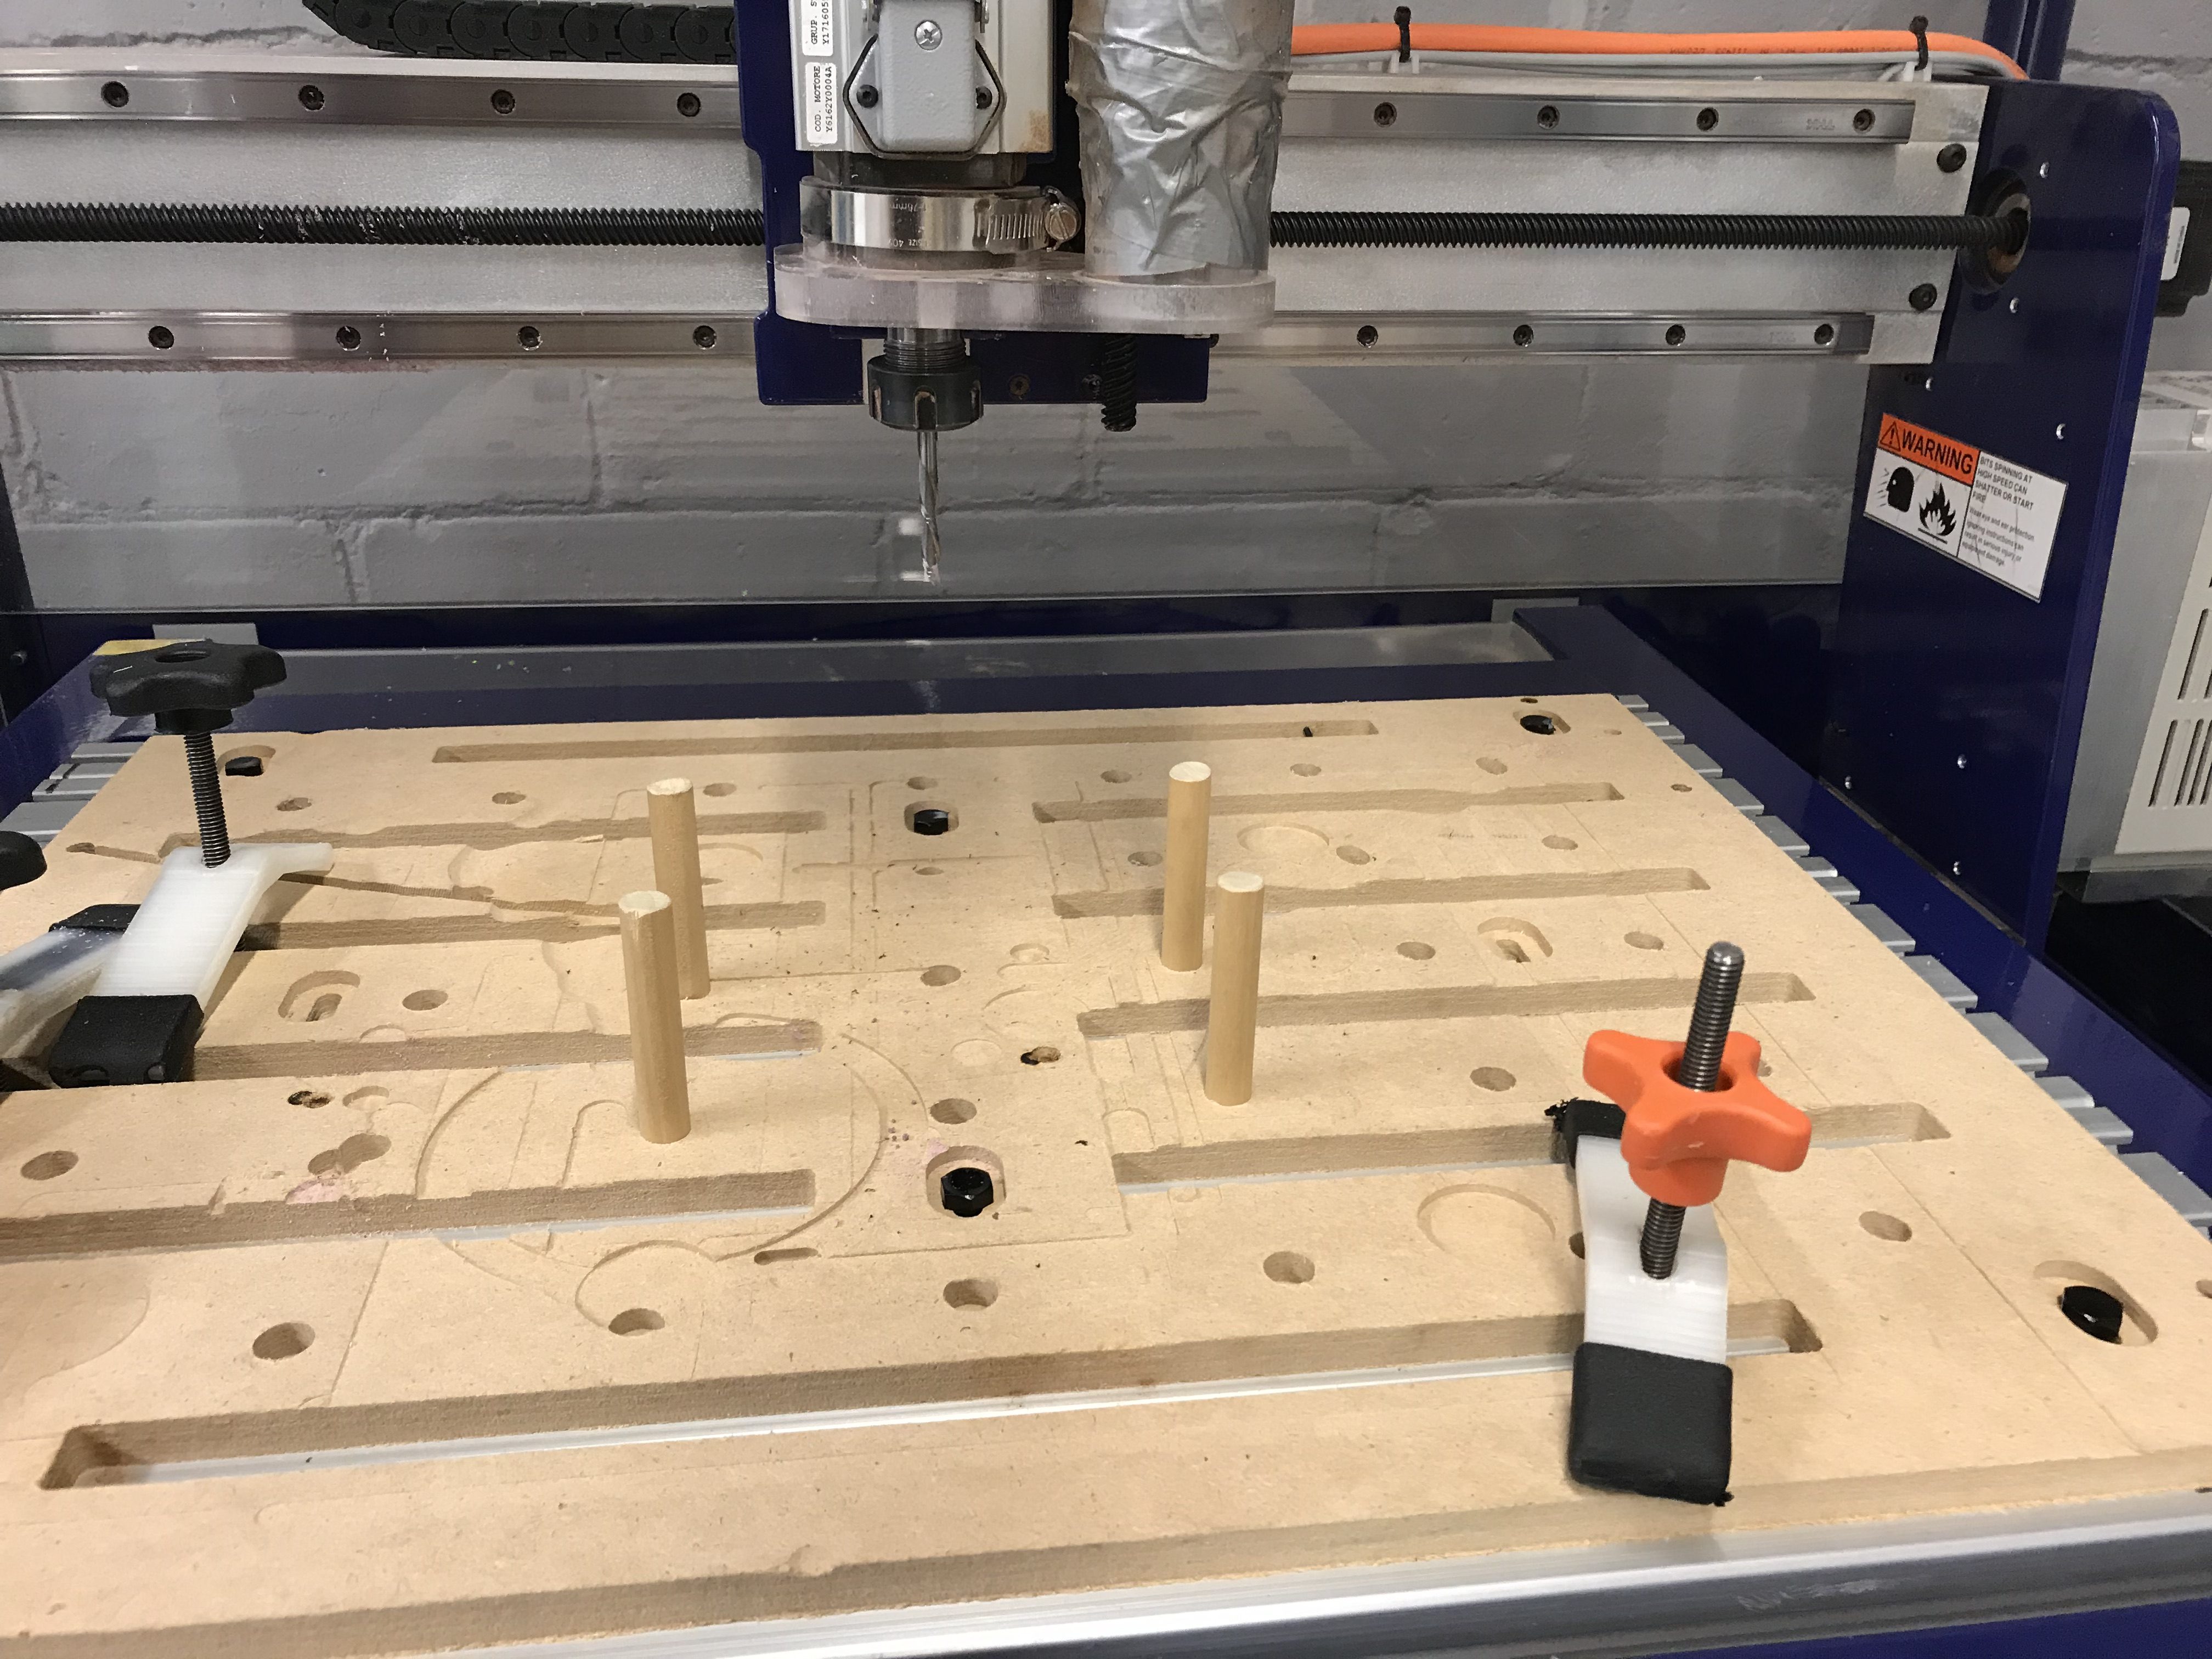
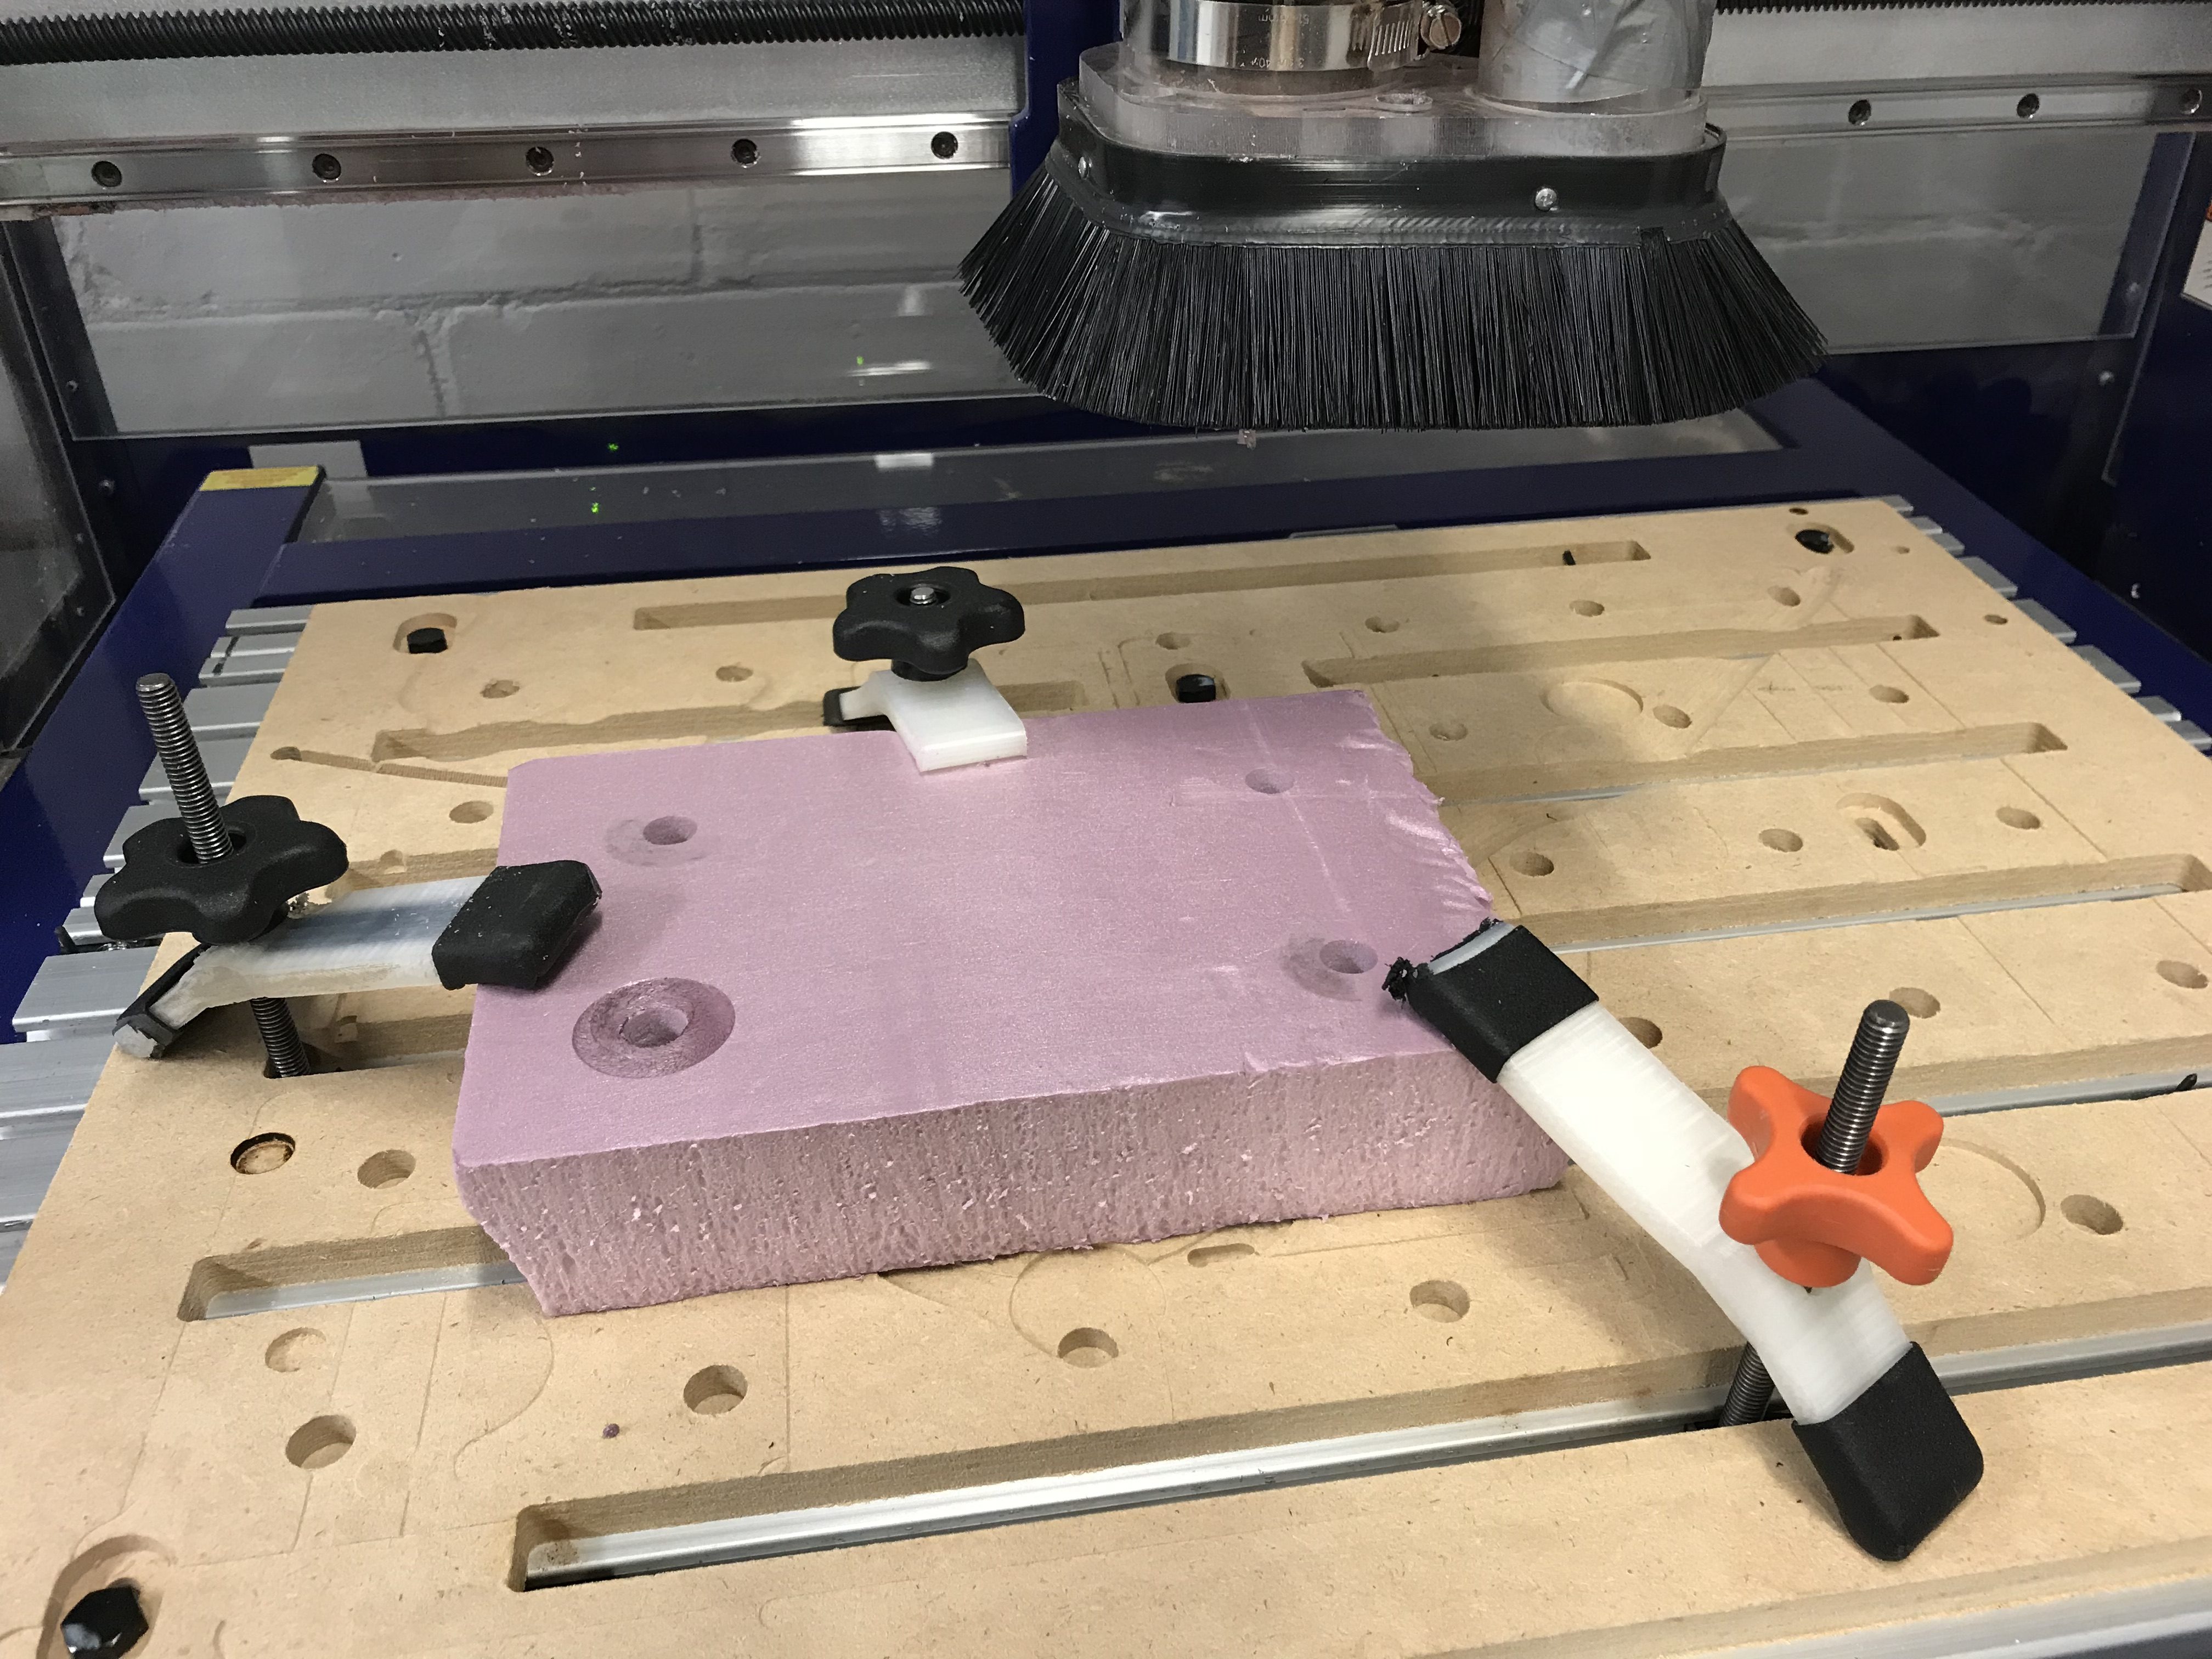
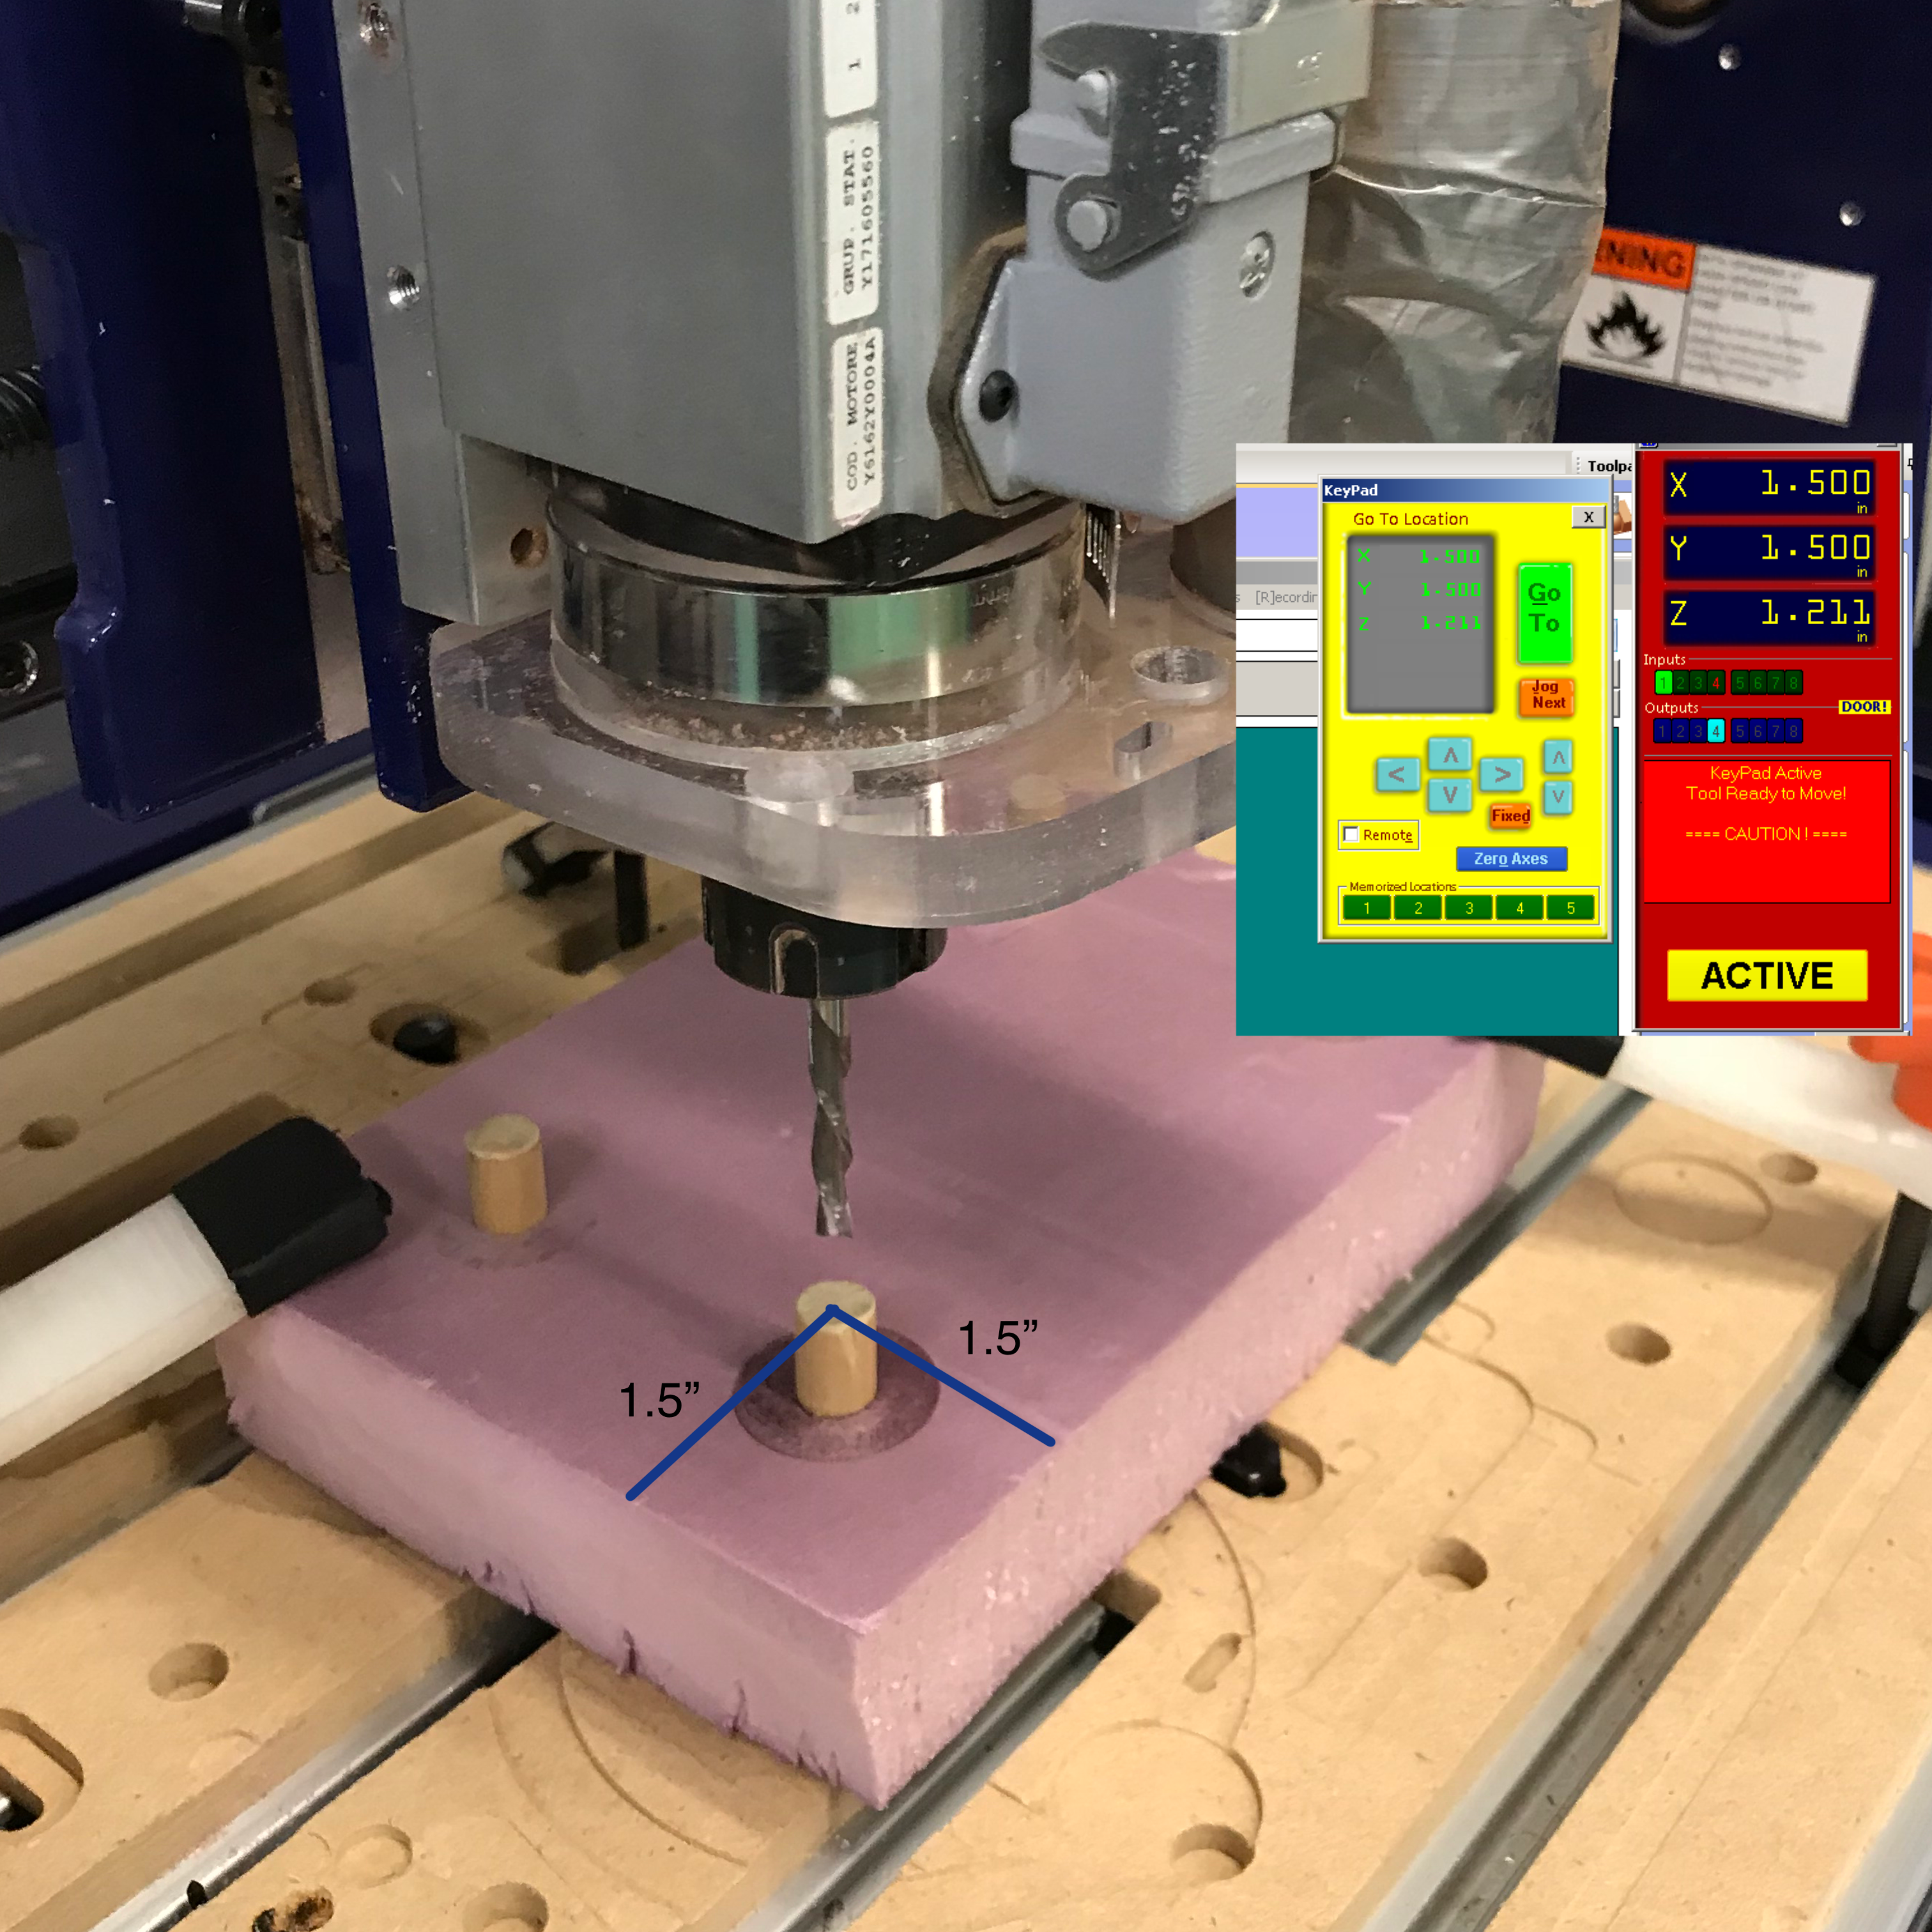
- Place piece with dowels going through the holes just milled.
- Re-Zero the x and y axis. Double check that the center of the bottom left dowel is at the center of the bottom left circle from the tool path. Remember to increase the z position beforehand so that the bit does not hit into the dowel.
- Run the roughing and finishing toolpath.
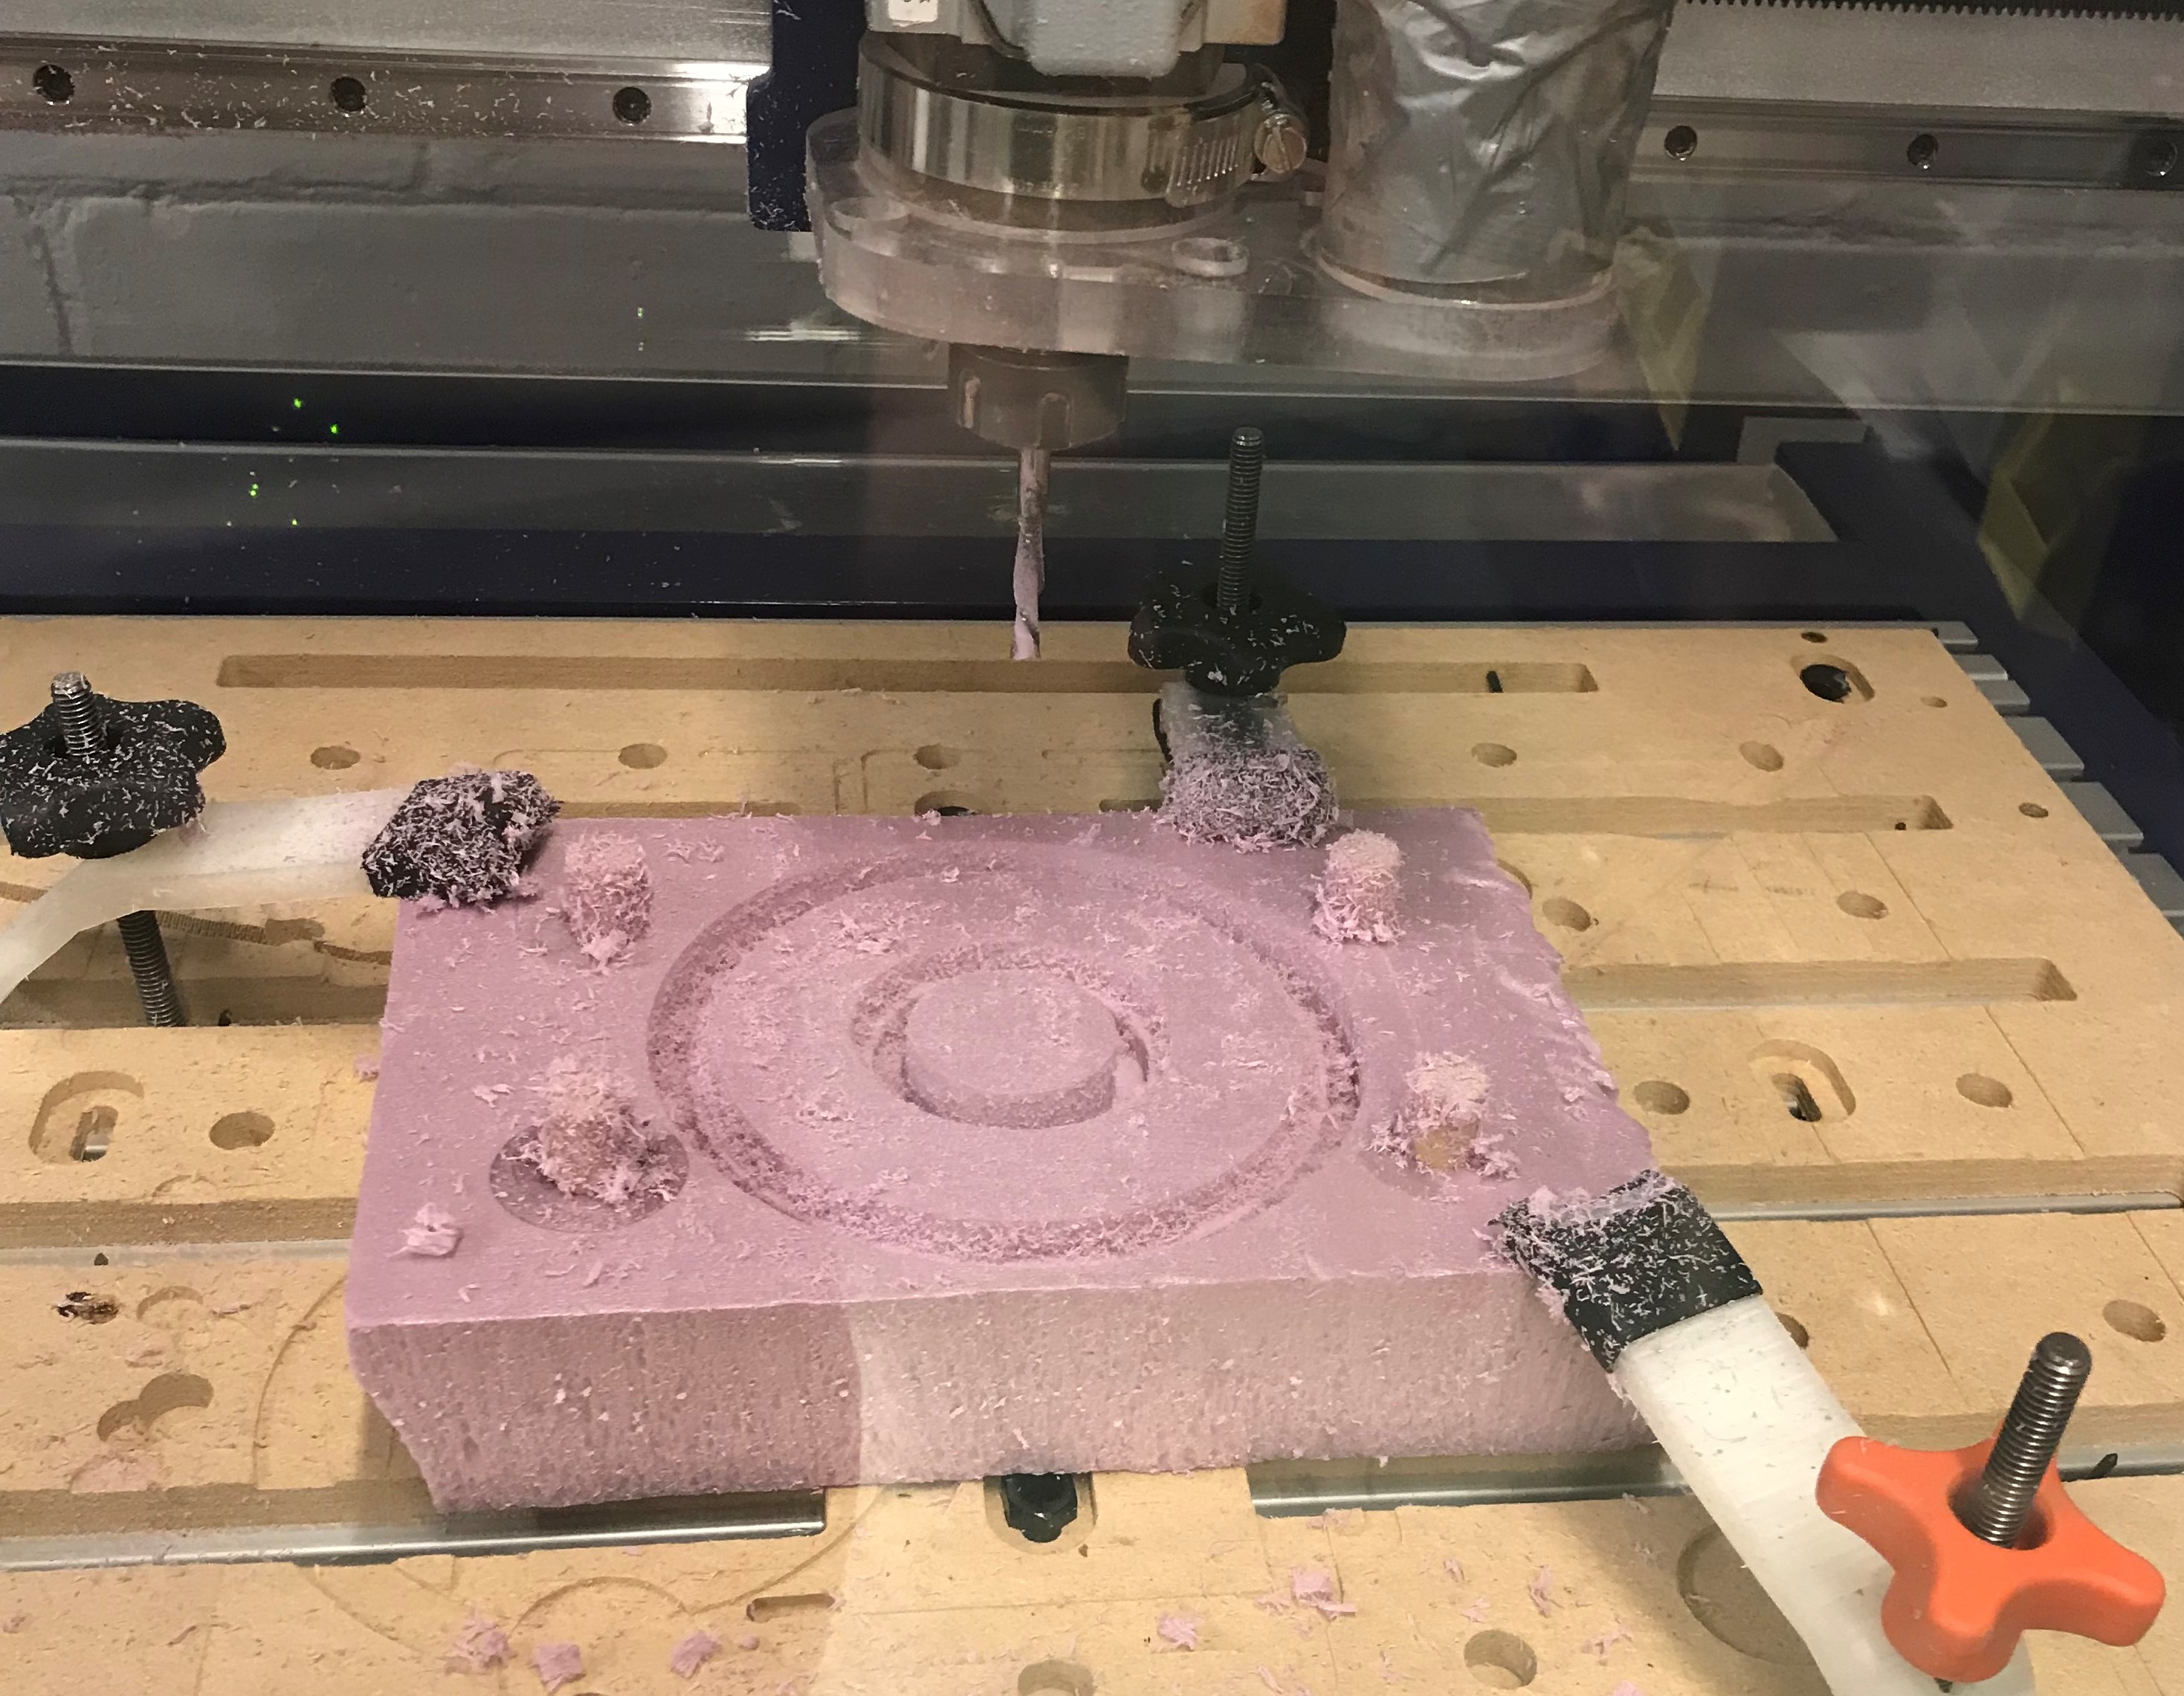
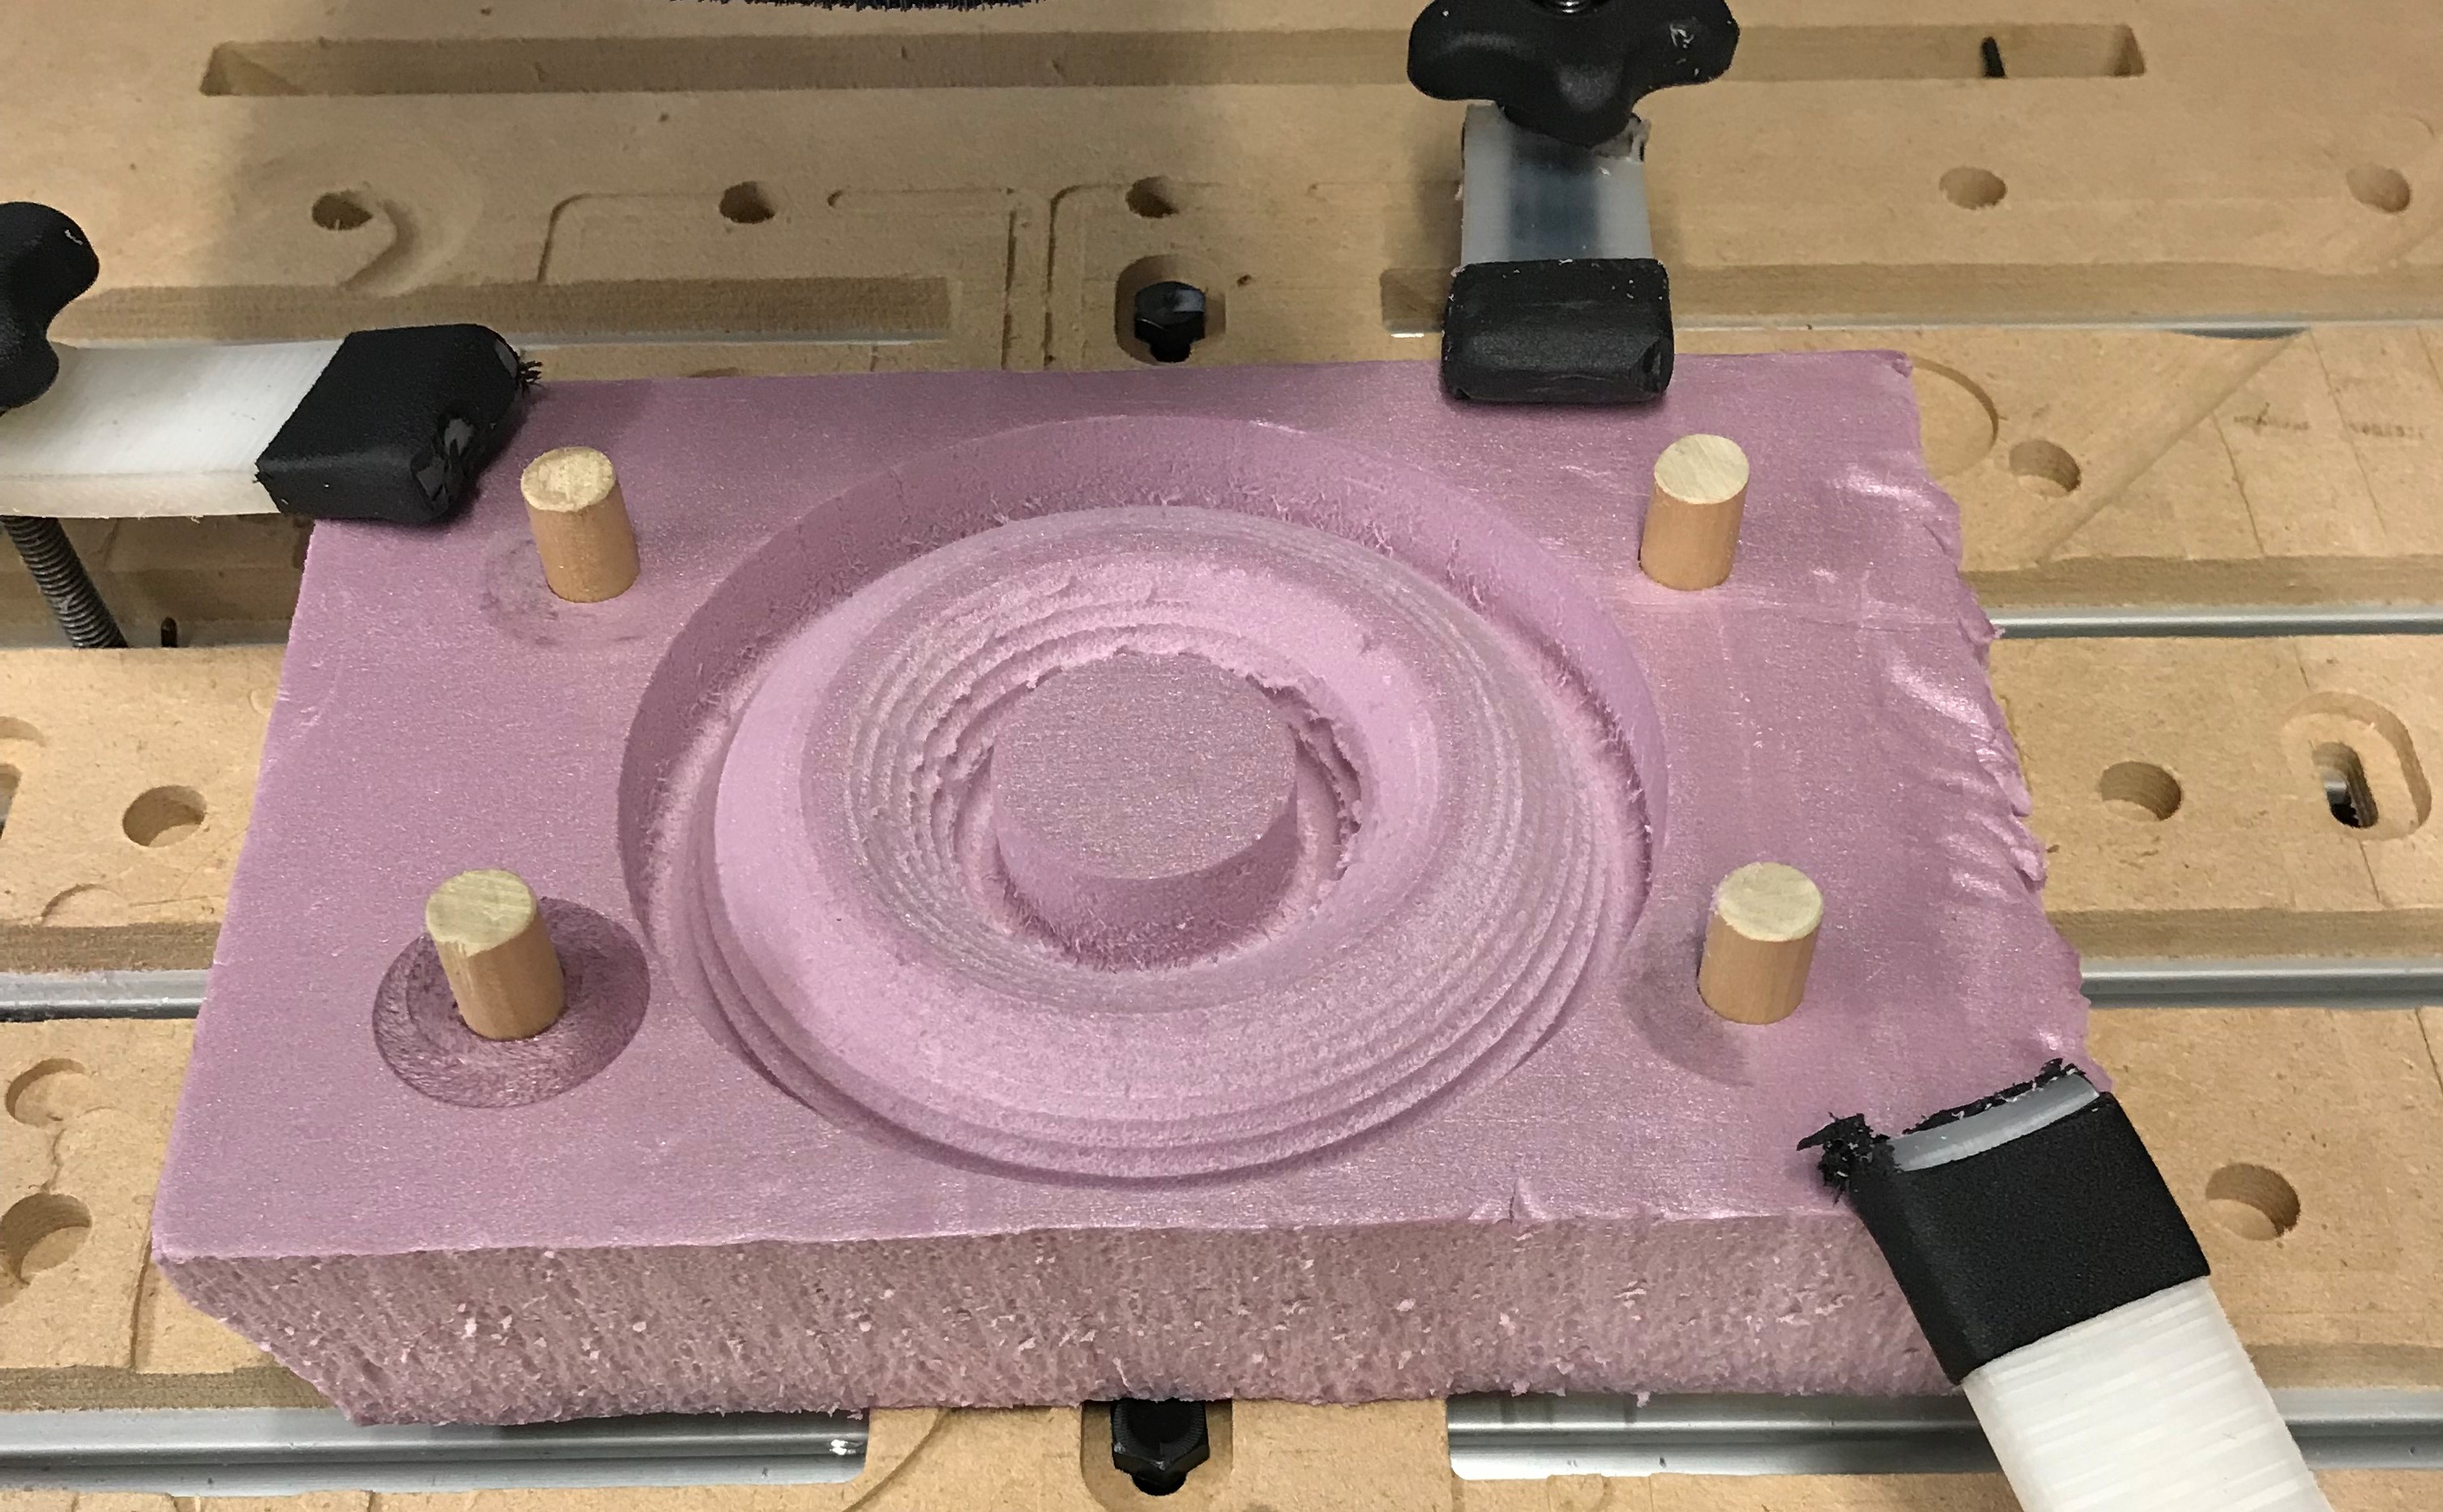
- Run the profile cut
- Flip the piece over and double check that the bottom left dowel is in the same positon as before (do NOT rezero the x and y positions)
- Run the roughing, finishing and profile cut for the bottom.

- Vacuum and unclamp your piece.
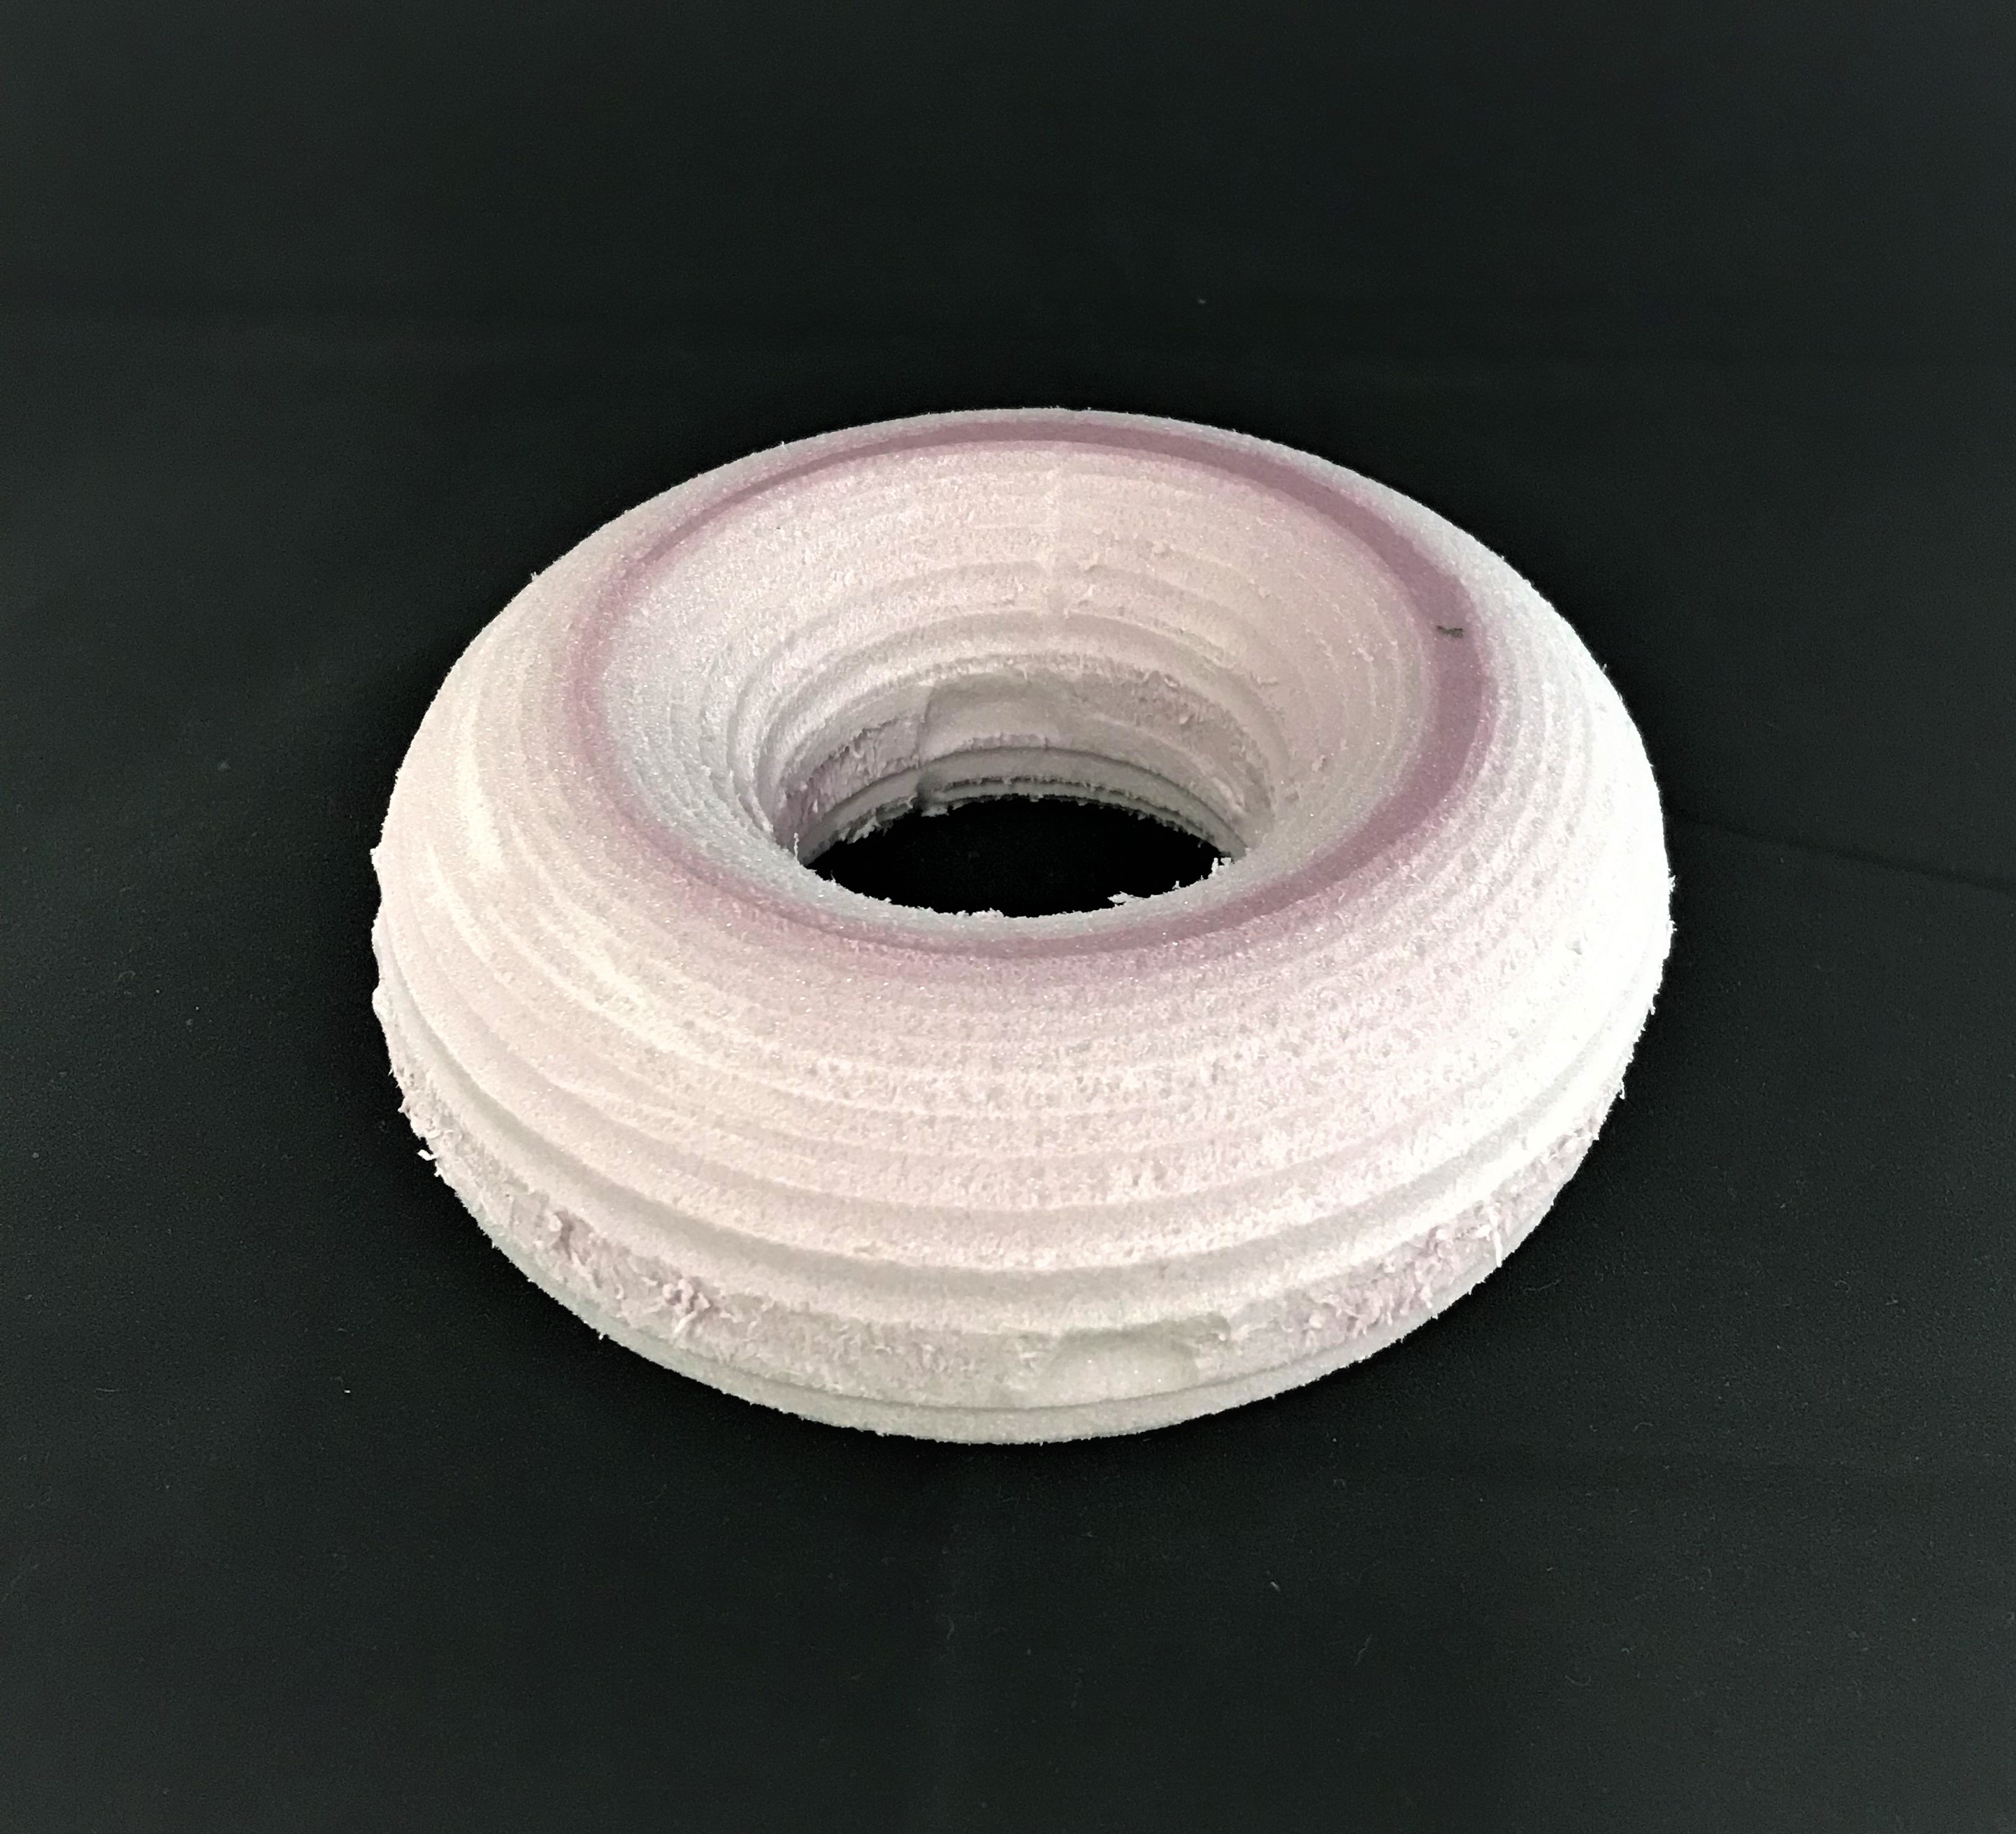
- Cut the tabs of your piece and admire your beautiful flip-cut!