I’ve been leading trainings on the ShopBot CNC Router in Bray for several years, and I find that people rarely take full advantage of its capabilities. Students most often use it to cut basic 2D shapes out of plastic or wood, with the occasional surface contouring thrown in. I wanted to undertake a project to demonstrate the full capabilities of the machine, and provide inspiration to others who may be unfamiliar with its many uses. So, never having attempted anything as ambitious as learning to play guitar, I decided to build one.
I. Planning
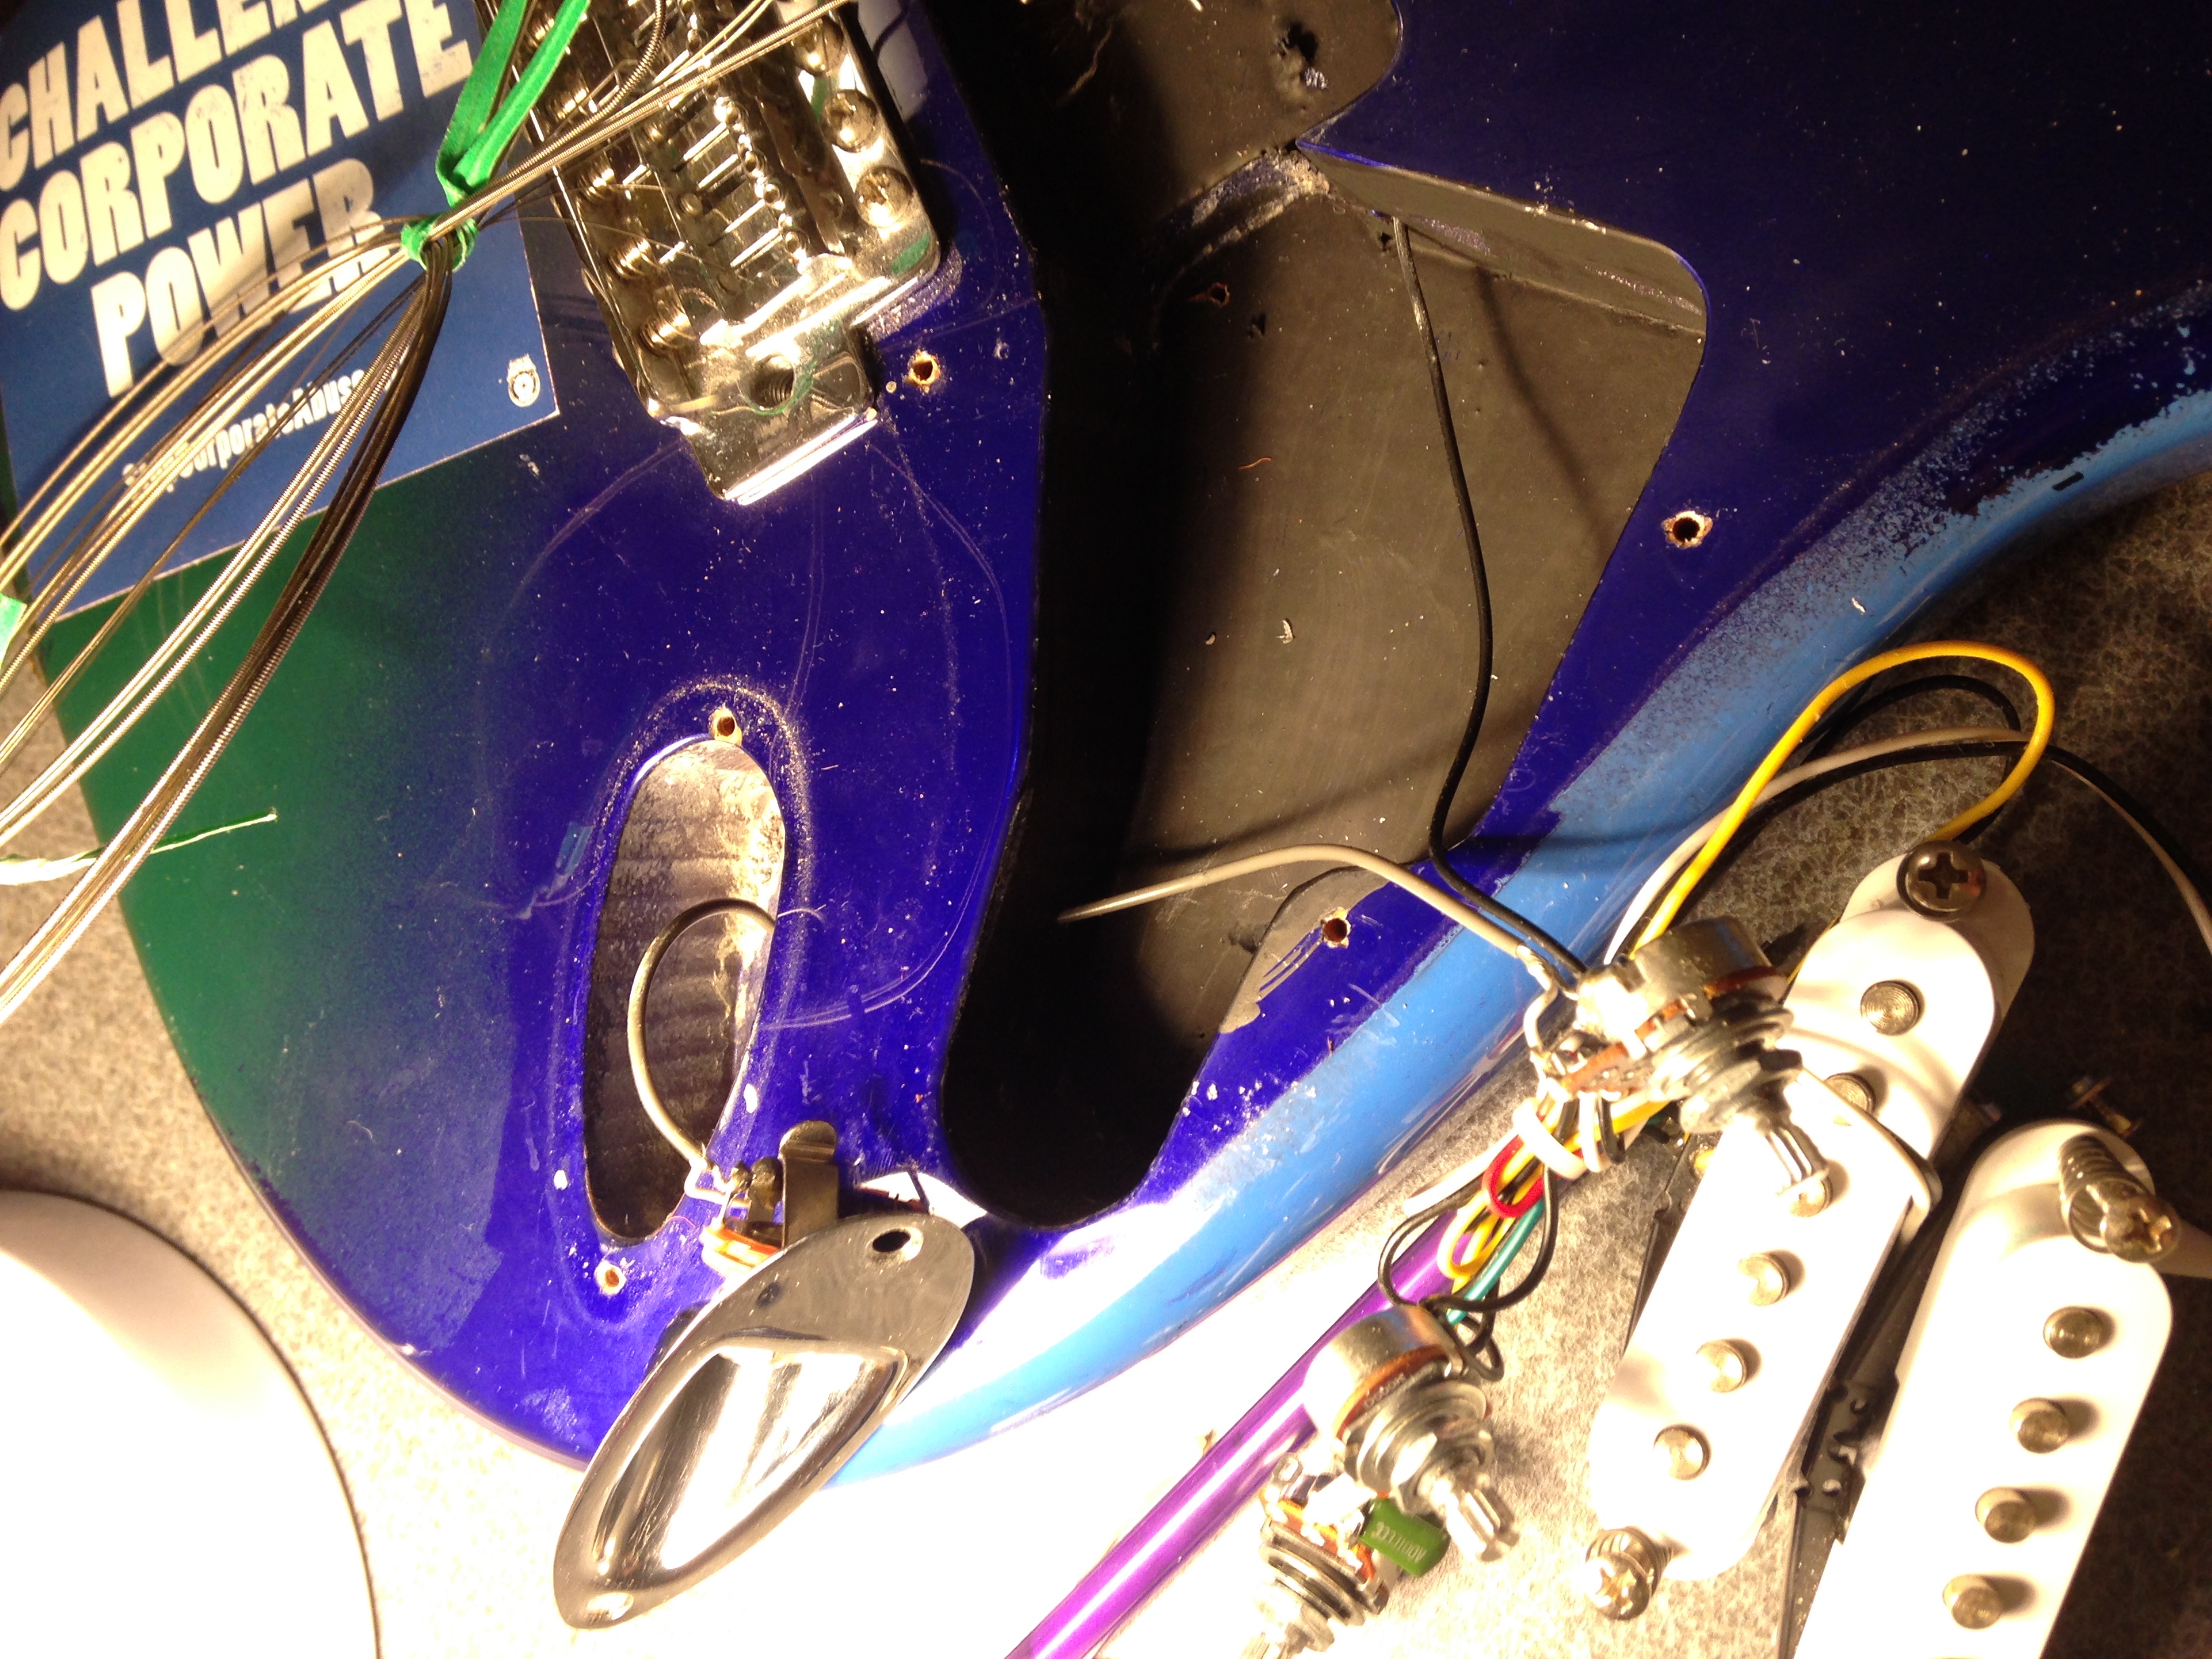
Naturally, I began this process by disassembling my own perfectly functional Fender Squier. This helped me gain a basic idea of how an electric guitar was constructed. I also removed the electronics and specialized metal pieces for later reuse.
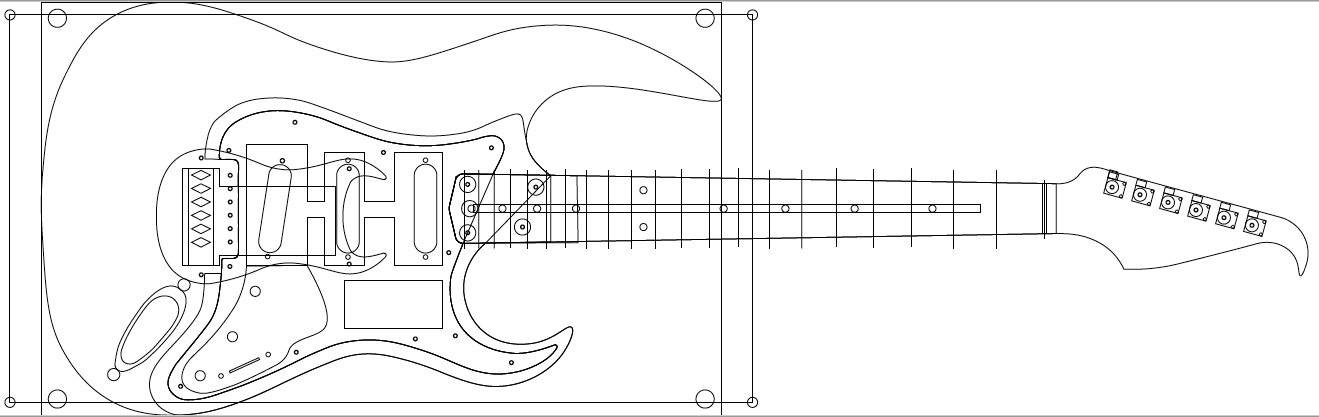
After this inspirational and informative journey of destruction, I began designing my own project. I first used Adobe Illustrator to create a detailed 2D replica of my own guitar, measuring it as precisely as I could, and including every conceivable measurement that might be necessary. I then modified this template to suit my own aesthetic preferences.
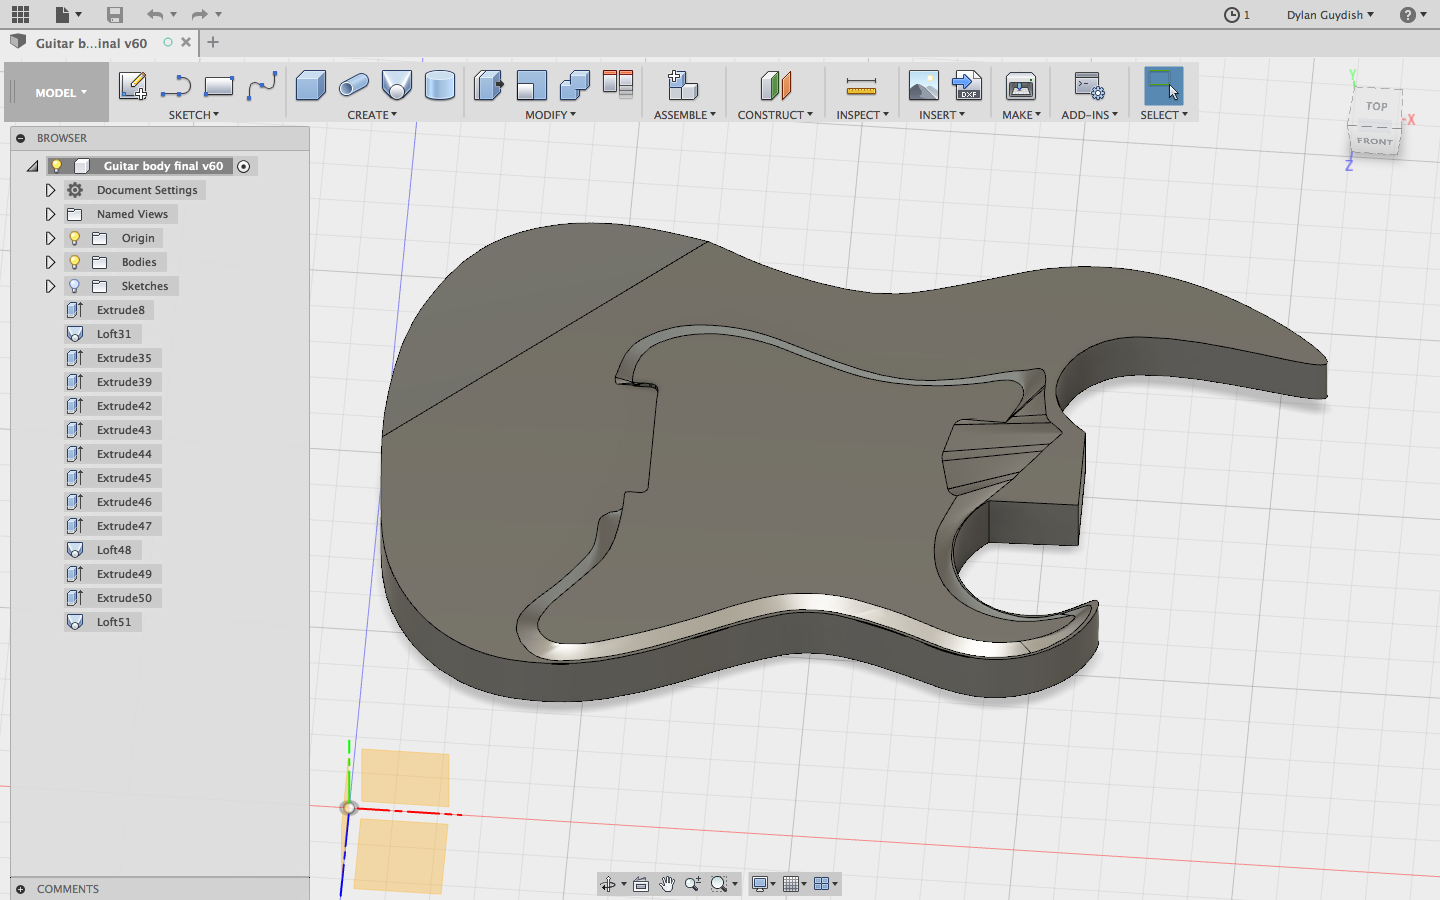
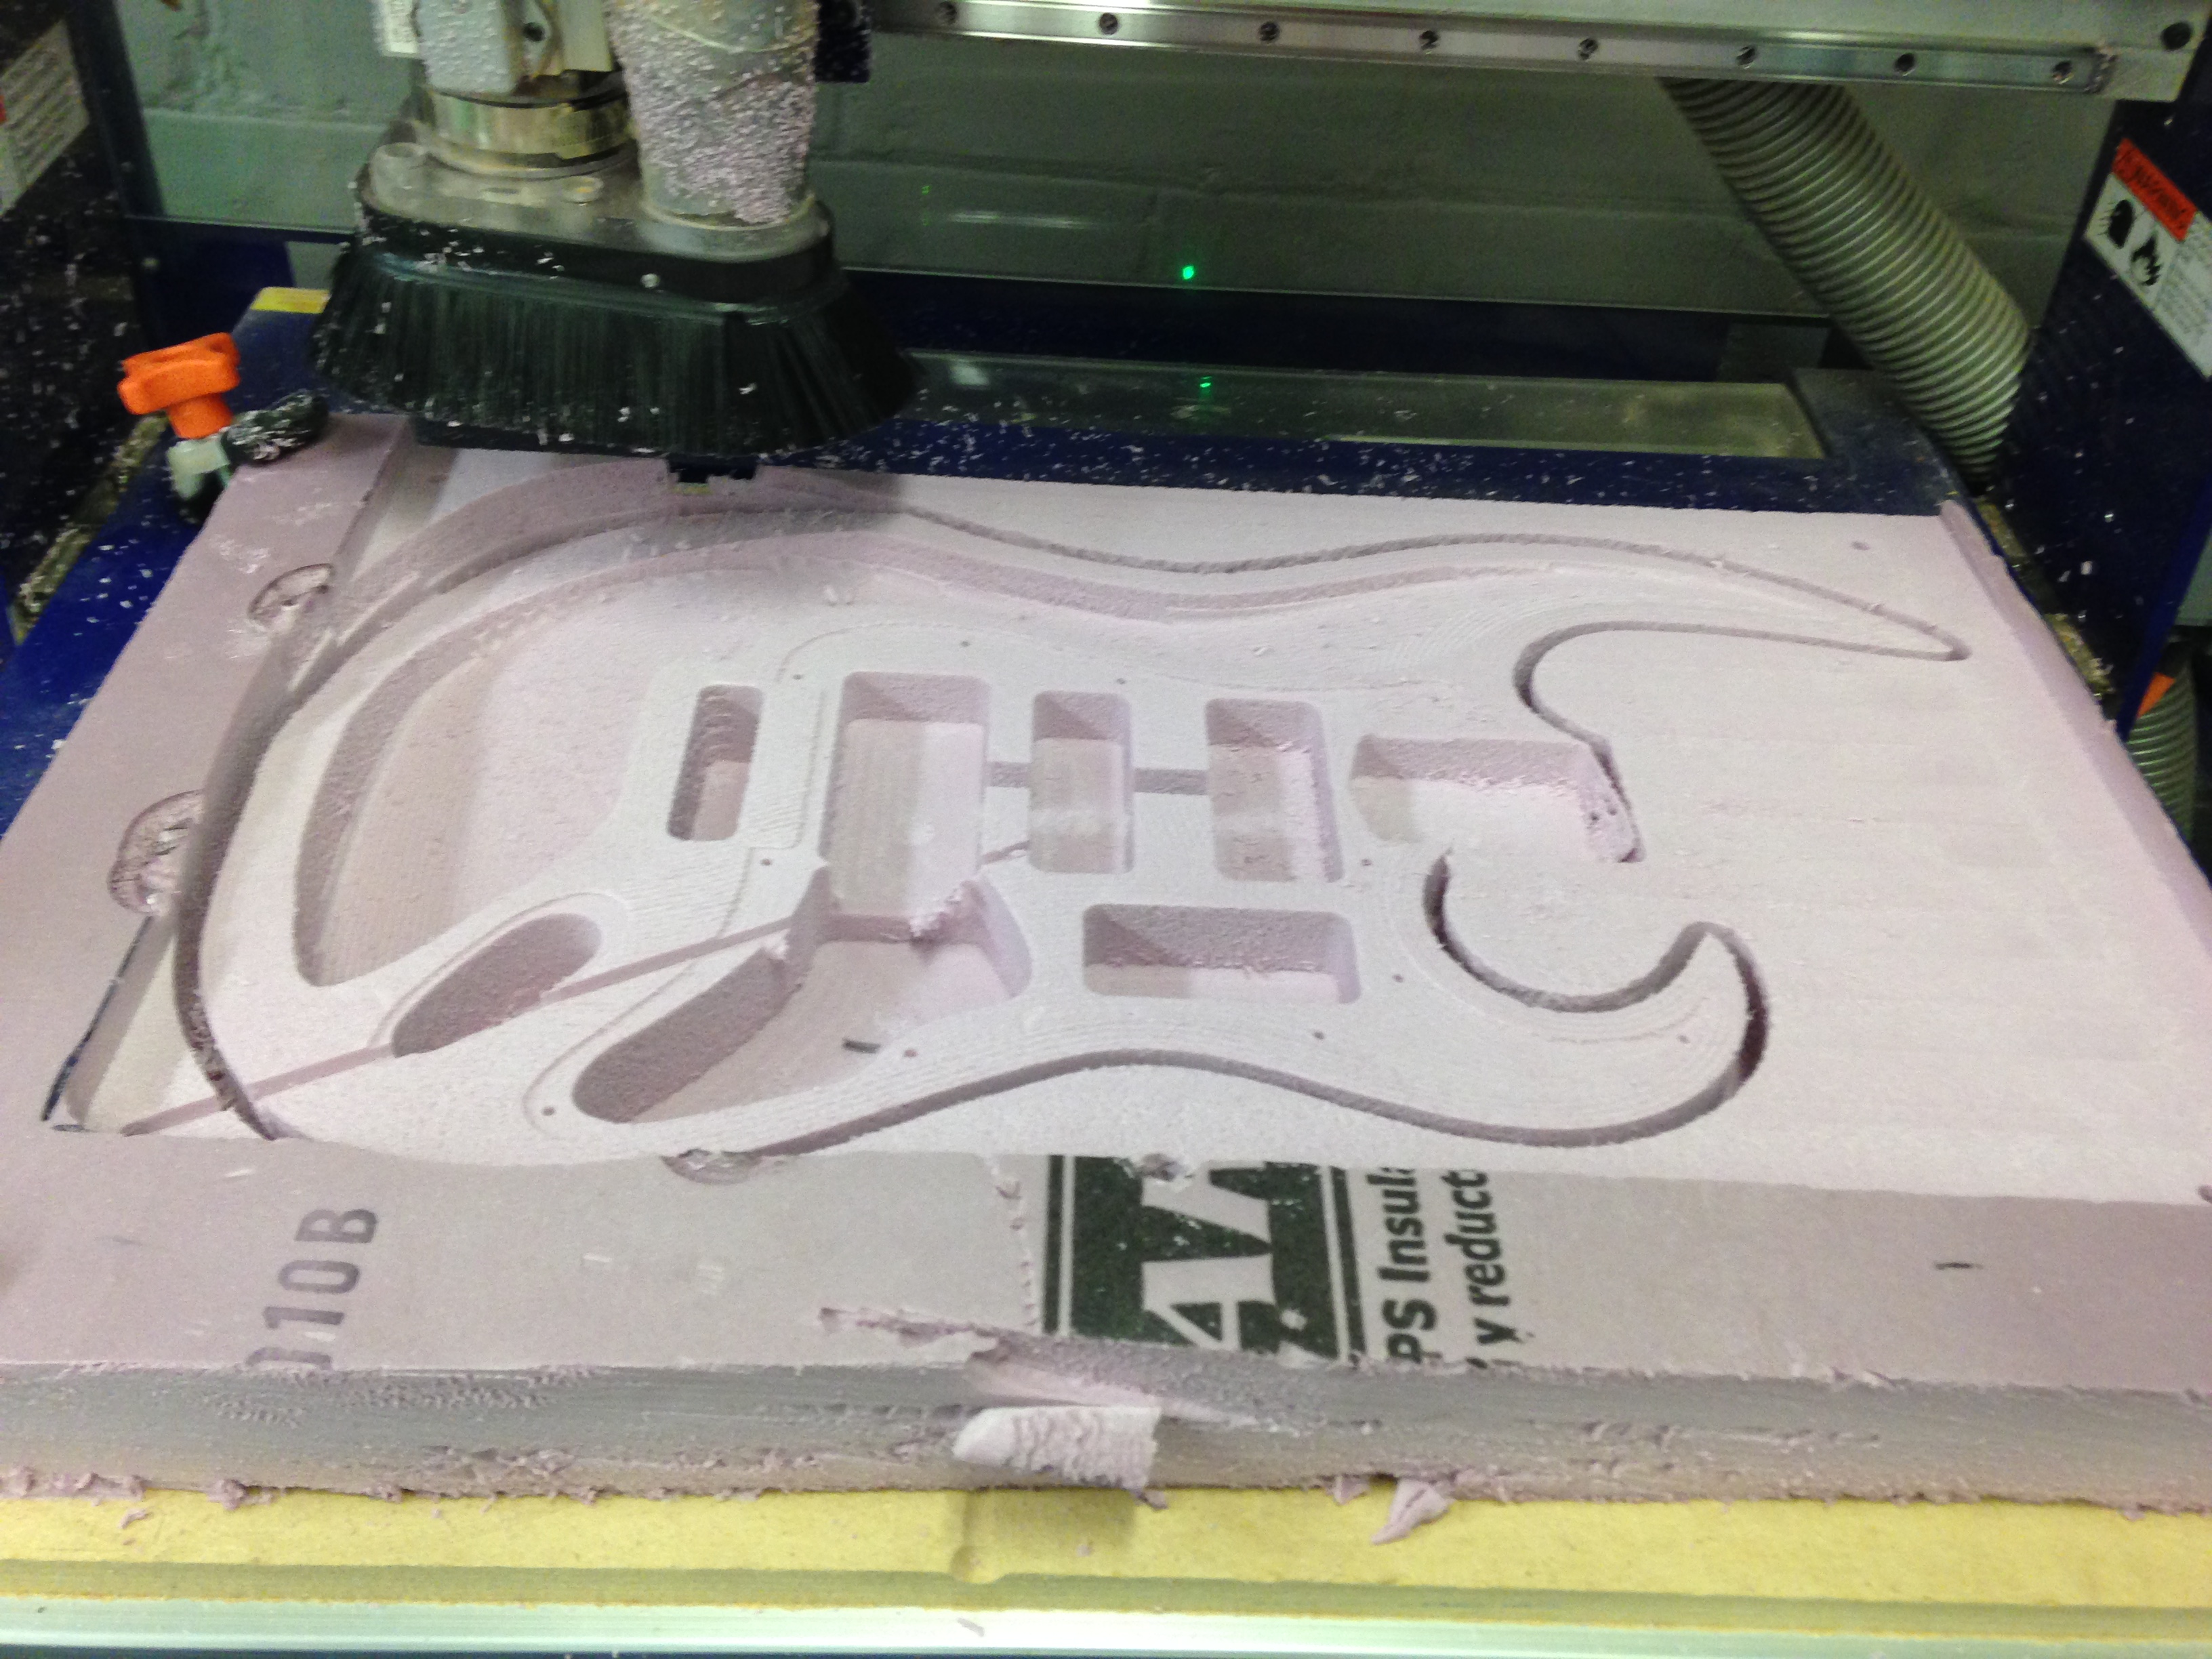
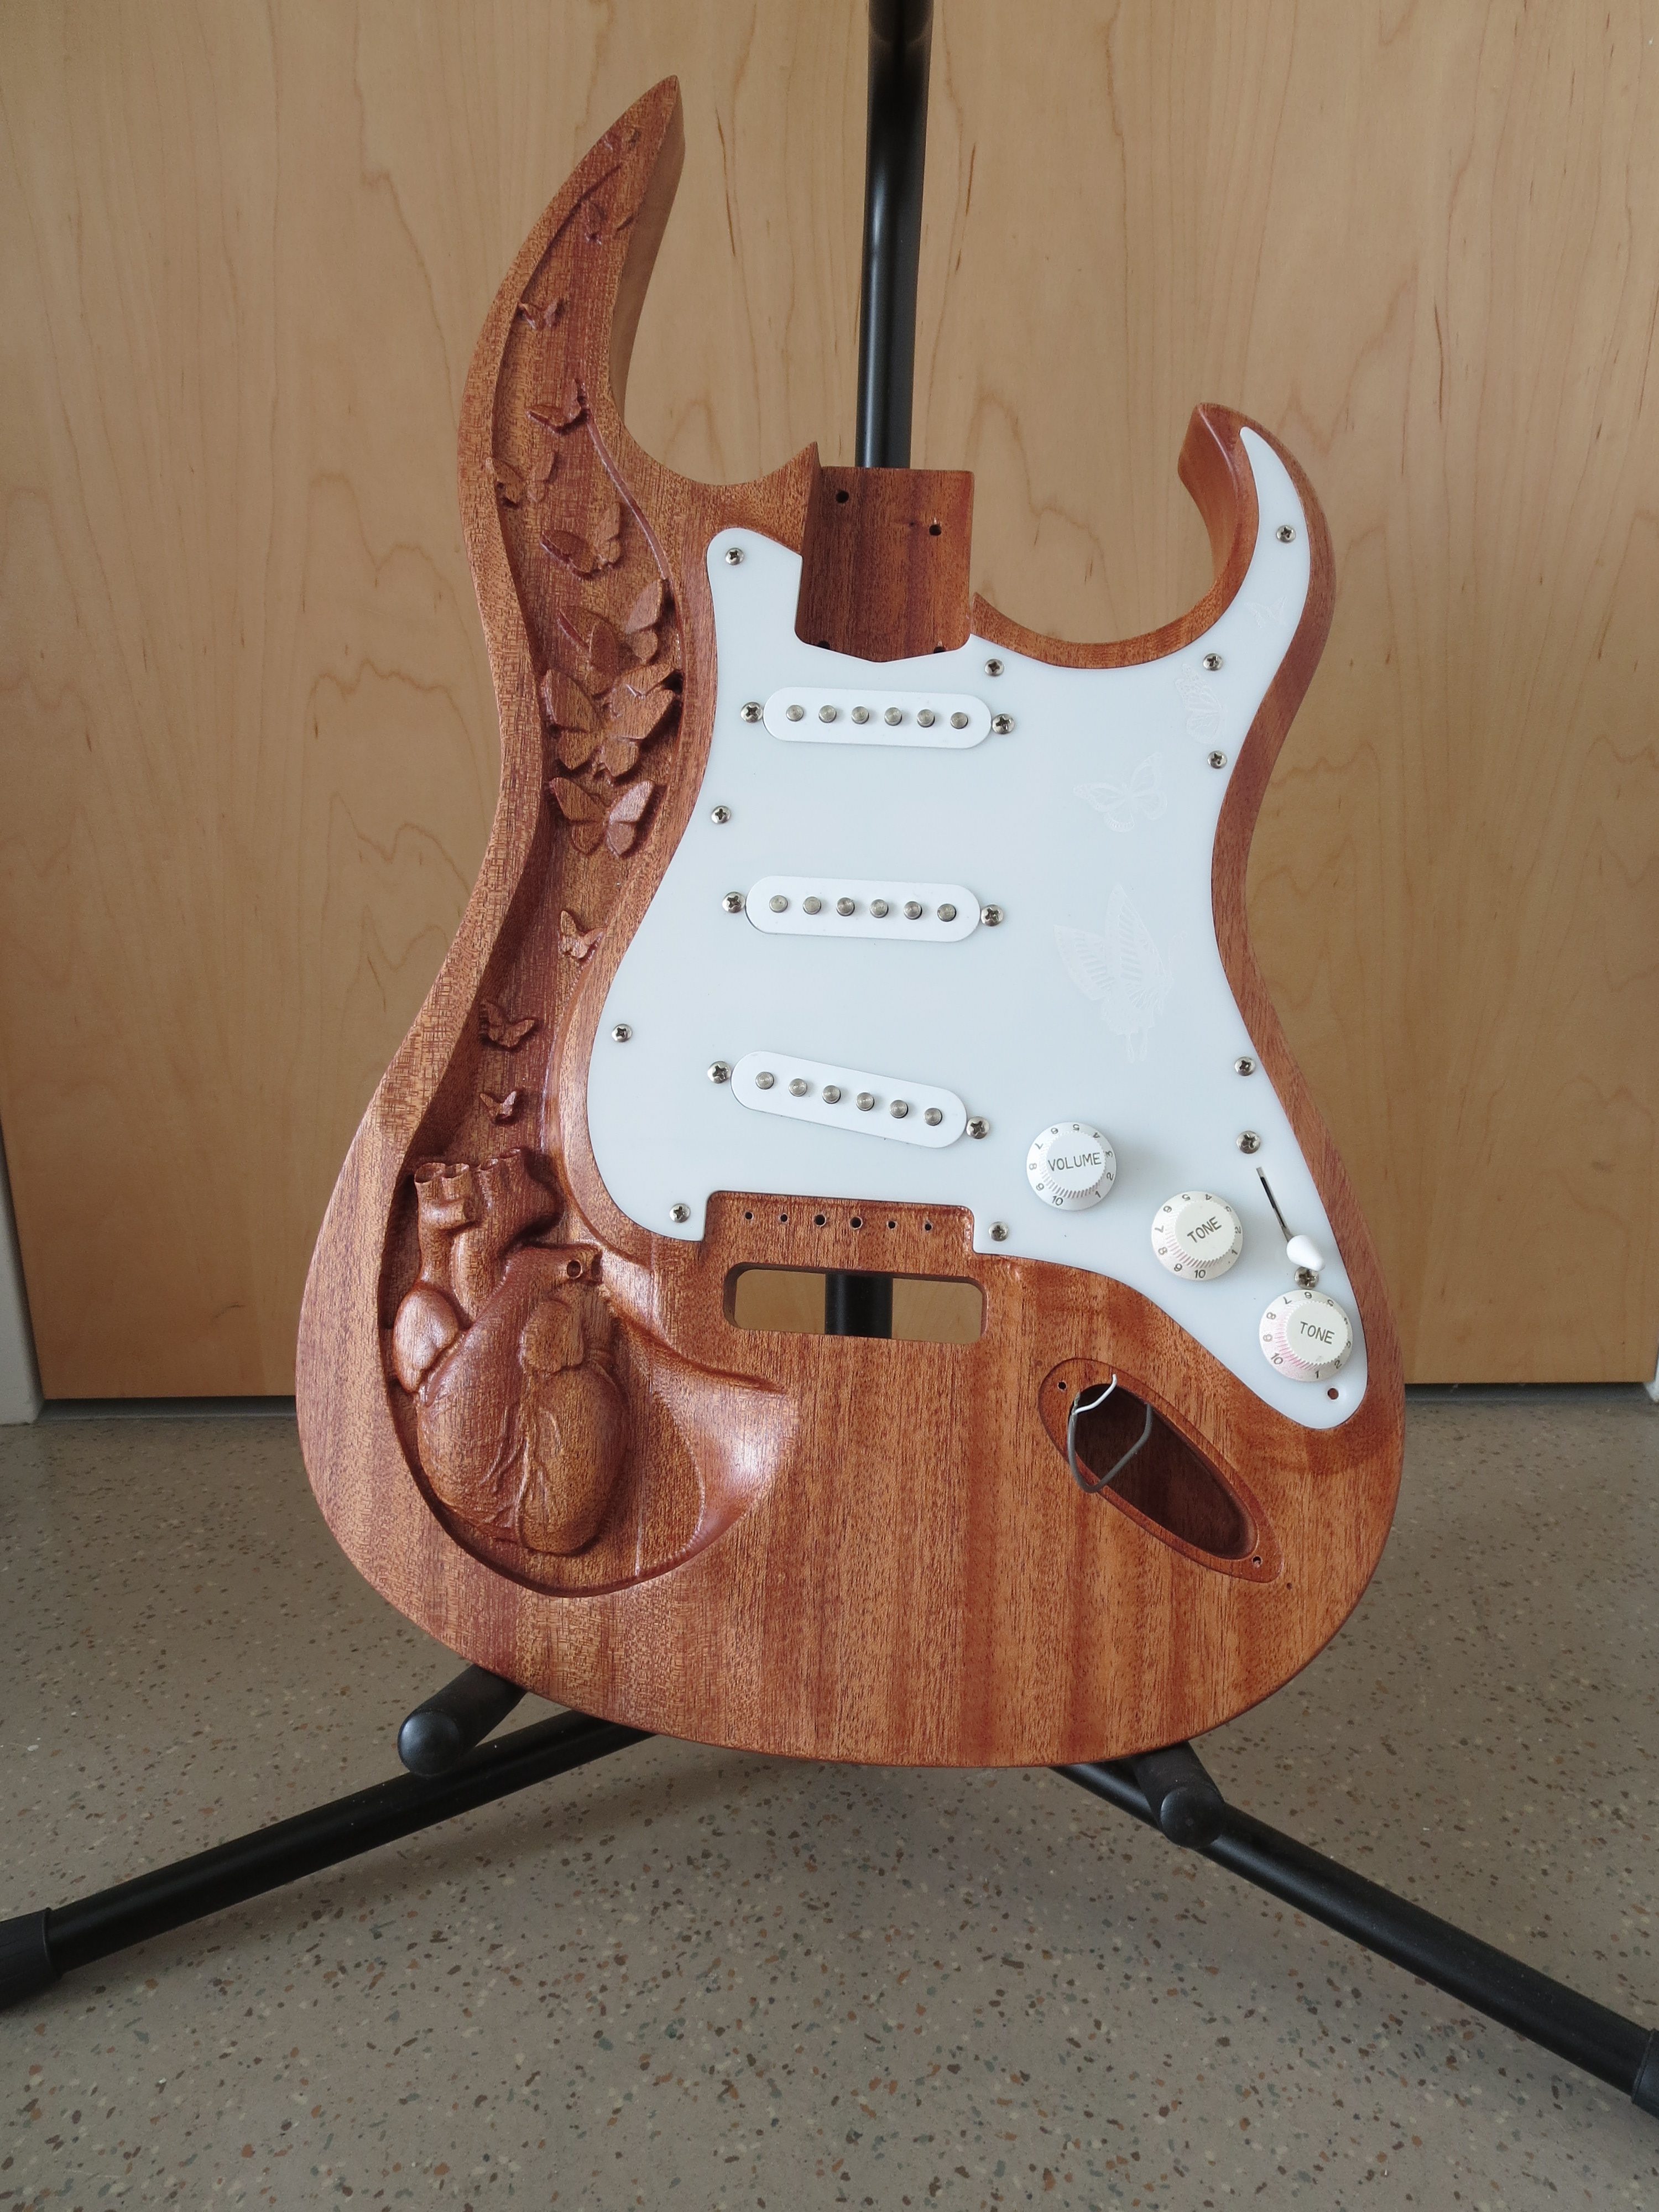
This 2D file served as the basis for my 3D construction of the guitar. I imported this file into the free (for students) 3D modeling program Fusion 360, by Autodesk. This took a lot of trial and error to get right. I included all the surface sculpting I would need in this model. However, the model does not yet represent the final shape of the guitar body. Notice that it is missing the pockets for the neck, pickups, and other electronics. This has to do with machining efficiency; it made more sense to create these features separately as toolpaths in V-Carve later on, rather than incorporating them into the 3D file, which would have resulted in slower and less precise machining. When I was ready, I used the ShopBot to mill a prototype out of XPS foam.
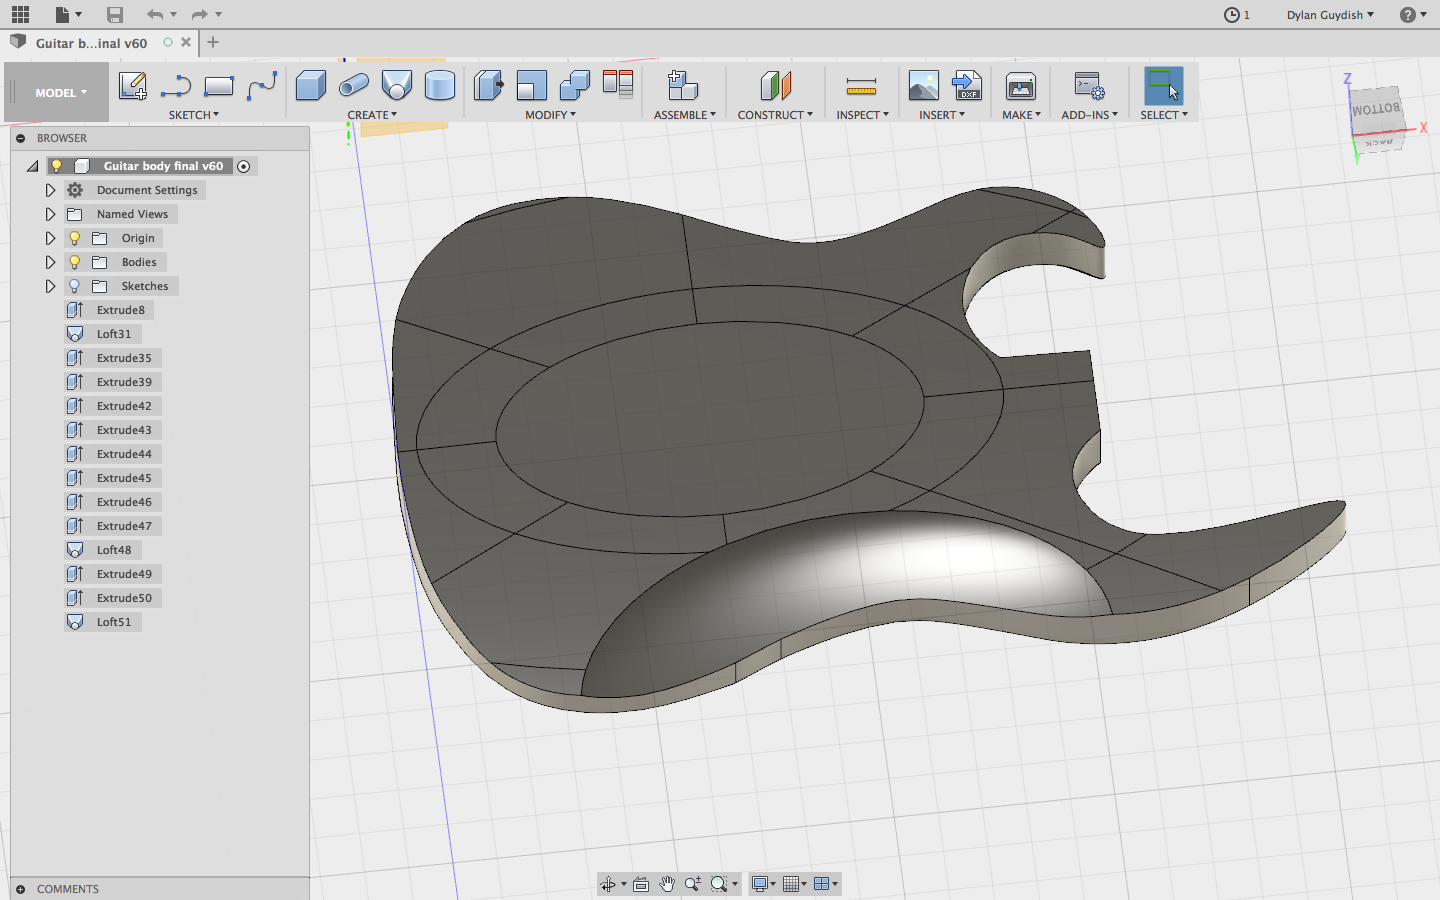
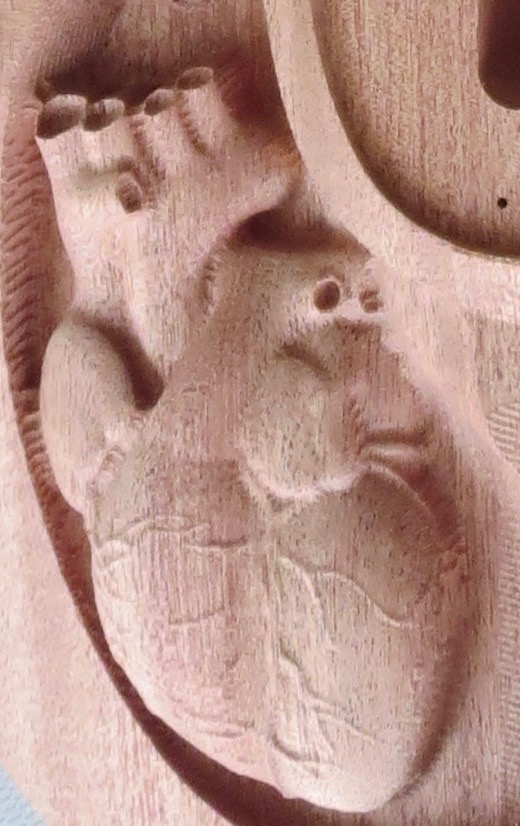
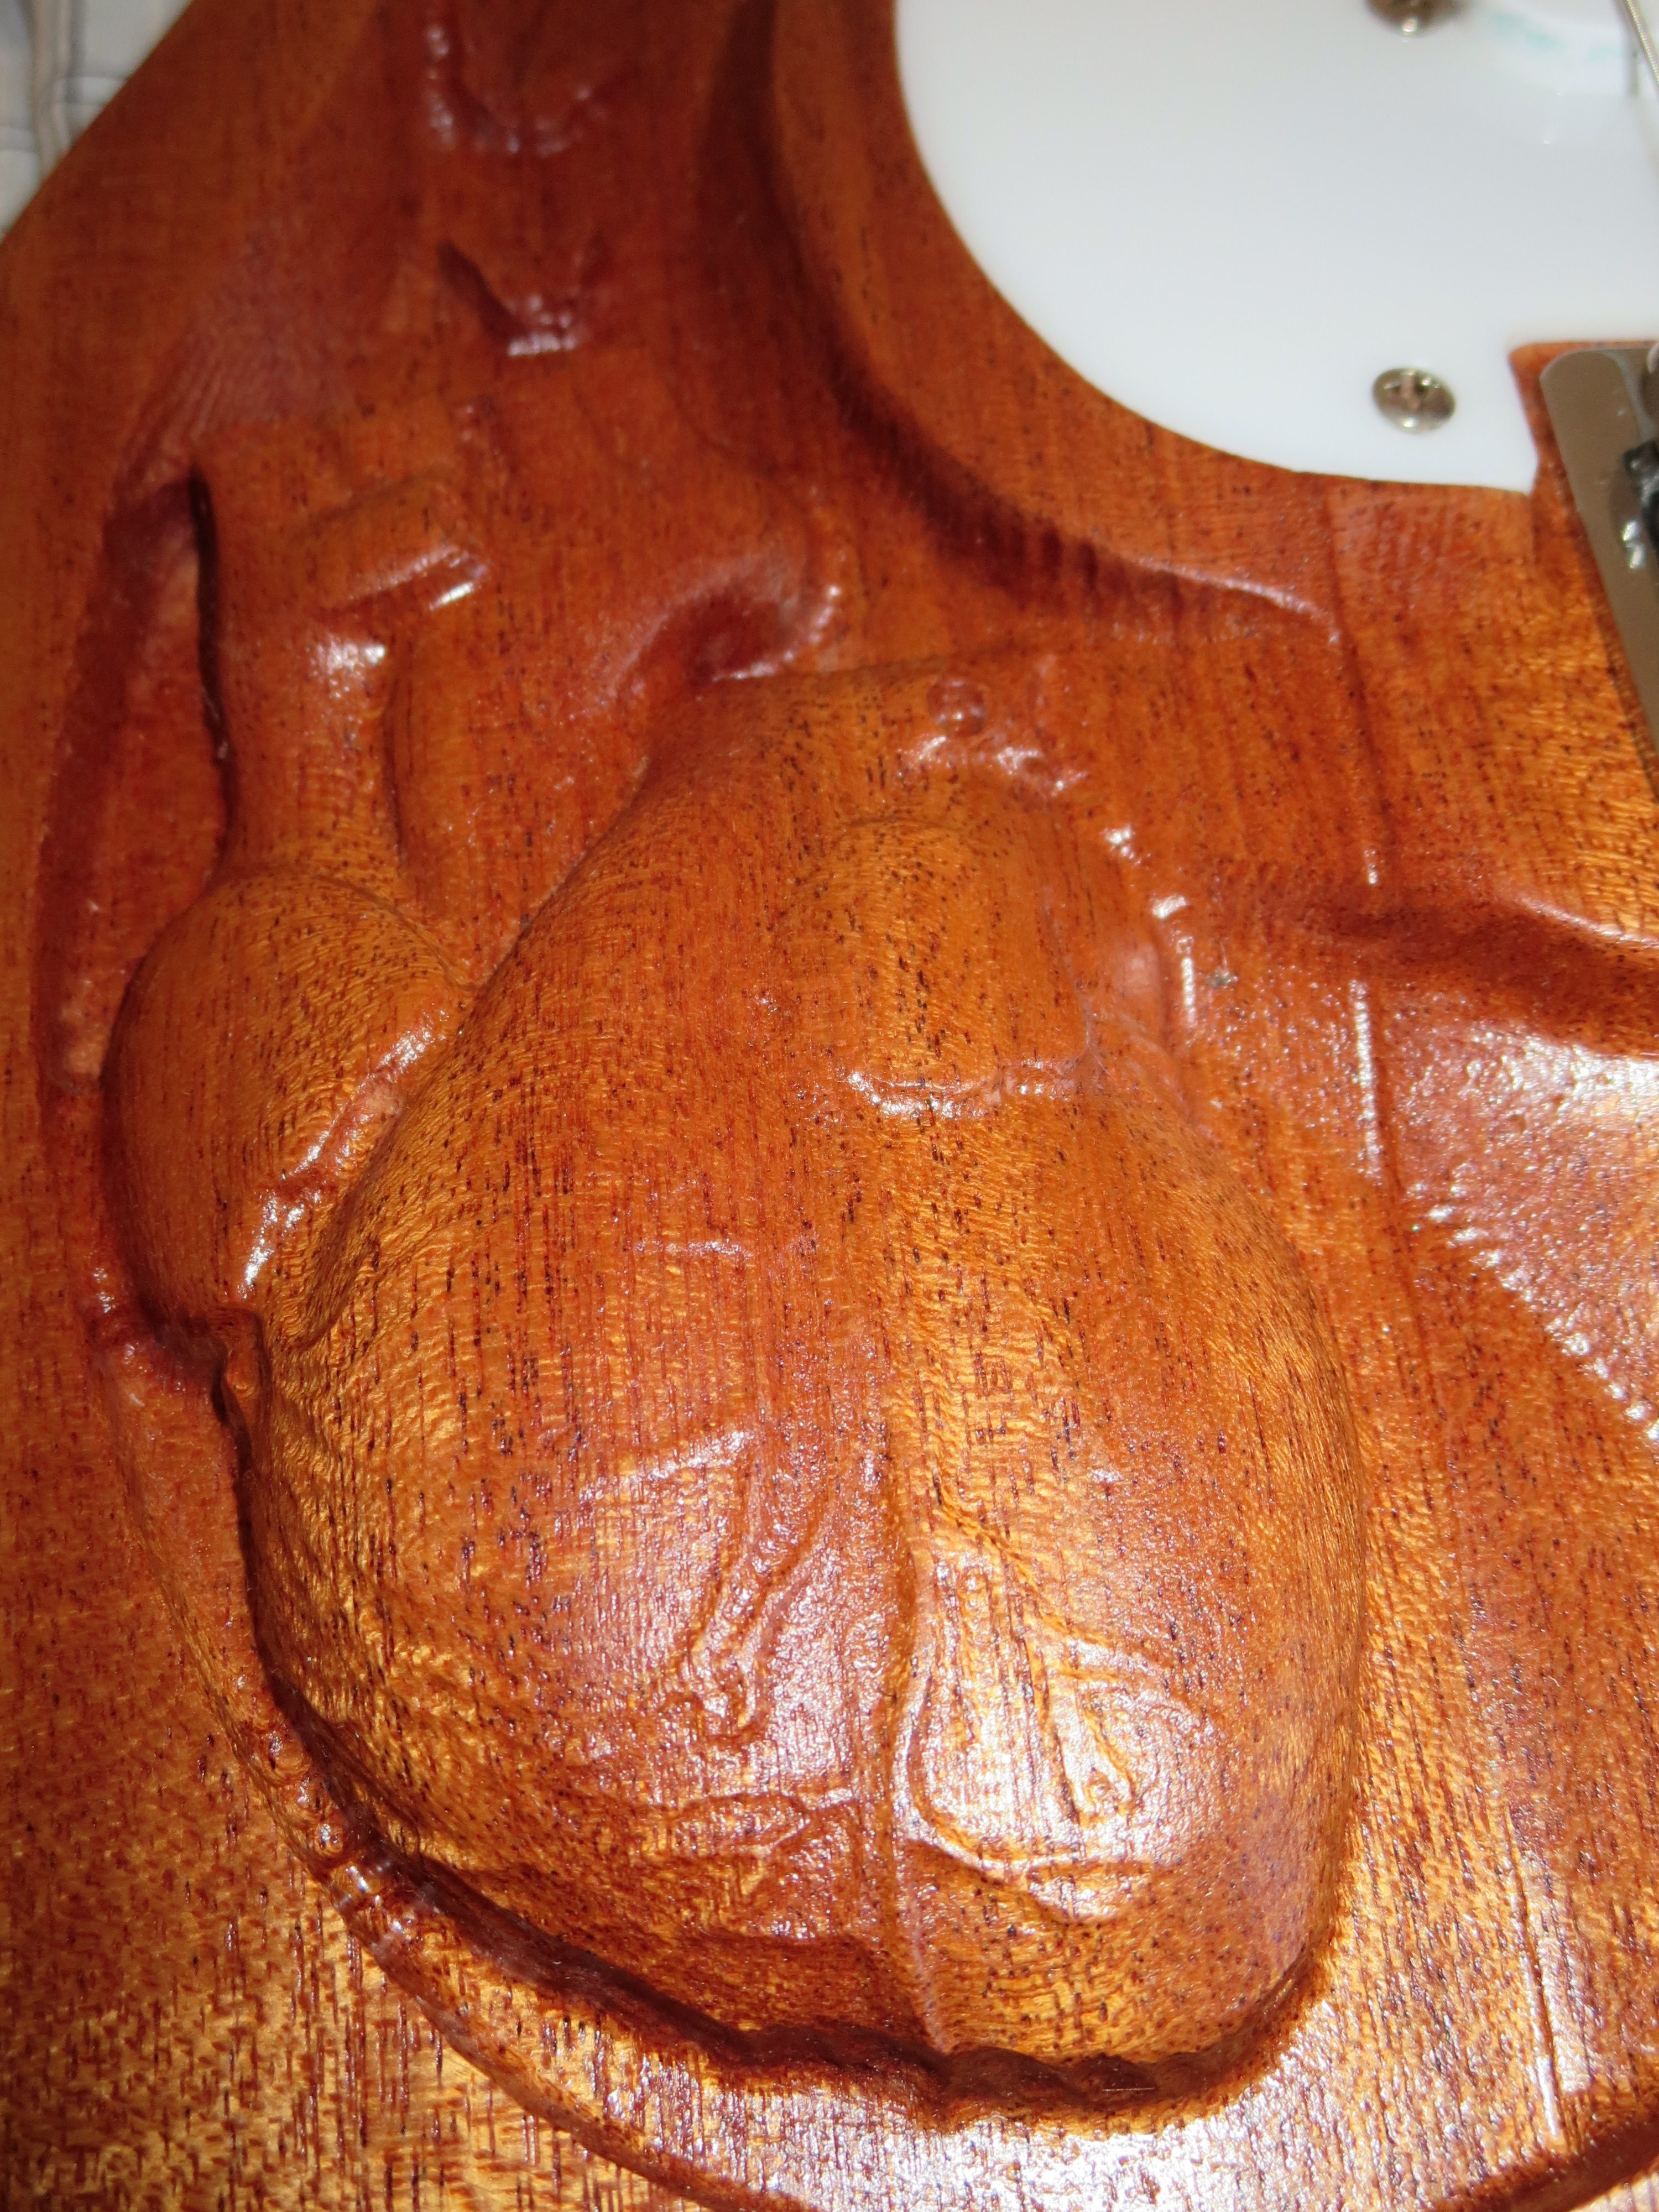
My physical prototype illuminated many areas for improvement, and I used this newfound knowledge to spend many more hours revising my 3D model. I also decided that I wanted to include 3D artwork in my guitar. Naturally, hearts and butterflies matched my personality best…
Since I lacked the skills to make nice things myself, I found designs that I liked online in the form of .stl files, a common 3D filetype. Next I had to incorporate them into my existing guitar model. Because Fusion 360 was not amenable to mashing together multiple .stl files, complaining that they were too imprecise a filetype to work with, I used another program (Meshmixer) to do just that. Meshmixer allowed me to import all the files I wanted as .stl’s, and then arrange them and “glue” them together in any way I wanted. I was then able to export my new Frankensteinian creation as a single 3D file that incorporated all the elements I desired. Note that this file was still missing the pockets for electronics, which was an intentional decision. Anything that could be milled using a standard 2D toolpath on the ShopBot, rather than 3D sculpting, was left out.

II. Machining
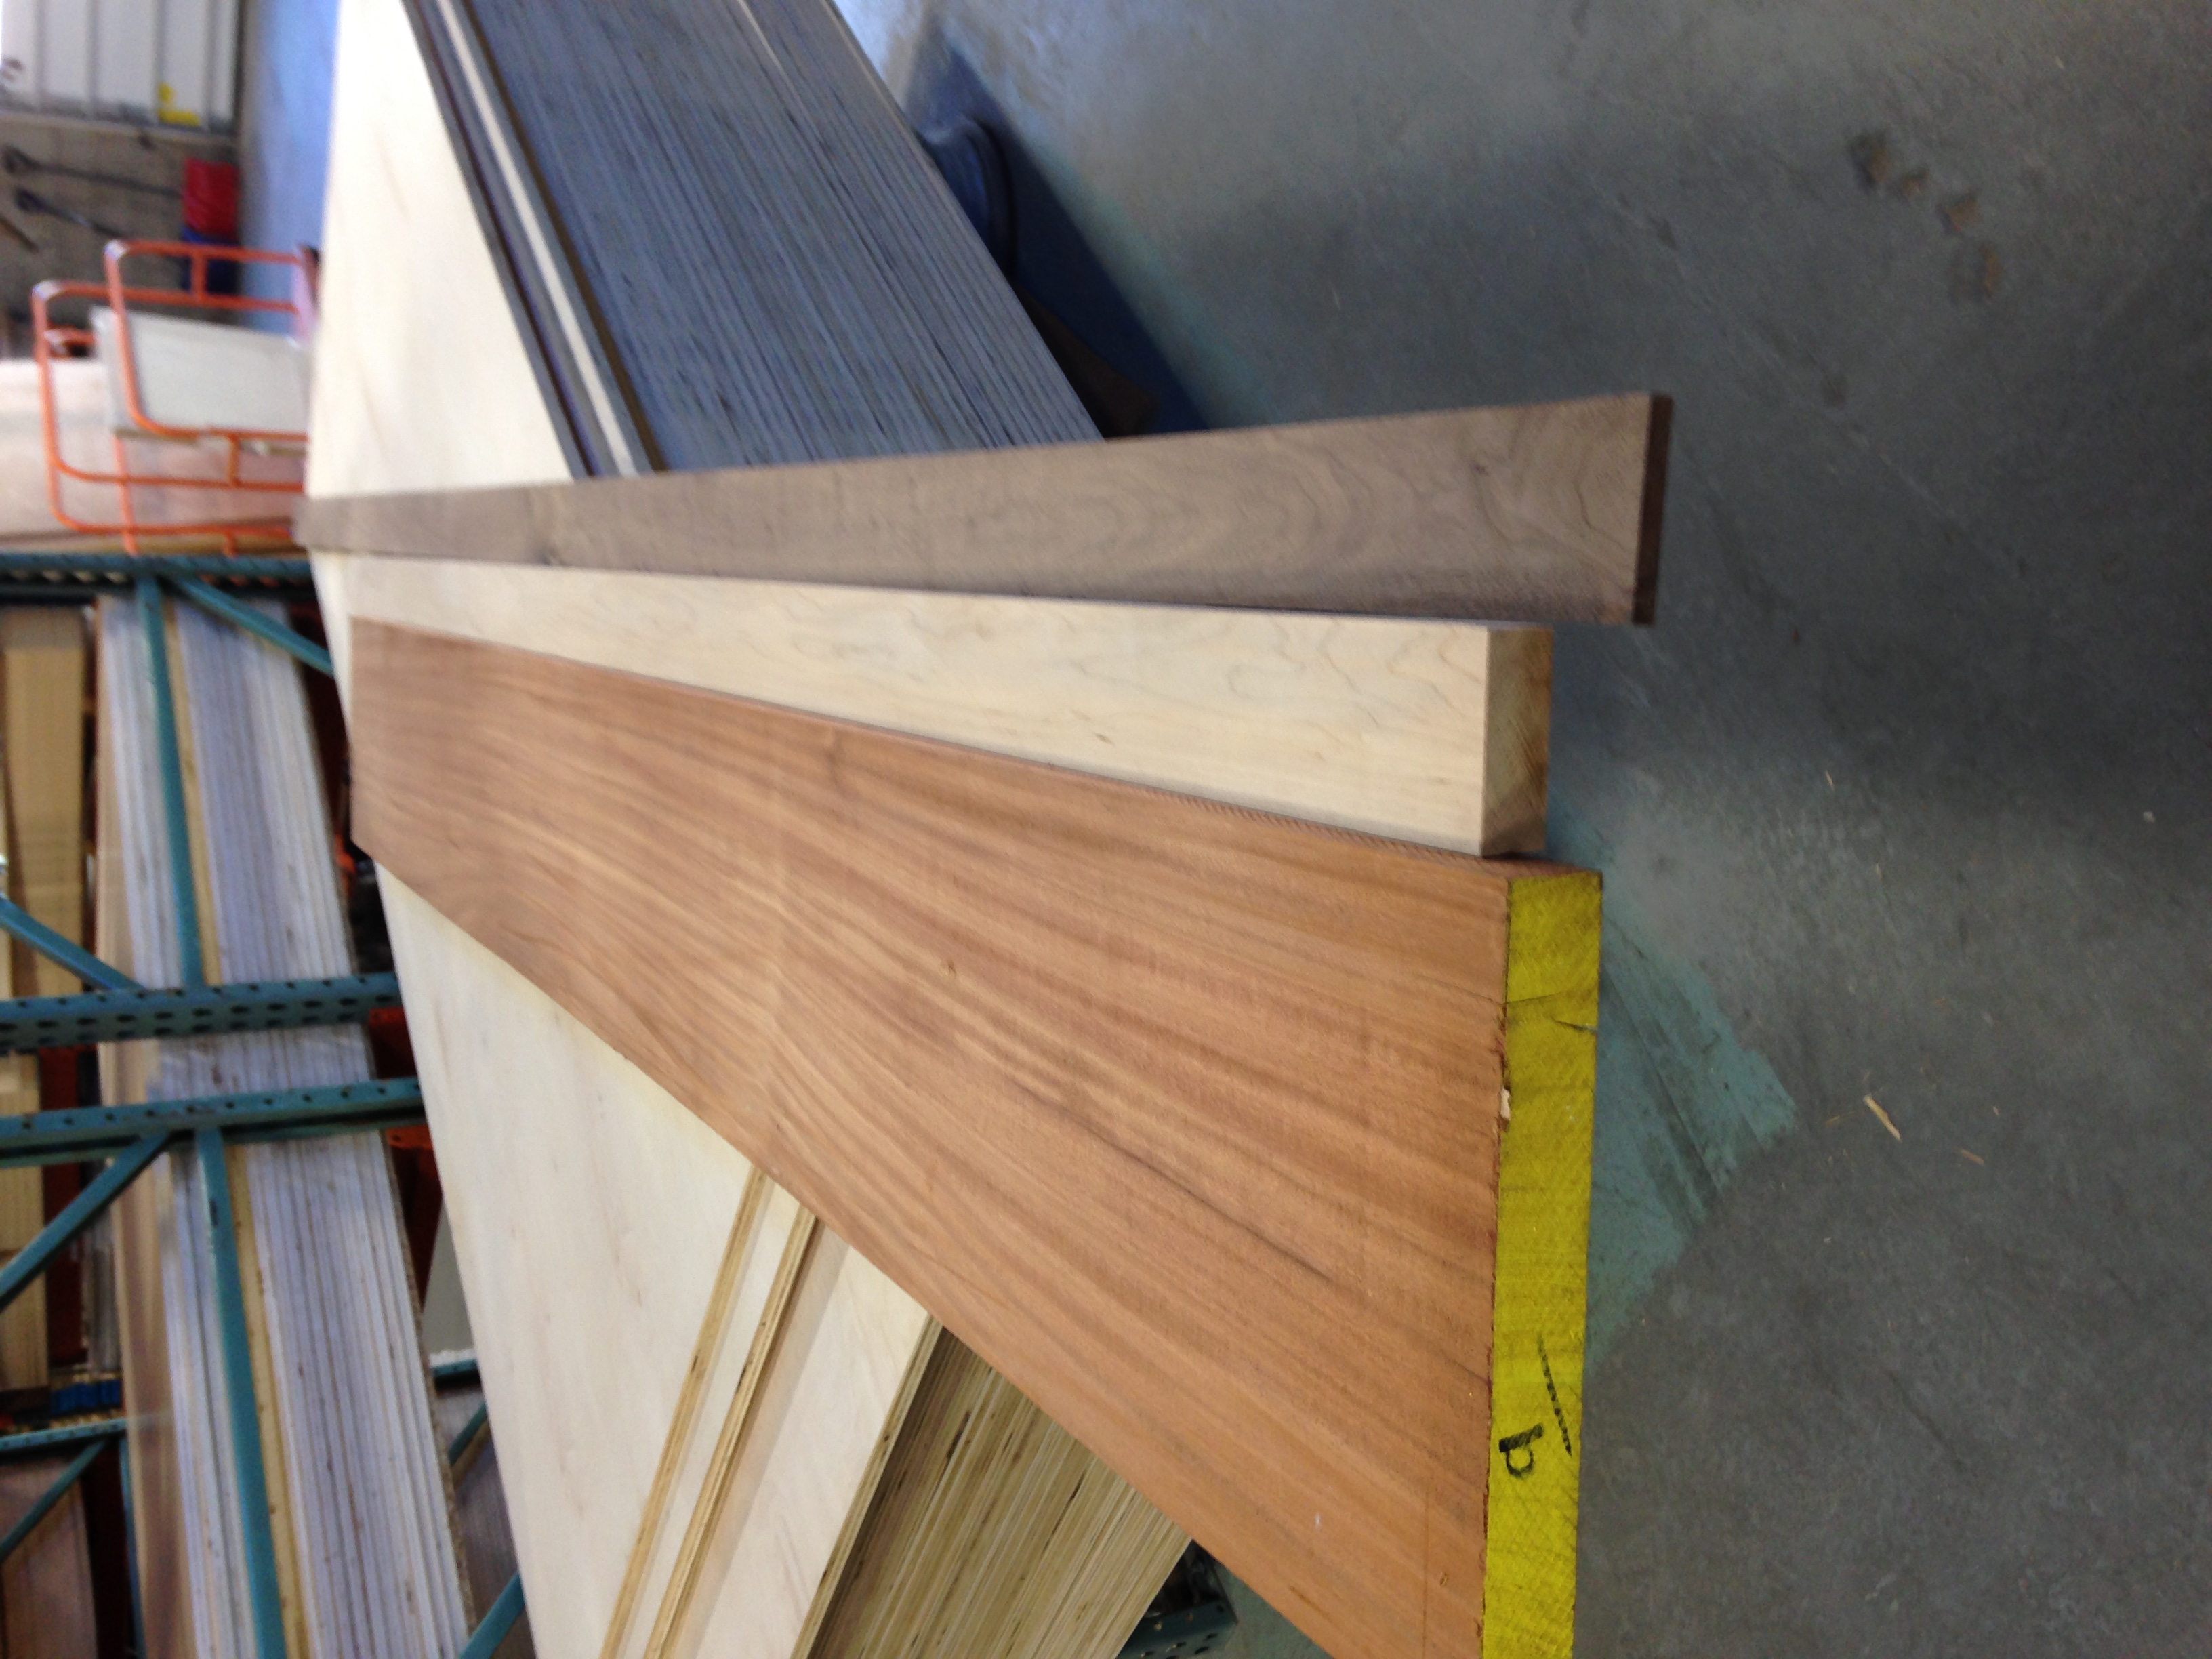
Now I was ready to buy my materials! I made the mistake of biking all the way to Boulter Plywood, purchasing 20+ pounds of lumber, and then biking back. I chose mahogany for the body, which was a pricier but aesthetically pleasing option that also happened to come in the wide dimensions I needed. For the neck and fingerboard, I bought maple and walnut, respectively. Many other wood types would also have been suitable, and my choices were influenced by a combination of strength, looks, and price. I made sure that my mahogany block was not longer than 2 feet, so that I could anchor it to the router bed.
a) Body
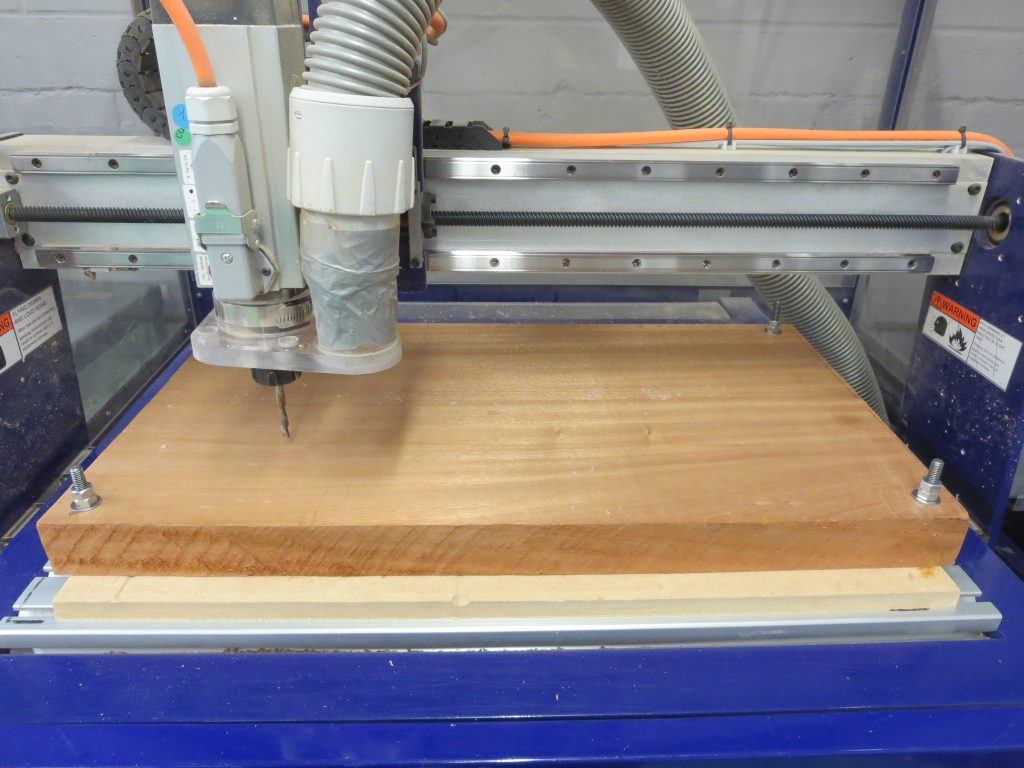
Because I intended to mill both sides of my material, I needed to make sure that they would line up correctly. This was one of the most difficult parts of the entire project, and took a long time to get right. After clamping my material on the machine bed, I drilled pilot holes all the way through the wood (using the router) and also through the spoilboard, being careful to align them directly above the slots. This allowed me to run threaded pins through the material and spoilboard, and into the drop-in anchors in the machine bed. Importantly, the exact locations of the pins were also saved in my original Illustrator file and my V-Carve file. These pins were now immobile, and would stay in place when I flipped the material to mill the back side. I capped each pin with a washer and two nuts, to ensure that the material was very firmly clamped down. This process took several hours to get right.
Next, I began working on my V-Carve file, which would allow me to create toolpaths from the 2D and 3D files that I already had. I began by importing both my 3D .stl file, and my 2D Illustrator file, into V-carve, making sure that they lined up perfectly. I would be using both to create the toolpaths necessary to mill my guitar body. I created 3D roughing and finishing toolpaths first, taking care to optimize my bit choices and feed rates for my specific material via trial and error. This would save a lot of time later, which was a worthwhile step for such a large job.
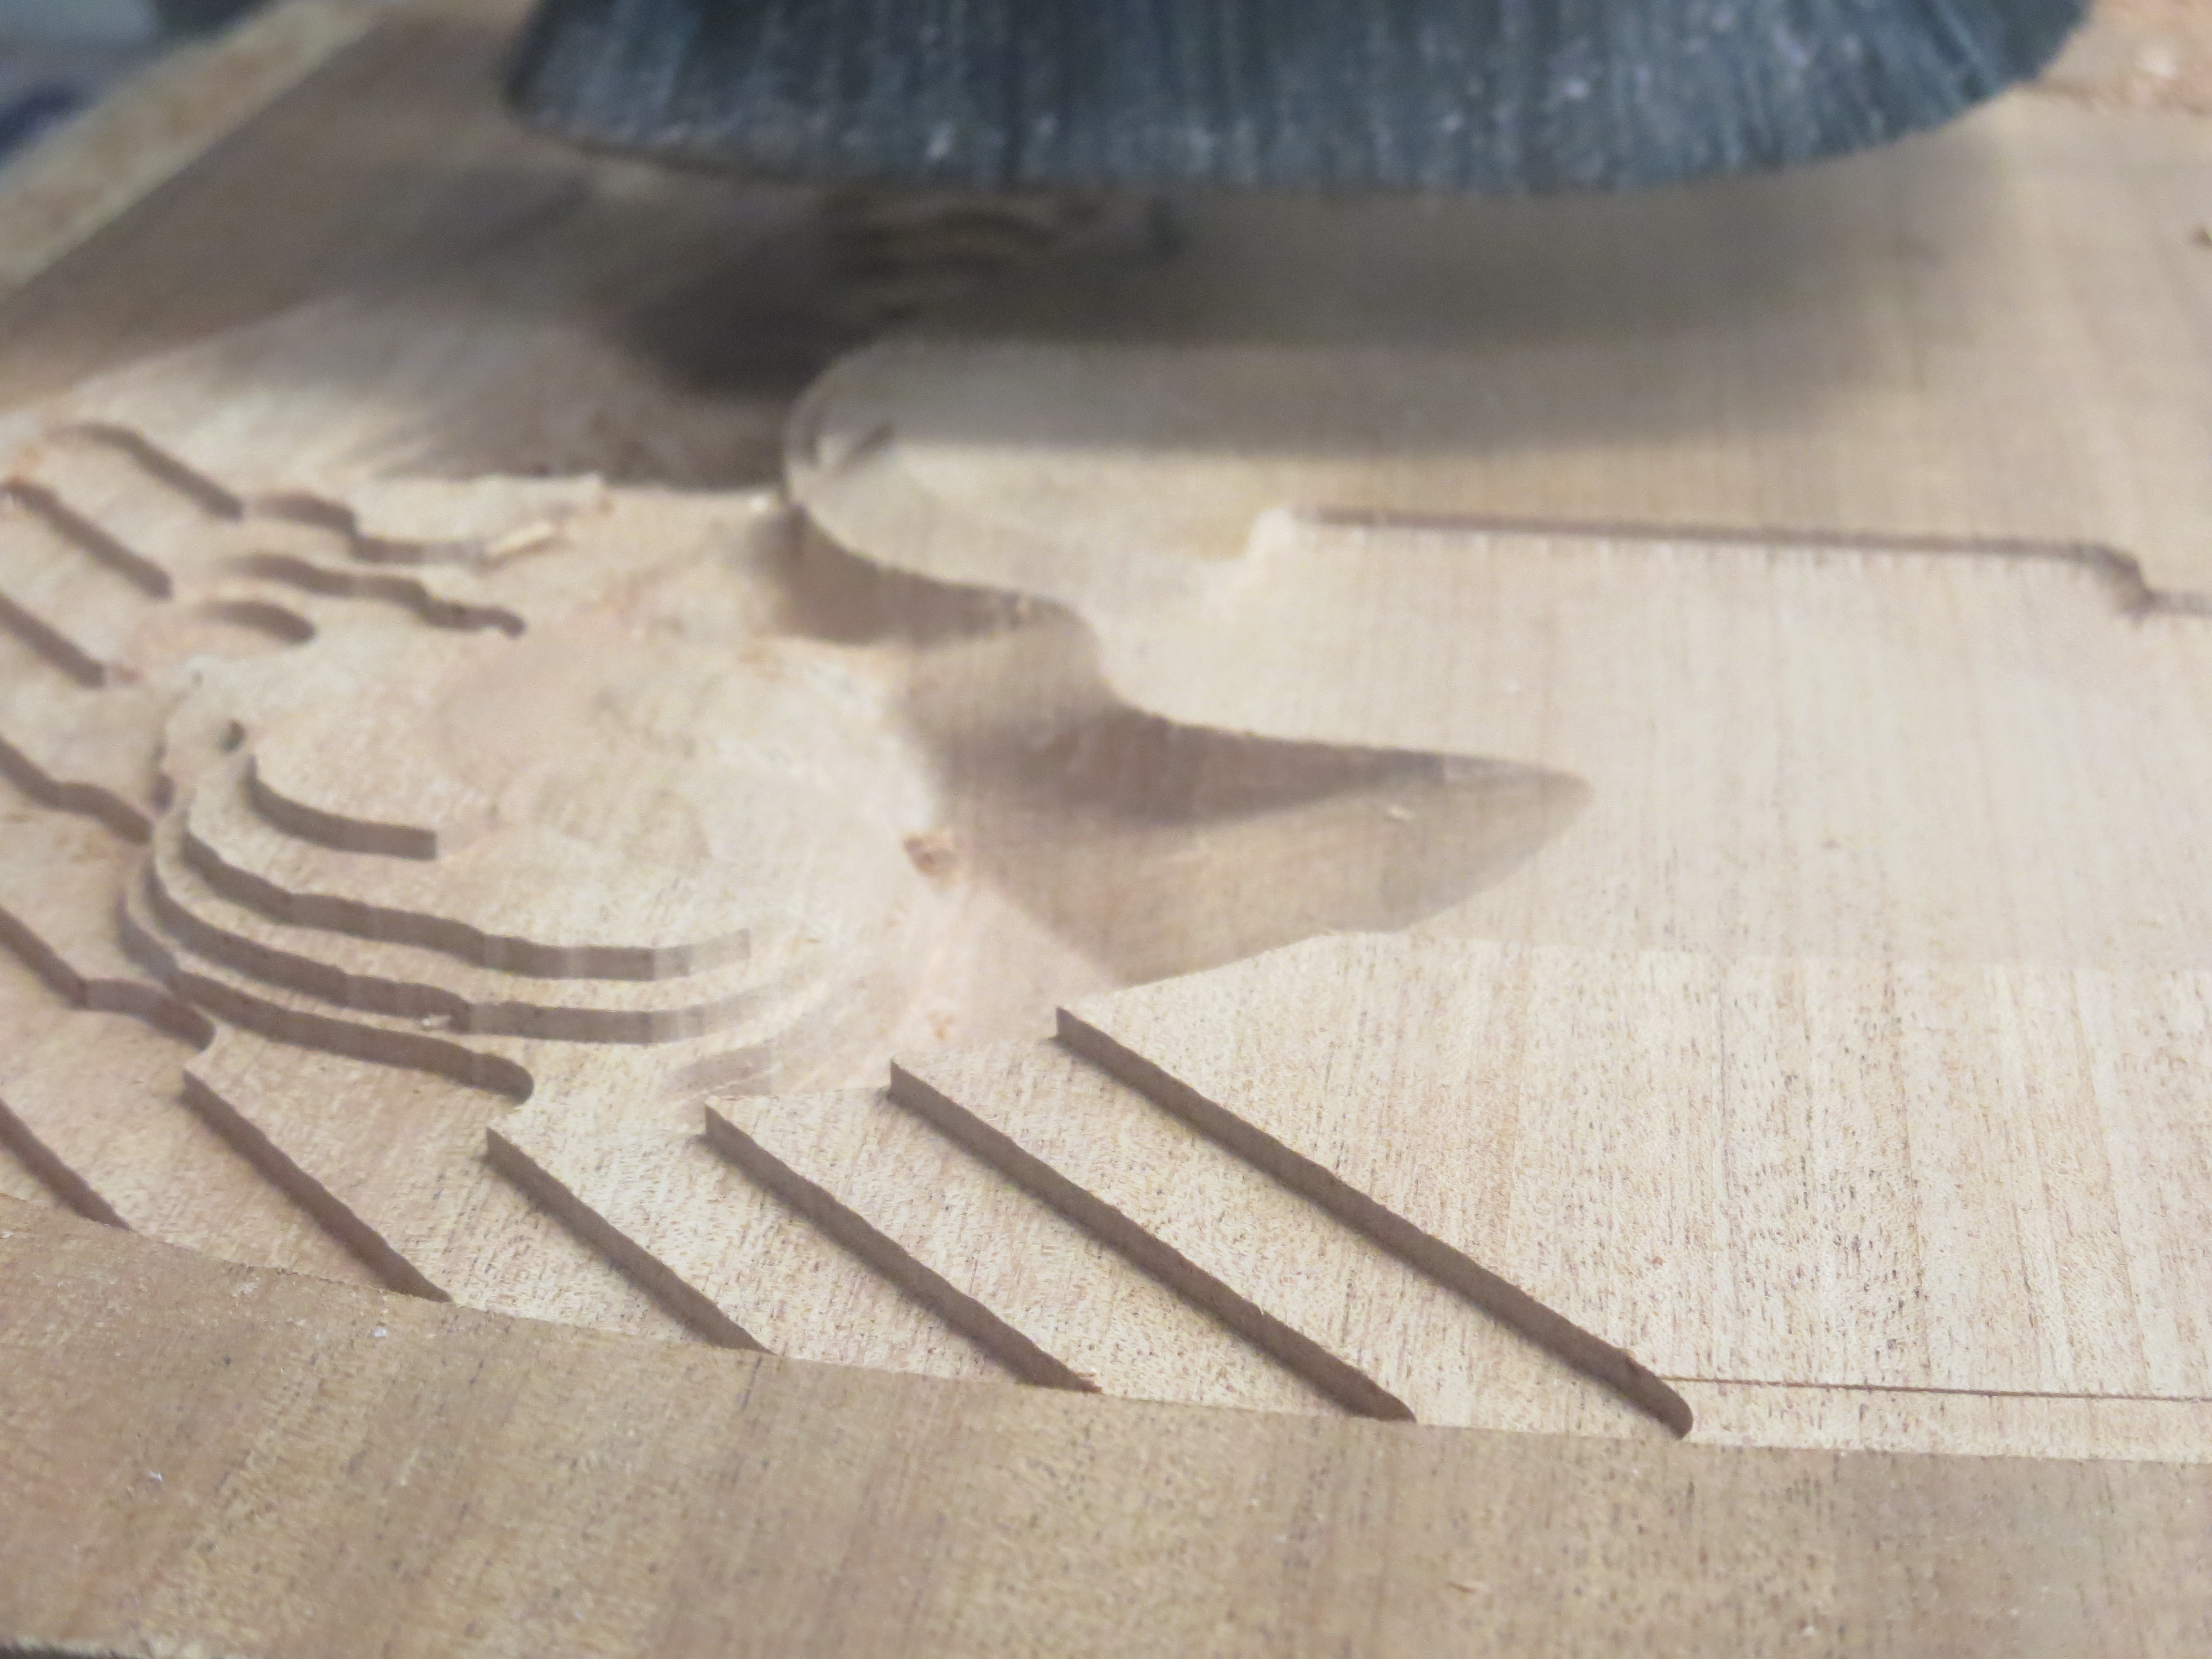
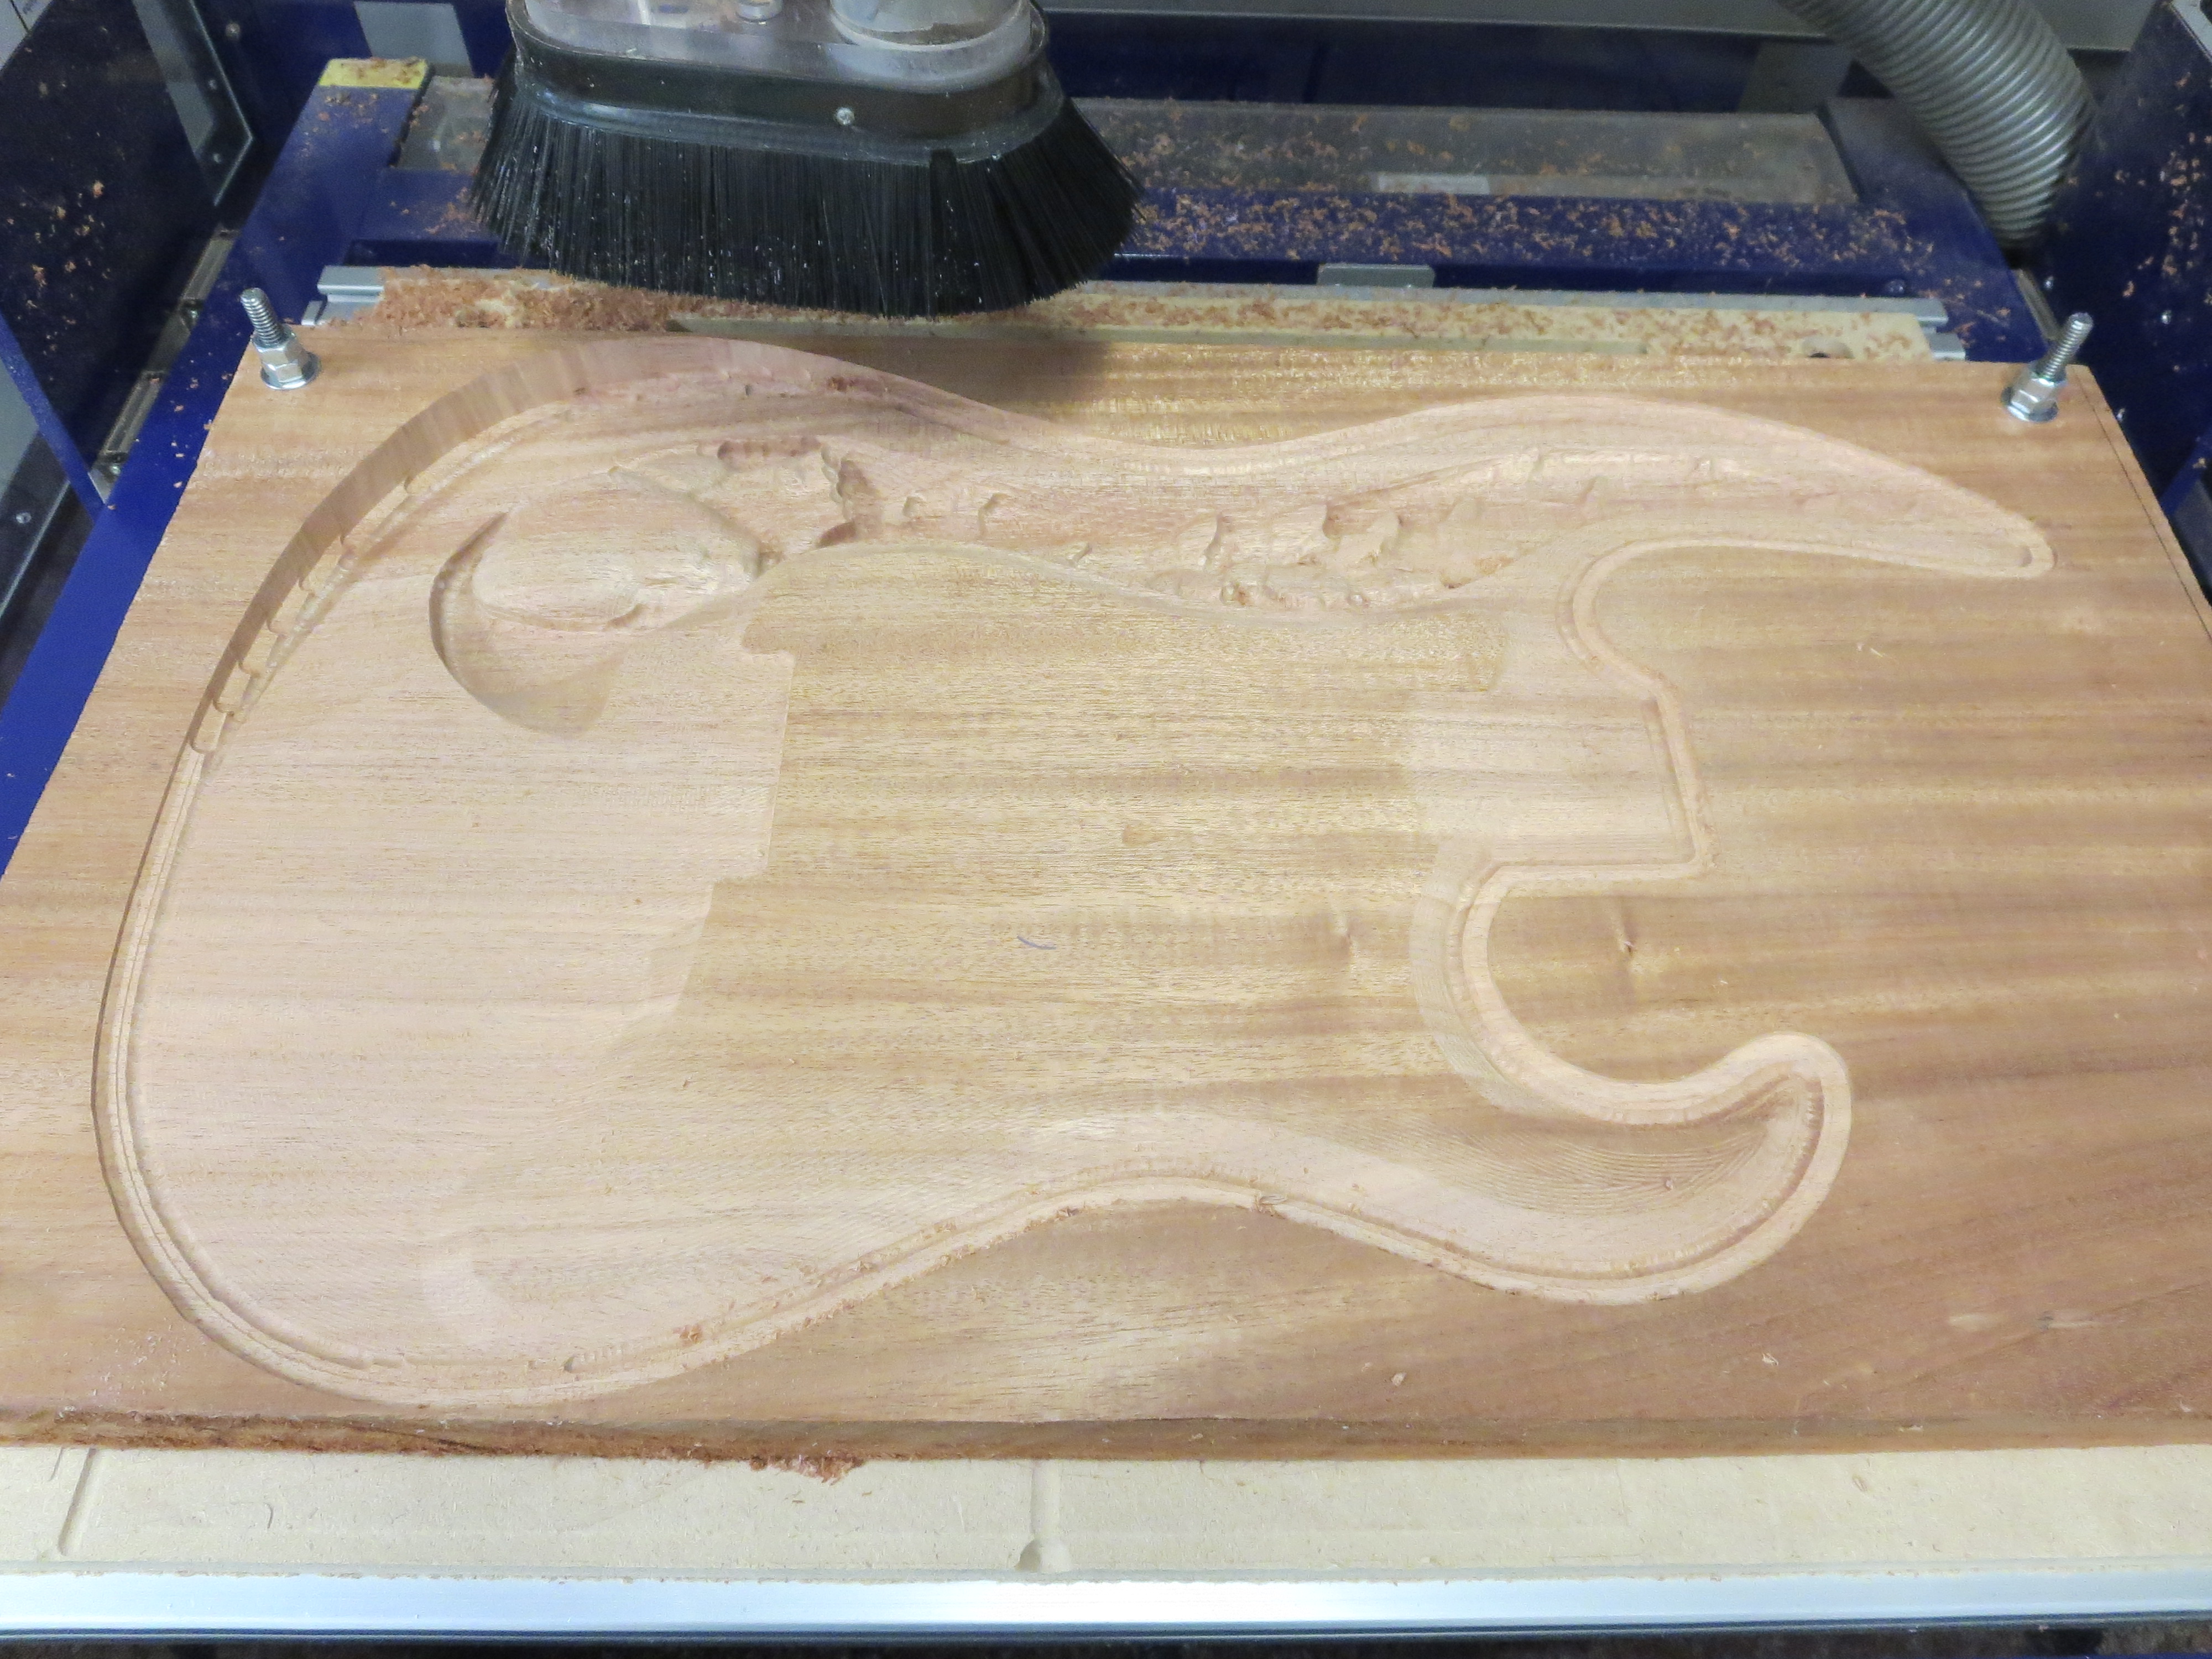
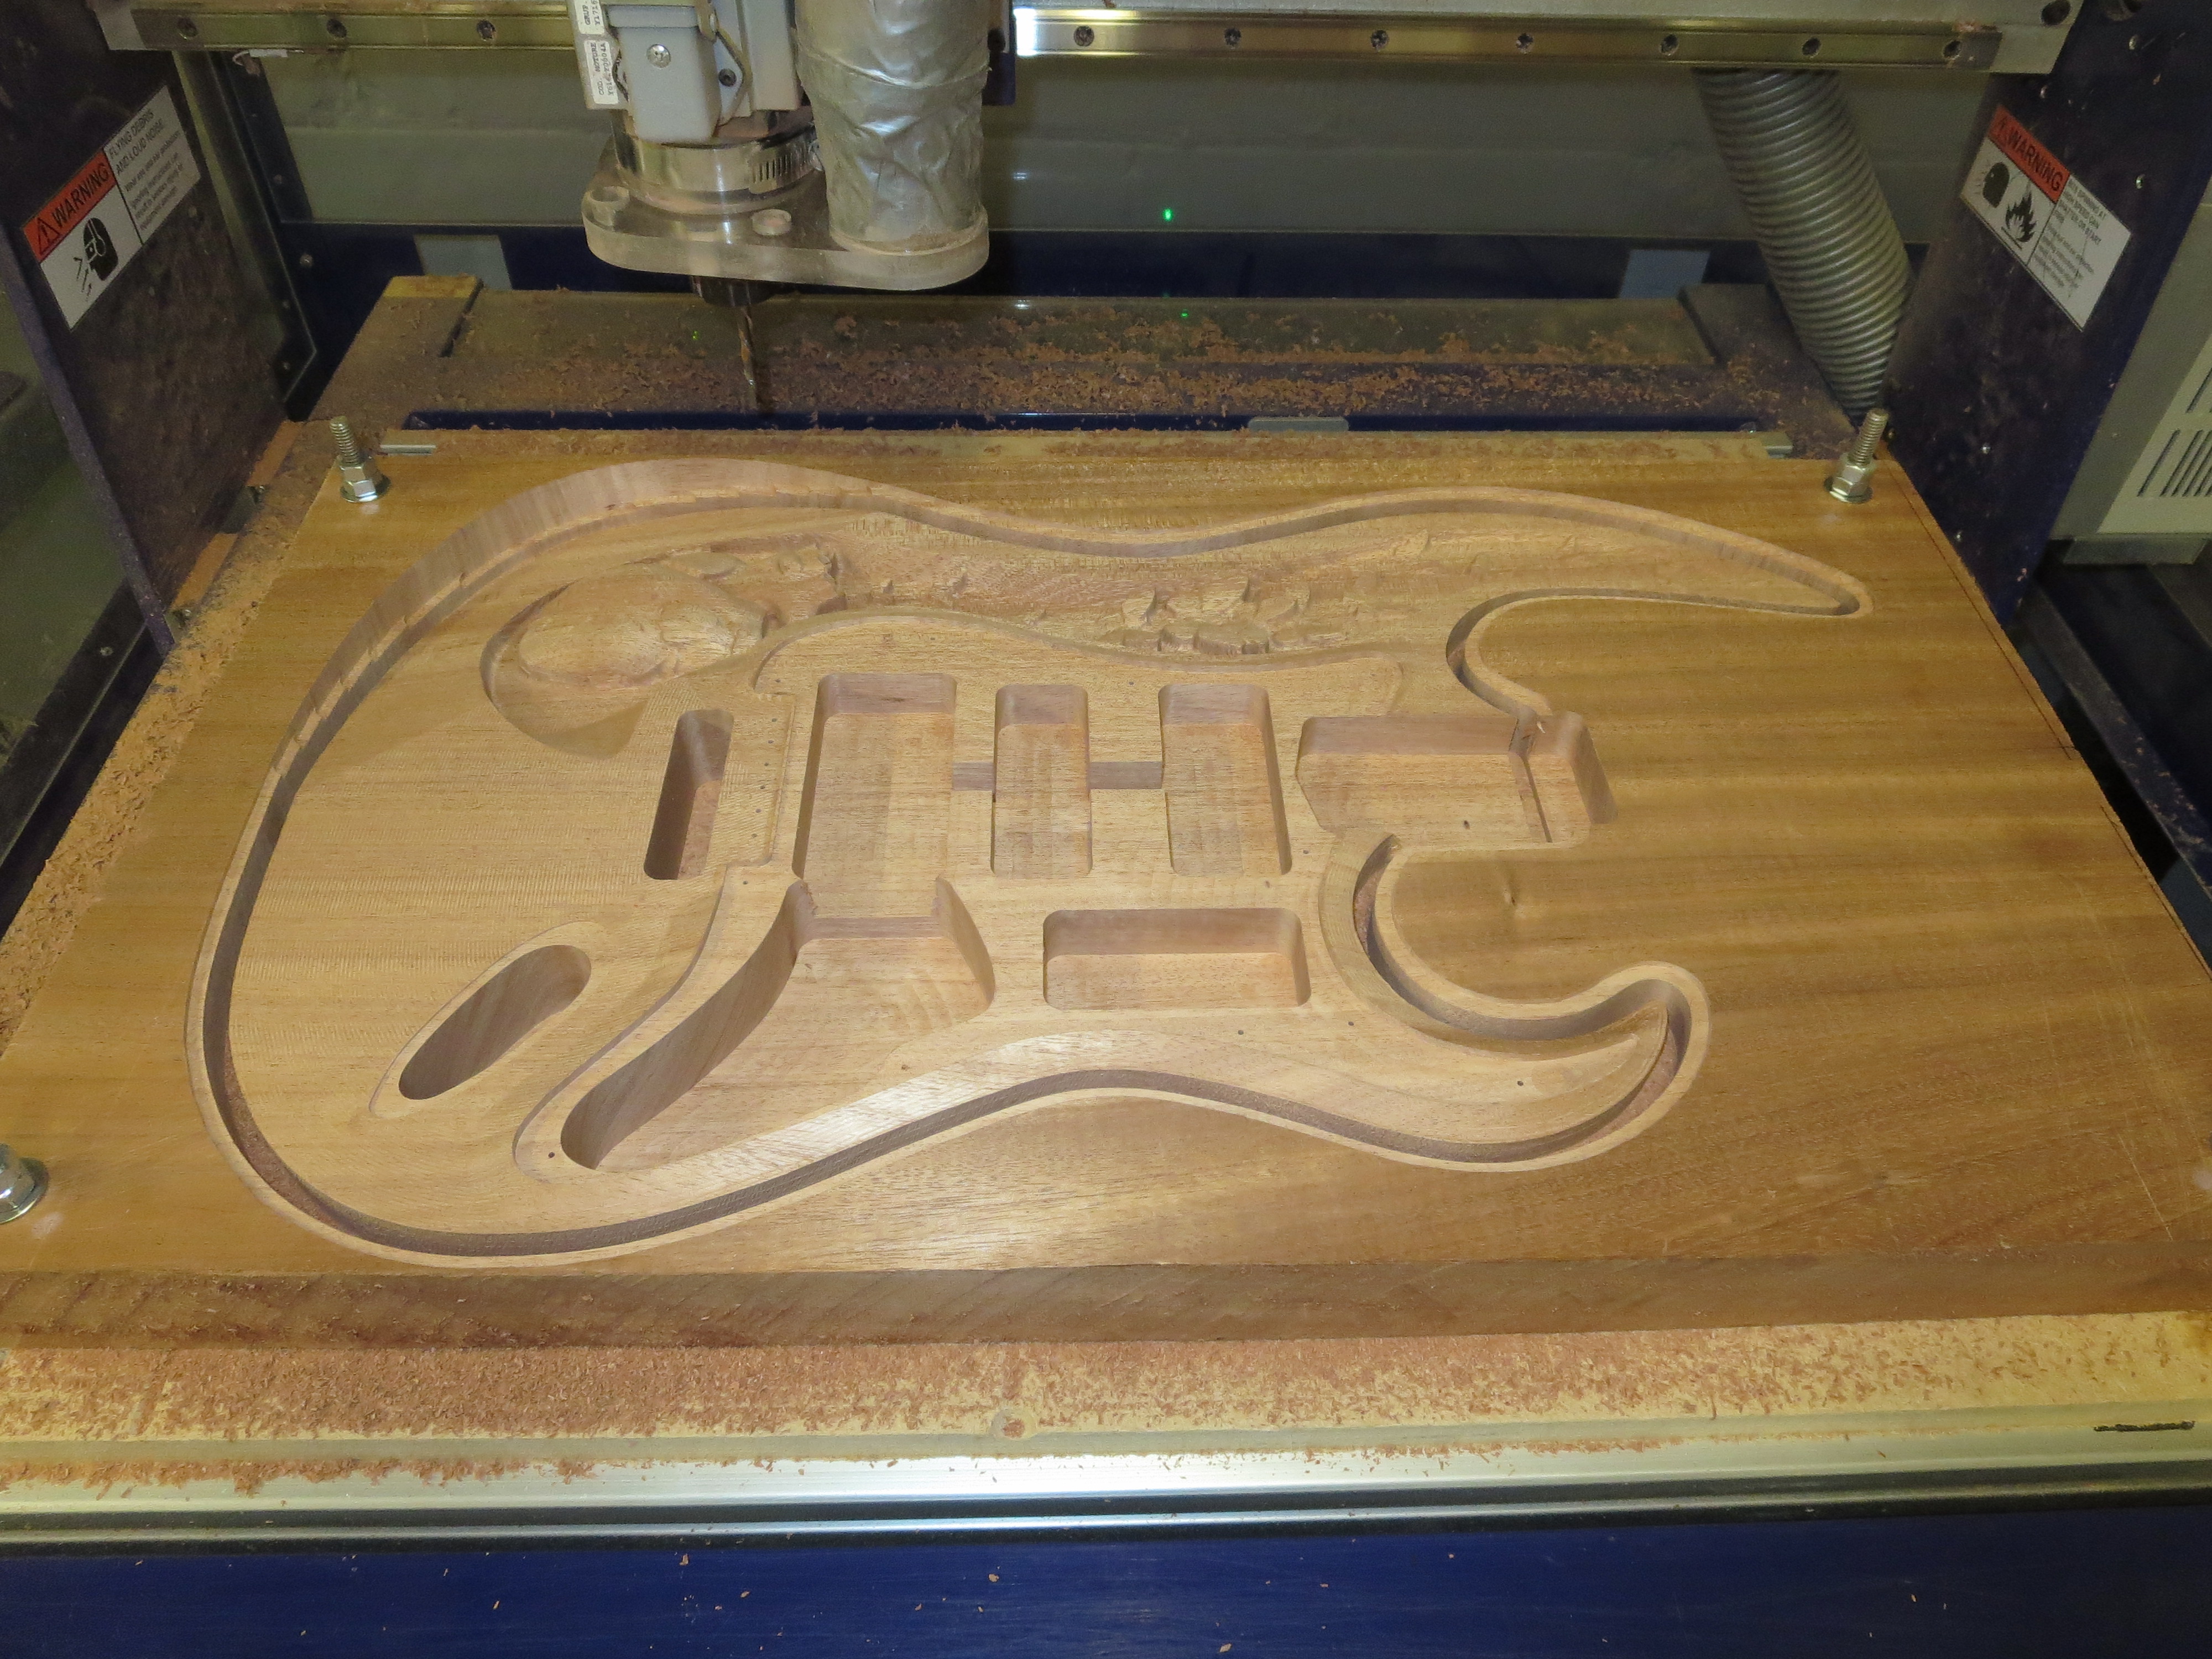
Once the 3D sculpting had finished, I created the remaining pocket toolpaths in V-carve from my original Illustrator file, and milled them as well. I also included pilot holes for all the screws I would be using later. My last cut was a profile toolpath around the exterior of my guitar body. I made sure to go only halfway through, since I did not want to cut the part loose yet.
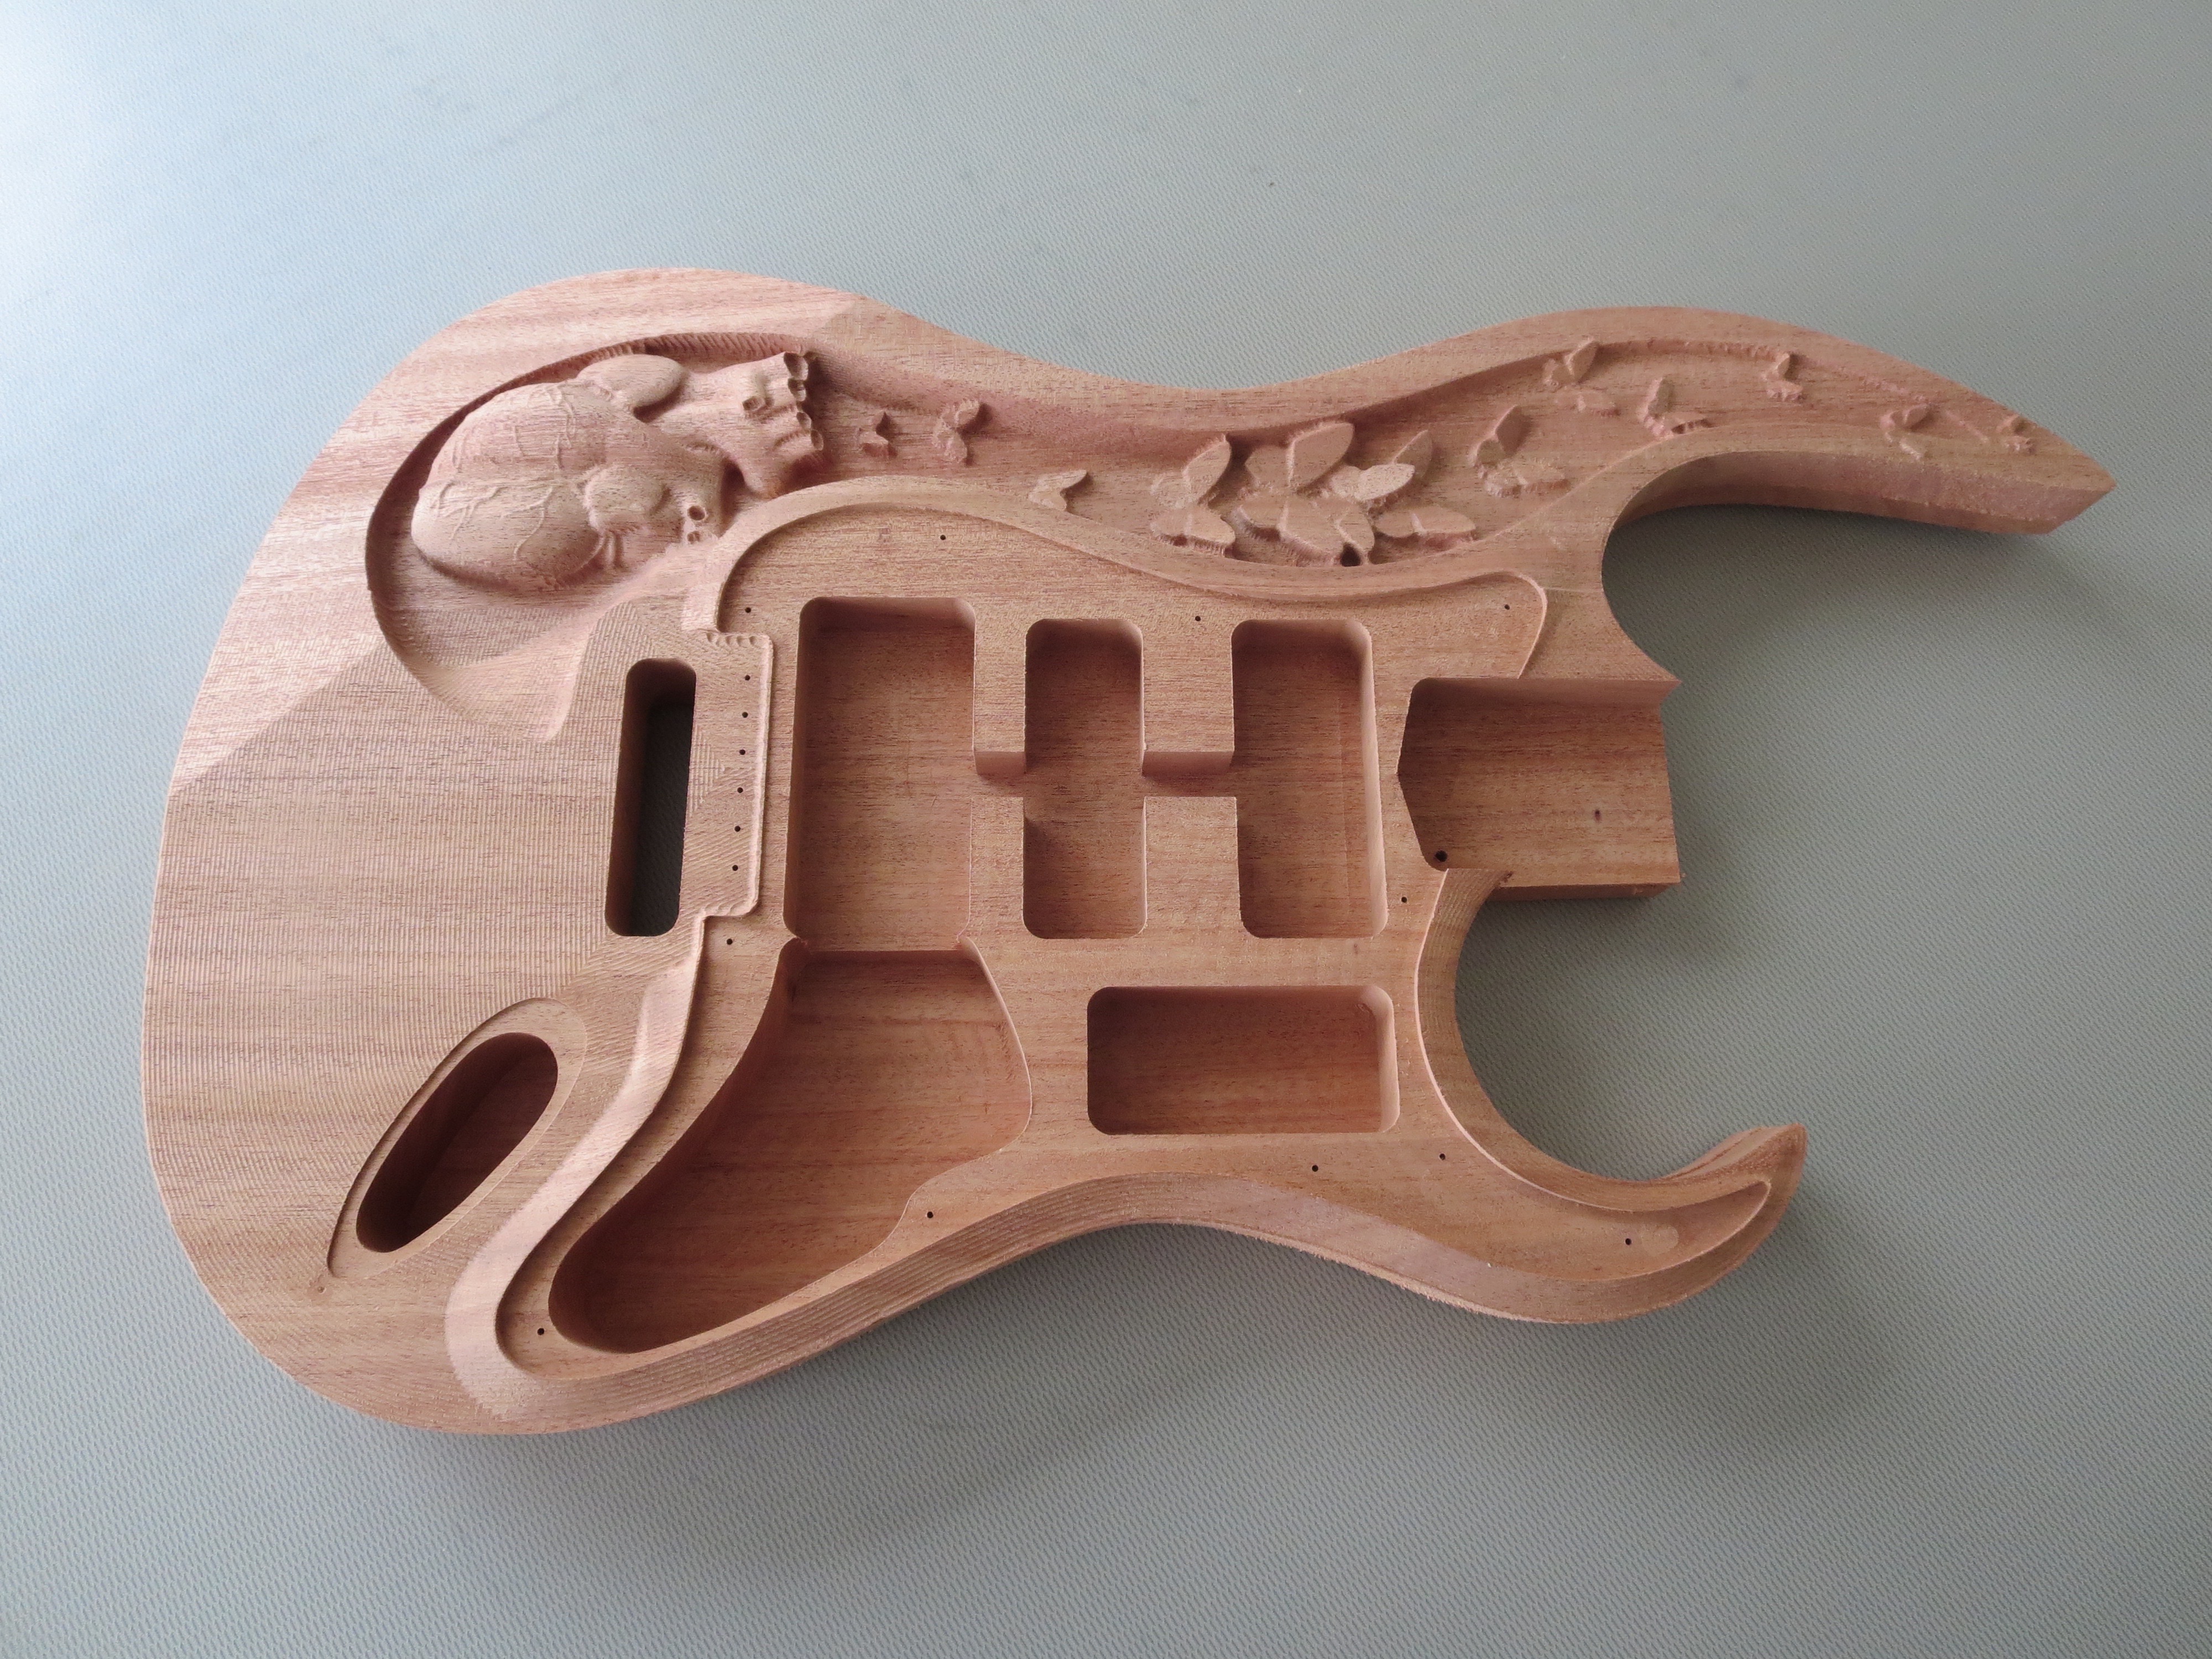
When I was satisfied with the front, I created a new V-carve file for the back side. I imported the same .stl model and the Illustrator file again, but this time mirrored everything. I flipped my half-carved piece of wood over and anchored it into the same pin holes, making sure that everything was aligned precisely. I was also careful to save the machine’s zero point, which was the same for the front and back cut jobs. I finished the back cut by completing the profile that I had started from the other side, so that my guitar was set free. The entire body milling process took three days and upwards of 10 hours.
b) Neck
I was tempted to stop here, having successfully created this thought-provoking piece of wall art, but there were still a few months left in the semester, so I decided to persevere. My next step was to mill the neck, which I had also designed as a 3D file using Fusion 360.

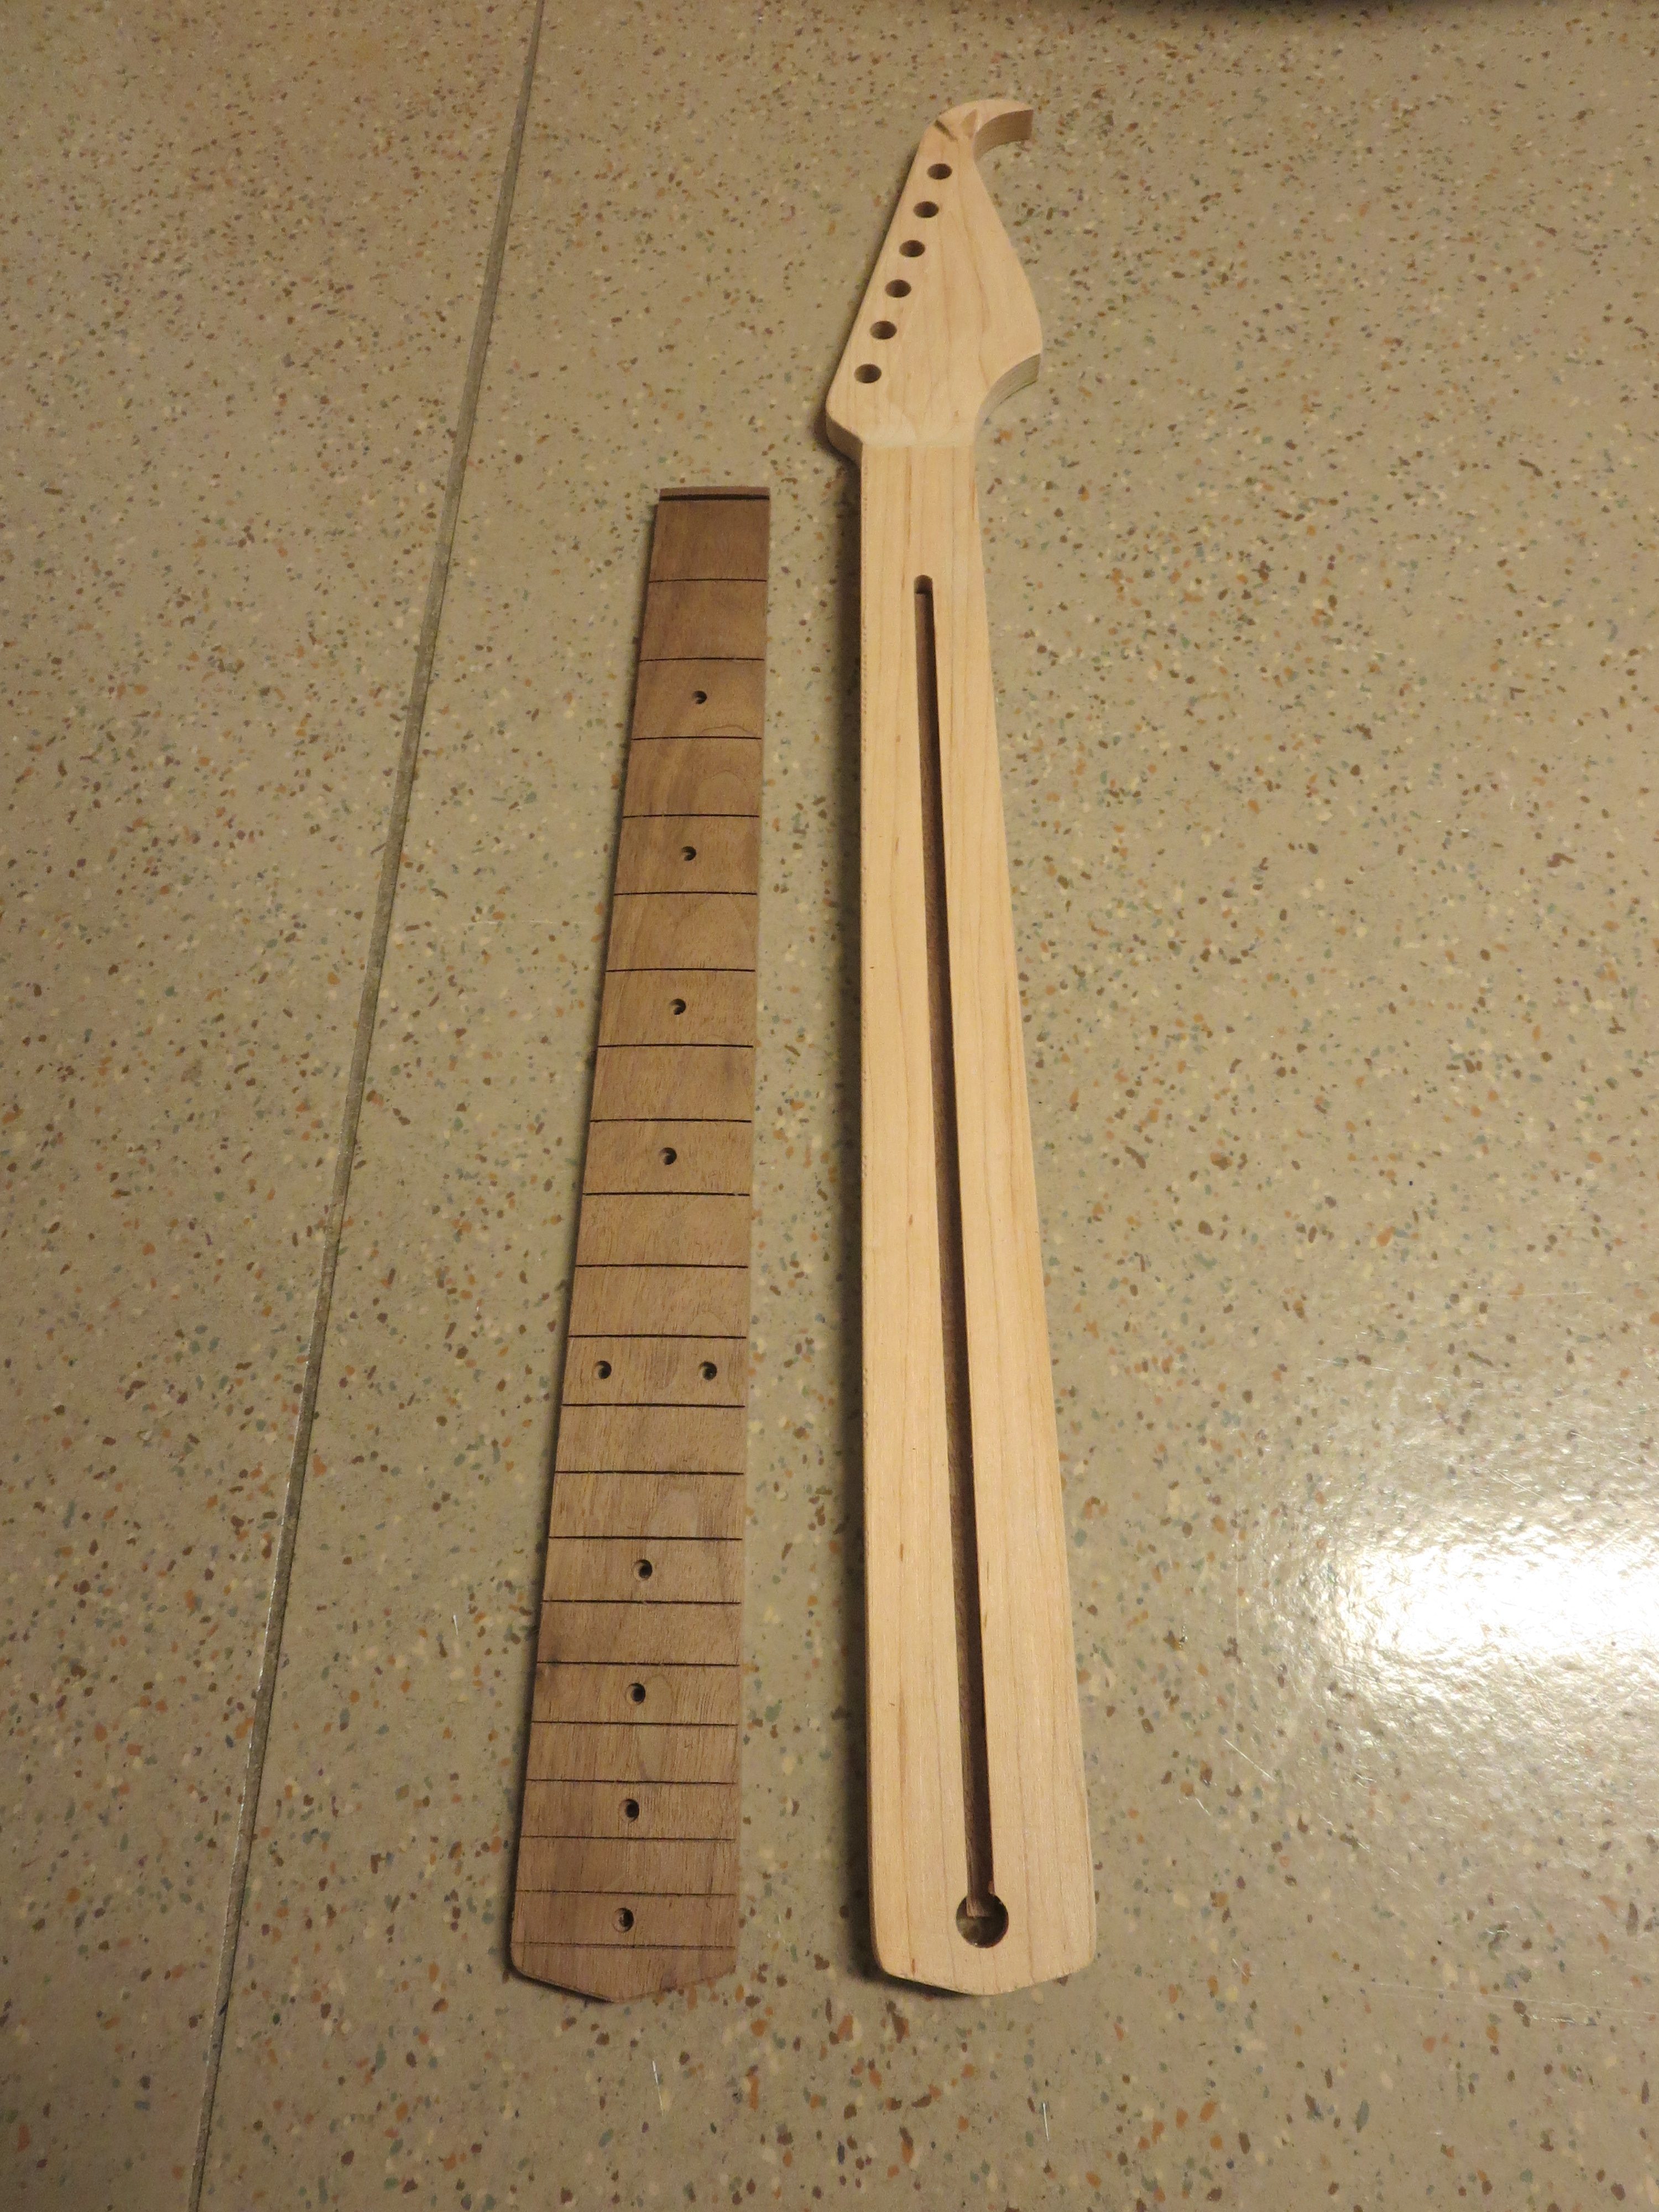
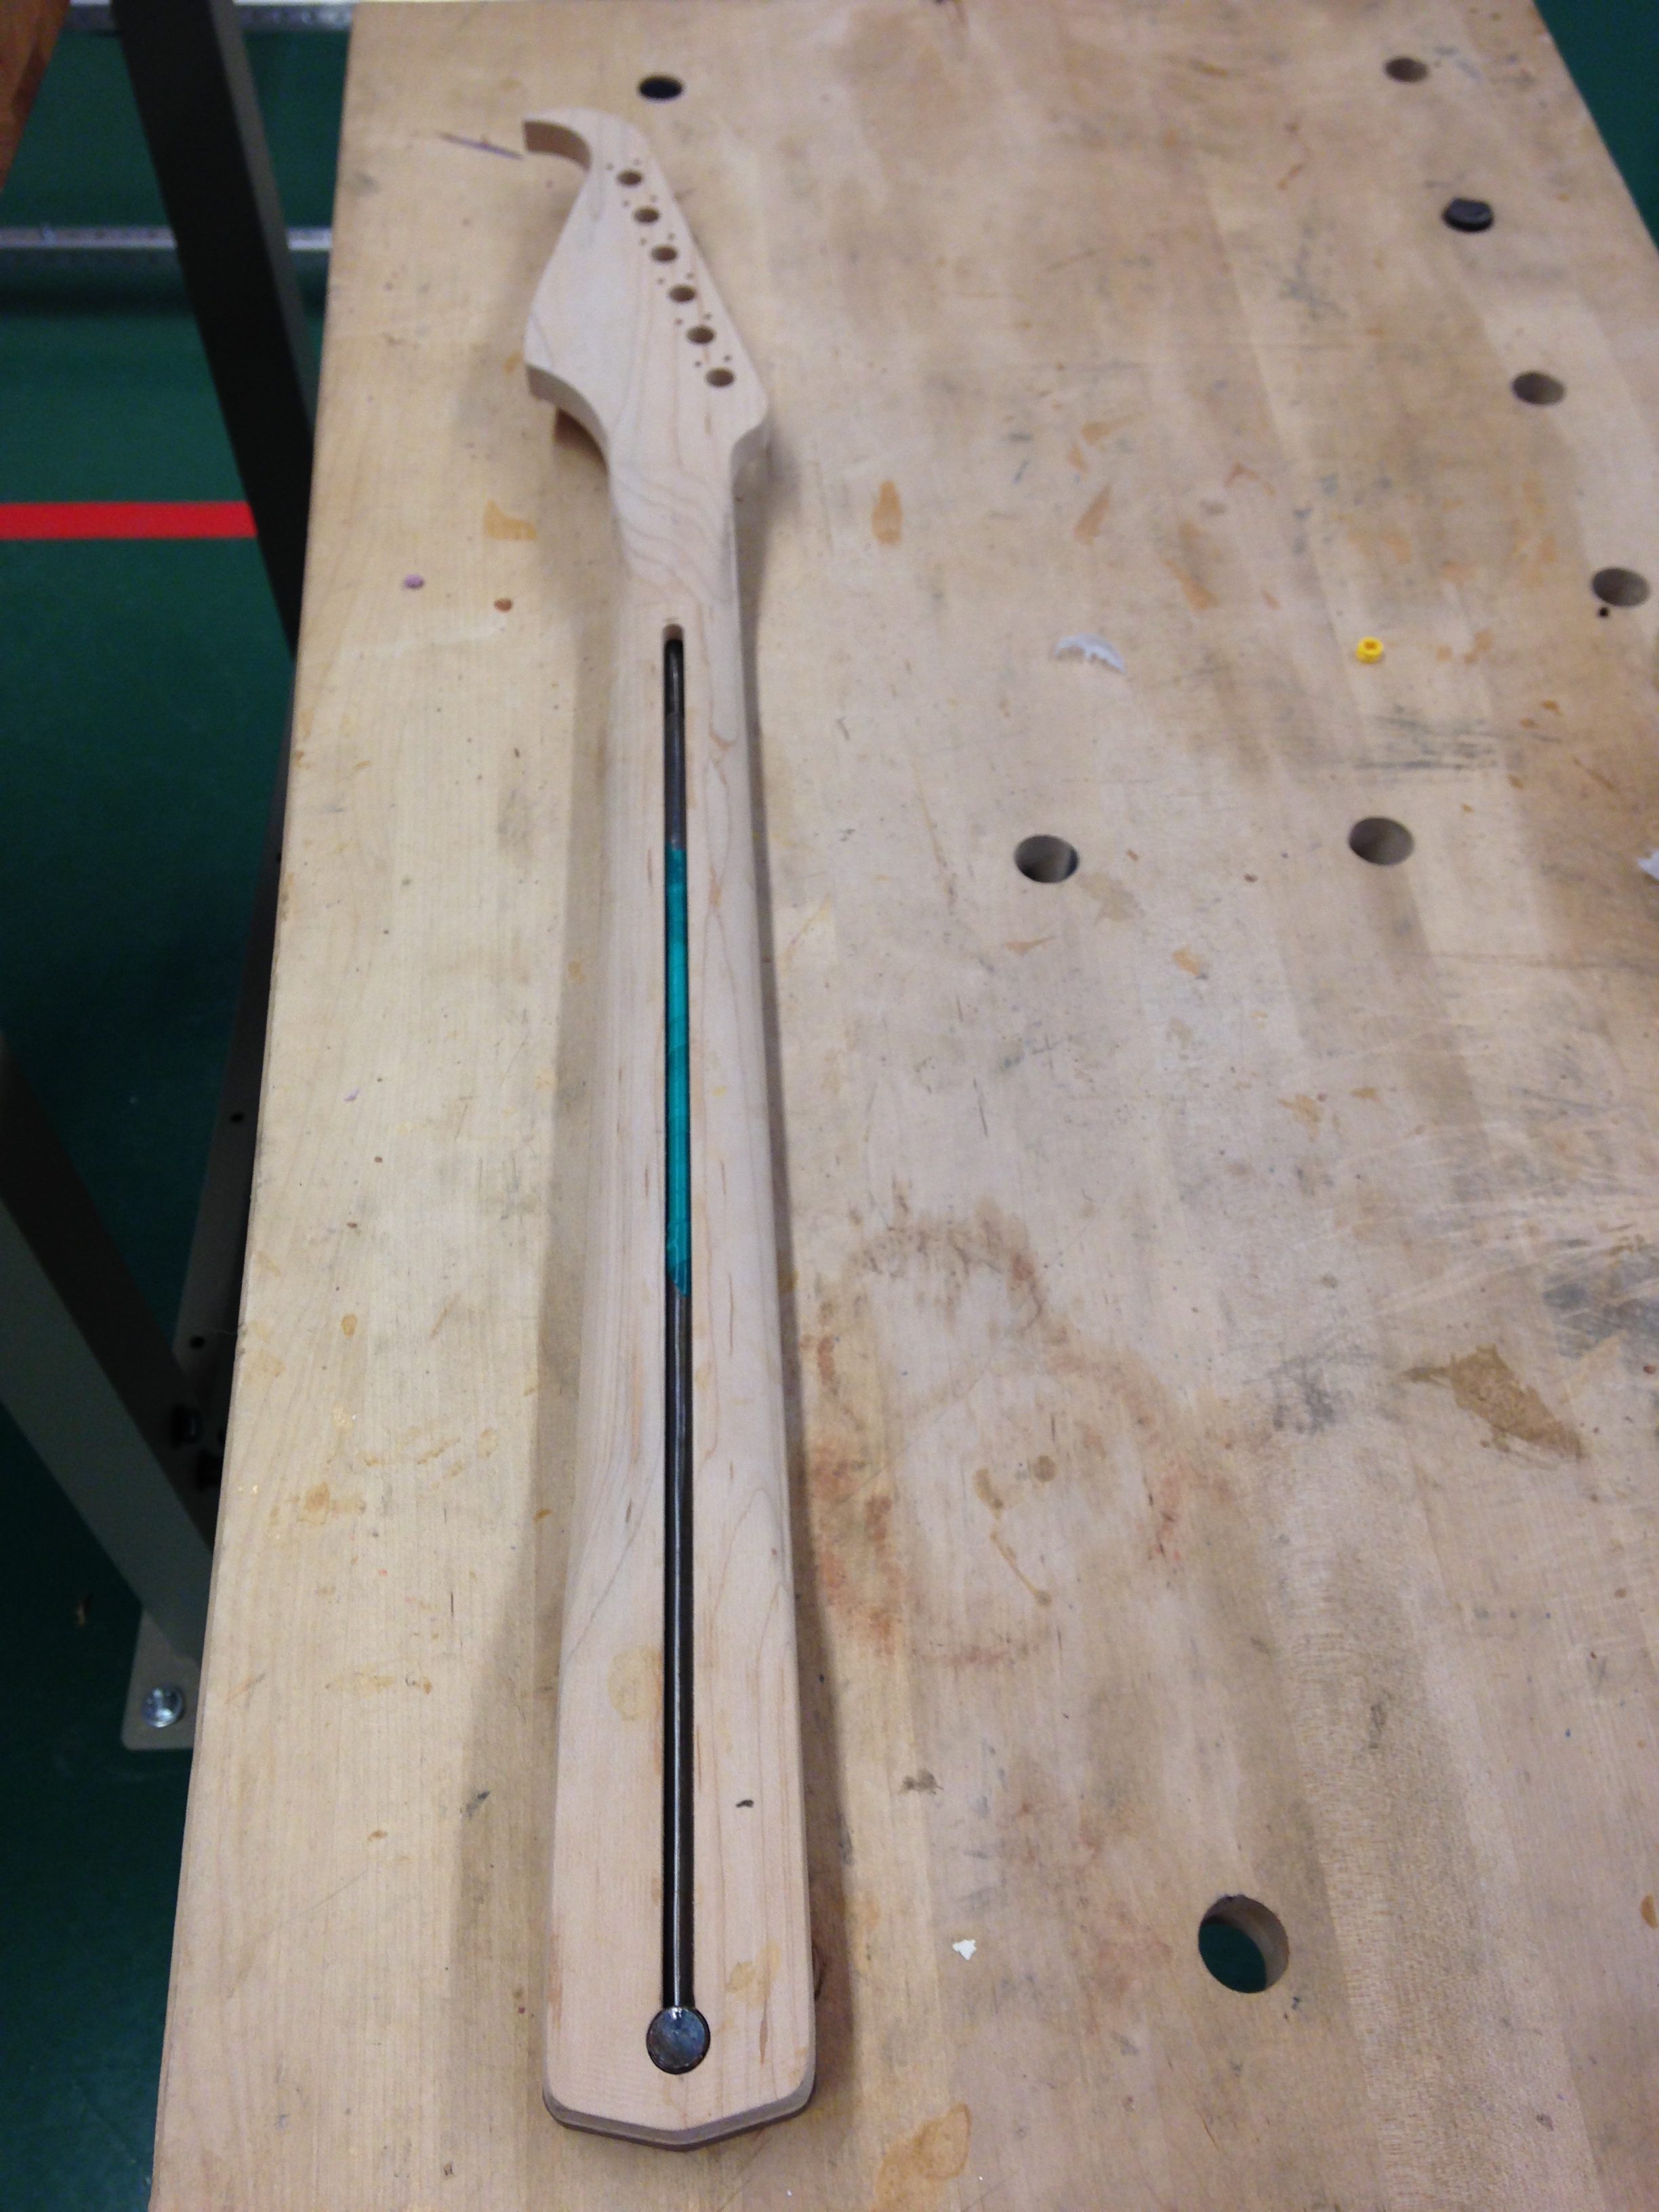
This was accomplished similarly to milling the body. That my maple block was longer than two feet posed an additional challenge, and I compensated by angling it diagonally on the ShopBot bed. Like before, I carefully placed pin holes that would allow me to flip the piece and mill the back. I also created separate toolpaths for the tuning machine holes and truss rod slot, which were intentionally absent from my .stl file.

Finally, I milled my last wooden part: the fingerboard. This was easier because it was one-sided, so it did not need alignment pins to facilitate a flipcut. These two pieces would eventually be glued together.
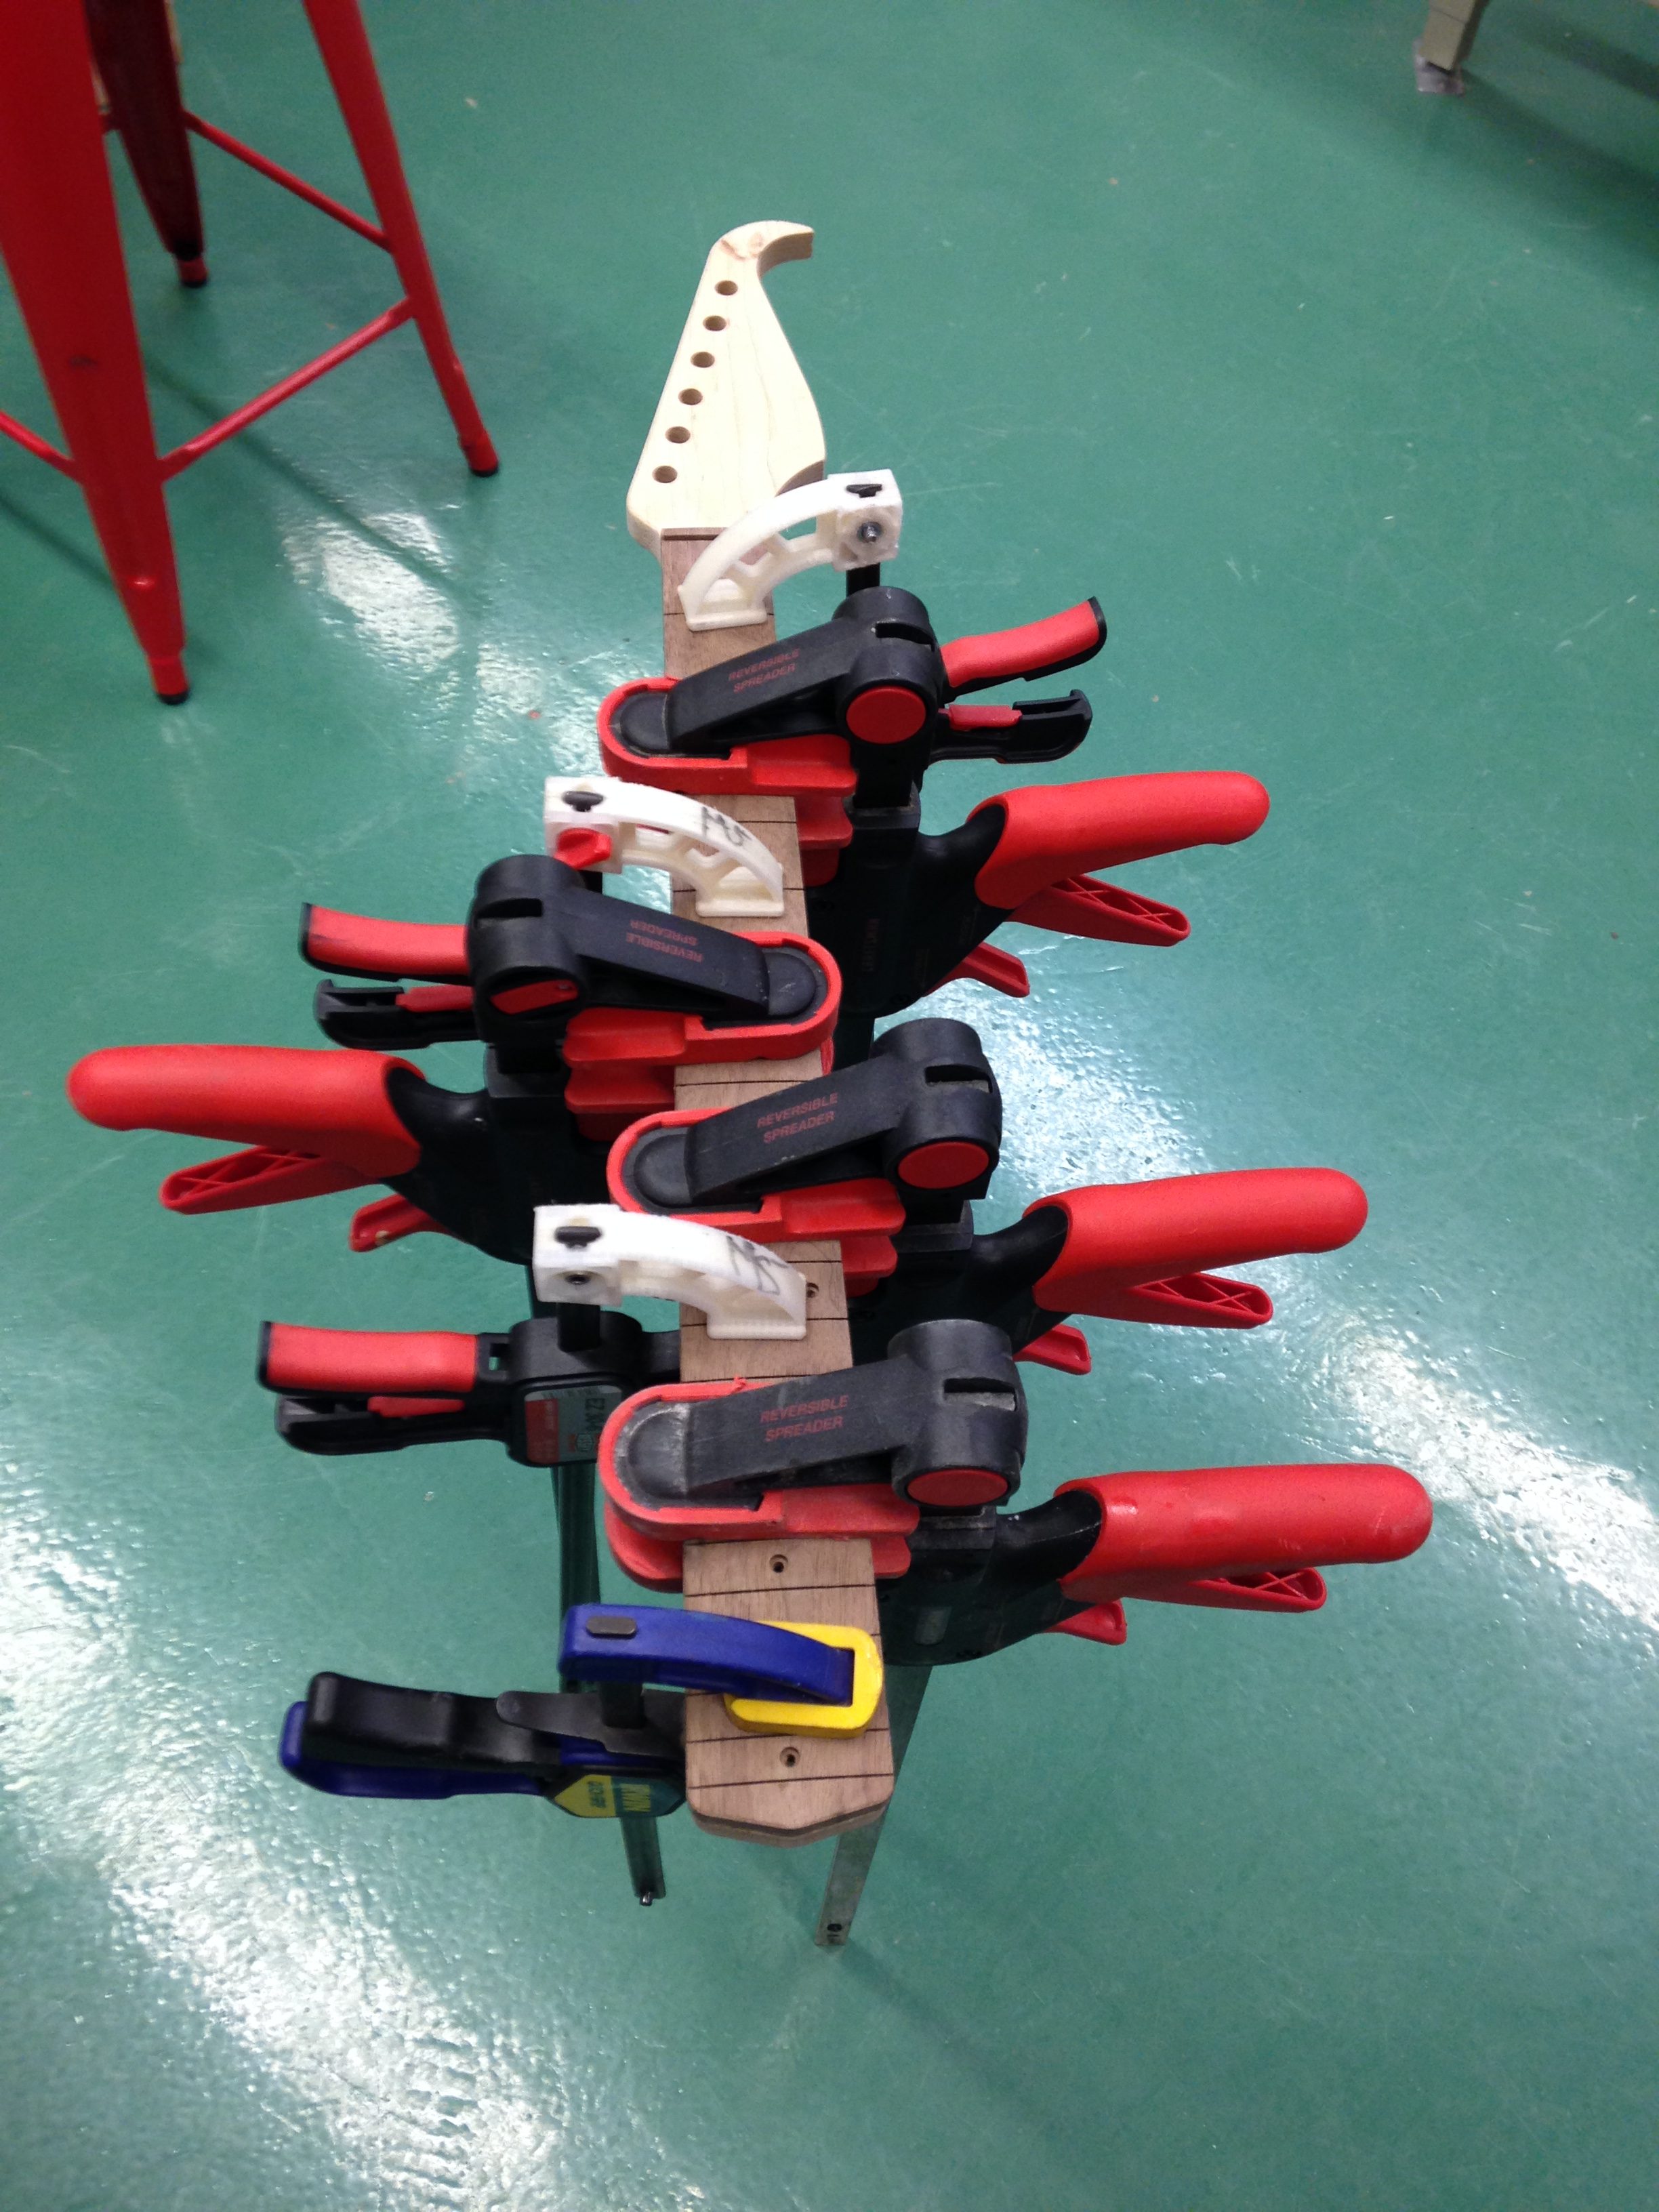
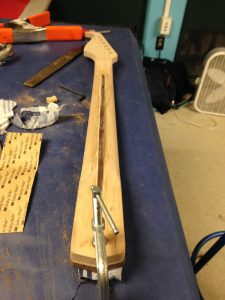
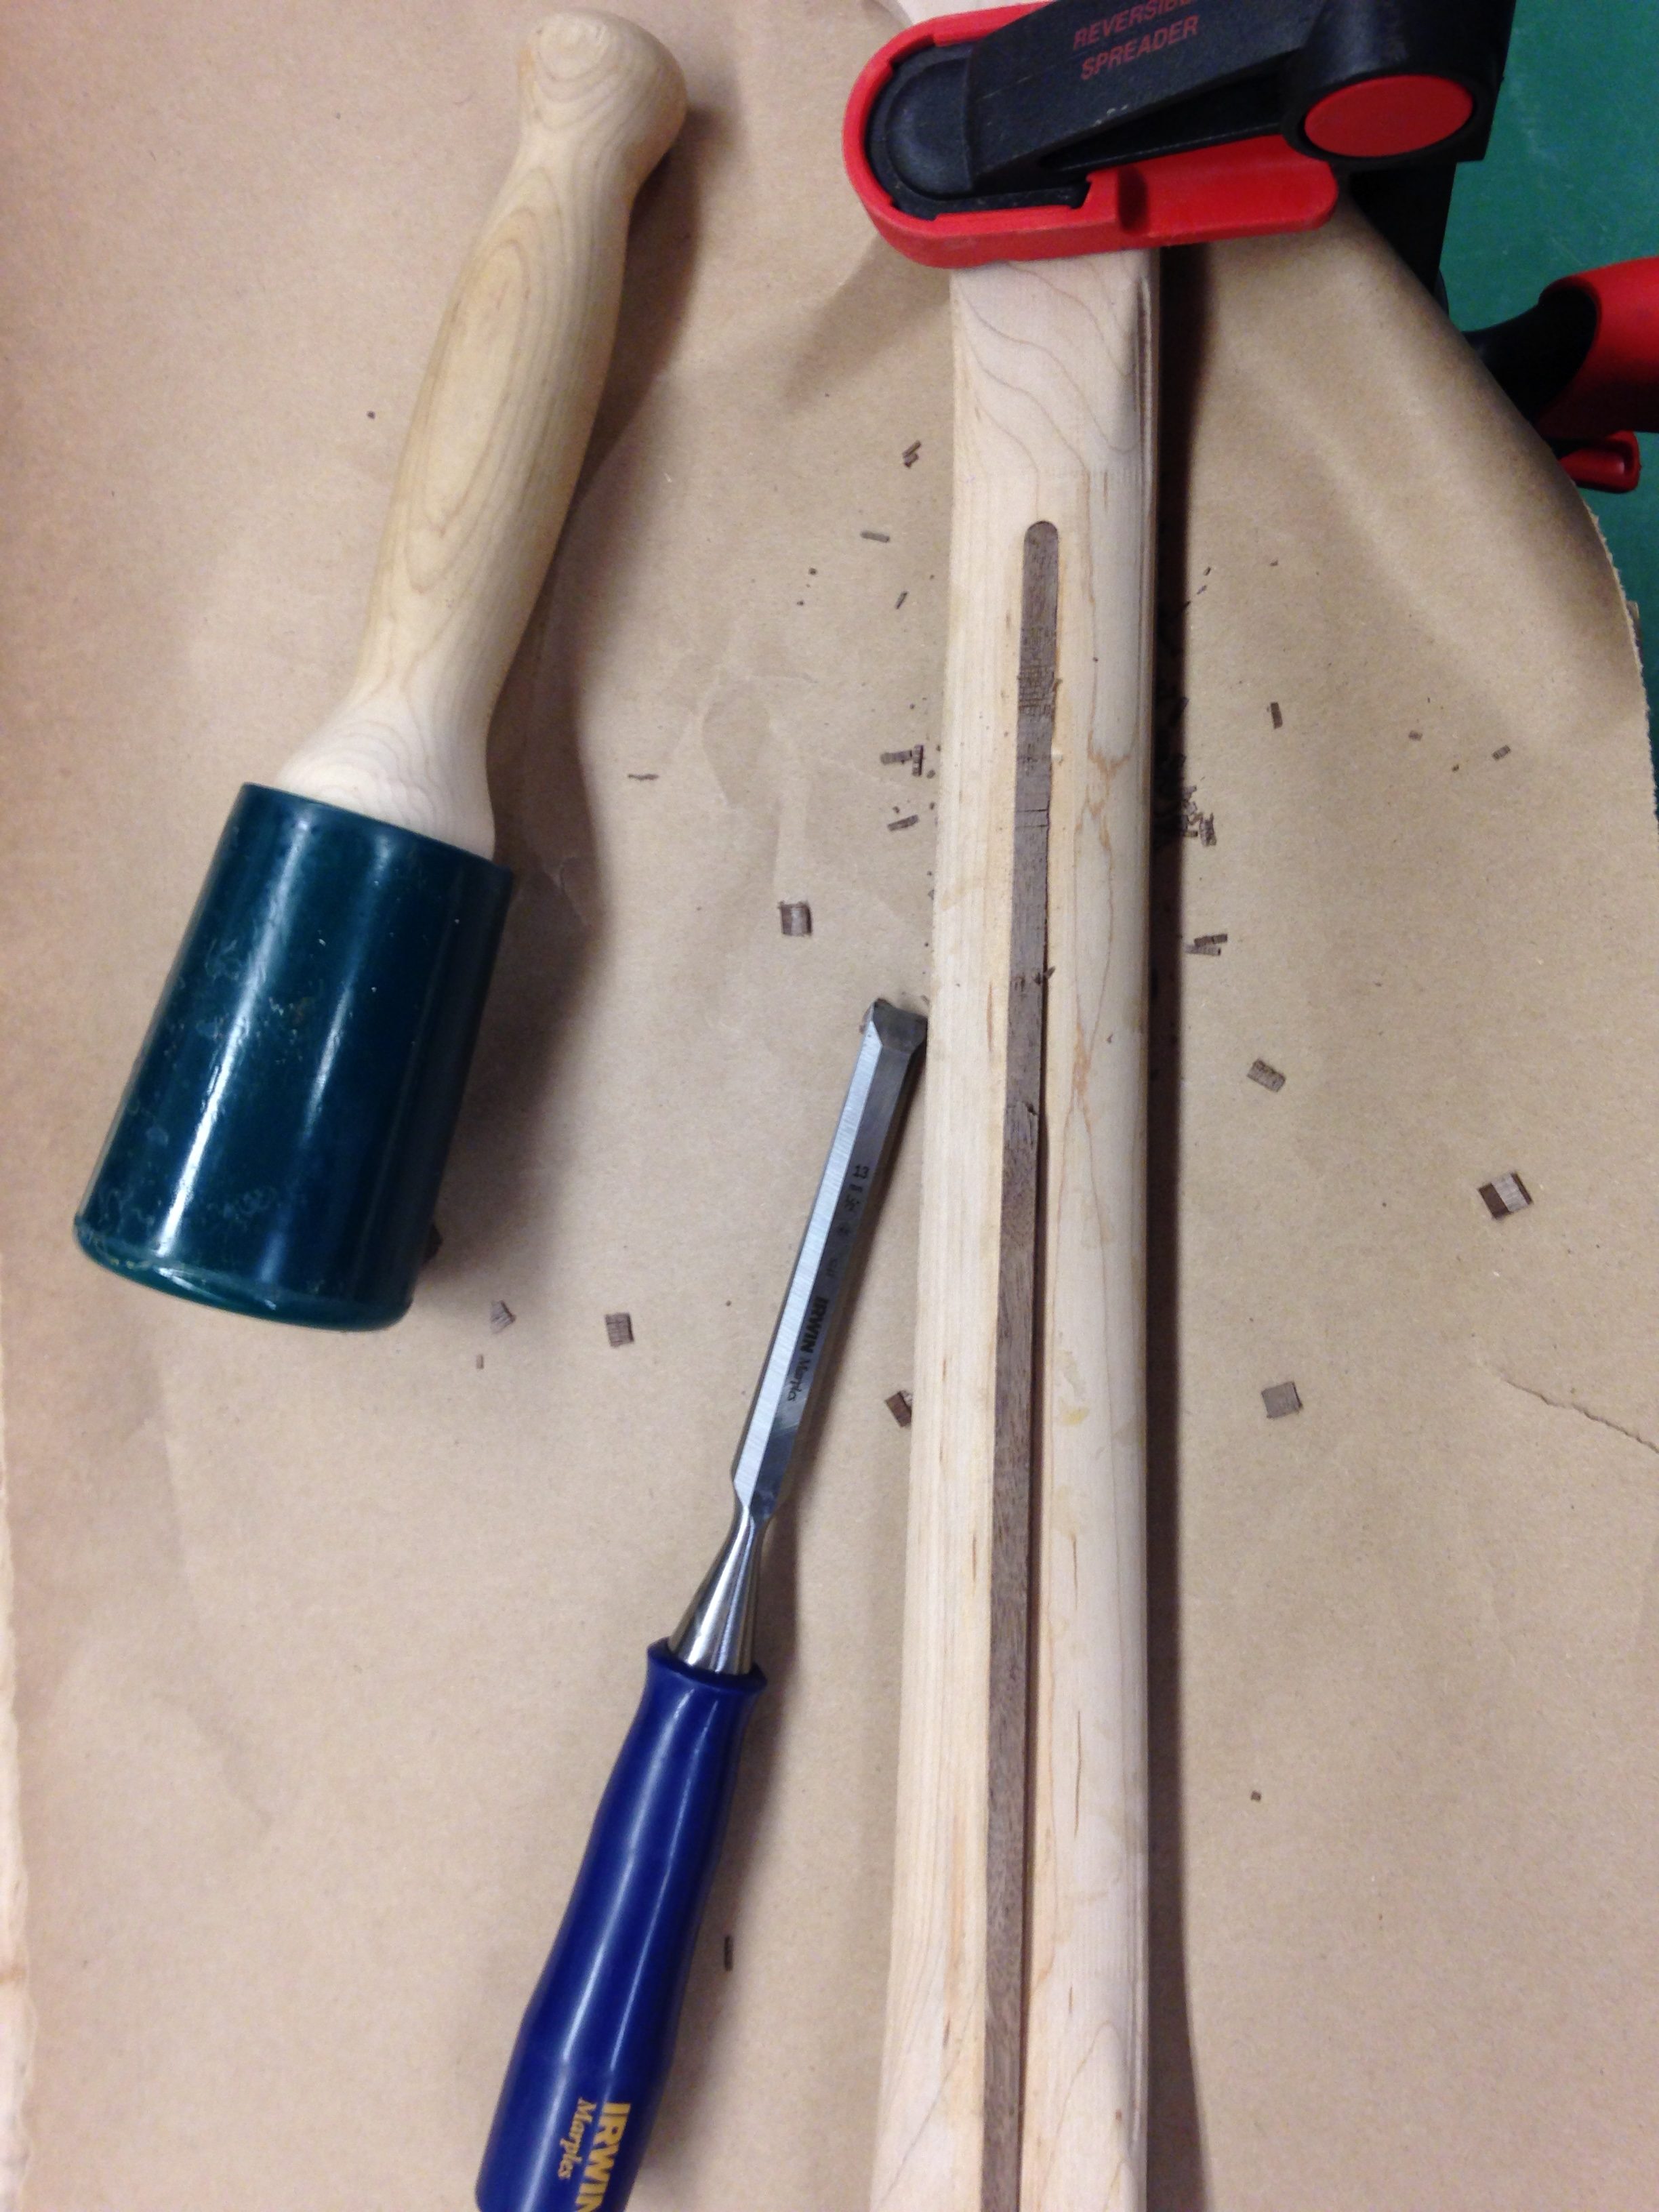
To complete the neck, I next needed to install the truss rod, which I had stolen from my unfortunate Fender Squier. This metal rod runs the length of the neck to allow for later adjustments in case it bows over time. I was at first discouraged by the added complexity of this system and eagerly considered leaving it out, but was advised against this course of action. My final truss rod was neatly covered with a walnut inlay. The inlay was glued in, and then chiseled and sanded until it was flush with the back of the neck, in a process that was actually more successful than I had anticipated.
c) Pickguard
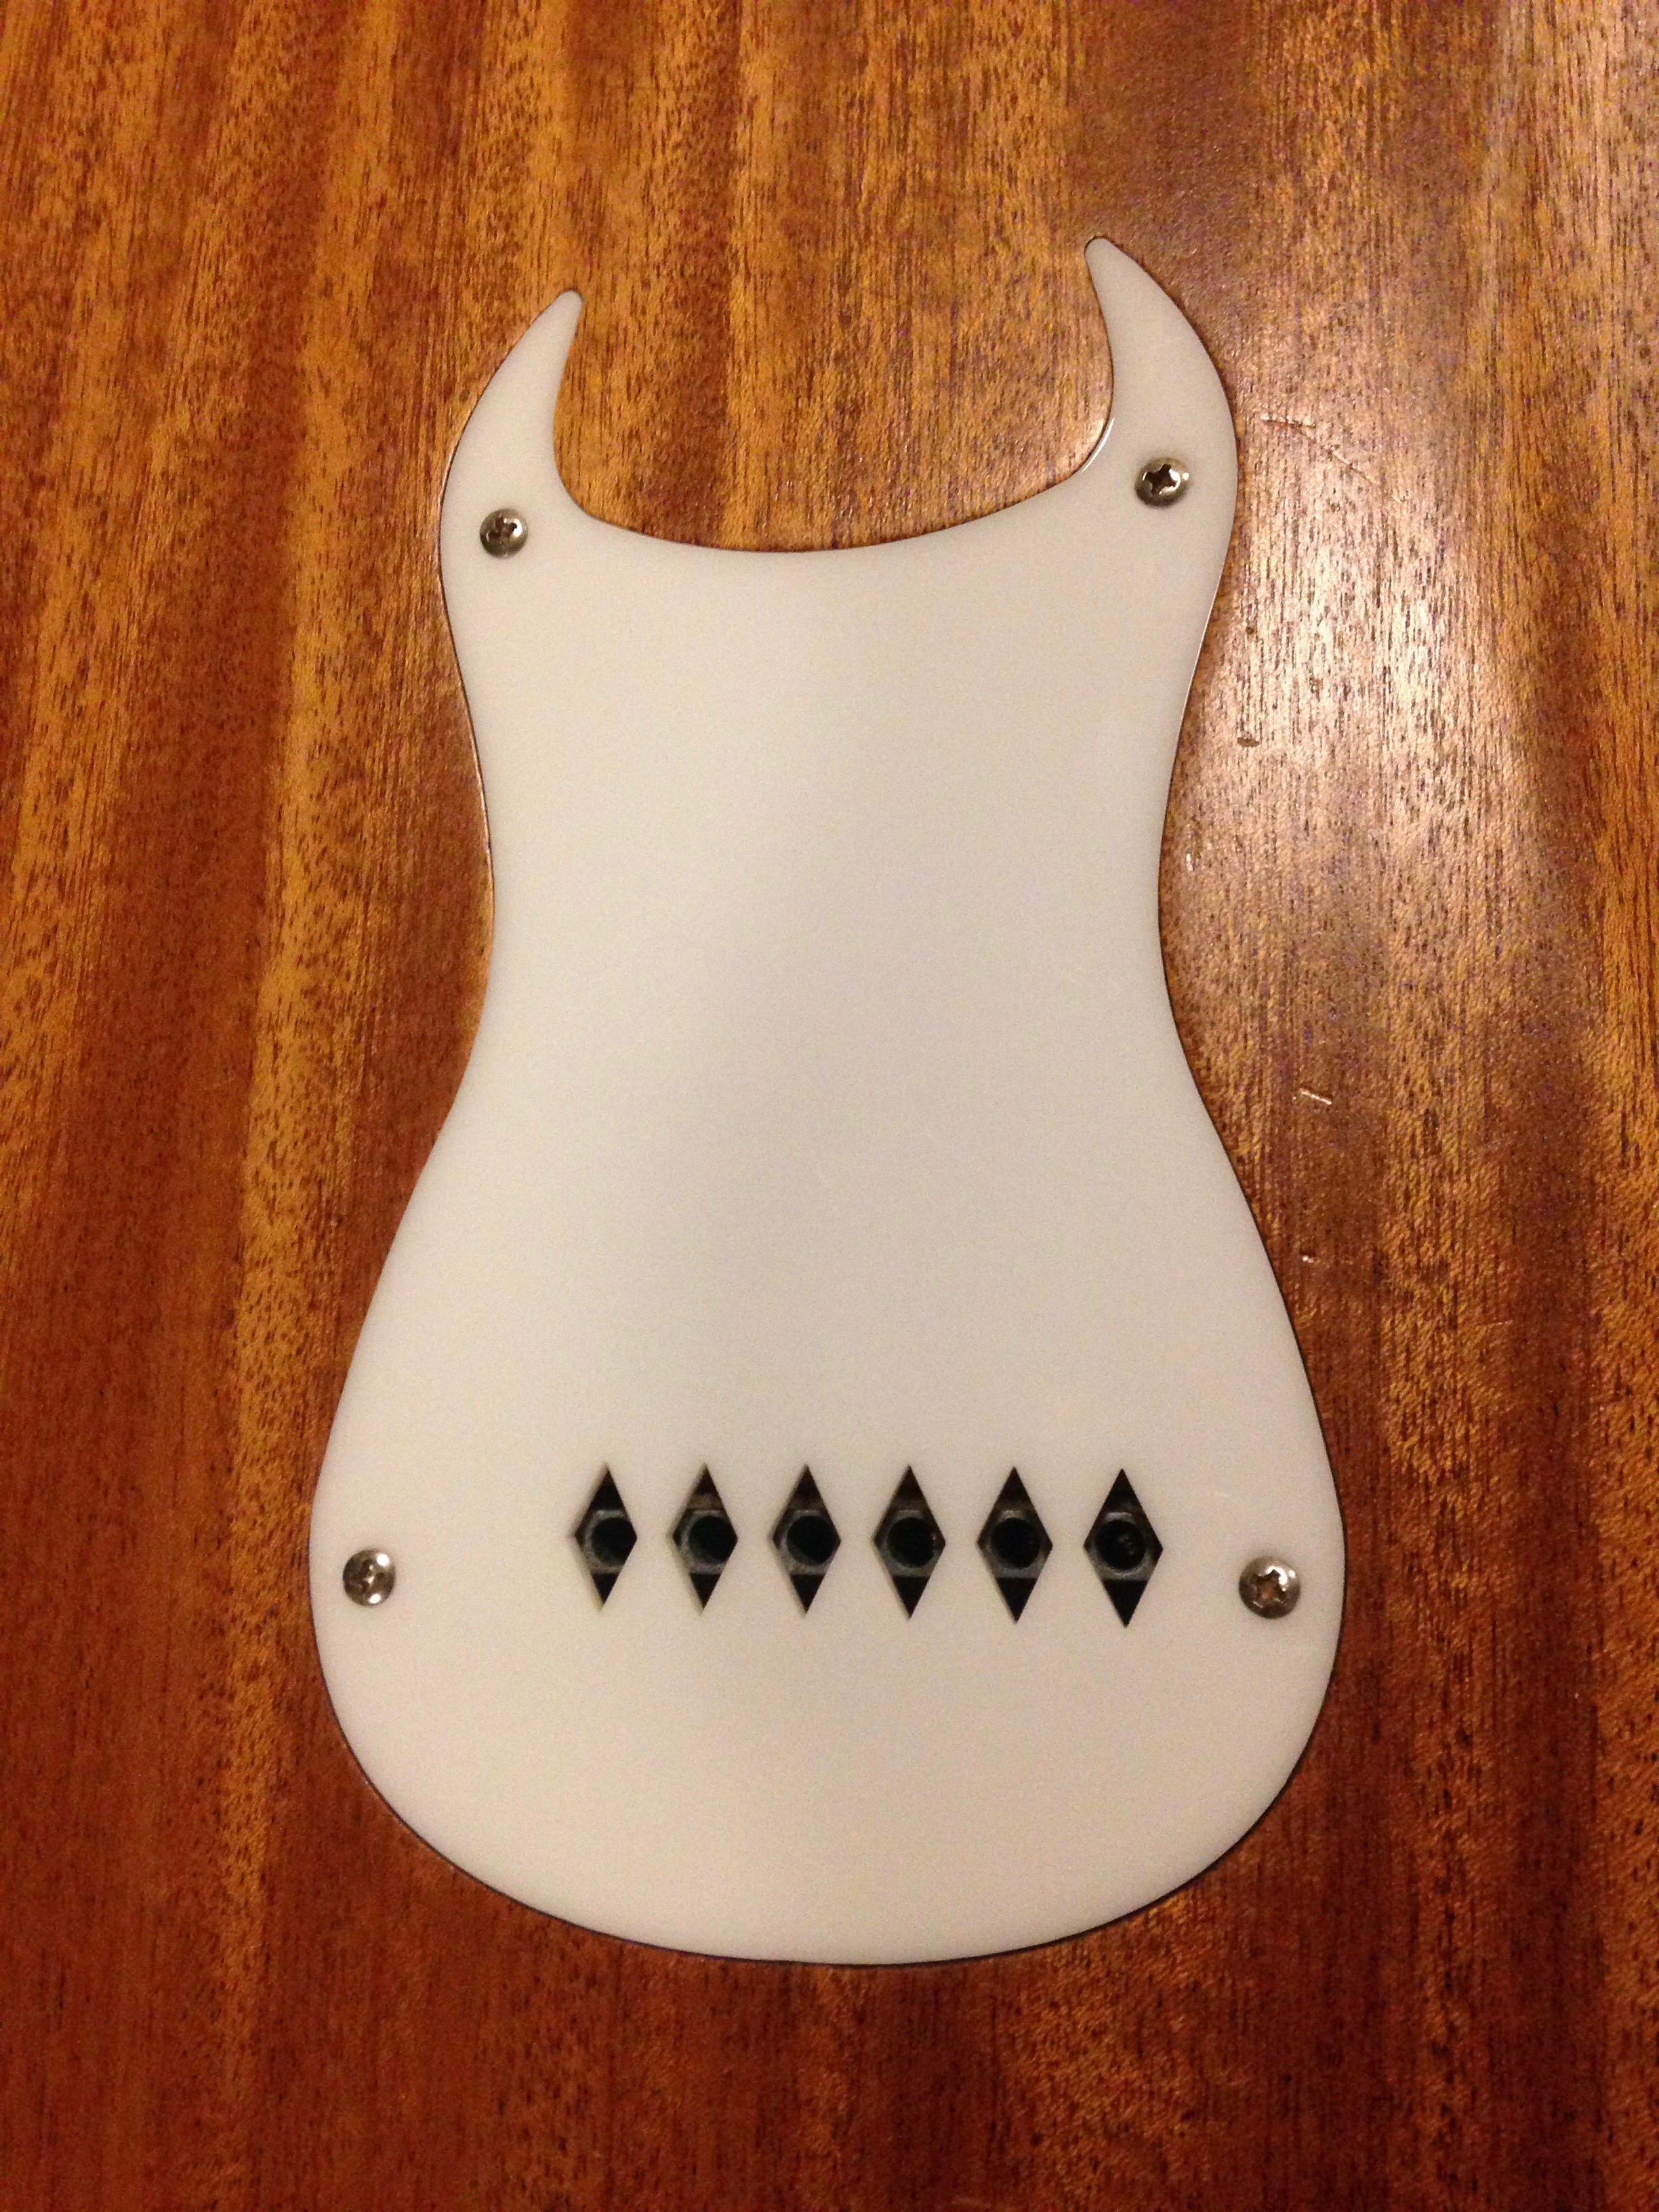
Although my guitar was starting to look like one, there were still a few more pieces that I needed to create. One of these was the pickguard, or the front plate into which the pickups and electronics are anchored. I lasercut this piece out of 1/8″ white acrylic, again using my original Illustrator file as a template. Never one for moderation, I also added some more butterfly etchings. I cut a similar plate for the back of the guitar, which would cover the back pocket that I had created. These parts took several tries to get right, especially because I had created such strangely shaped press-fit pockets for them to rest in.
III. Finishing
Now that all of my major parts had been created, I set about finishing the wood. This involved a lot of sanding to achieve a smooth surface, which was followed by many coats of polyurethane. There are lots of other options for finishing and protecting wood surfaces, but I was familiar with using polyurethane and happened to have a can of it lying about already. This finish gave my wooden parts a semi-glossy sheen, which would also help protect it from dirt and moisture.
IV. Assembling
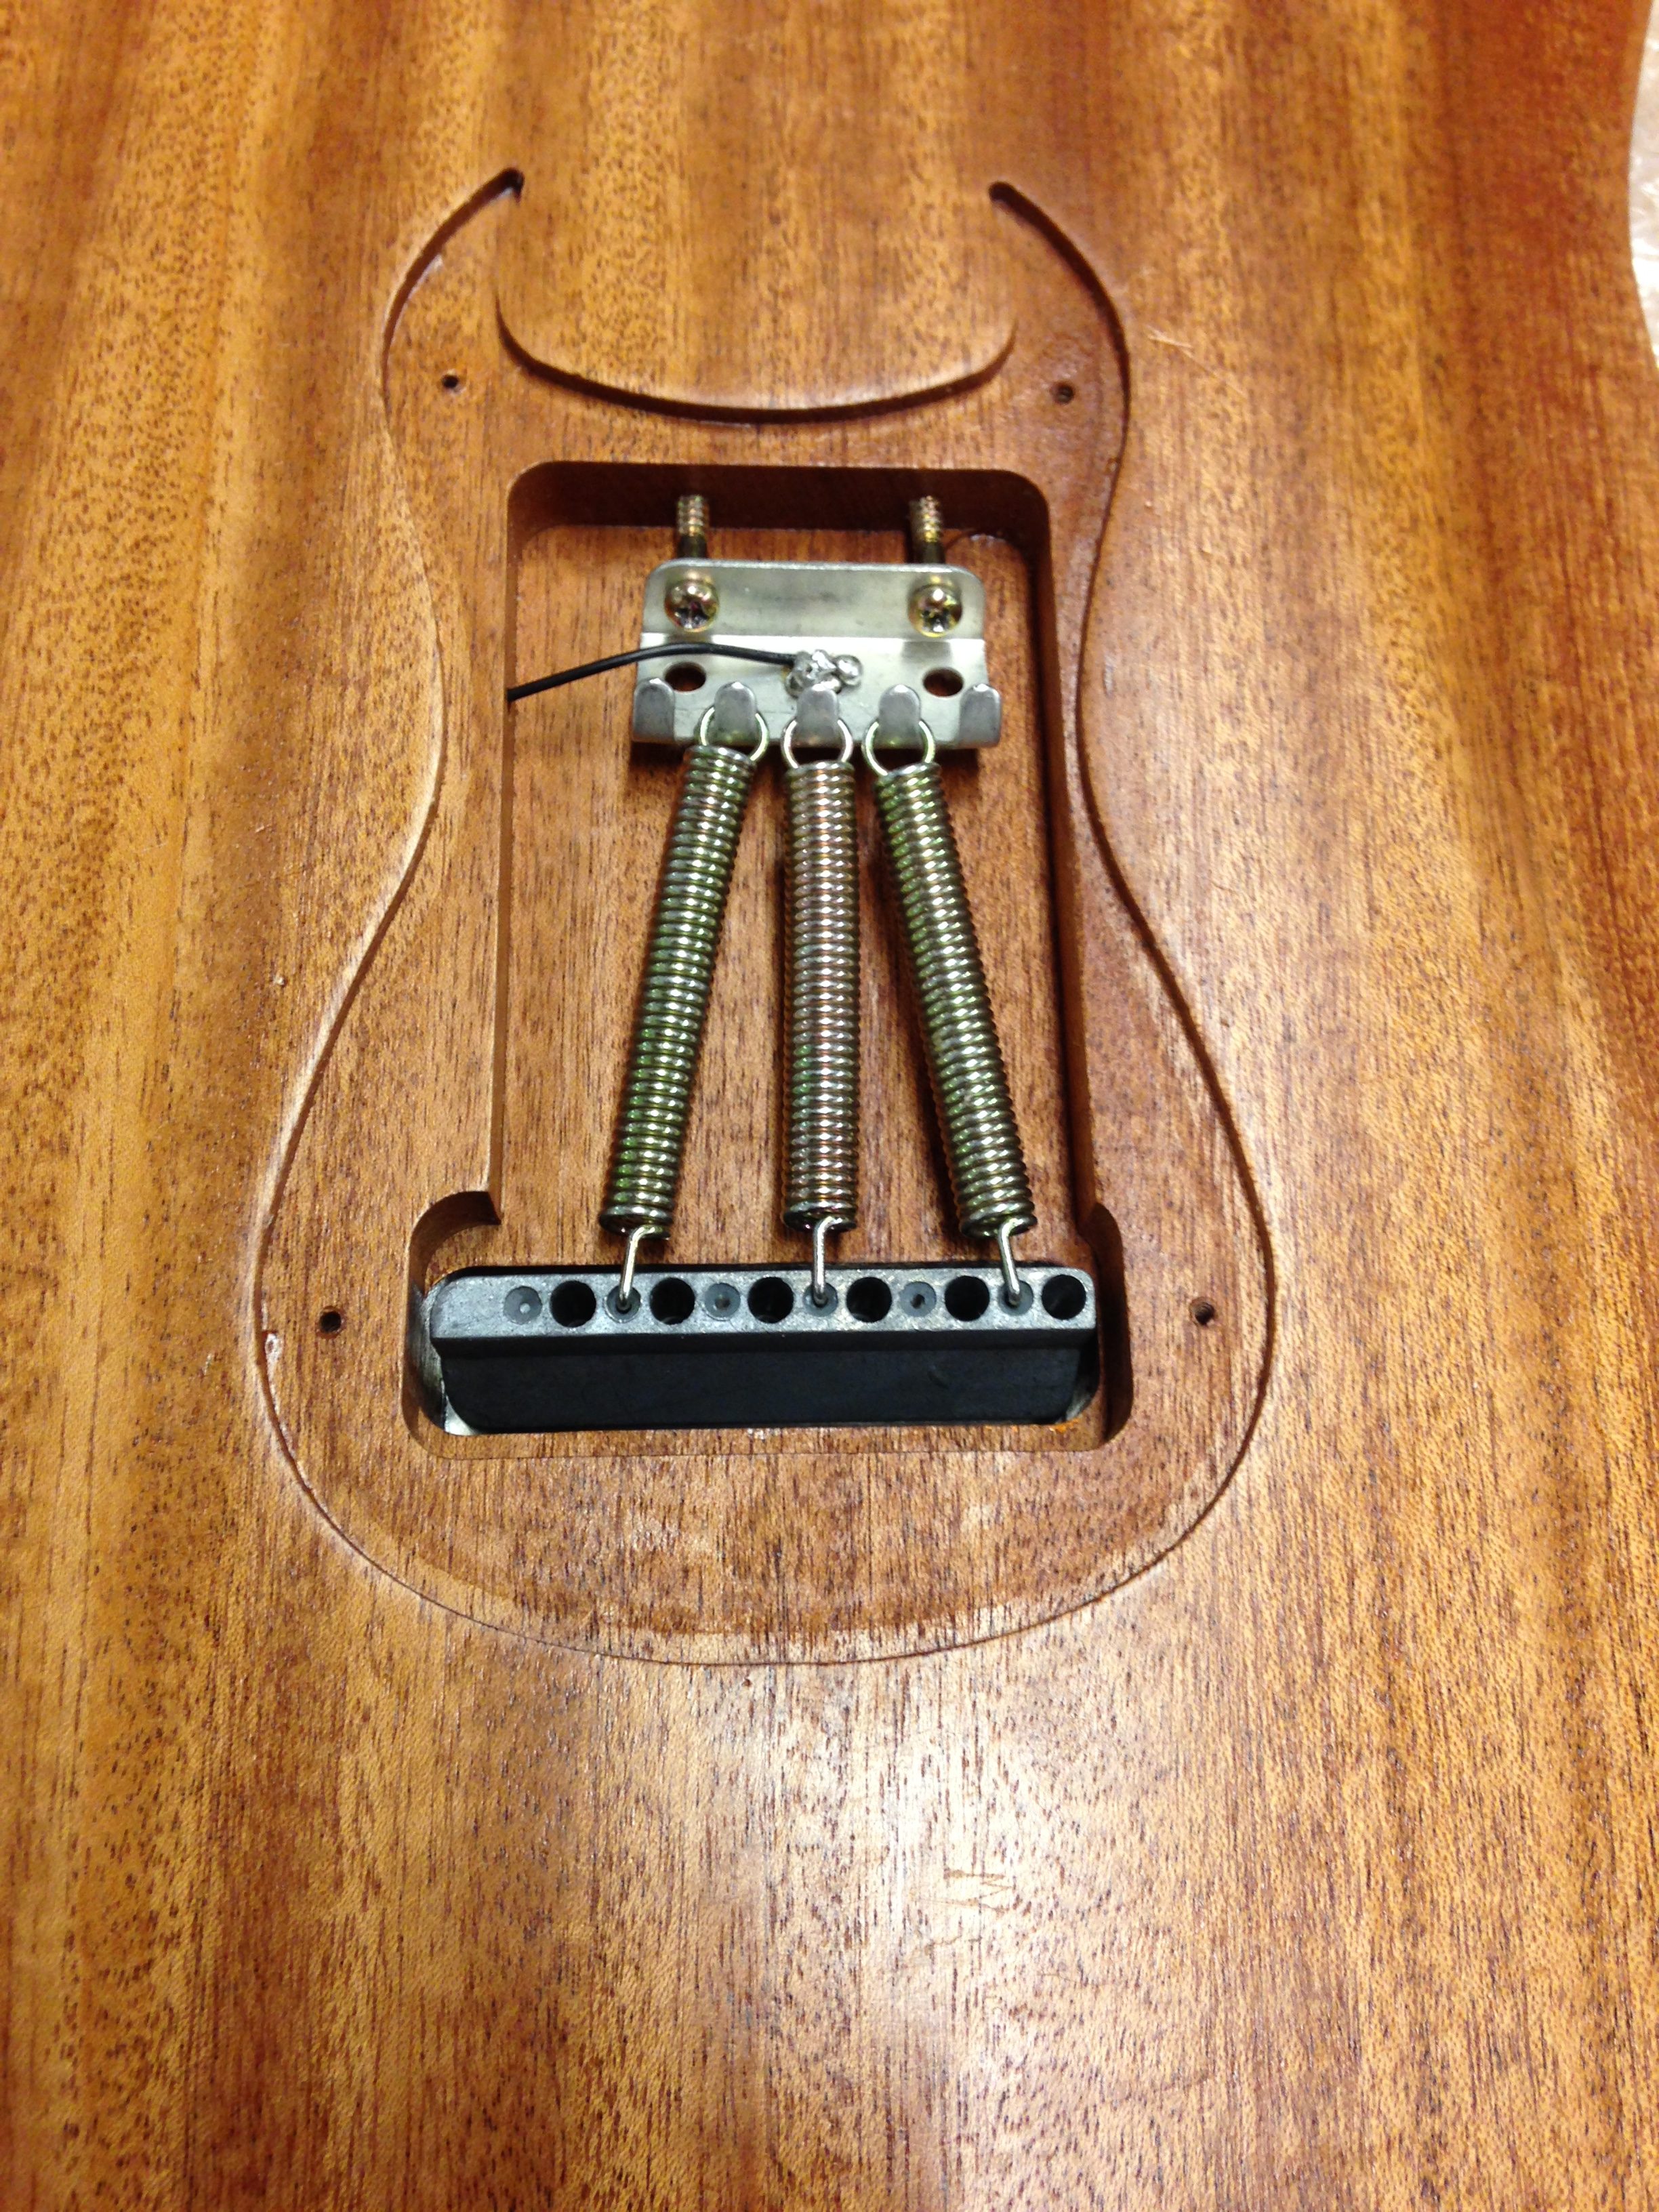
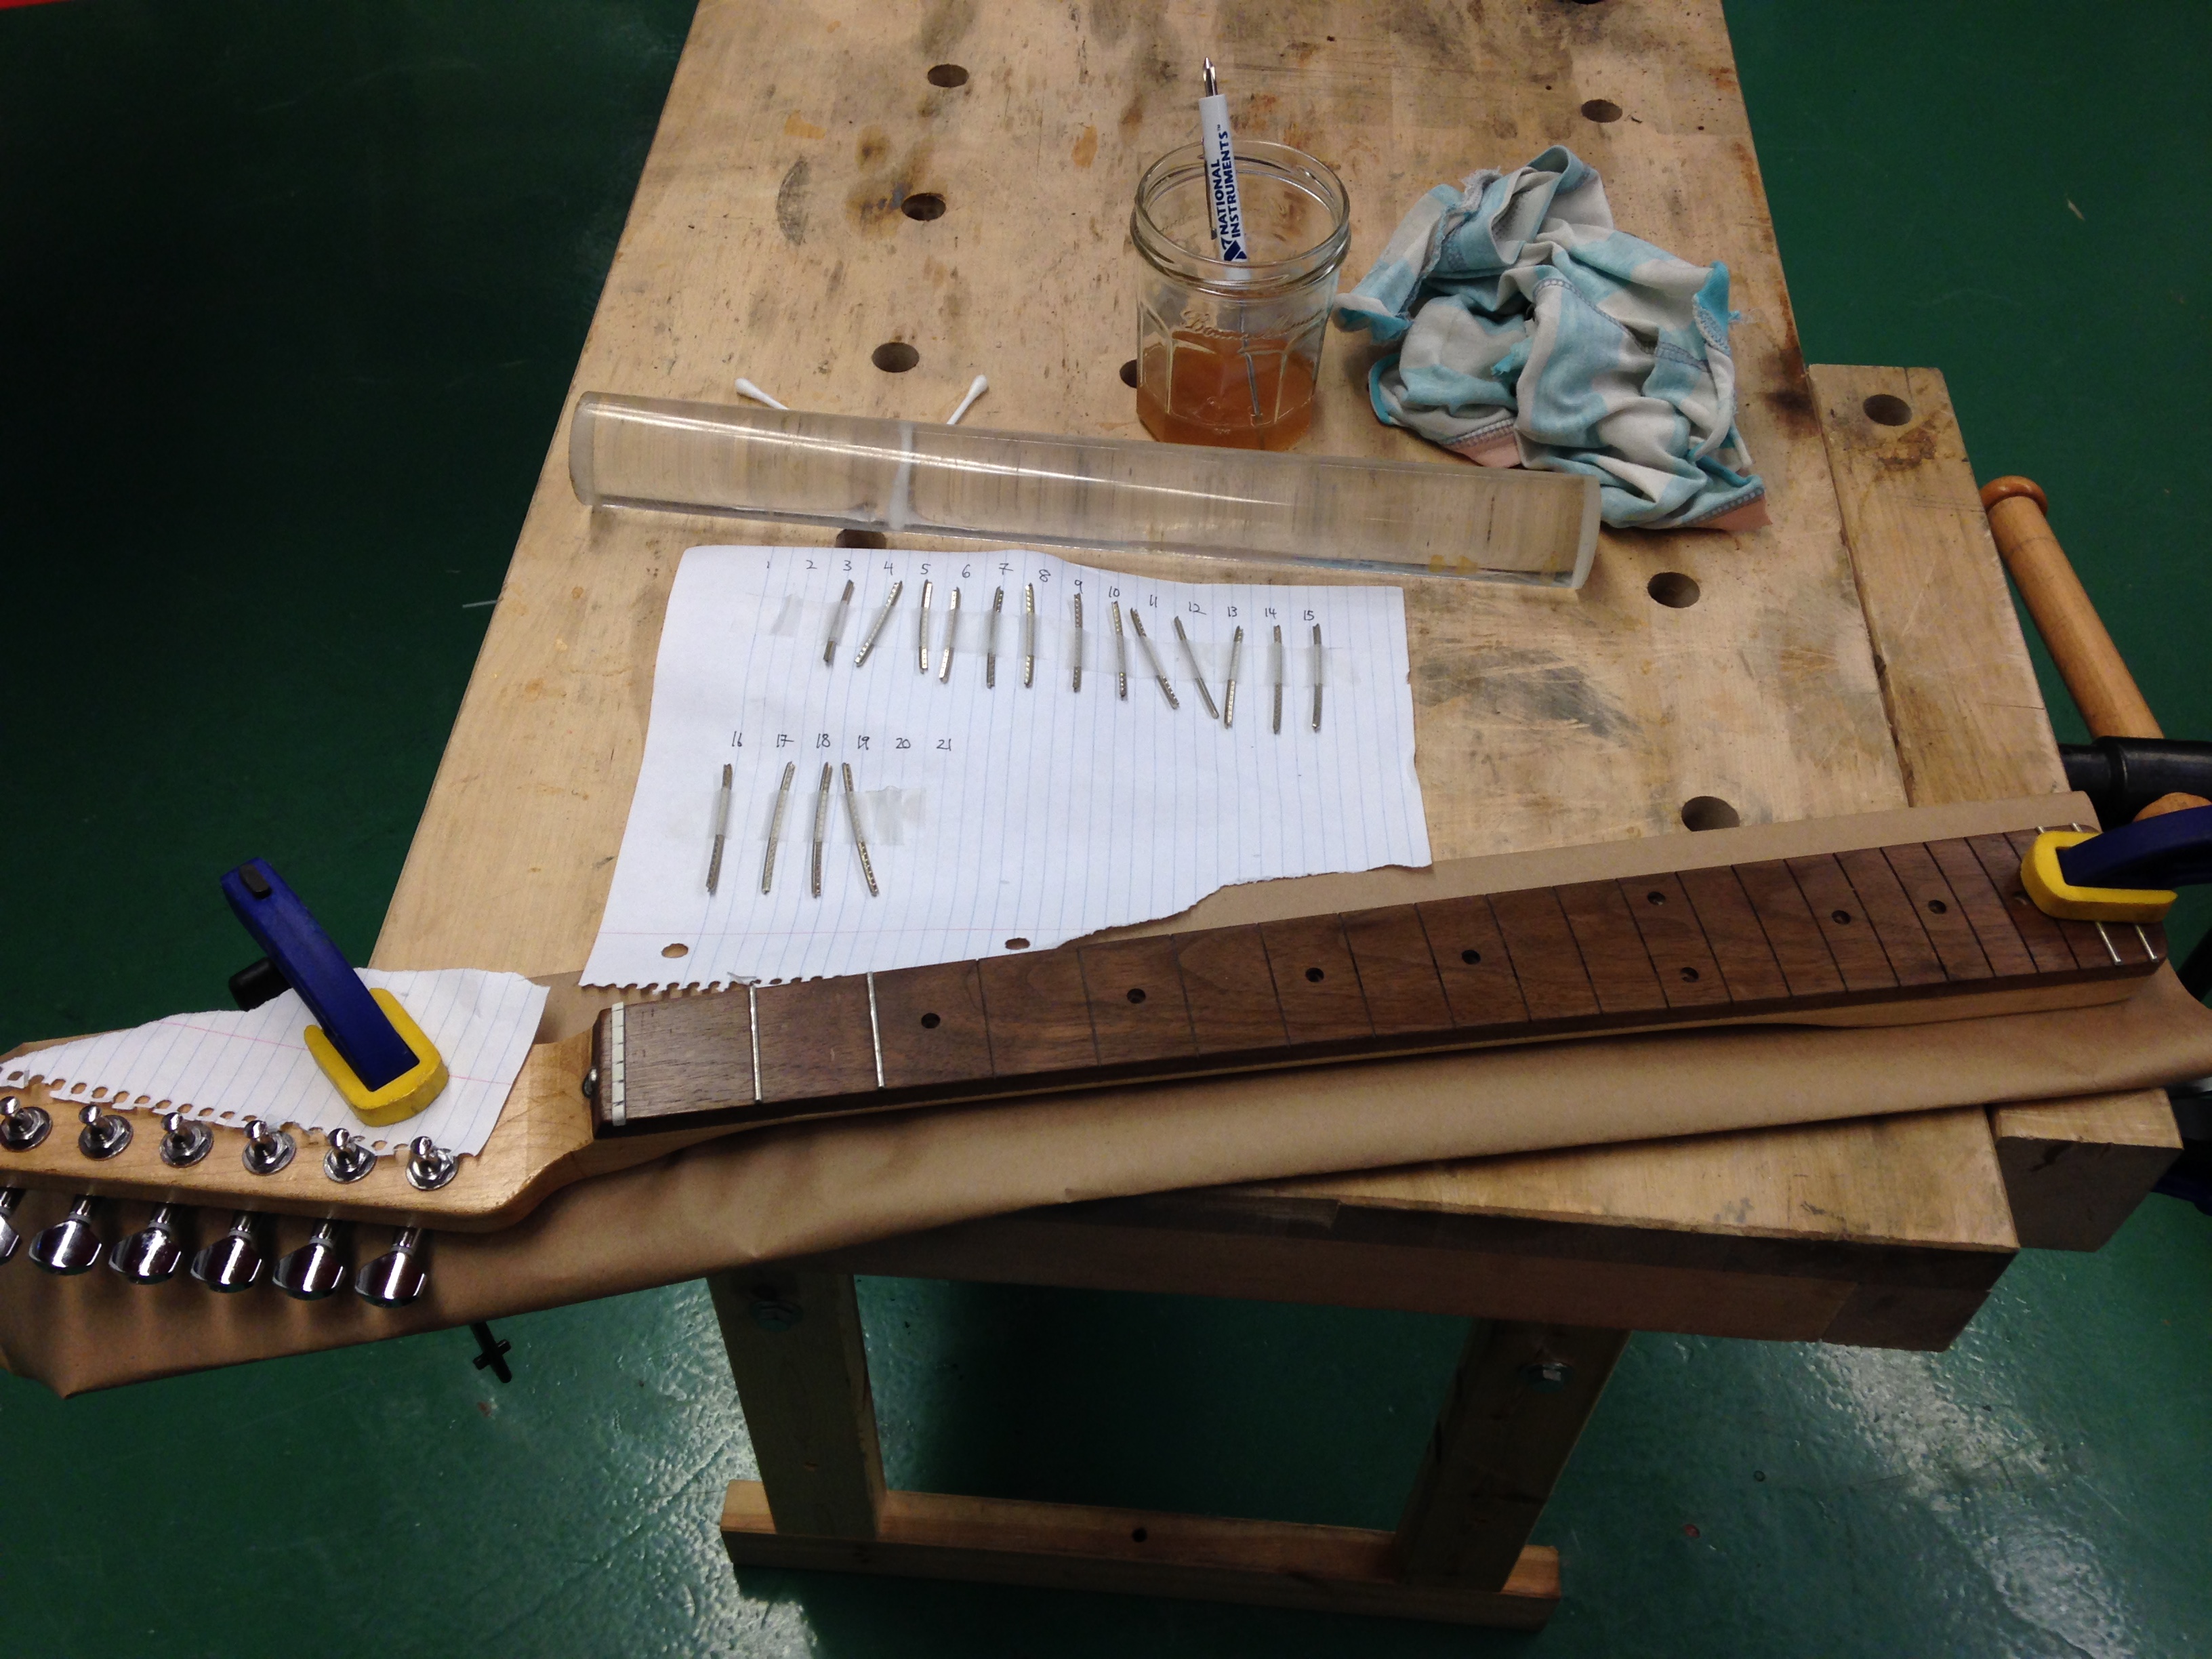
All that remained now was to assemble my guitar, and fabricate a few more minor parts along the way. This involved installing the tuning machines, frets (also reused from my dissected Squier, which was probably a bad idea), and “pearls” (lasercut from acrylic). I also attached the bridge, whammy bar springs, and cable jack, and installed the pickups and electronics, which required a bit of soldering. Because my Squier had been missing its whammy bar, I also made a new one out of a stainless steel rod. Finally, I attached the neck to the body using four woodscrews.

V. Setup
Although my guitar was now recognizable as one, it was not quite finished. I installed a new set of strings, and adjusted the string heights and lengths using calipers and patience. Not being a guitar player, I didn’t know what the correct measurements might be, so I used Fender’s official specifications as a guideline.

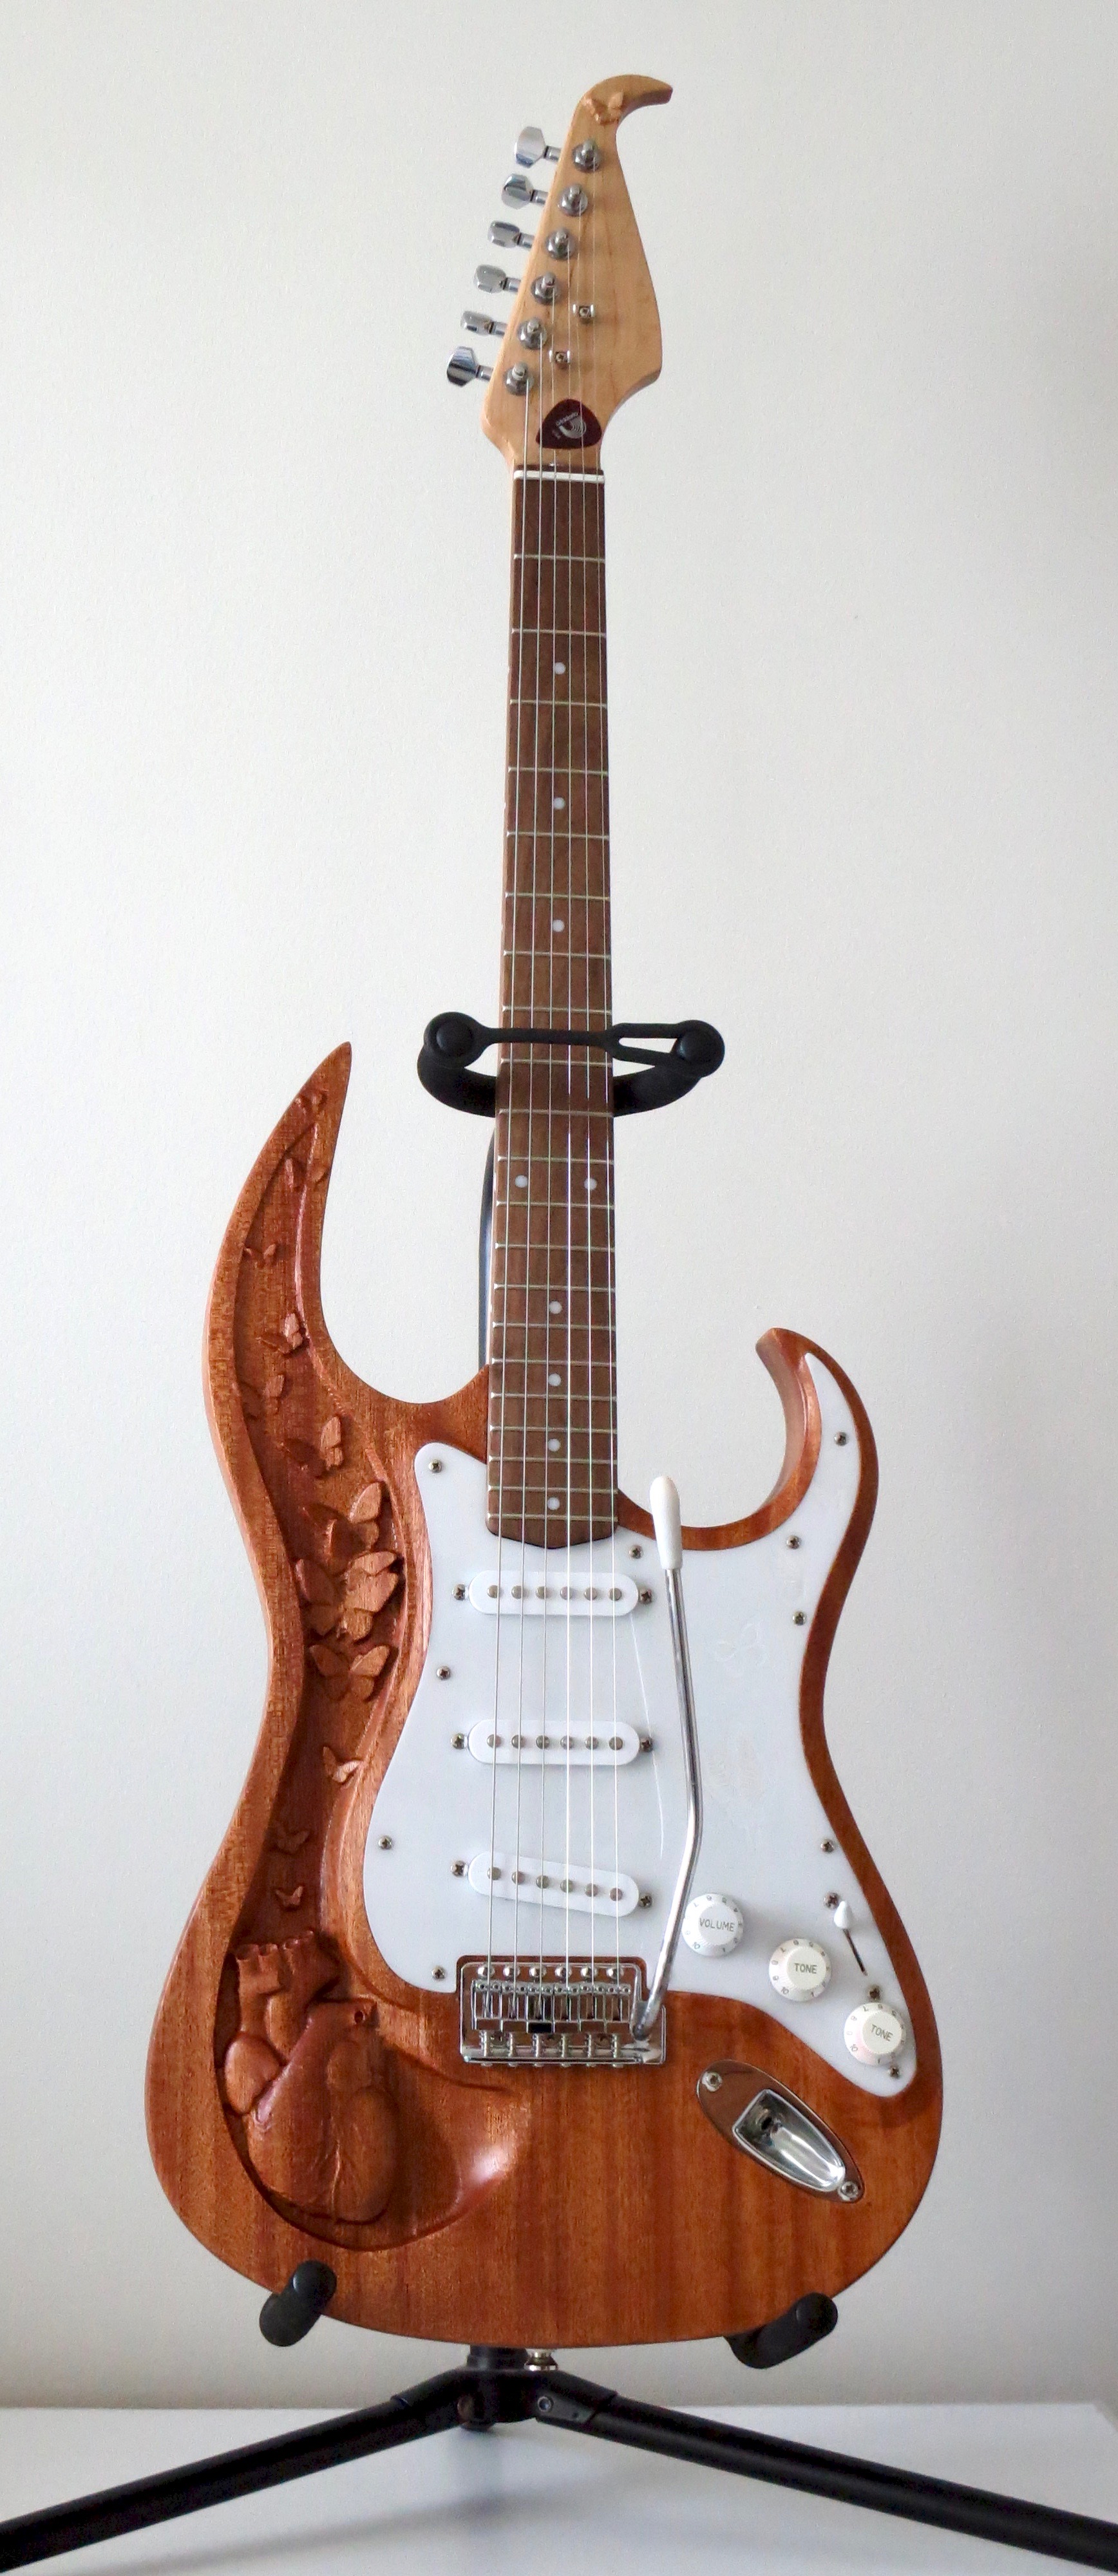
After plugging it into an amp, I was excited to find that my new guitar actually played reasonably well. If any sound quality had been lost from my original Squier, it was more than offset by my cool new aesthetics! I figure that the heart and butterflies will help divert attention away from my playing. But more importantly, I proved that with the help of a few other tools, Bray’s unassuming ShopBot can fabricate a killer electric guitar! What will you make with it?
_________________________________________________________________________________________________________________________________________________