Adobe Illustrator Tips
This page provides mini tutorials and guides on the various features Adobe Illustrator has to offer. Keep in mind Adobe Illustrator is very powerful vector graphics software and has a multitude of tools and features, so do not get overwhelmed! The best way to get good at using the software is to just click, learn and practice as much as you can. View the following link for extra tutorials provided by Adobe itself:
Adobe Illustrator Tutorials
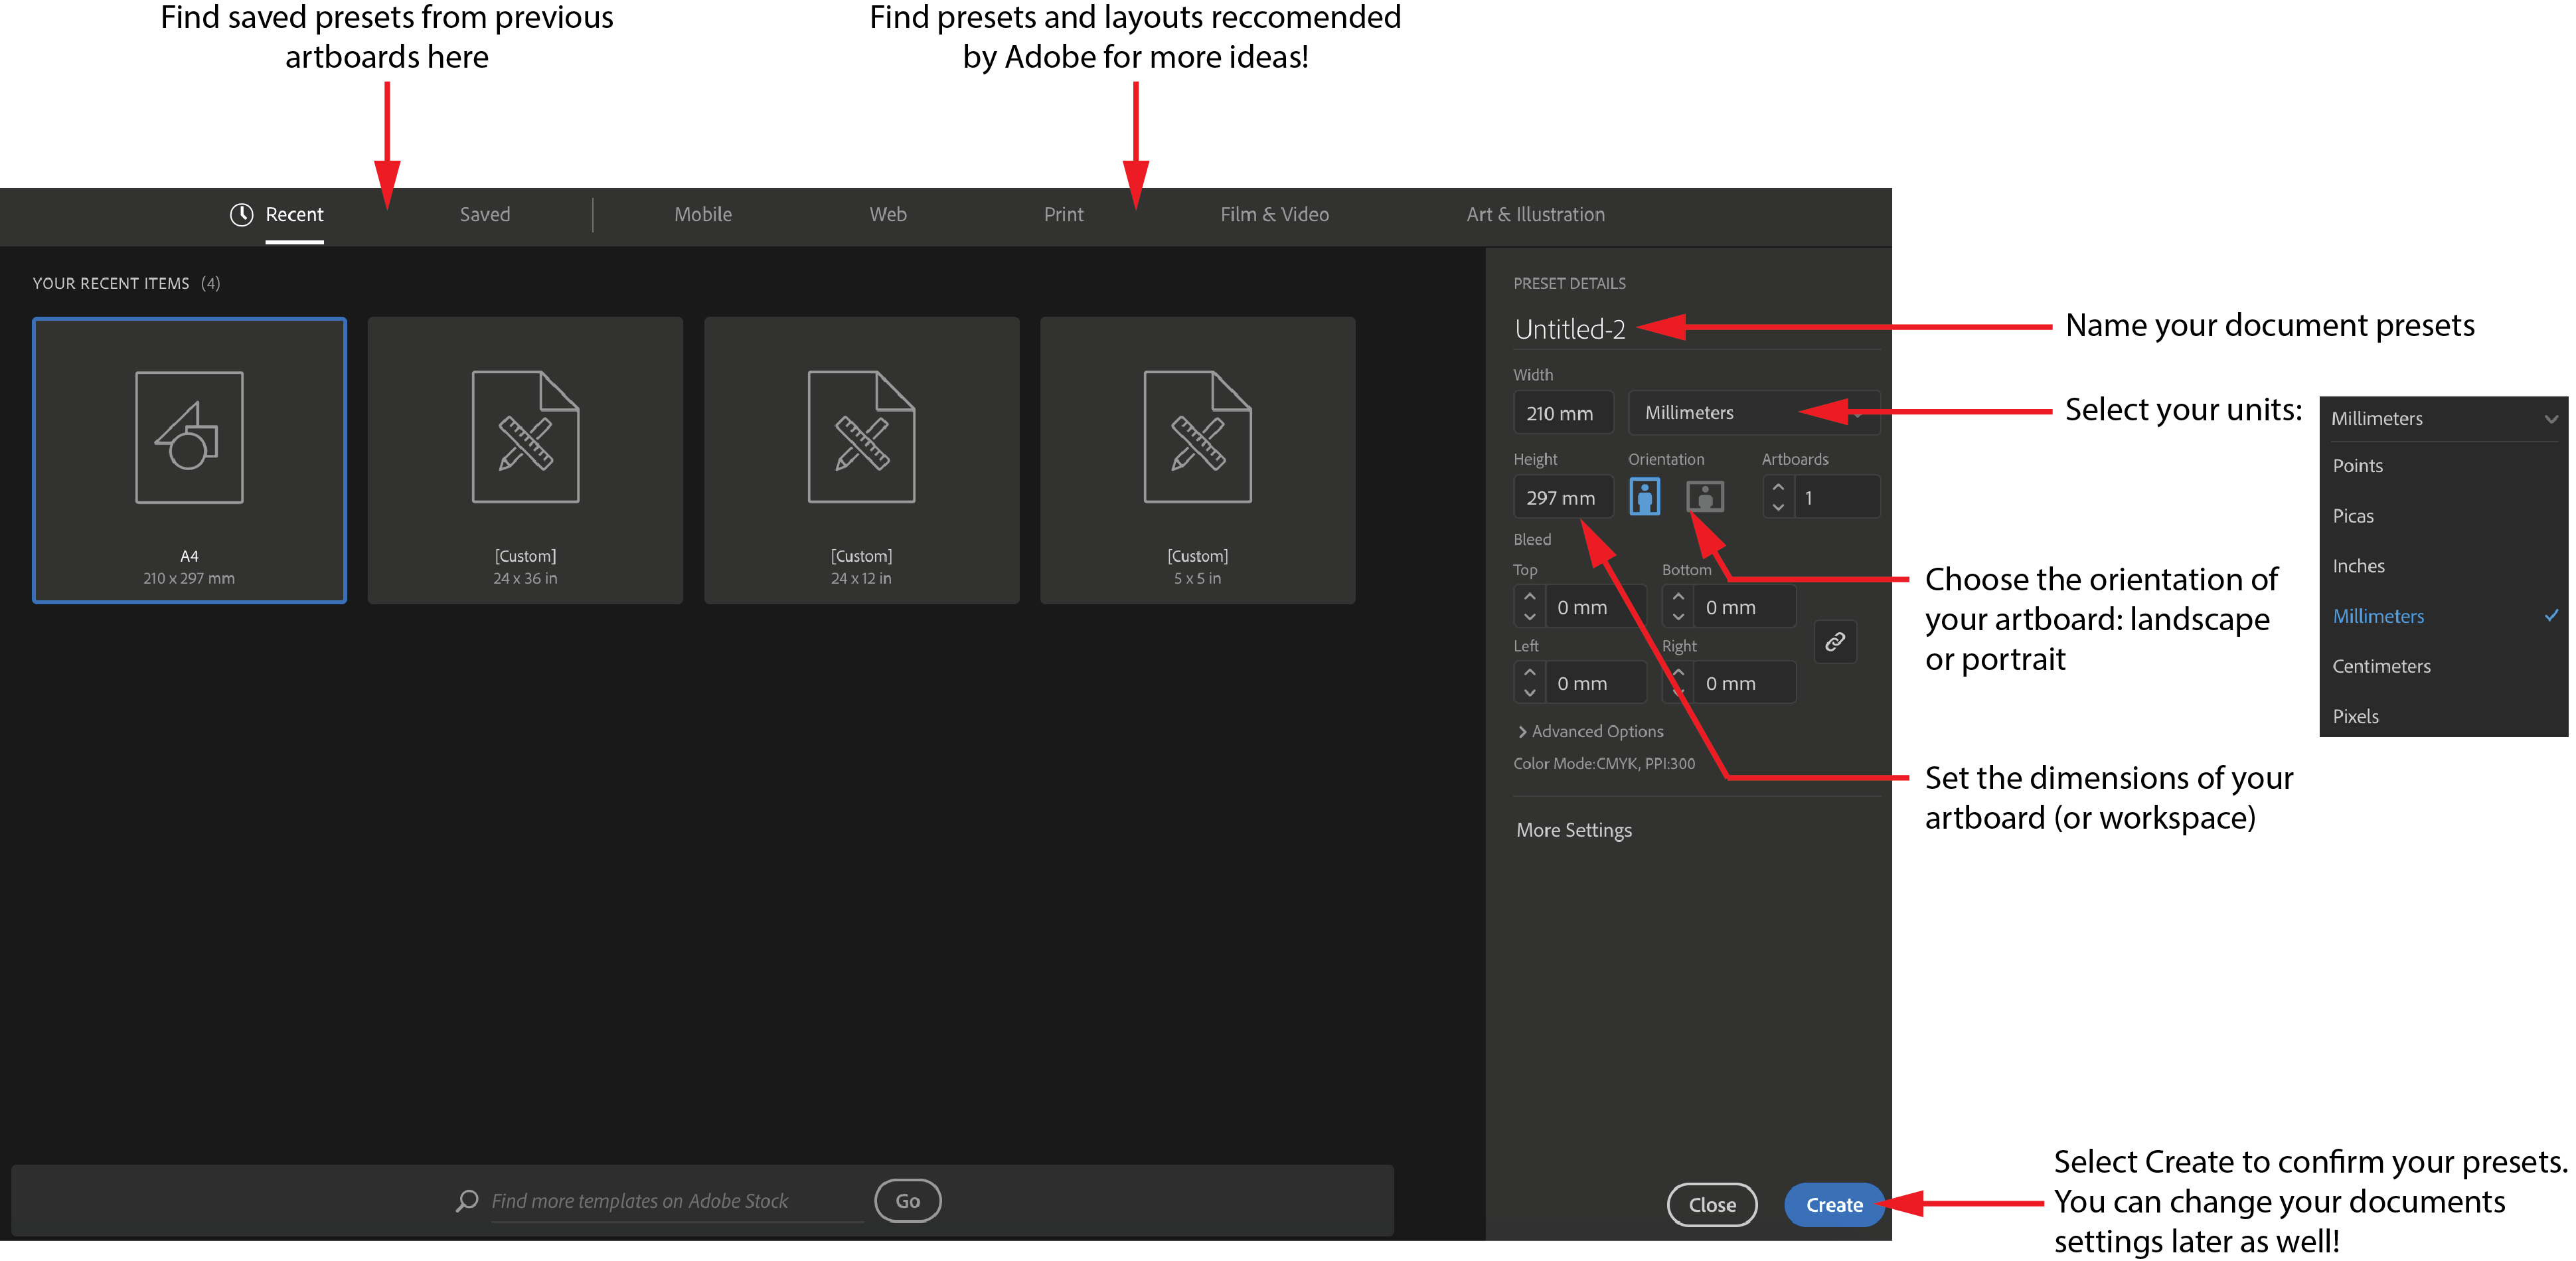
Setting up your artboard, or your AI workspace, is the first and most important steps when creating a document on Illustrator. A dialog window will pop up when you first open Illustrator to create a new document. You can always adjust these document settings later but it is better to have a good idea of what dimensions and units you want to work with prior to designing. The following image shows how to set up your document:
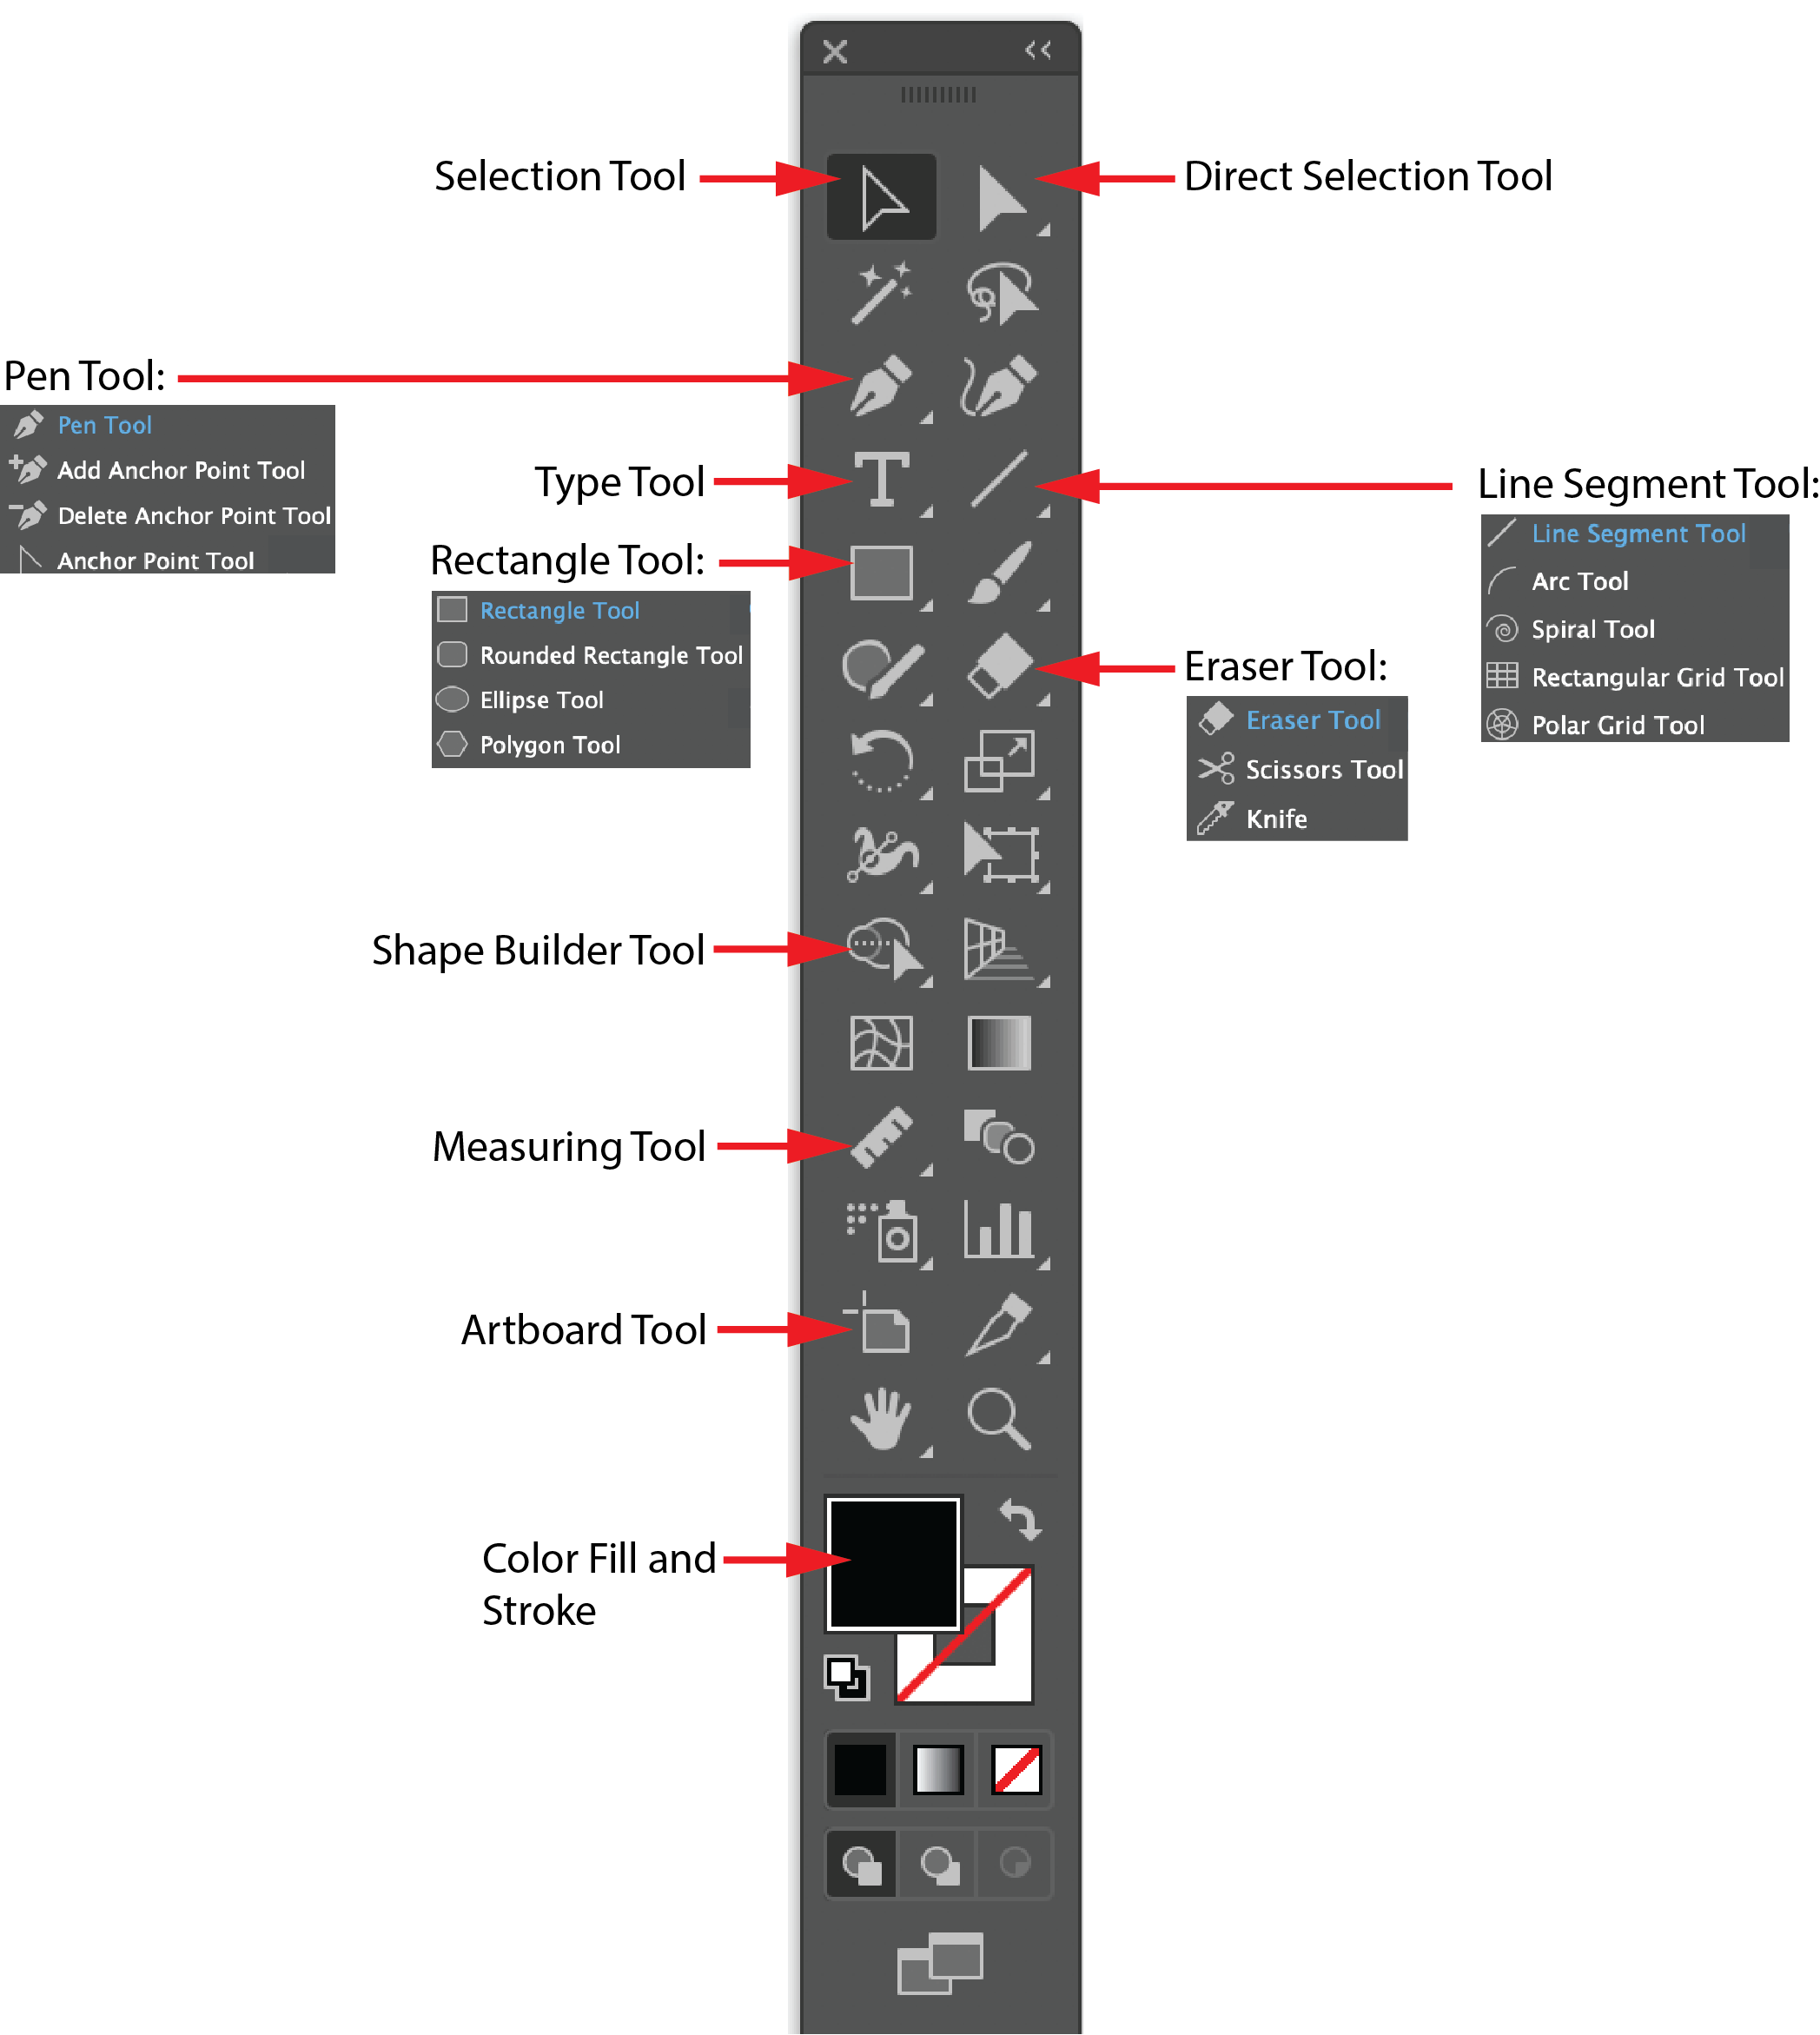
After you setup and create your artboard, your document will have a toolbar that includes various tools useful for creating your design. The tools allow you to perform several tasks such as creating, selecting, and manipulating shapes and lines, and editing and moving images. The trickiest part of using the Toolbar is learning how to navigate it and figuring out what each tool does. The tools can be broadly organized in the following categories:
- Select
- Draw
- Type
- Paint
- Modify
- Navigate
The following image points out the most useful tools that can be found in the Advanced toolbar. Any icon that has an arrow in the bottom right corner has more options to select from if you right click.
The Shape Builder tool allows you to combine, edit and fill shapes on your Illustrator artboard. Follow these steps to create your own unique shape using the Shape Builder Tool:
1. Create several overlapping shapes
2. Select the shapes that you want to combine. Make sure that the shapes overlap so that there are no open lines or spaces.
3. Select the Shape Builder tool and then click and drag across the selected shapes.

4. You should now be able to select your object with the Selection Tool
The Pen tool, which can be found in the Toolbar, is one of the most powerful drawing tool in Illustrator. It allows you to create and edit anchor points and paths. Here’s a quick list of the common features associated with the Pen Tool:
- Path: a single line which can be made up of several points
- Basic path = with two end points is an open path
- Closed path = a shape without points
- Compound path = when two or more paths are connected
- Anchor Point: points found at the ends of a path that give you control over the path’s direction and curvature
- Corner points = can connect straight lines, curved lines or a combination of the two
- Smooth points = designed so that a path continues as one smooth lines without changes in directions or curvature
- Bézier Curve: curves that use anchor points and control handles to adjust its direction and curvature
- Bézier feature helps you create natural looking points and curves that can add a lot to your illustration
Try to use as few anchor points as possible while creating your design so it’s easier to edit later on. You can use the pen tool to add or delete anchor points on your path. As your design becomes more complex, you can connect multiple Bézier curves to minimize the number of anchor points on your path.
Practice using the pen tool with this fun Bezier Game.
Laser cutting is a 2D machining process so Adobe Illustrator is very helpful for creating 2D vector files (file types that end in .ai or .dxf) that can be cut on our laser machines here at Bray. The following sections gives a few Illustrator tips that will make the laser cutting process easier:
1. Joining Vectors
When you are making a design for a complete through cut (instead of an etch), you want to make sure that all your paths and vectors are joined and closed. If you have an open or stray vectors, the laser job control software will not be able recognize which paths to cut. To join vectors, select all the open paths you want to join and click CTRL+J to close your vectors. Sometimes Illustrator will unreasonable lines to close paths, so you can use the join tool to manually connect anchor points together.
As mentioned before, Adobe Illustrator is a 2D vector graphics software. This means that the software only allows you to work with drawings or vector files that end in .pdf, .dxf, .dwg, .svg or .ai! The trickiest part of importing files from 3D designing softwares like SolidWorks or OnShape is making sure to convert 3D file types (.sldprt, .obj) into a 2D file by selecting the face of the object you want to laser cut. Use the following step-by-step tutorial to learn how to import files from SolidWorks into Illustrator for laser cutting!

Since laser cutting is a 2D form of fabrication, we can use certain techniques in Illustrator to laser cut a three dimensional object. In this tutorial we will construct a simple three dimensional object: a box! We can use techniques such as finger joints, a type of woodworking joint, to make a 2D vector design on Illustrator and put the 2D pieces together to make a three dimensional object.
A finger joint, also known as a comb joint, is a woodworking joint made by cutting a set of complementary, interlocking profiles in two pieces of wood (or acrylic), which can then be press-fit or glued. The cross-section of the joint resembles the interlocking of fingers, therefore the name finger joint.

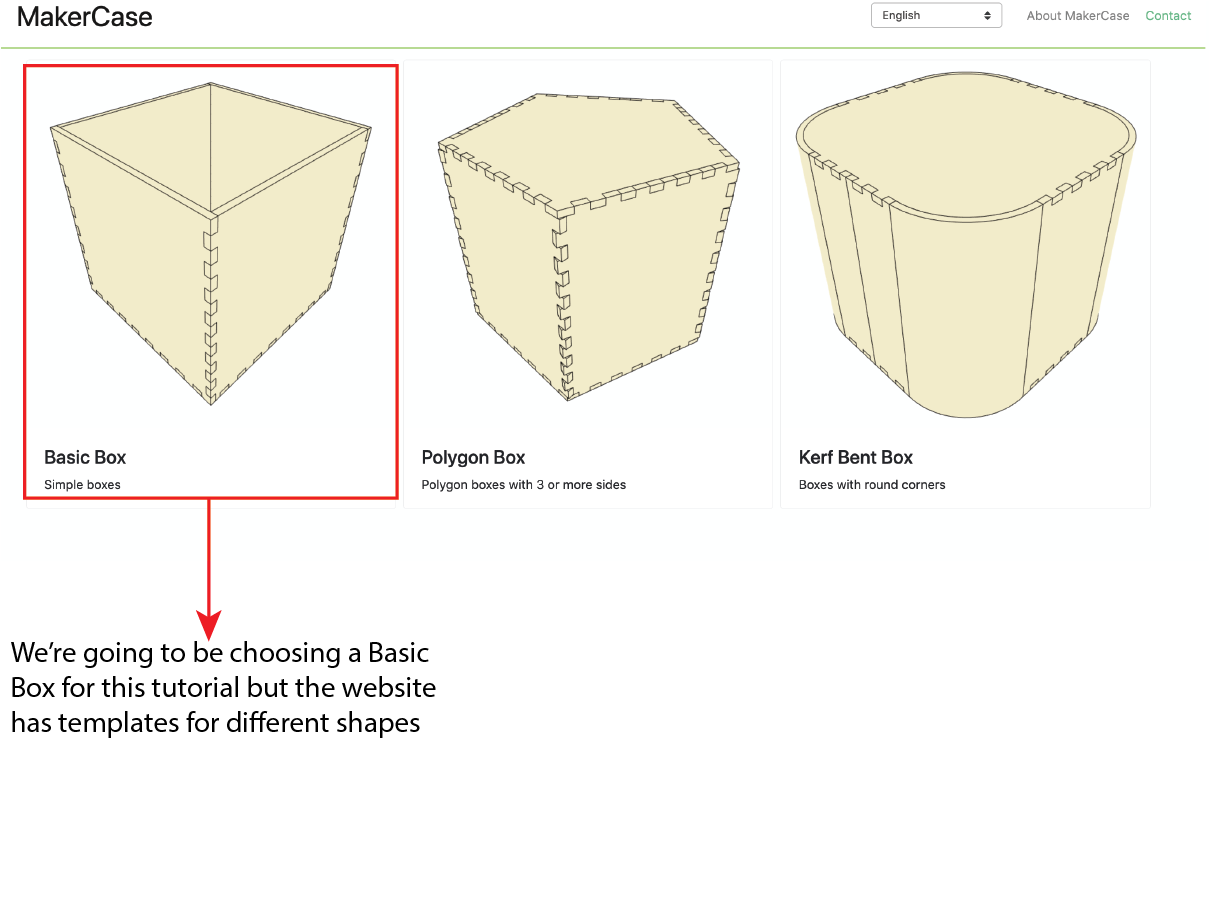
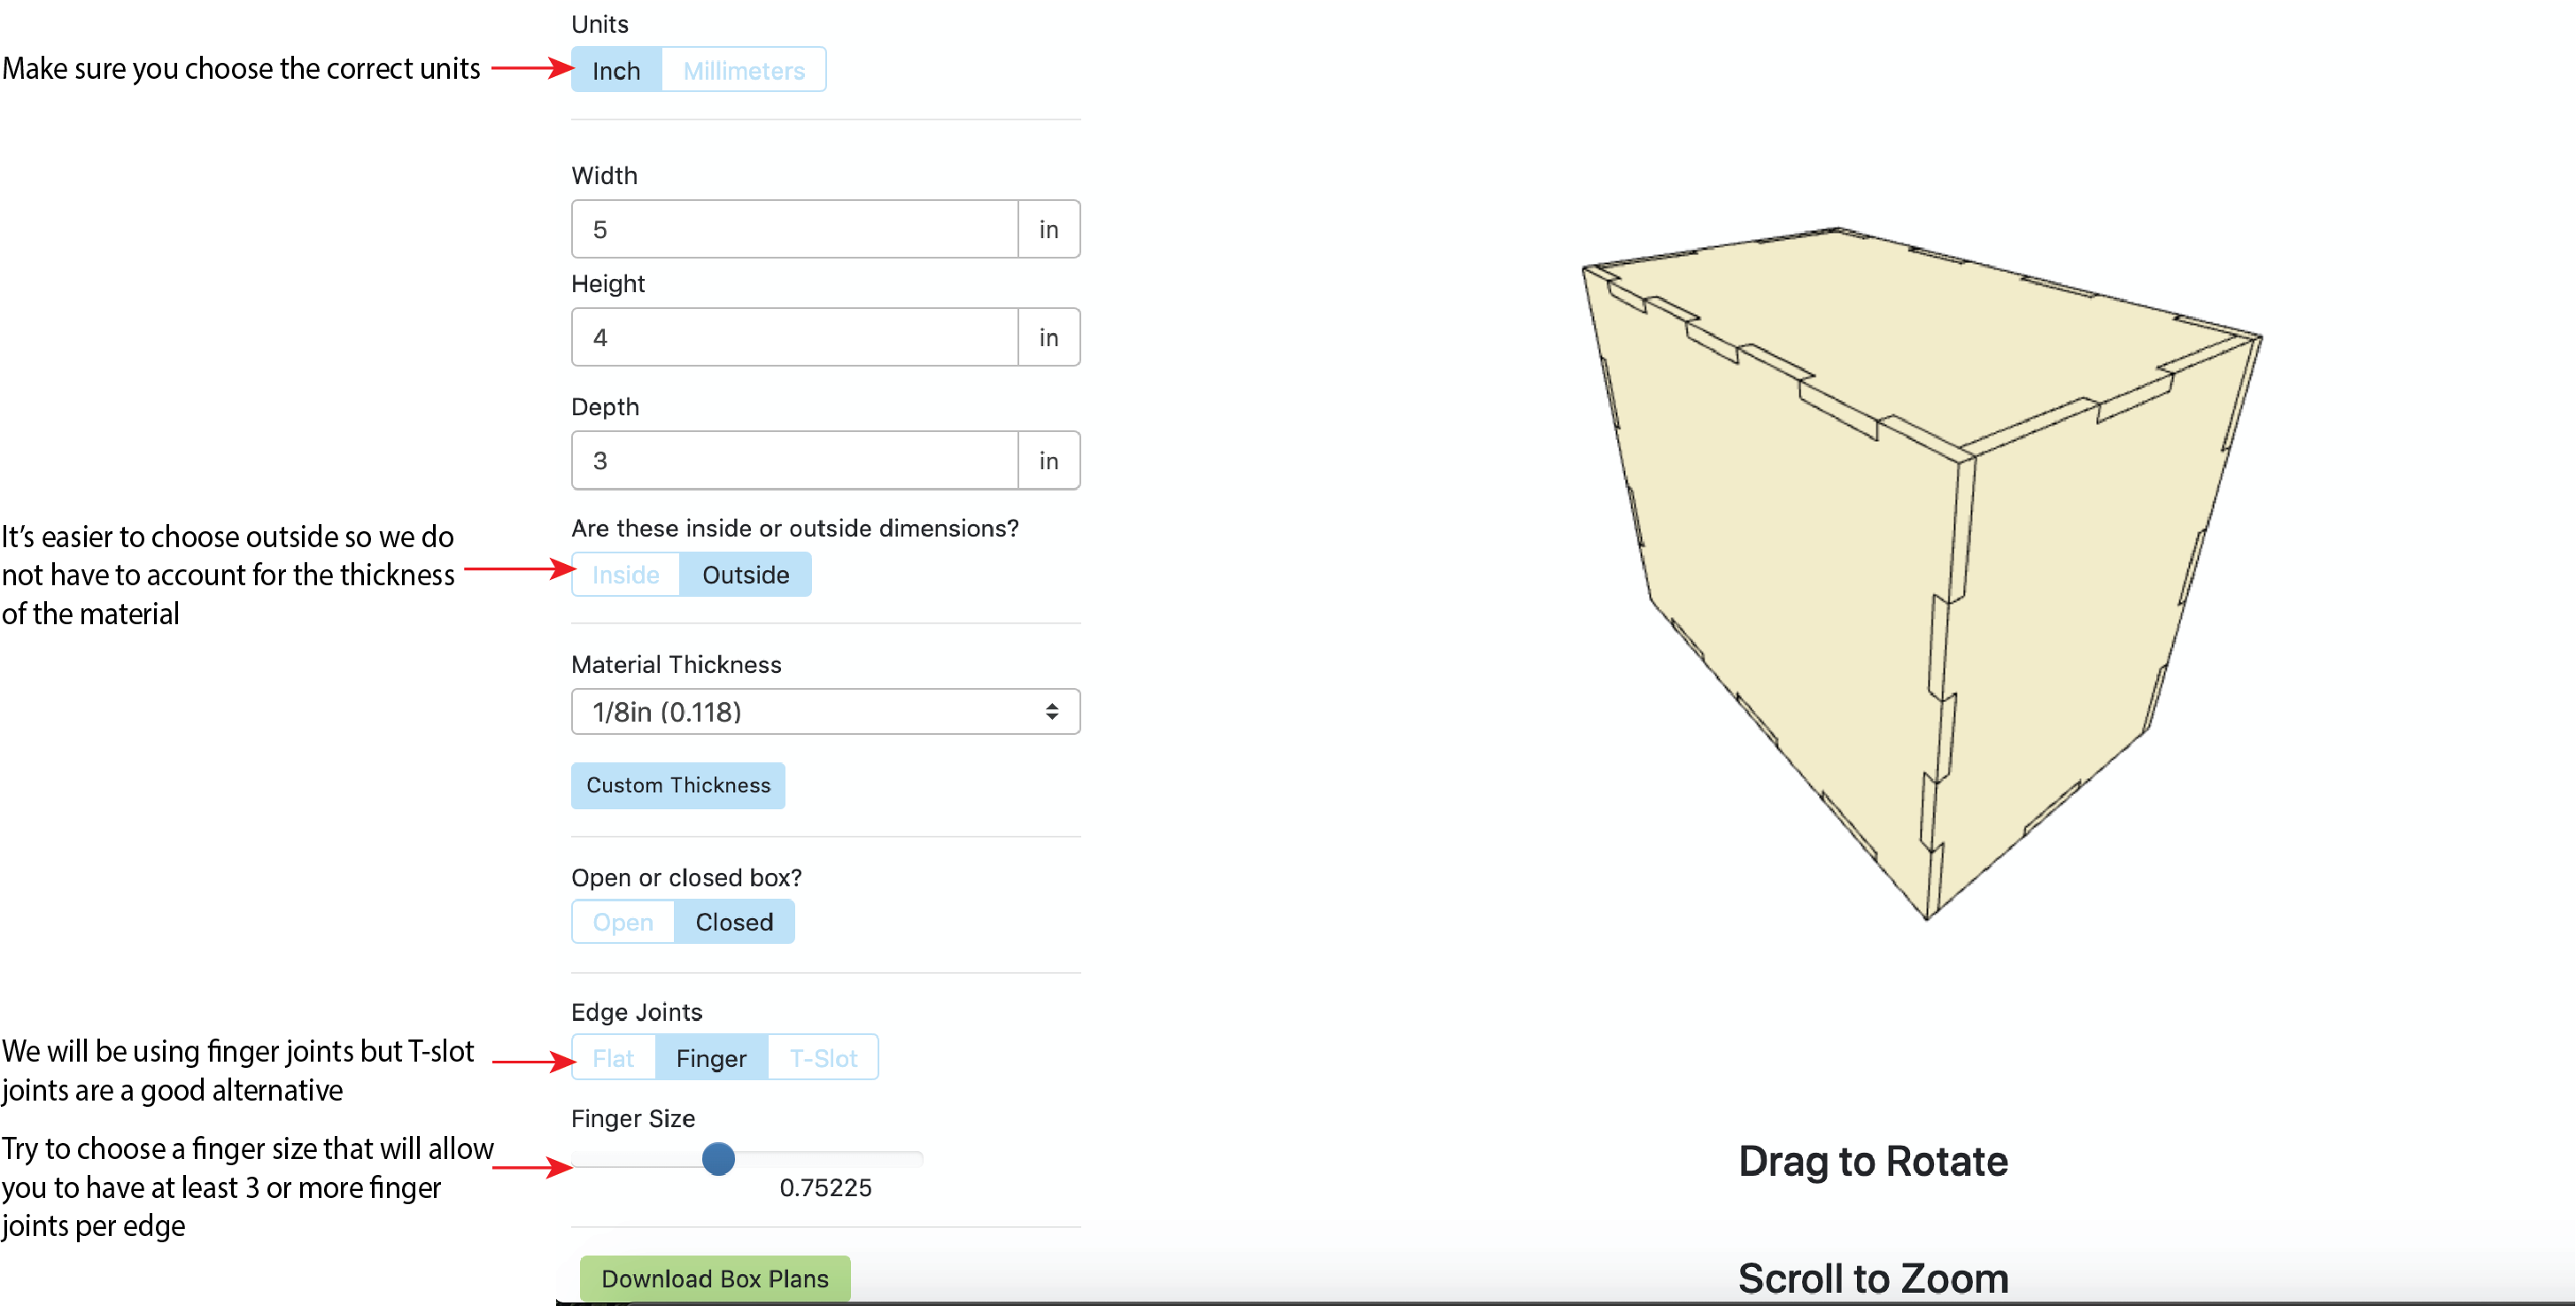
It is very simple to make your own finger joints on Illustrator using the pen tool and dimensioning it based on whatever size you want your box to be. But there are also websites online that easily generate a .dxf file that you can import into Illustrator. We recommend using MakerCase, a user-friendly and easy site that allows you to choose the dimensions of your box and generates a 2D vector file that you can download.
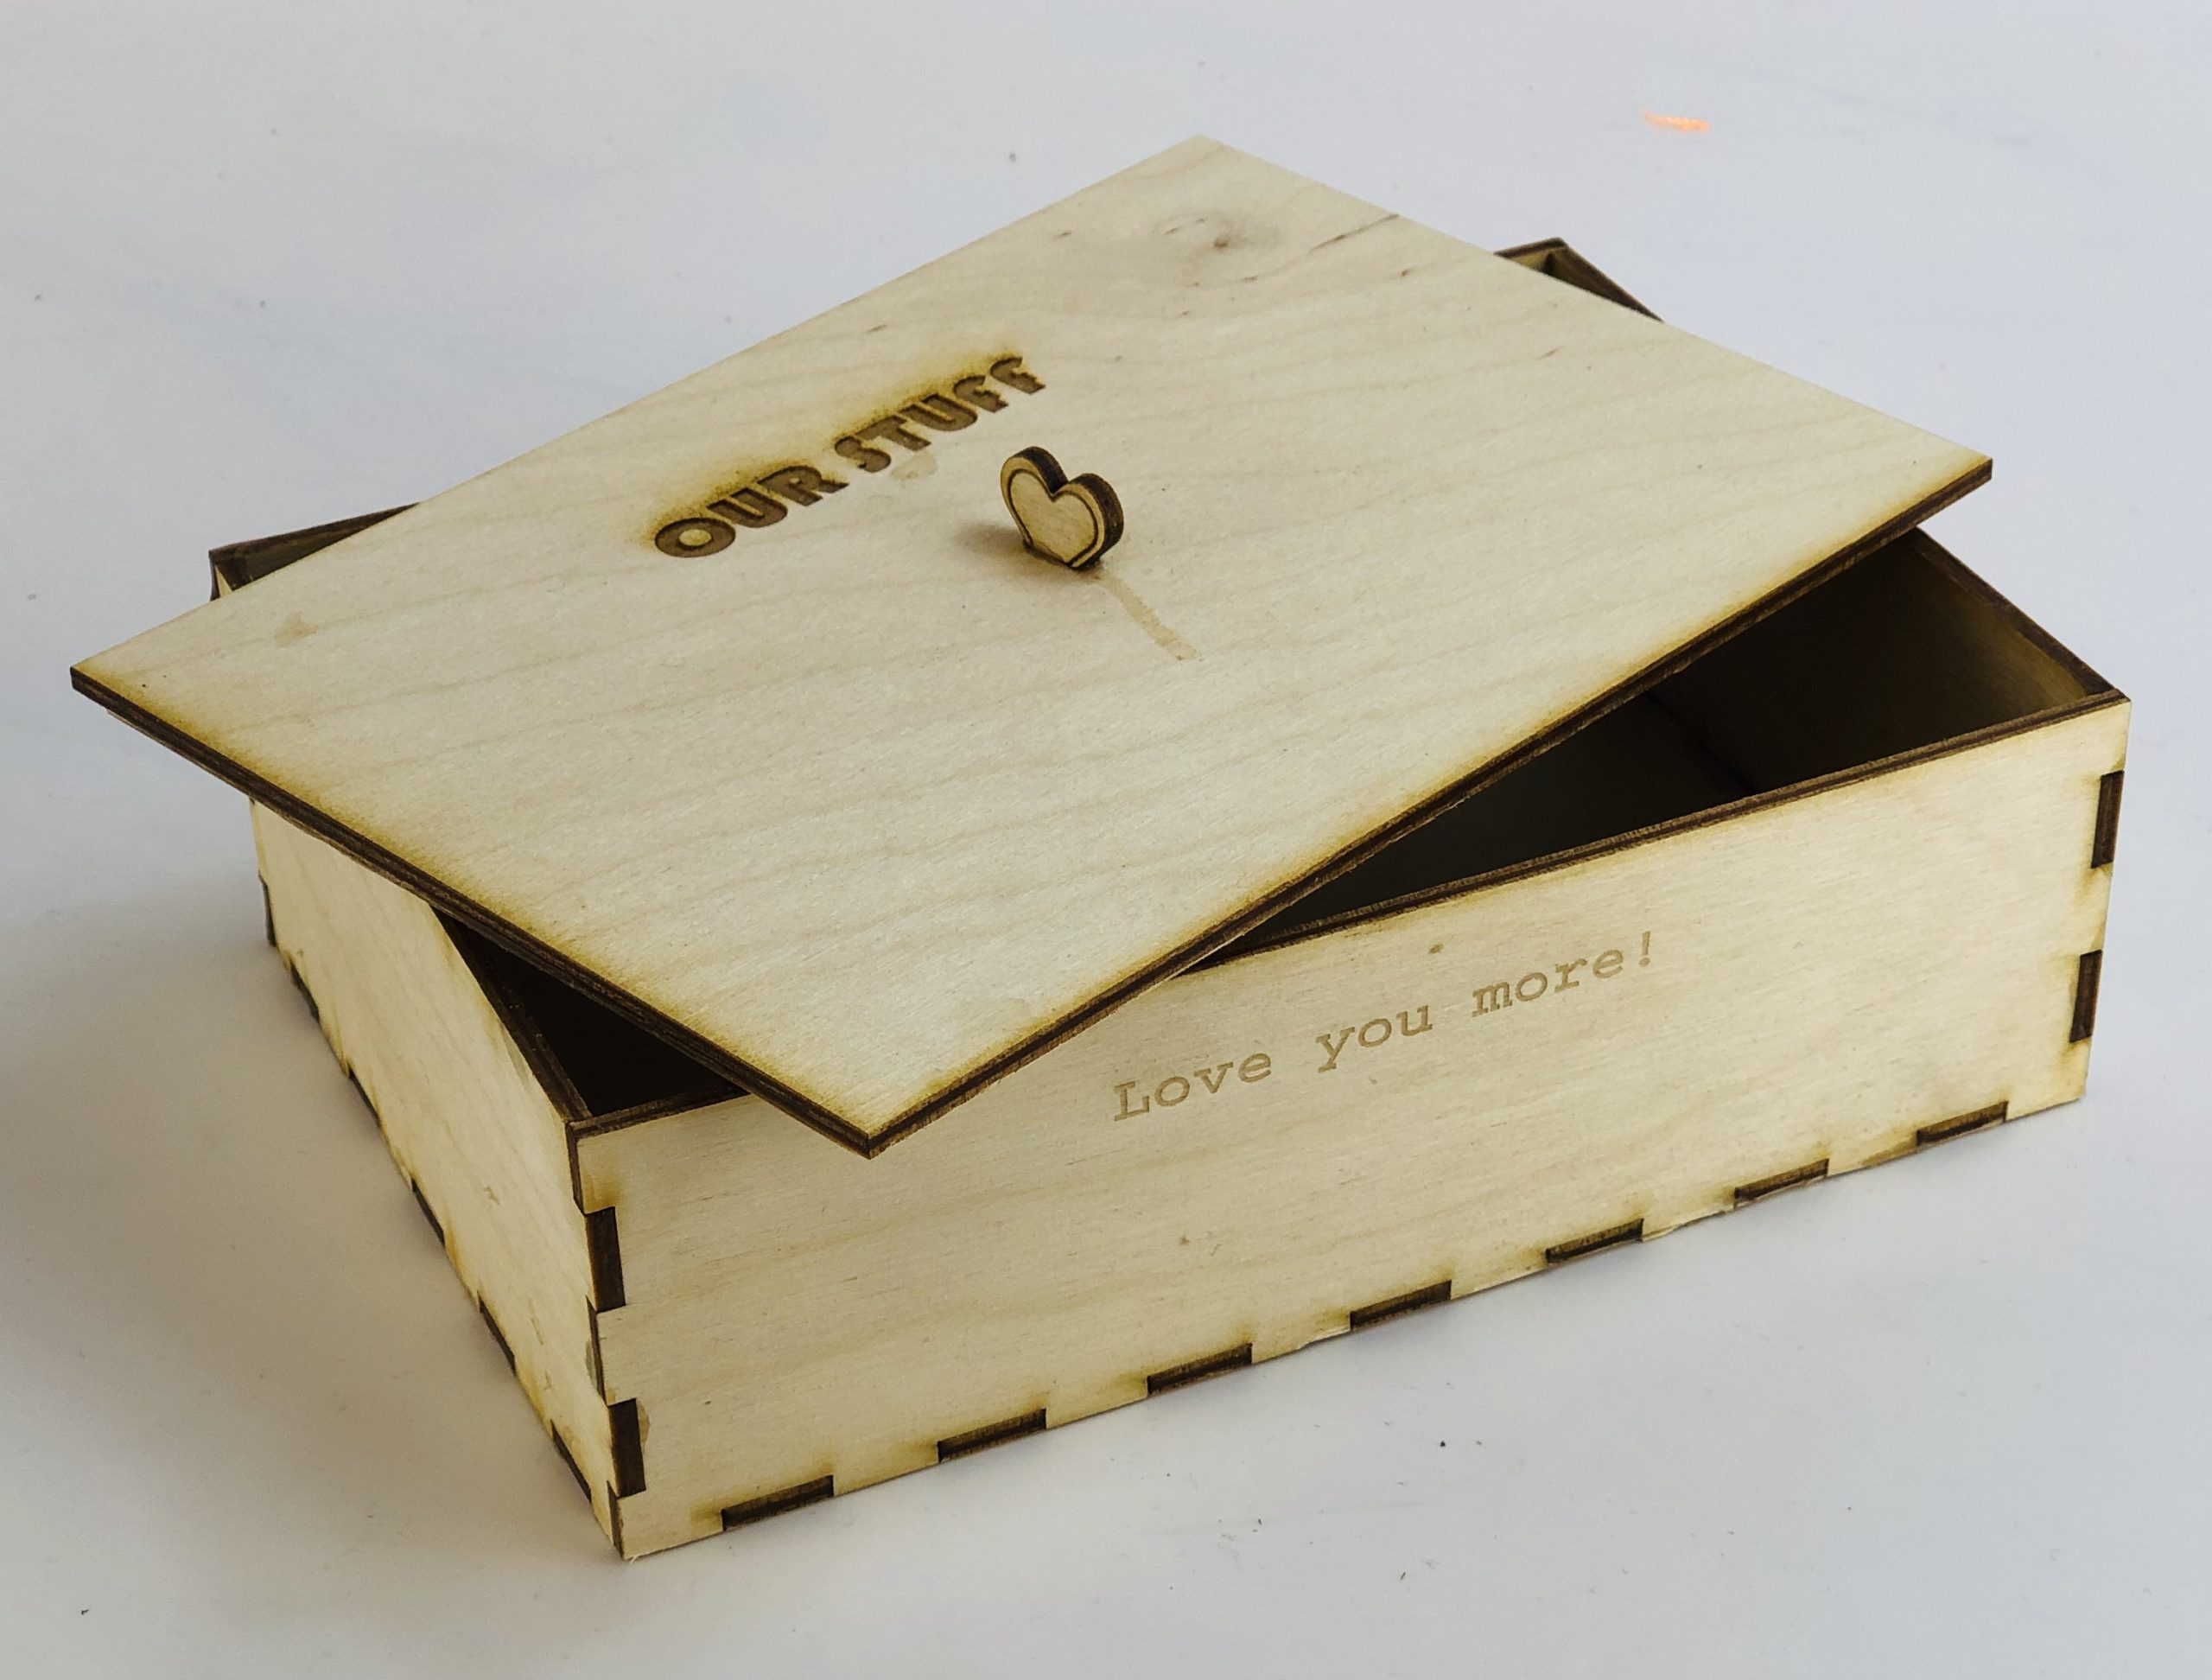
Once you have chosen your necessary dimensions and joint requirements, you can preview the 2D vector file before downloading the file. It is easiest to import a file into Adobe Illustrator if you download the file as a .svg. Once you’ve imported your file into Illustrator, double check your file dimensions to make sure your box is the correct height, width and depth before adding any extra features to your design. Once you have downloaded the file, you can open it in Illustrator and add any etchings or extra features to your box. Before you laser cut your box, just make sure that your lines are at the required thickness and color for cutting (0.001 inches and 255-0-0 on the RGB scale). Below is an example of a box that one of our Bray employees made using finger-joints along the edges. She also added additional features such as a shaped handle and a groove-fitted cover on the top. So feel free to get creative on Illustrator and add some personalized touches to your design!
