Desktop 3D Printer Maintenance
The following page goes over the steps to perform basic maintenance tasks on the desktop 3D printers. If you still have errors in your print after performing maintenance or need help, please ask the staff in Bray!
3D Printer Maintenance Kit
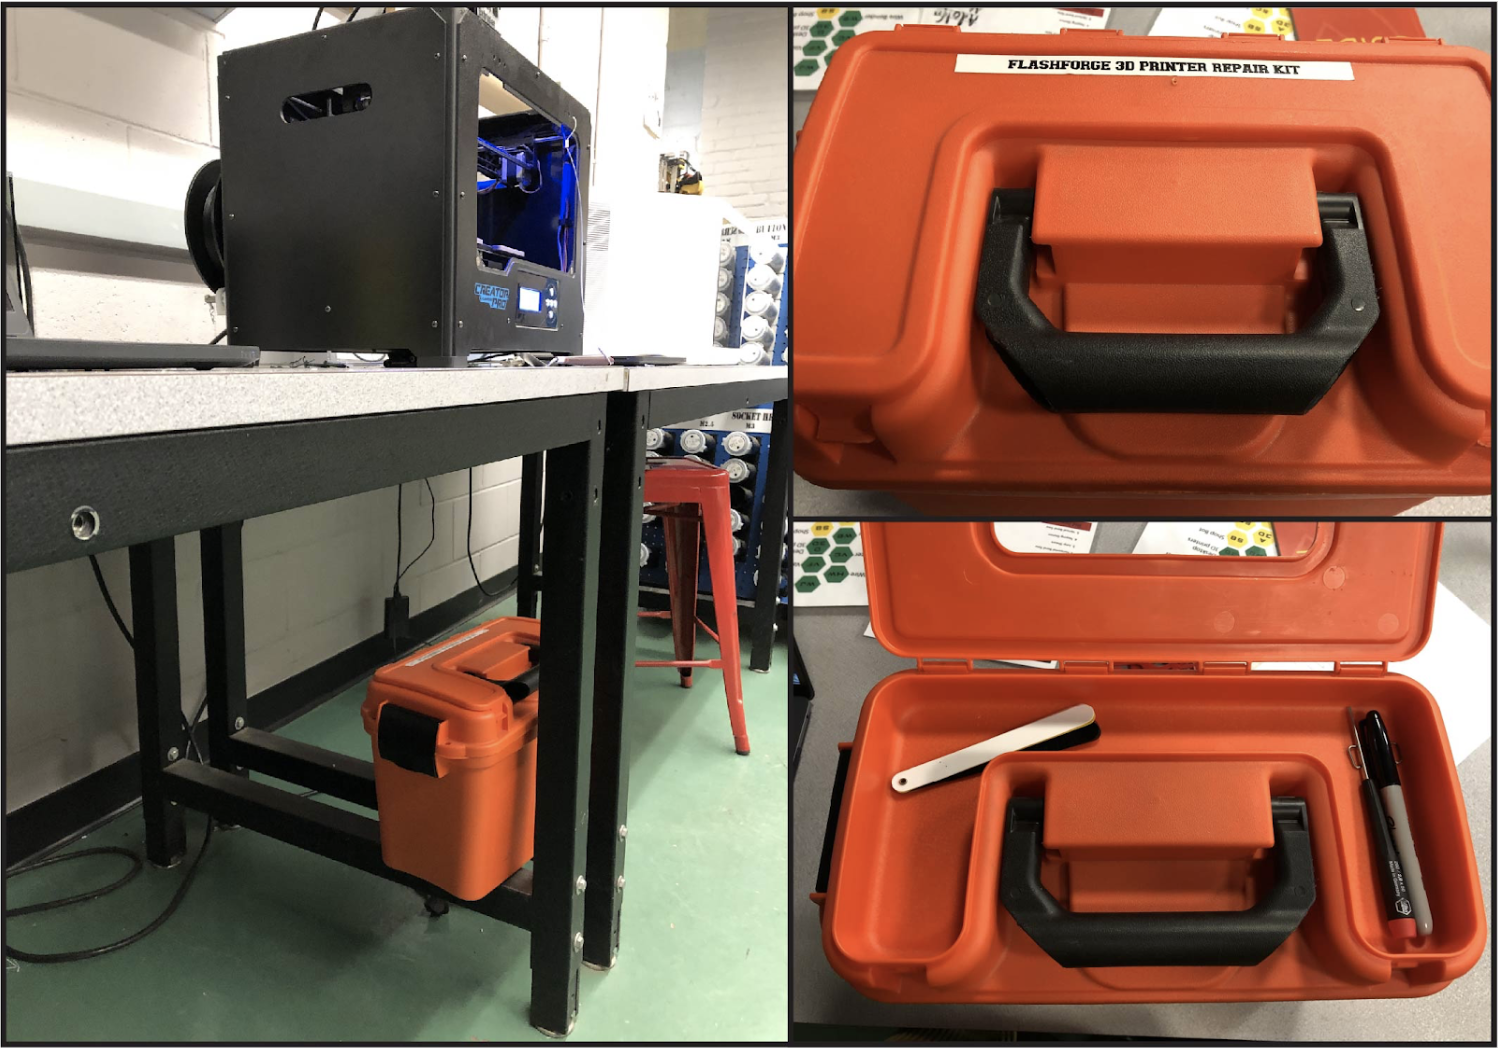
The 3D printer repair kit can be found under the 3D printers table. Please return the tool kit back where its located after using!
Leveling the Bed
It’s always good to level the bed before you print as it will reduce the chances of your print failing:
1. The distance between the extruder nozzle and the bed should be at 0.003in. We can adjust this distance by using the three wing nuts attached to the bottom of the bed.
2. To get the bed up to a height so you can start level go to Utilities > Level Build Plate. Now you should have access to the bottom of the bed.
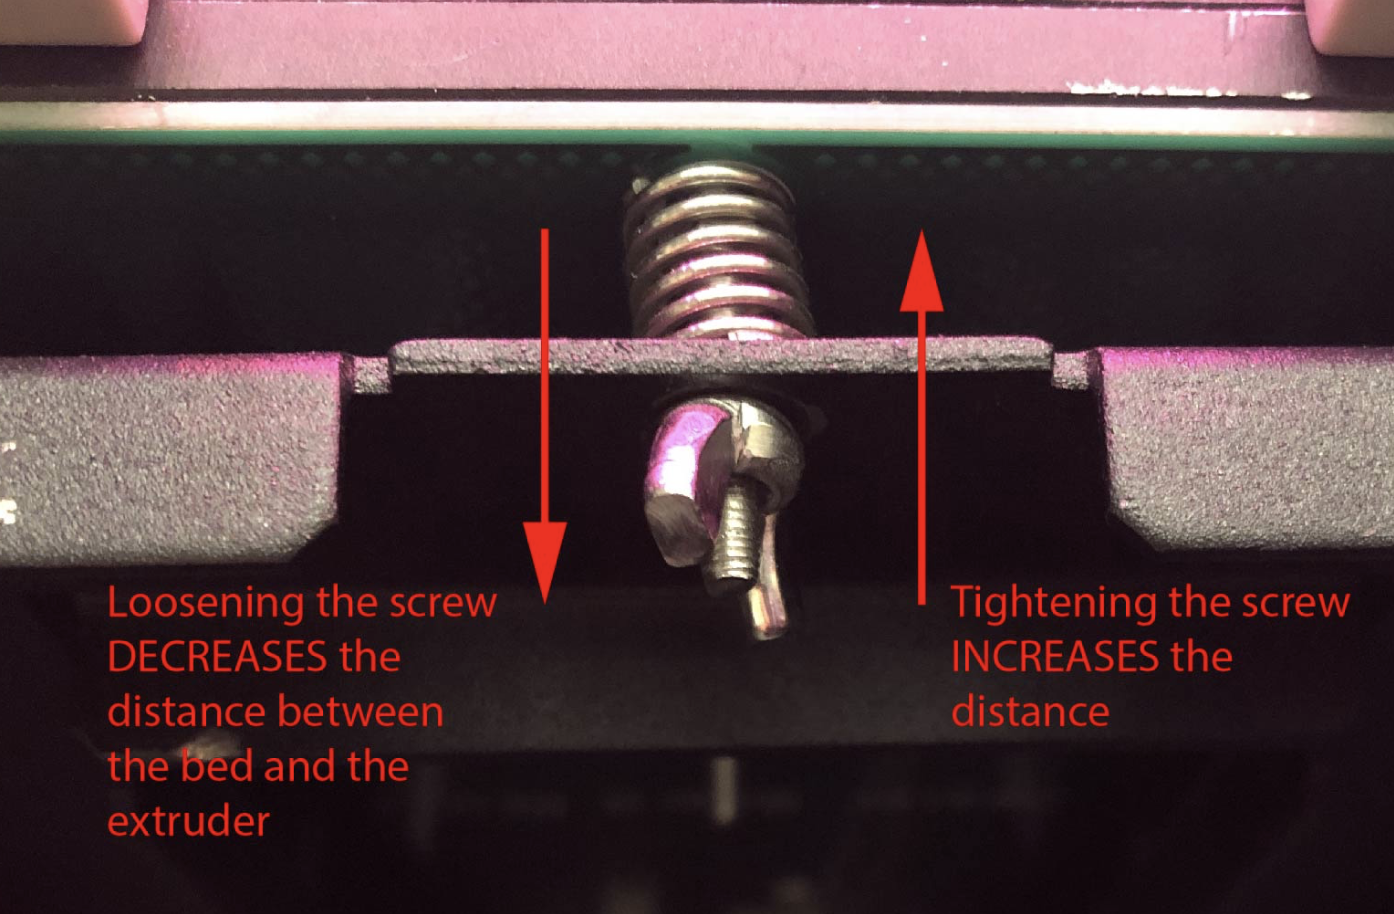
3. Keep in mind because there is a spring attached, loosening the screw will push the bed closer to the extruder whereas tightening the screw will bring the bed further away from the extruder.
4. Use the 0.003 in level guide to adjust the bed. The paper should be able to move snuggly between the extruder and the bed.
5. Repeat this five times making sure to move the extruder to all four corners and the middle of the bed, adjusting all three wing nuts to ensure that the entire bed is equally leveled. Once the bed is leveled, select okay to allow the bed to reset its position.
Changing and Repairing Filament
Please use filament with the PLA and TPU that Bray provides and do NOT replace the filament type without asking the Bray staff. Using unknown material can really damage our printers!
To Take Out Filament:
1. Select Utilities > Filament Loading > Unload Right/Left (make sure you select the correct extruder!)
2. Wait for the selected extruder to heat up. Once heated the filament should be hot enough to pull out from the extruder.
3. If the filament is stuck in the extruder, hold down the black button on the right to loosen the filament a bit.
4. Make sure that the extruder has no clog and is completely clean since this will make it easier for you to load in new filament. Select ok when you’re done.
To Load Filament:
1. Select Utilities > Filament Loading > Load Right/Left (make sure you select the correct extruder!)
2. Wait for the selected extruder to heat up. Place your new roll of filament properly in the stand on the back of the printer and feed the filament into the black rubber tubing. Using a wire cutter, cut the filament at a 45 degree angle (this will make it easier for the extruder to grab the filament during loading)
3. Once heated, gently guide your filament into the extruder. Let some of the filament come through the extruder so you know its loaded correctly. Select ok when you’re done.


