Dual Extrusion on Desktop 3D Printers
Dual extrusion printing can be done on the left-most 3D printer in the Mechatronics Lab.
Typically the left extruder uses the flexible black TPU filament and the right extruder uses the regular white PLA filament. Check what filament is loaded in the back of the machine.
Setup in SOLIDWORKS
To make things easier later on in the process, make sure you create each part with reference to the same origin. Below are directions for the easiest way to do set this up.
Creating an Assembly
Create a part as you would normally do, open it in an assembly, and create the other parts in that same assembly.
You can create new parts in an assembly by clicking the arrow below “Insert Components” and selecting “New Part”. 
Once selected, you will be prompted to select the face or plane on which to position the new part. Afterwards, the first part will become translucent and you can begin making your new part.
Once your parts are finished, you can save the assembly as an STL file. It will create different STL files for each of the parts you have in the assembly.


Setup in MakerBot
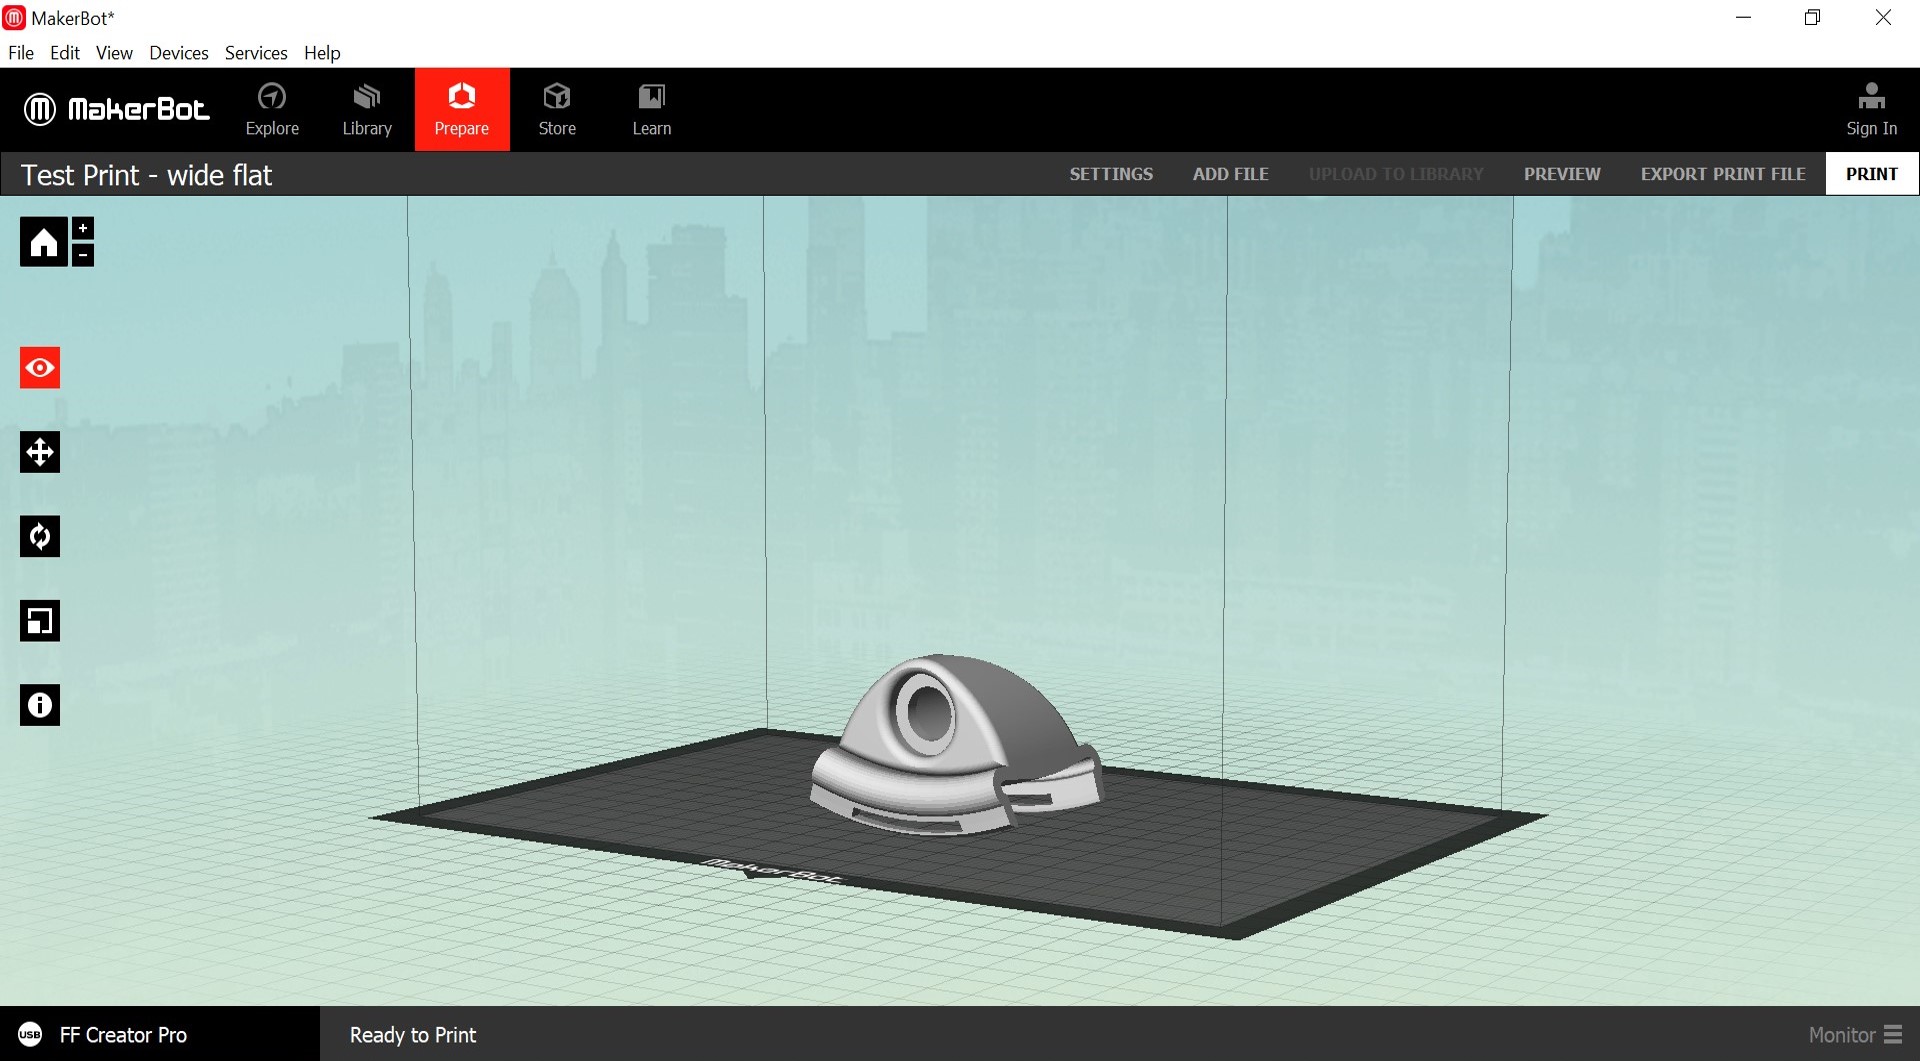
Once you are in MakerBot, add your STL files individually. After you add each part, make sure you press Ctrl+Z to move the part back to its place in respect to its origin. Make sure you follow that step for each part, and they should line up the same way they did in SOLIDWORKS or OnShape. To move and rearrange the parts, you can press Ctrl+A to select all the parts and then move or rotate them.
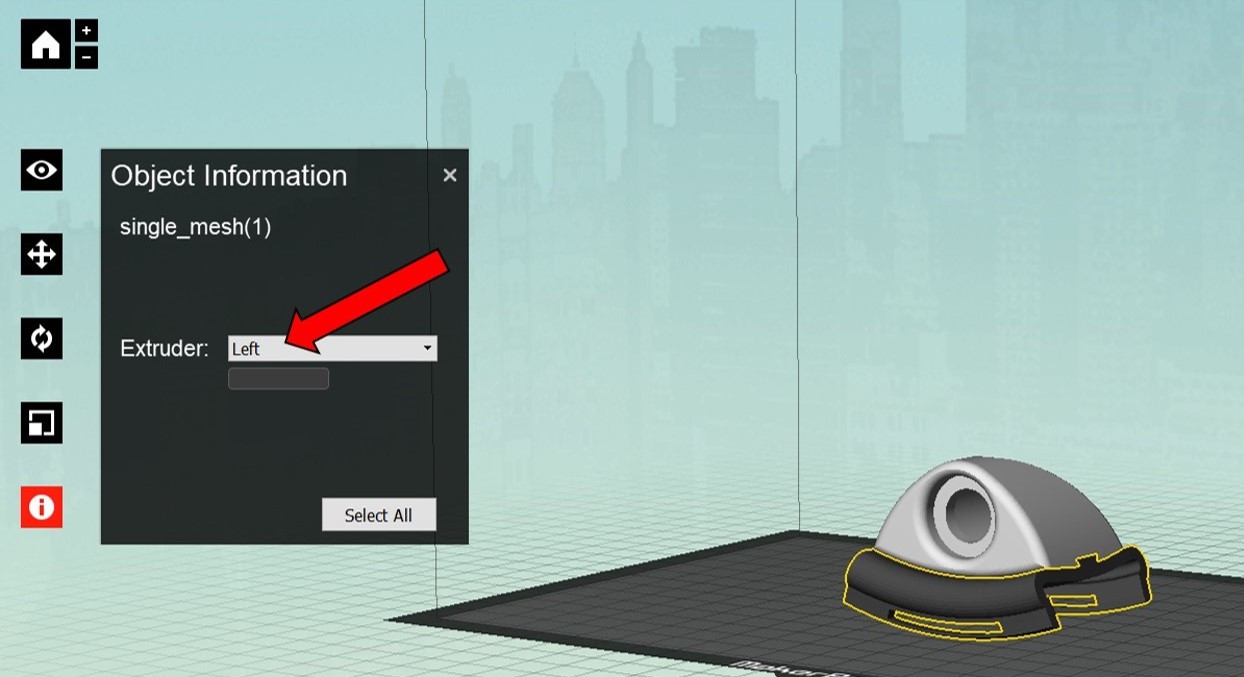
Afterwards, make sure you select which extruder you want to use for each part. Typically the left extruder uses the flexible black TPU filament and the right extruder uses the regular white PLA filament. Check what filament is loaded in the back of the machine.
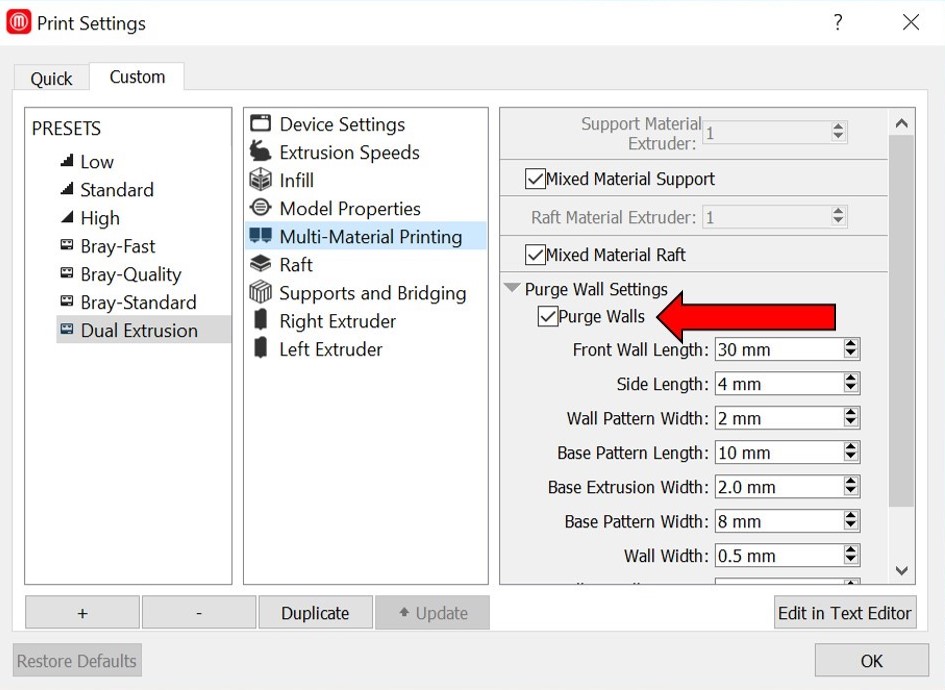
If you want your print to come out a lot cleaner, you can use the “Purge Walls” setting under “Multi-Material Printing”. When the setting is checked, the printer will create walls around your part that will clean the nozzles of the extruders while it is printing.
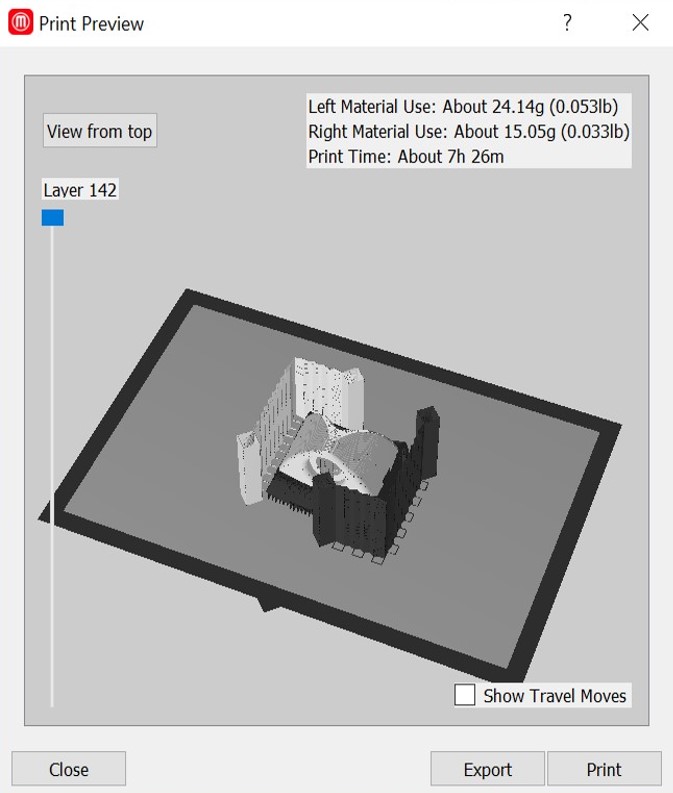
Preview the print and make sure that everything makes sense. Once ready, click print. The machine will take a few minutes to heat up before it begins printing. Watch the machine for at least the first 30 minutes of the print to ensure the printed material adheres to the bed and the object is printing correctly.
Alternative Method for Setup in SOLIDWORKS
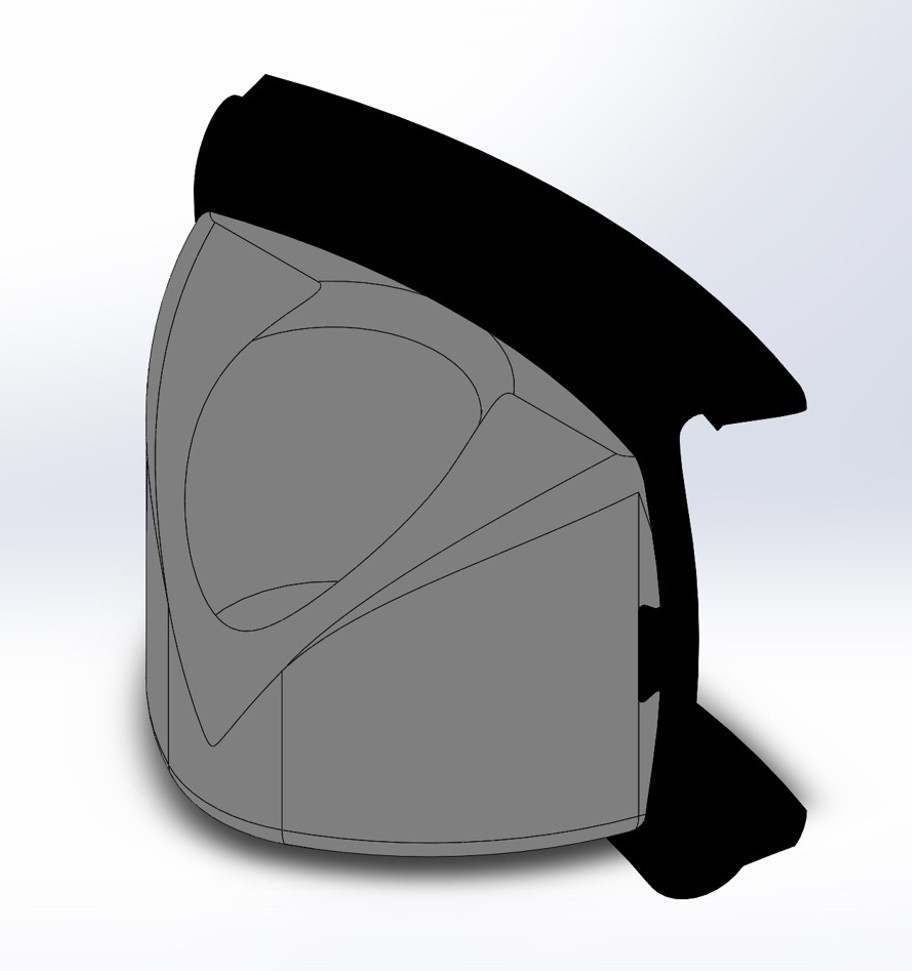
Creating Bodies
In a part file, you can create different bodies using surfaces.
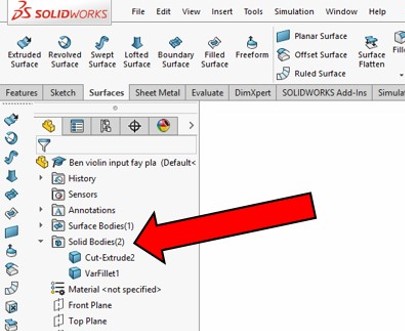
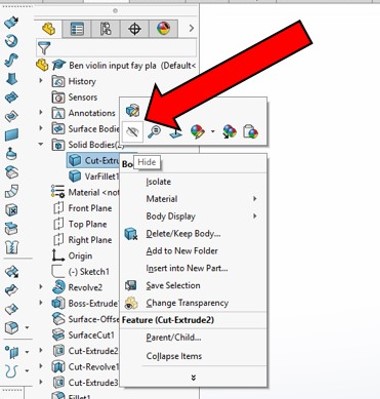
Once you have your bodies created, isolate each body by right-clicking and hiding the other bodies from view. Afterwards, save the part file as an STL file. It will create an STL file for only the body that was visible.
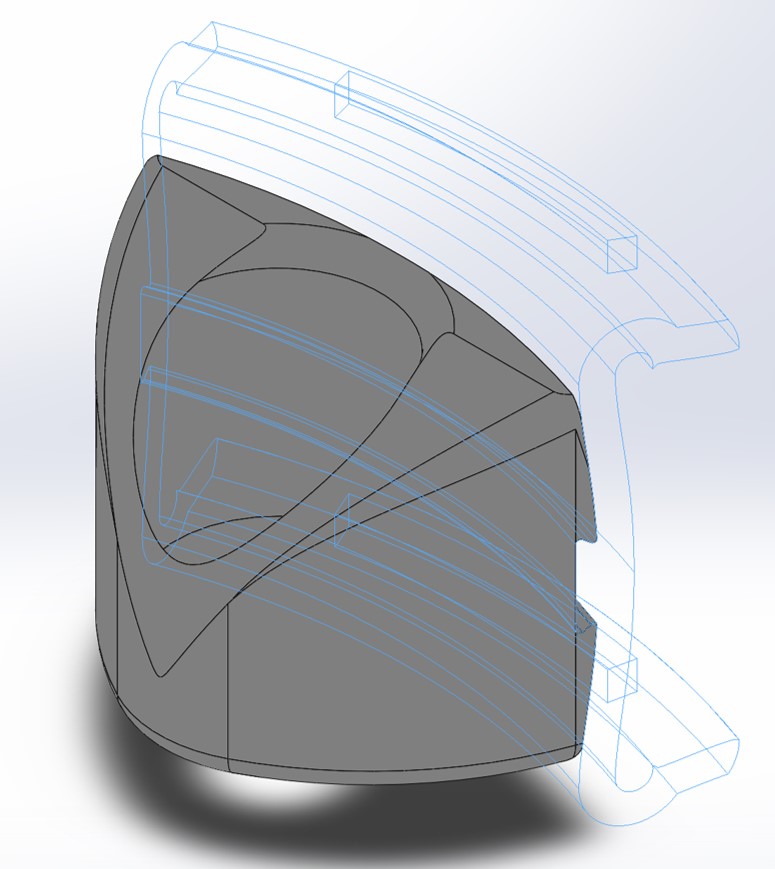
Repeat the previous step for each of the bodies until you have an STL file for each of them.
Alternative Method for Setup in OnShape
Similar to SOLIDWORKS, in OnShape, you need to make sure that each part has the same origin so that they line up well when you import them into MakerBot. The easiest way to do this is by creating your different parts under one part studio file.
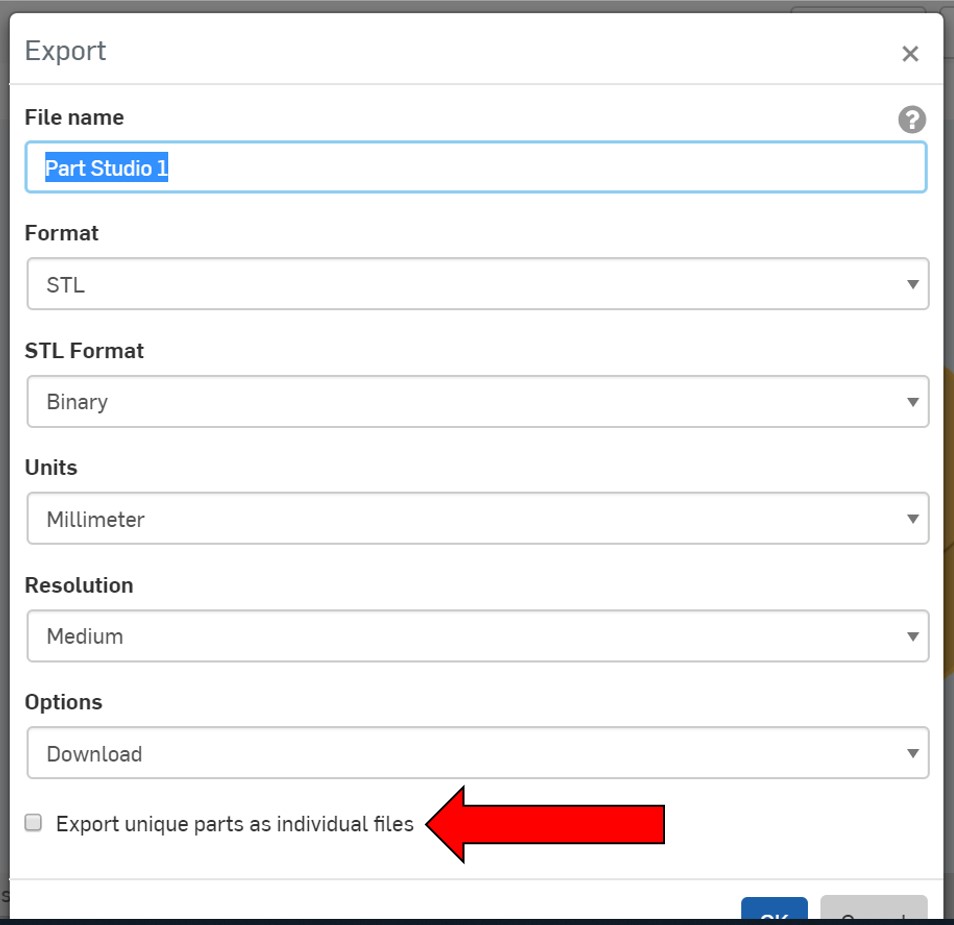
On the left hand side under the feature tree, select the parts that you want to be the same type of filament. Right-click one of those parts and select “Export…”.
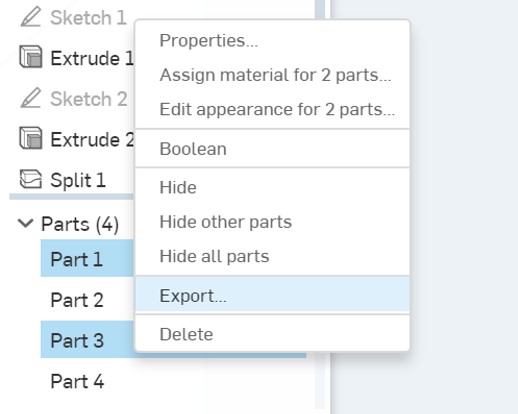
Select “STL” for format and the units you used while making your parts. Make sure to uncheck the box at the bottom of the dialog box and then click “OK”.