Tension Test: Running a Tension Test
1. Turn on Instron
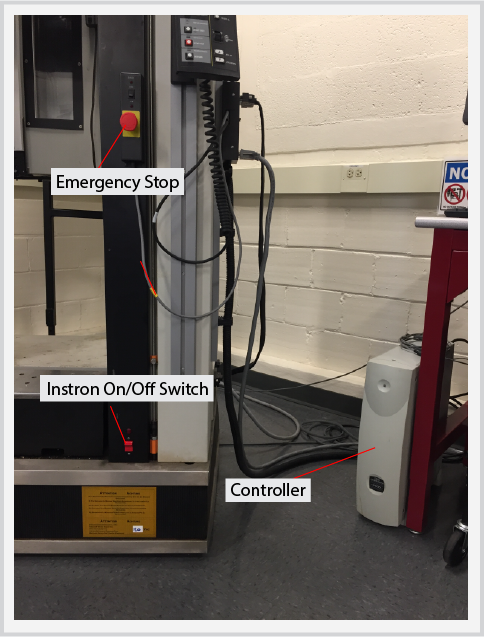
- Flip the Instron On/Off switch to on, it is located on the bottom right of the front face of the Instron.
- Check that the emergency stop (e-stop) is disengaged. If the e- stop turns easily to the right it is disengaged. If it is engaged, turn it to the right until it pops to the disengaged position.
- Turn on the controller using the switch towards the bottom of the back of the unit.
2. Install Material Specimen
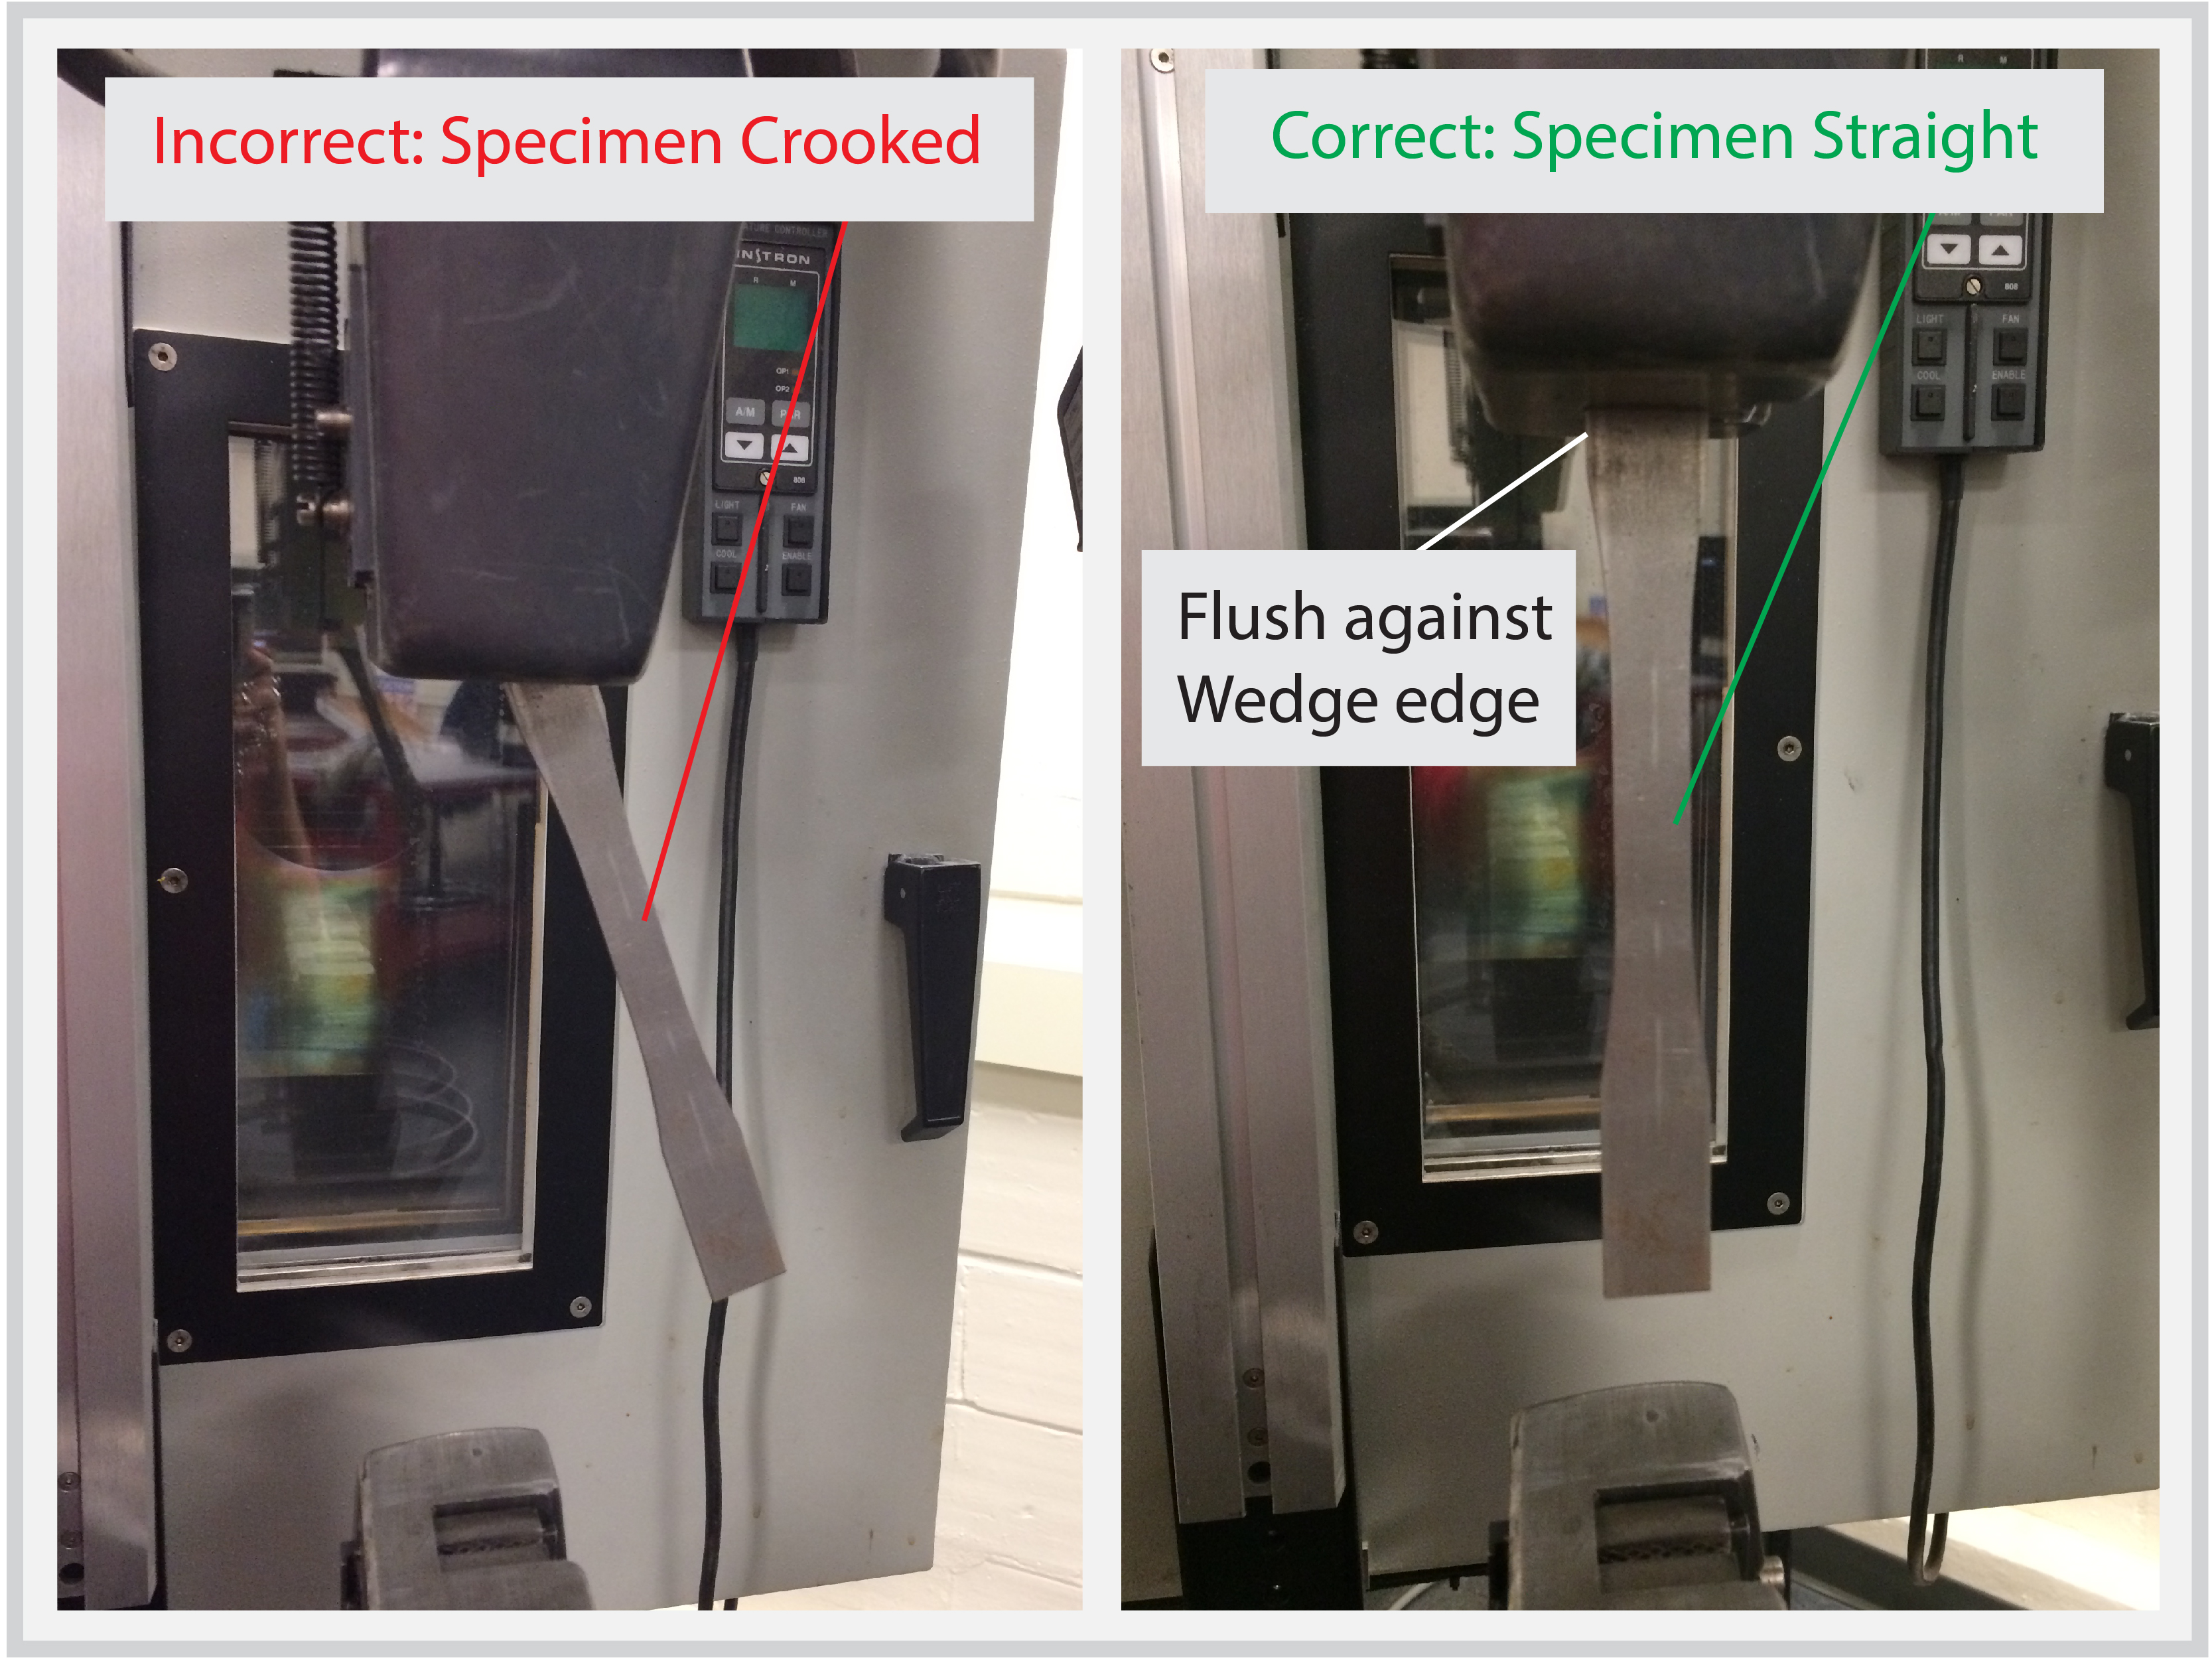
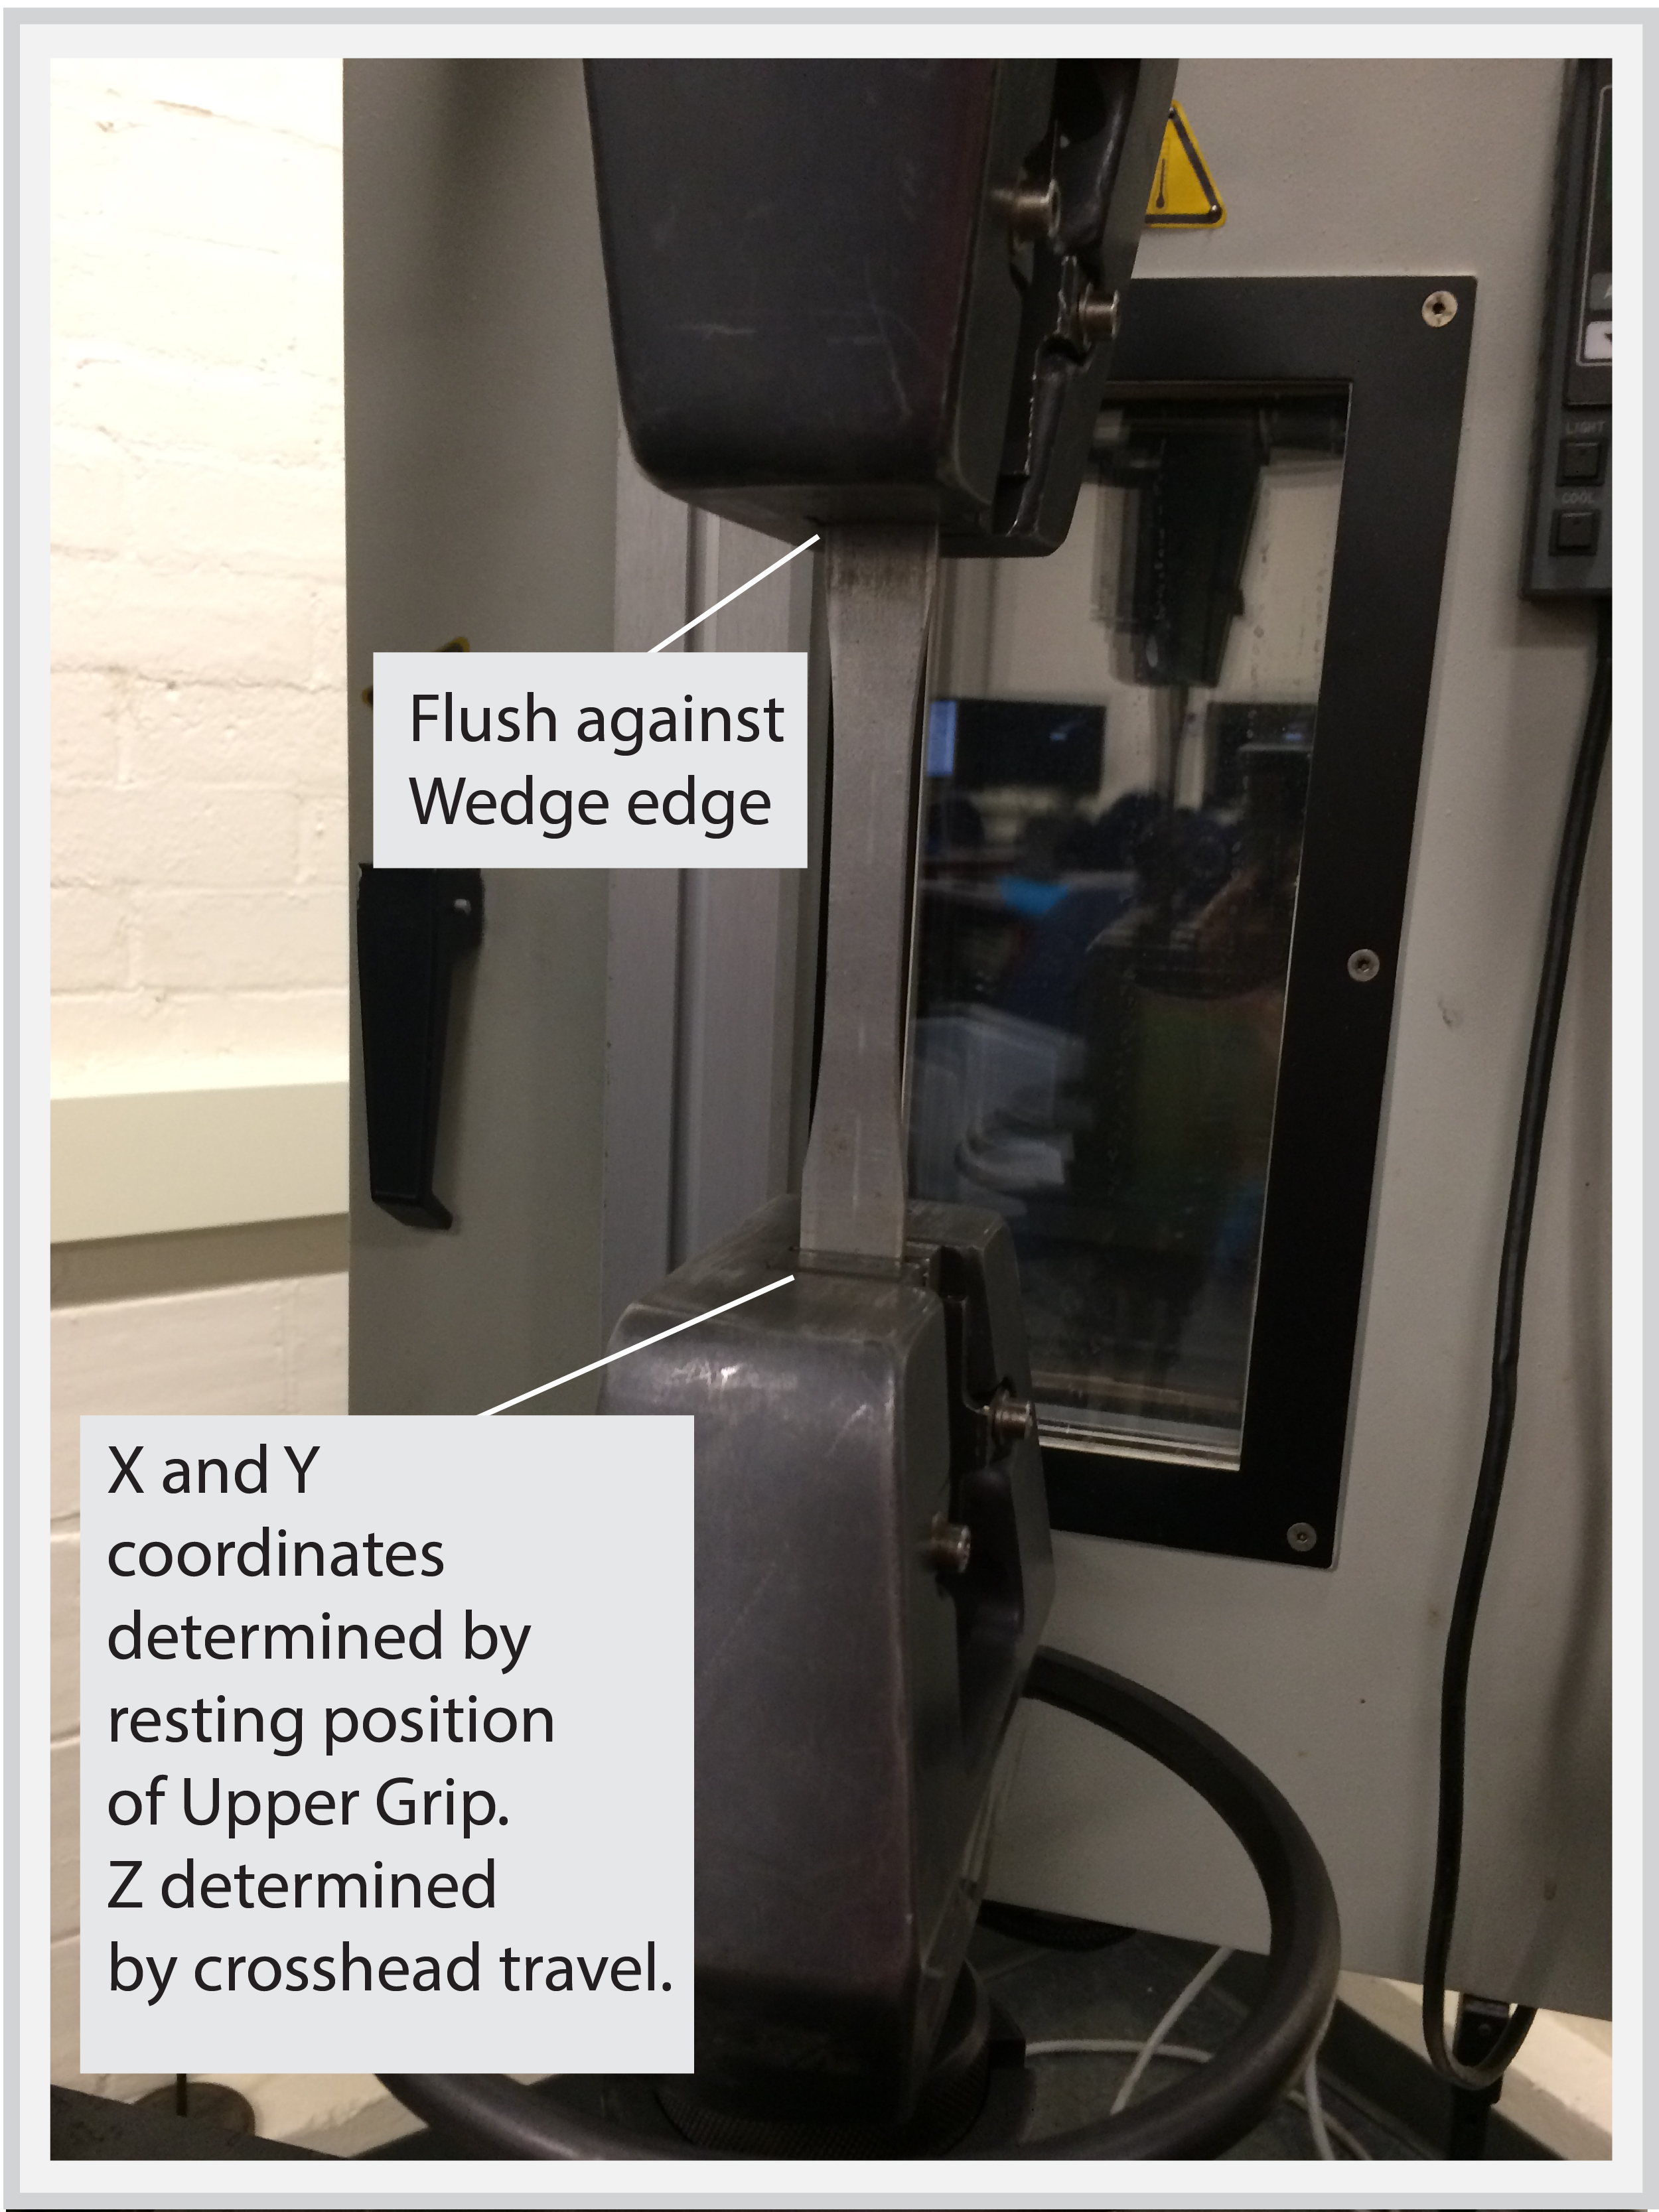
- Place the material specimen into the jaws of the Upper Wedge Grip and clamp it securely. Make sure that the specimen is flush against the inside edge of the Wedge Grip and straight as pictured below.
- Balance Load. This will zero the load on the display.
- Slowly raise the crosshead to bring the Lower Wedge Grip up to the material specimen. Note: Push the material specimen out of the way to make sure the Lower Wedge Grip DOES NOT COLLIDE with either the material specimen or the Upper Wedge Grip.
- Because the Upper Wedge Grip is attached to the Flexible Tension Coupling, it has a range of motion in the X and Y directions. Thus, it’s recommended to let the material specimen hang down naturally and let that determine where it should be clamped into the Lower Wedge Grip. You can determine the Z coordinate by jogging the crosshead up and down as desired.
3. Install the Extensometer
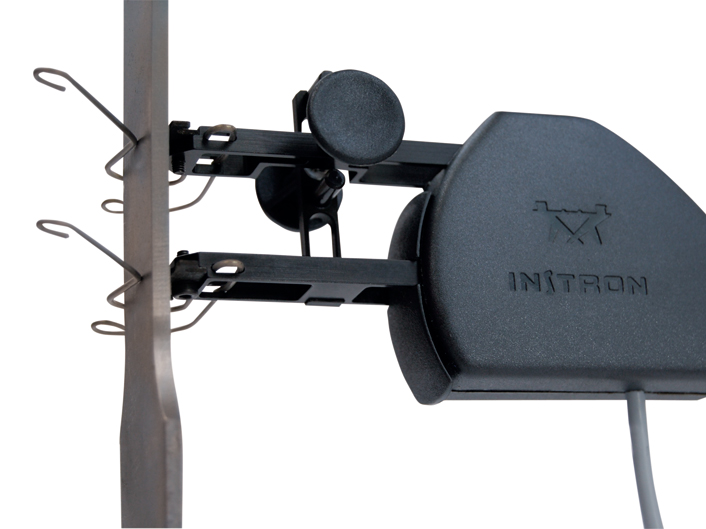
Select appropriate pins and insert into Extensometer
Carefully, clip Extensometer onto specimen by holding the round buttons to ensure the arms do not move. Do not scrap the knife edges against the material (this could damage the Extensometer and speciman).
Balance Strain 1. <<Need to update the software page to include balance strain 1 as a button key>>

