ShopBot Machine Setup
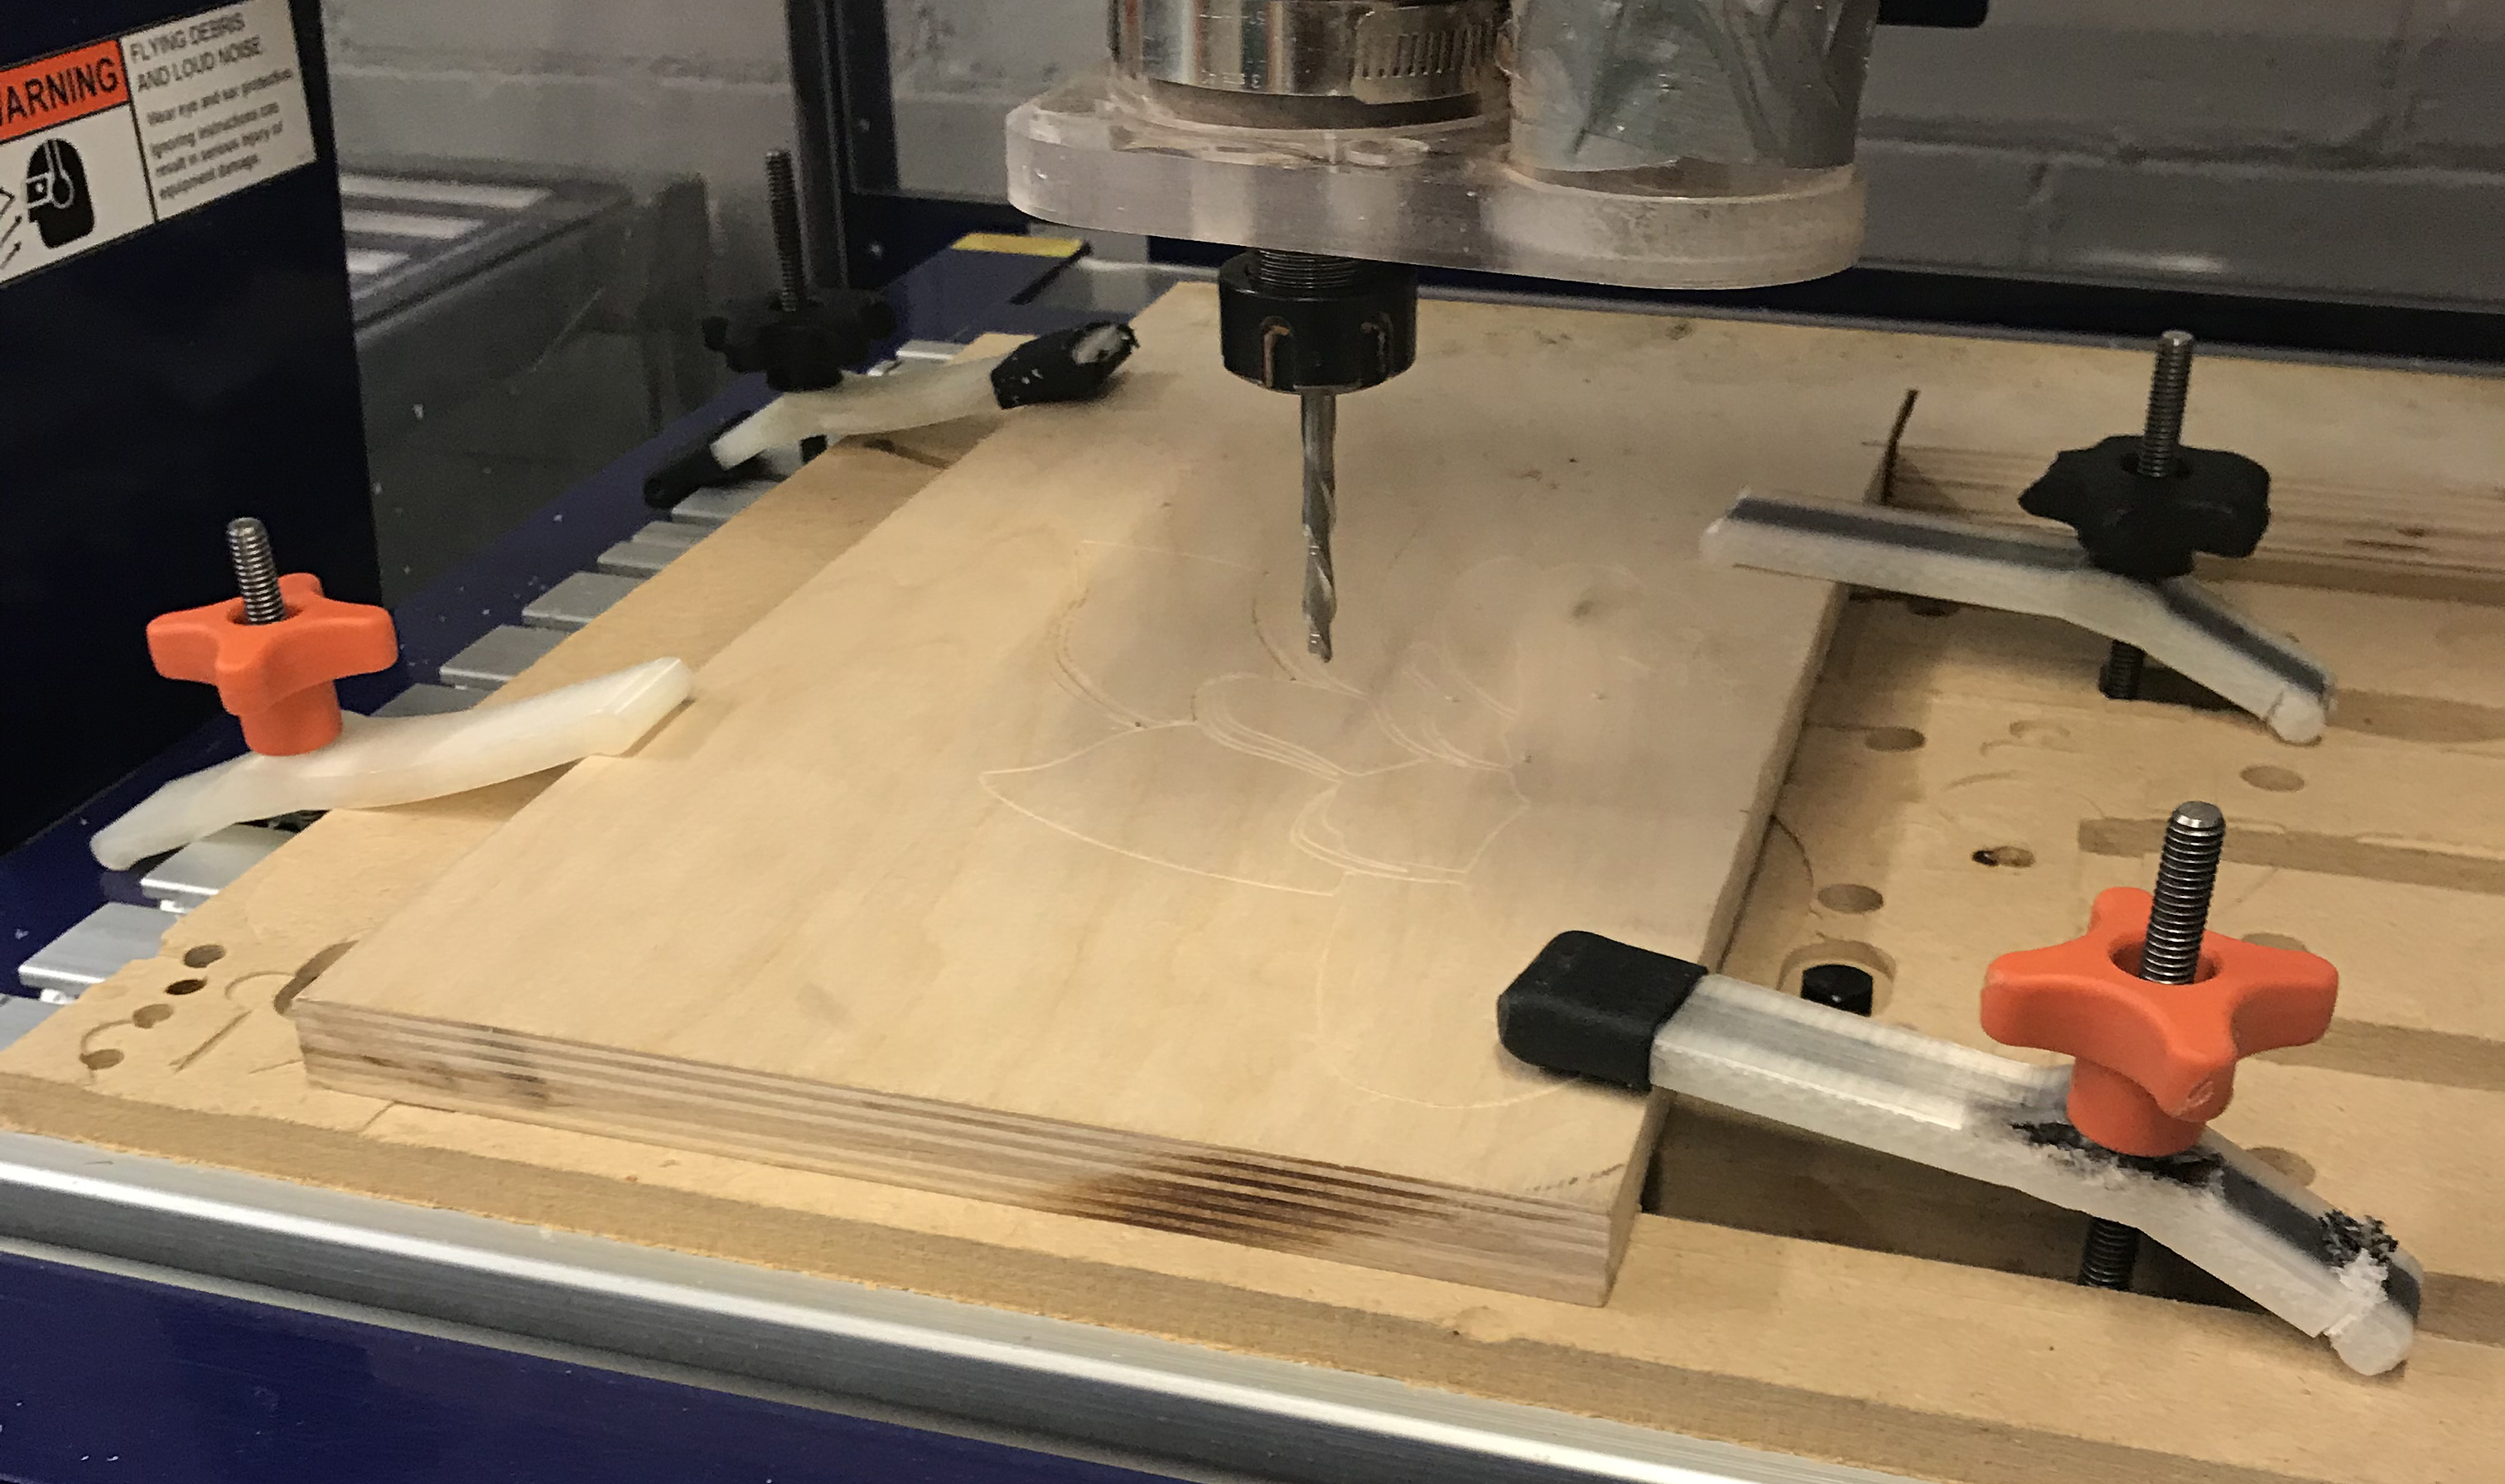
1. Secure your work piece
Use at least 3 clamps to secure the work piece.
- Make sure your clamps will not be in the way of the bit.
- Make sure your clamps are not hanging over the edge of the workspace as they will get in the way of the machine.
- Make sure the clamps will not be in the way of the zeroing routine.
- Some claps have rubber ends– these are great to use on slippery materials like HDPE. The clear acrylic corner pieces can be used to limit rotation.
NOTE: Once your milling job has finished, the machine automatically returns the spindle to XY zero. Best practices suggests clamping three corners of your material, and zeroing your XY to the non-clamped corner to avoid tool and clamp collision.
2. Insert the bit
- Use the two wrenches to remove previous bit from the collet. Place a scrap piece of foam, wood or plastic below the bit in case it falls out of the collet when removing.
- Refer to the image below on how to use the wrenches. Move the wrenches TOWARDS EACH OTHER to LOOSEN. Move AWAY FROM EACH OTHER to tighten. Do not overtighten the bits!!

- If necessary, remove collet and insert a new collet that is sized to the desired bit.
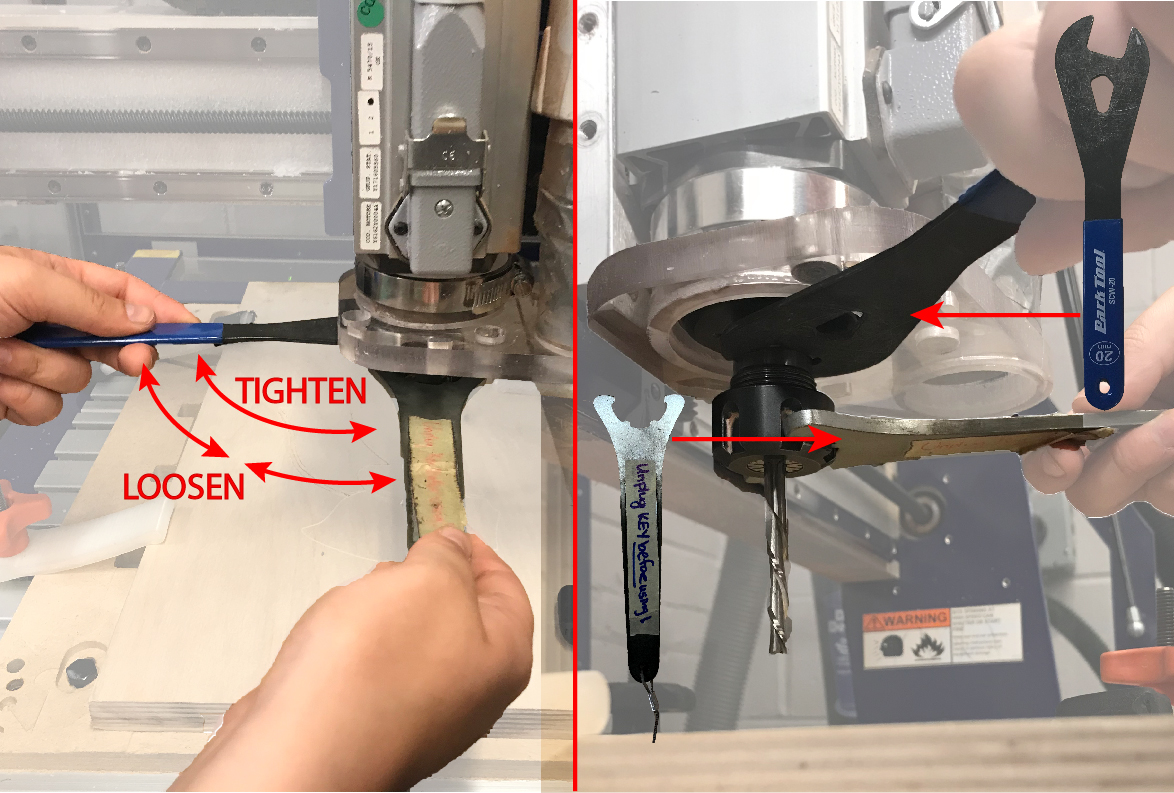

- Insert the desired bit up into the collet (be careful that the flutes of the bit DO NOT go up inside the collet!).
- Use the wrenches to hand tighten the bit and collet in place.
NOTE: The type of bit the machine will be expecting to use is whatever bit was selected in the software during the toolpath creation. It is up to you to make sure that you are putting the correct bit into the machine that matches what is indicated in the toolpath.

3. Zero X, Y, and Z axes
- To zero the X and Y axes:
- Open the control panel that allows you to move the spindle. Use the arrows to navigate to the lower left corner of your material. Alternatively, you can click on the numerical locations, type in a value, and press “Go To.”
- Once you are satisfied with your X,Y location, press the blue “Zero Axes” button. Check the box for X and Y. Do not check the box for Z. You will zero the Z axis in the next step. Press enter to confirm this zero location for the X and Y axes.
- Use paper zeroing to zero the Z axis.
- Move the spindle close to your material.
- Place a piece of paper between the bit and your material. Continue to move the spindle down in the Z direction until it touches the paper. You may need to type in values and press “go to” to move the spindle in very small increments.
- Your goal is to feel friction between the paper and the bit, but not tear the paper. Once you can feel this friction, press the blue “Zero Axes” button. Check the box for Z. Press enter.
NOTE: Once your milling job has finished, the machine automatically returns the spindle to XY zero. Best practices suggests clamping three corners of your material, and zeroing your XY to the non-clamped corner to avoid tool and clamp collision.
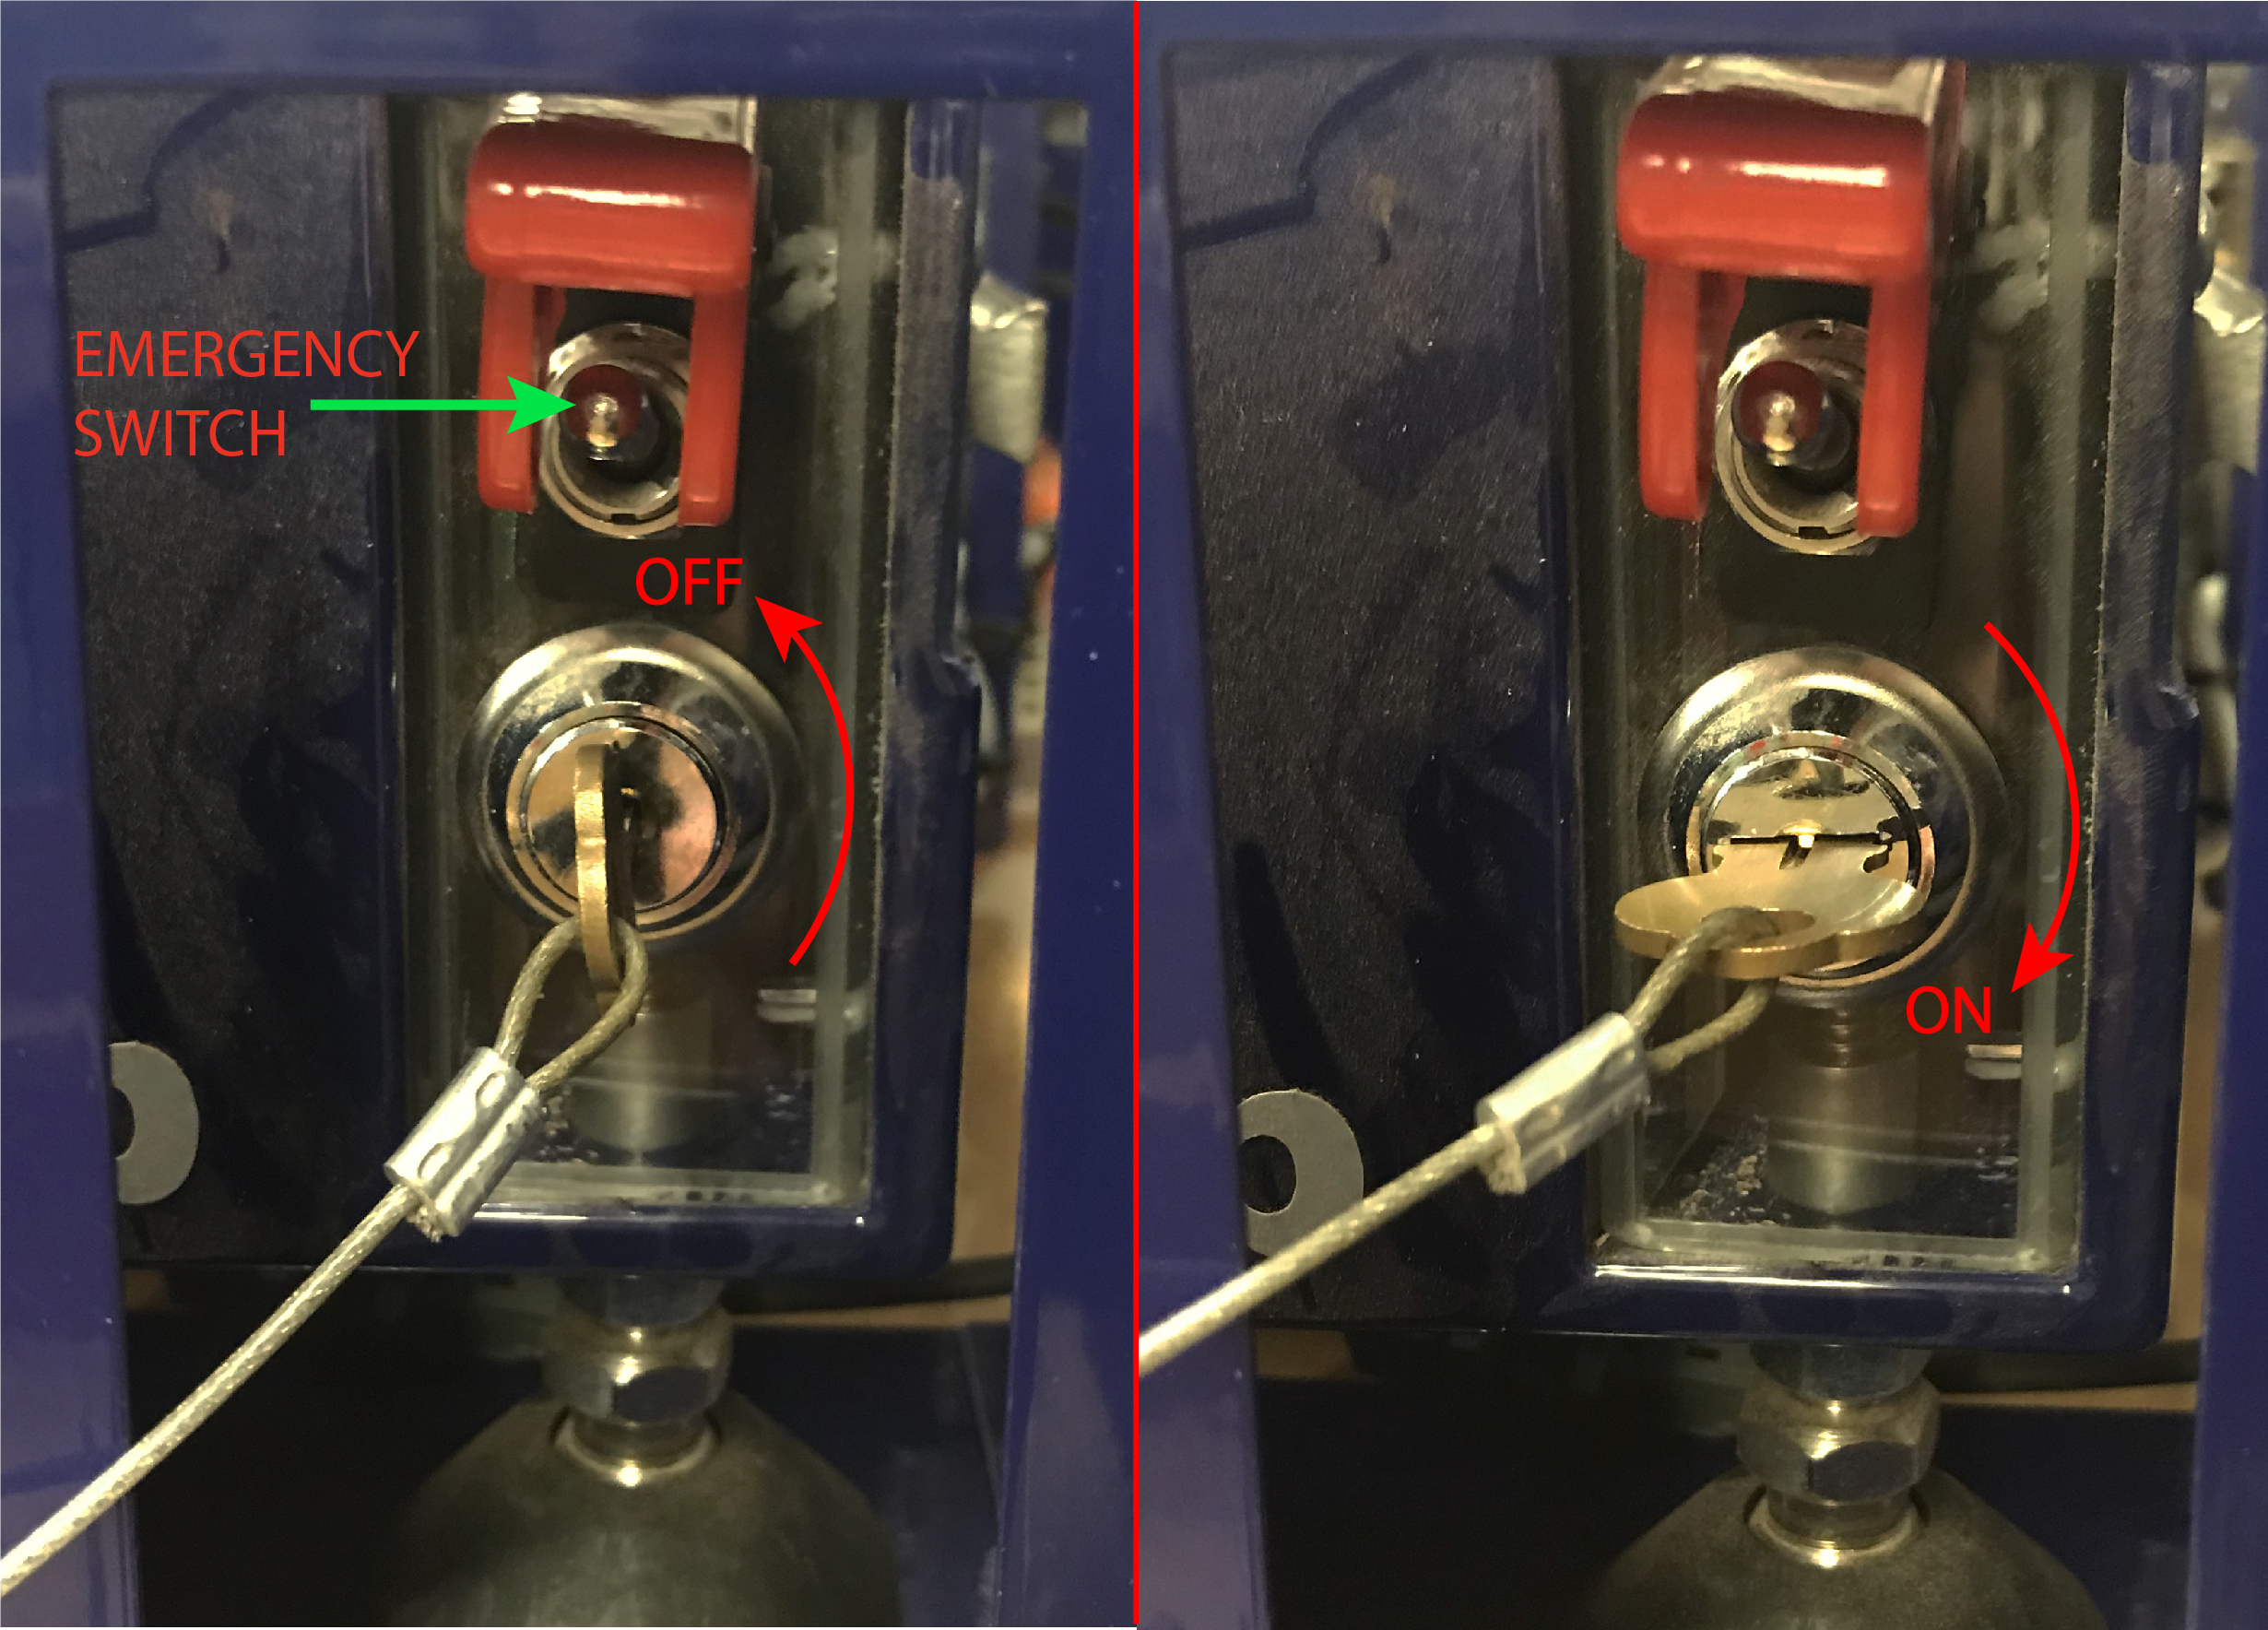
4. Warm up the spindle
- Close the ShopBot cover and put the spindle key into the lock and turn 90 degrees:
- Exit the keypad view (if open), and switch to Full view by clicking on the light blue box with the question mark “?”
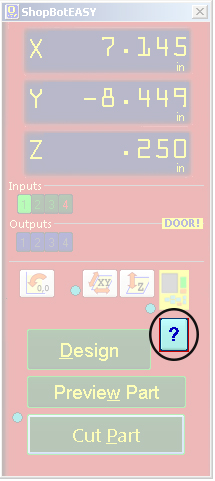
- Click the ‘Switch to FULL’ button. The ShopBotEasy panel will disappear and the below Command Console will appear.
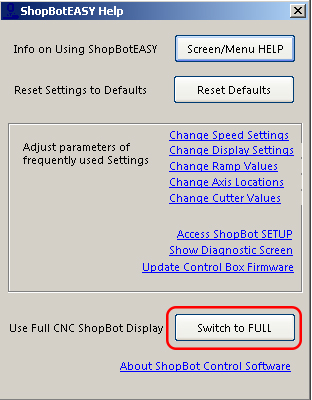
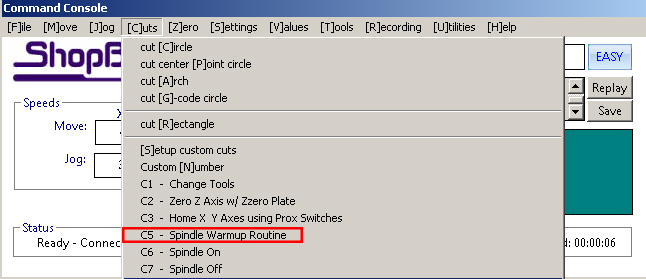
- Click on [C]uts and choose command C5 – Spindle Warmup Routine.
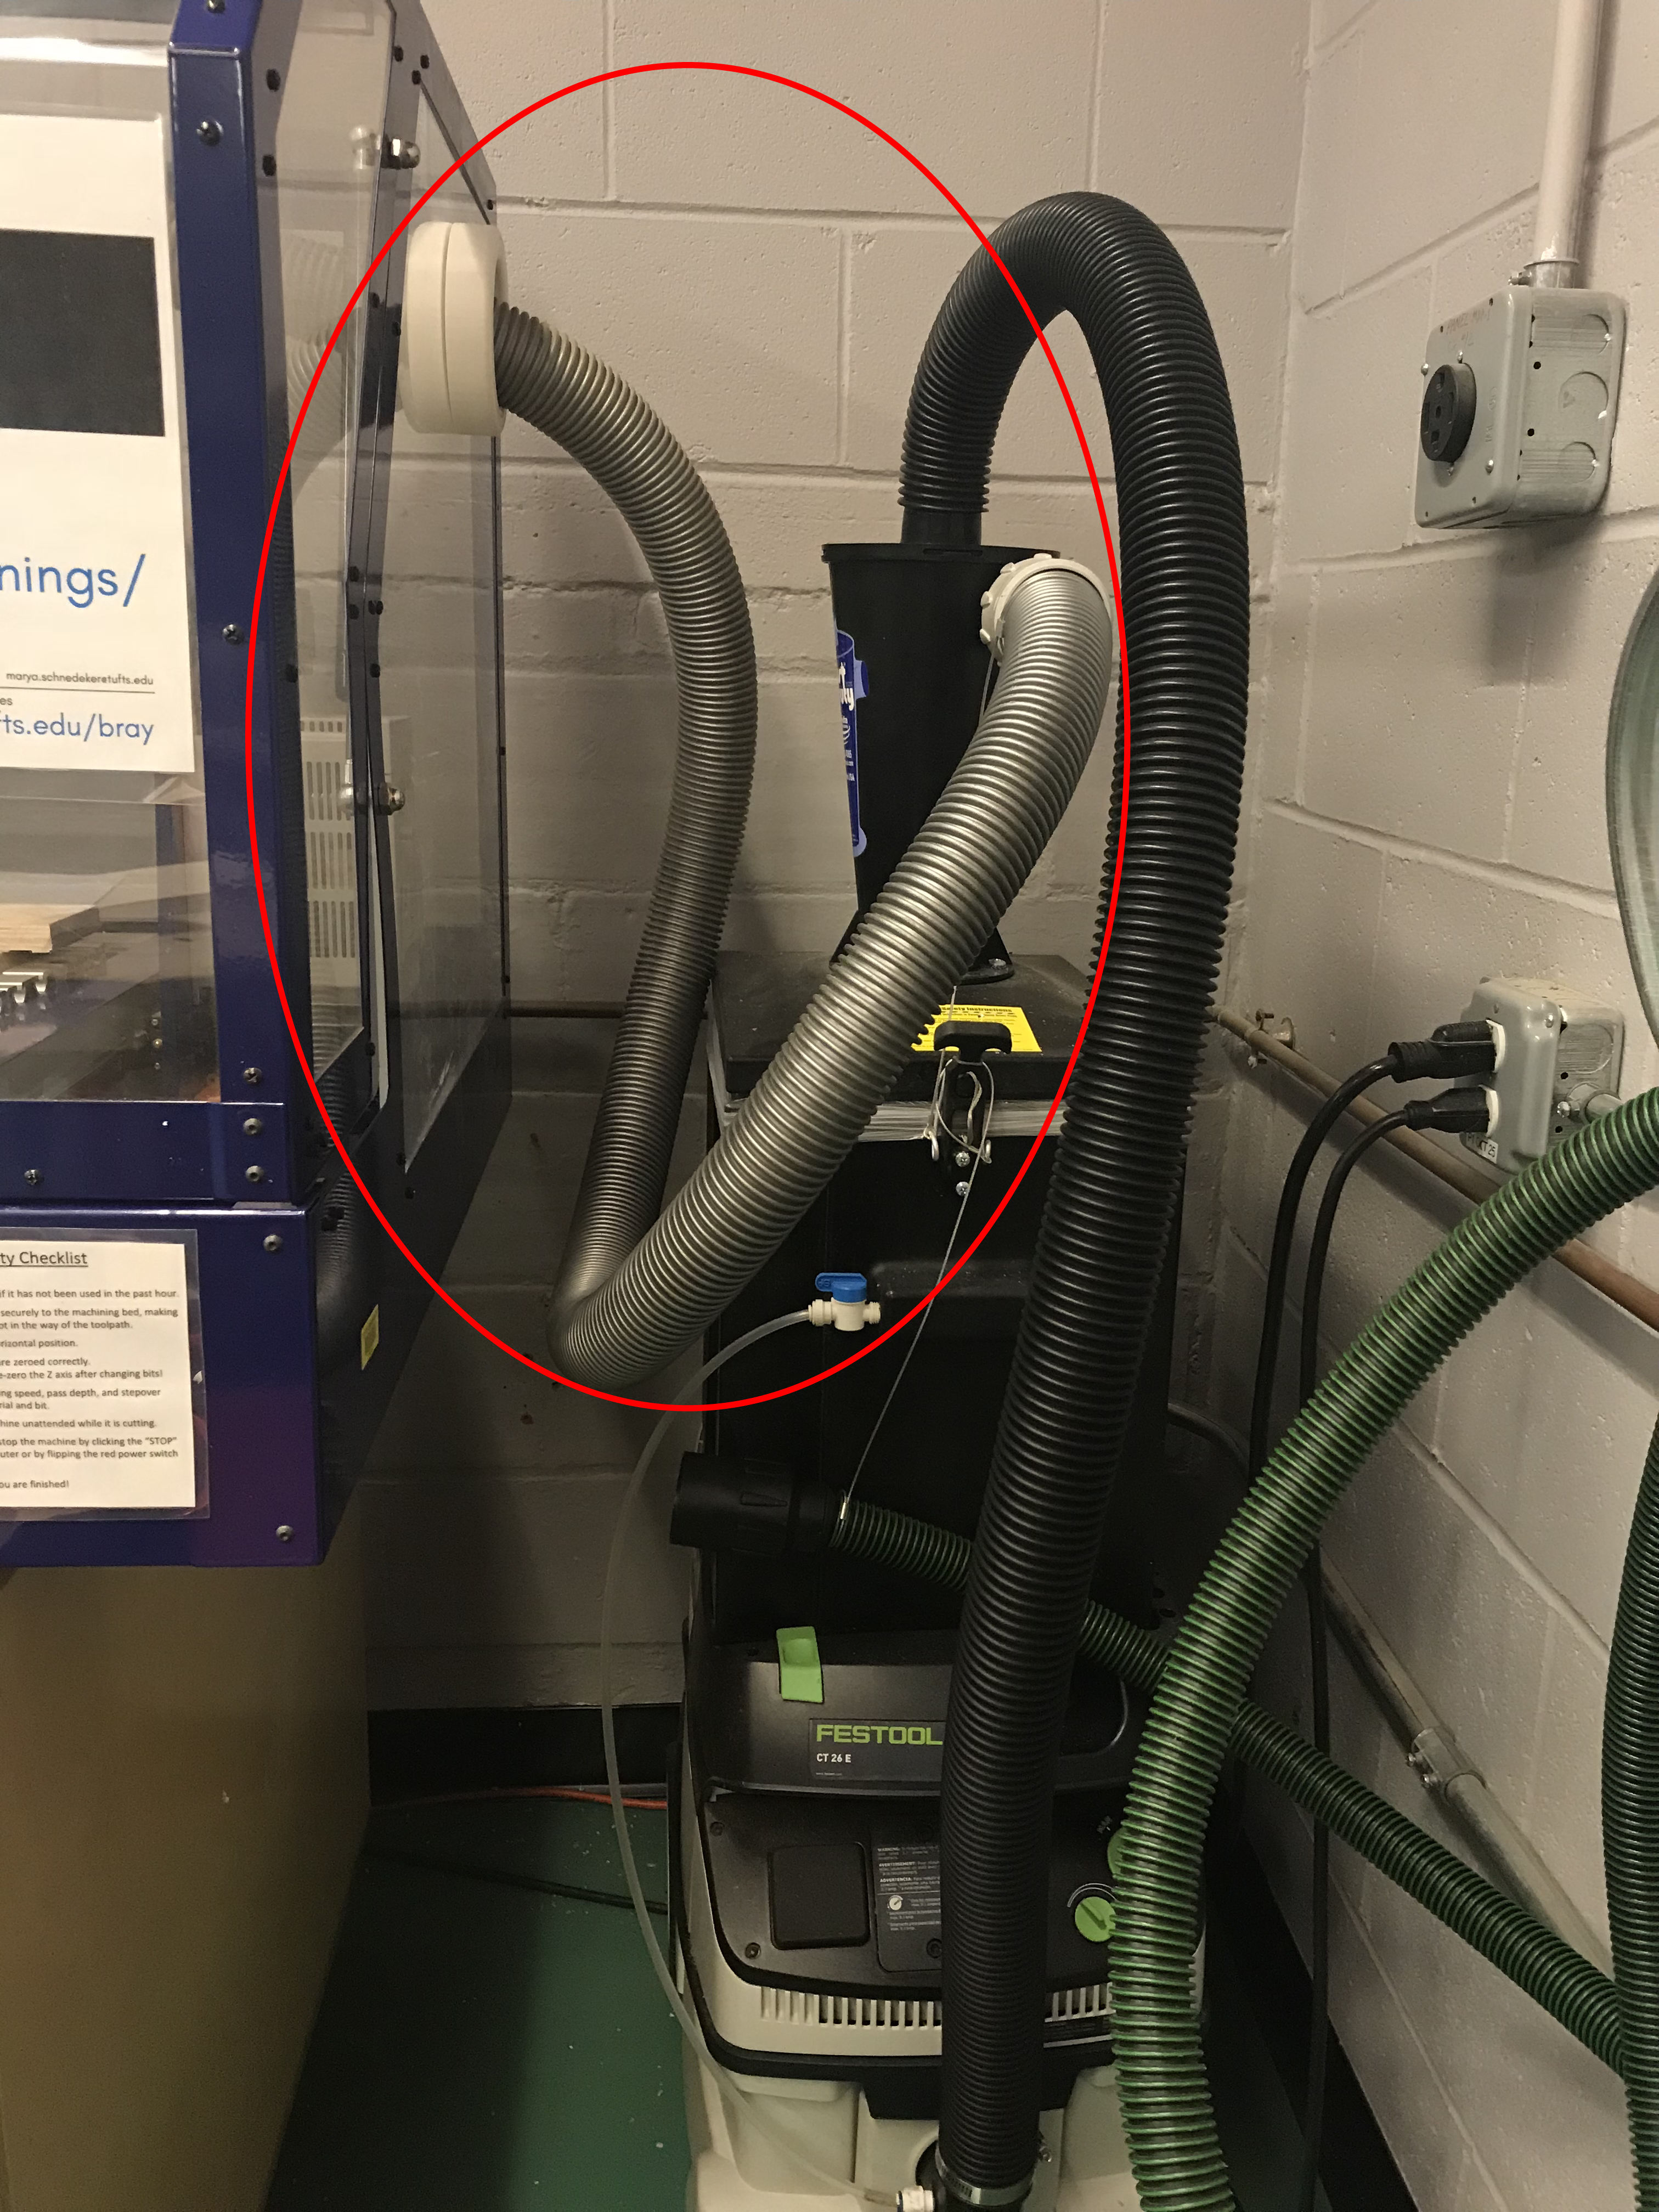
5. Dust collection and running cut
- Check that the light gray vacuum hose is connected to ShopBot and turn the vacuum on.
- Select the ‘Cut Part’ green button from the Shopbot EASY red panel. It will let you know that the spindle will start running.
- Stand by to use the emergency shut off switch in case there are any issues, for example:
- The machine starts to move but the spindle is not turning (typically because the key is not in its proper position)
- The machine cuts into the spoil board. (Shallow cuts into the spoil board are fine, but this can be an indication that the zero on your file was not set to the top of the material).
PLEASE WATCH THE MACHINE UNTIL IT IS FINISHED CUTTING to ensure the safety of the machine and to prevent damage to your material.
Previous Steps:
The steps below describe how to use the XYZ zeroing plate, which is currently not used.
Zeroing to an Outside Corner

- To zero to an outside corner, place the zero plate face down on the corner of the material as shown, making sure that the plate is pressed up against the board on both edges. The blue dot on the plate marks the origin where the bit will be zeroed.

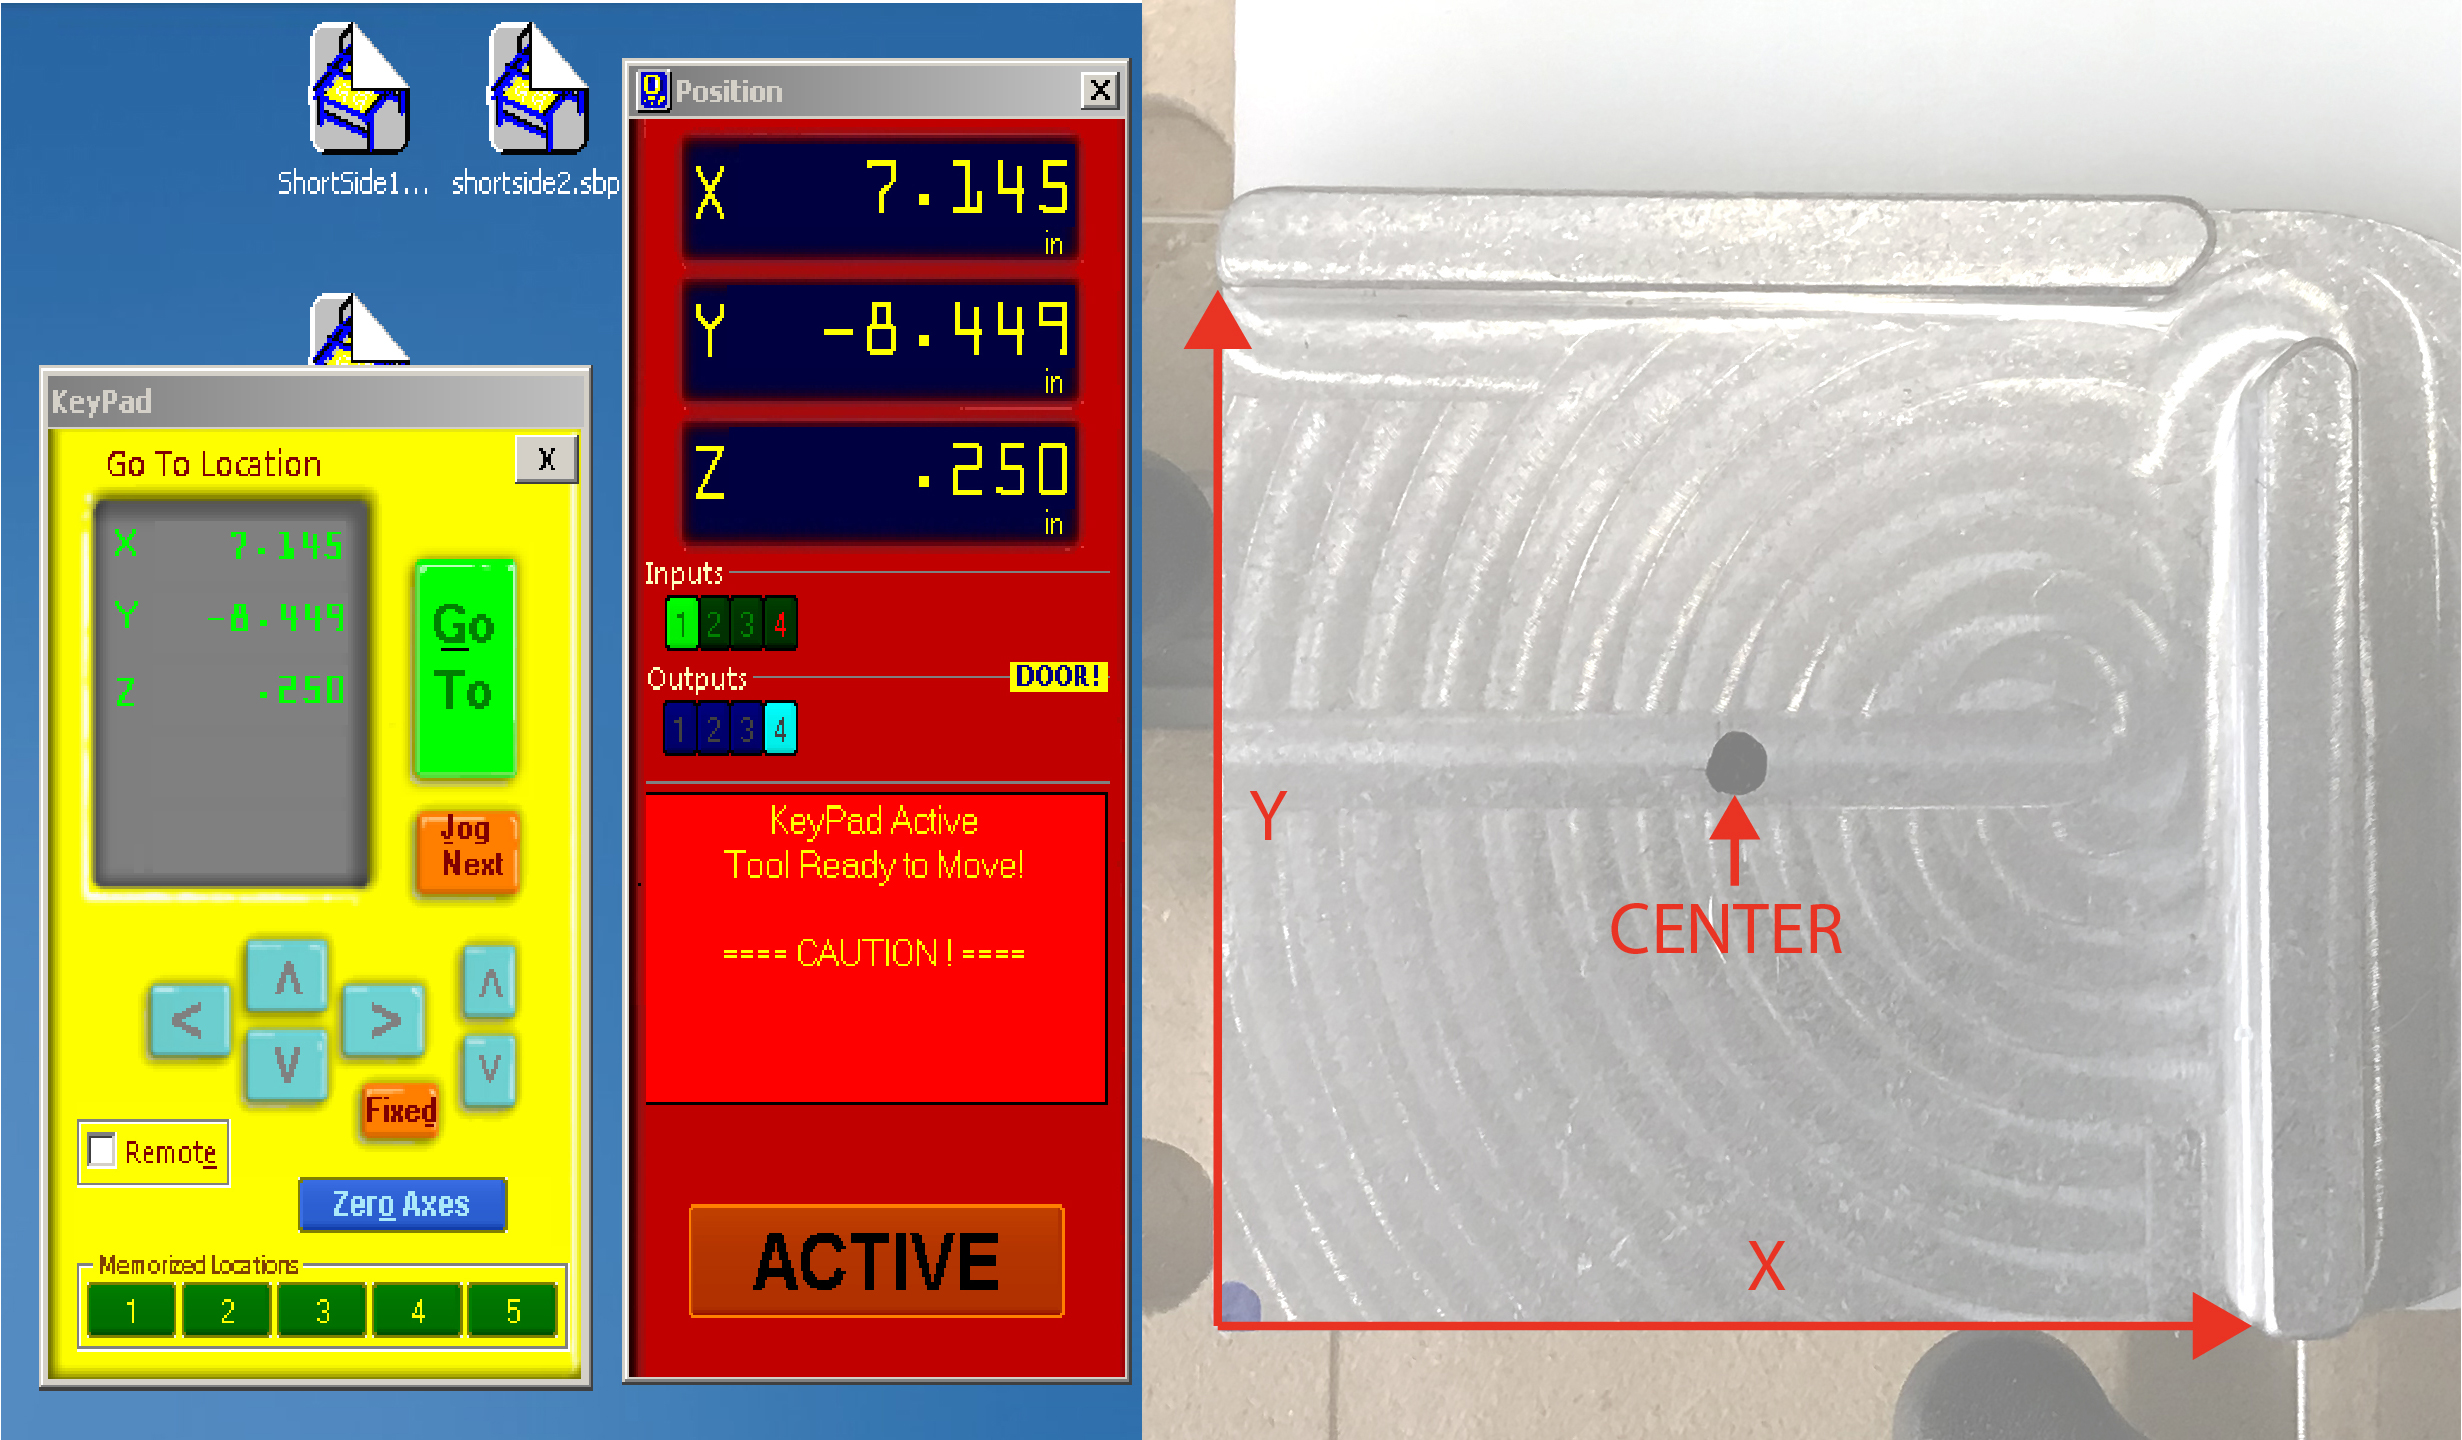
- Select the button that looks like a miniature version of the yellow keypad. Use the keypad’s arrow buttons to move the spindle over the top of the plate’s center (use black dot as reference).
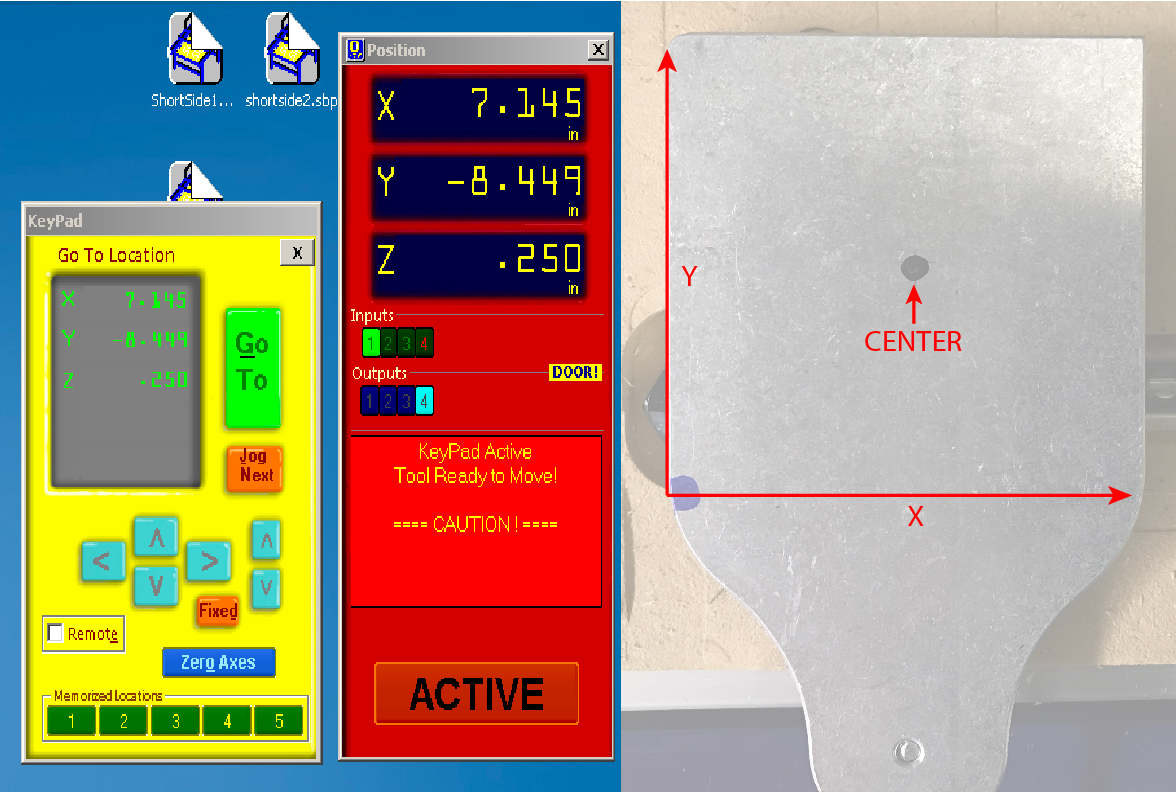
- Exit the KeyPad.
- Clip the alligator clip to the neck of the spindle to ground it. Test the connection by touching the zero plate to the bit. The Input 1 on the red Position panel should light up green if the connection is good.
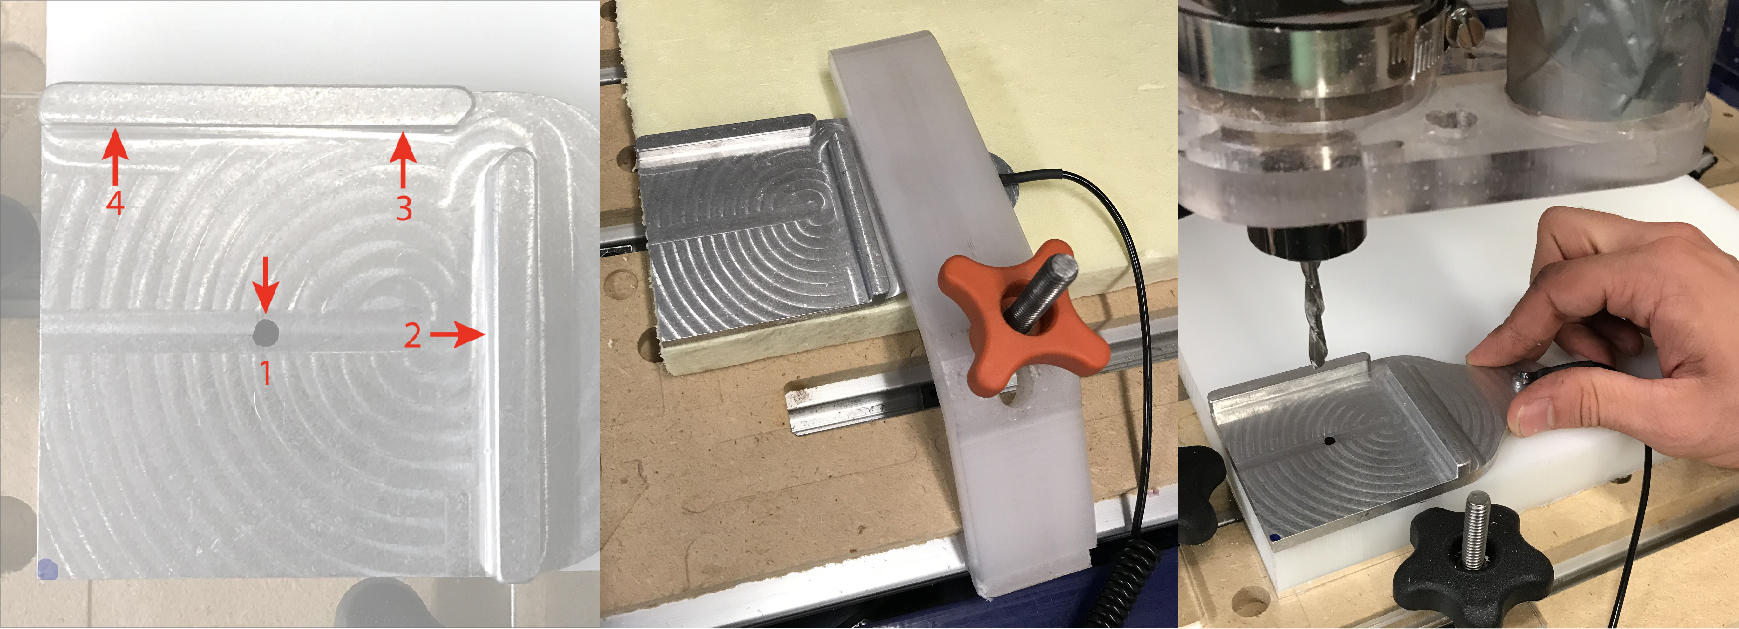
- You will need to hold the plate in place during the routine and the bit will touch off on the following surface of the plate. As long as you clamp or hold on to the plate outside of these areas, you will not interfere with the routine:

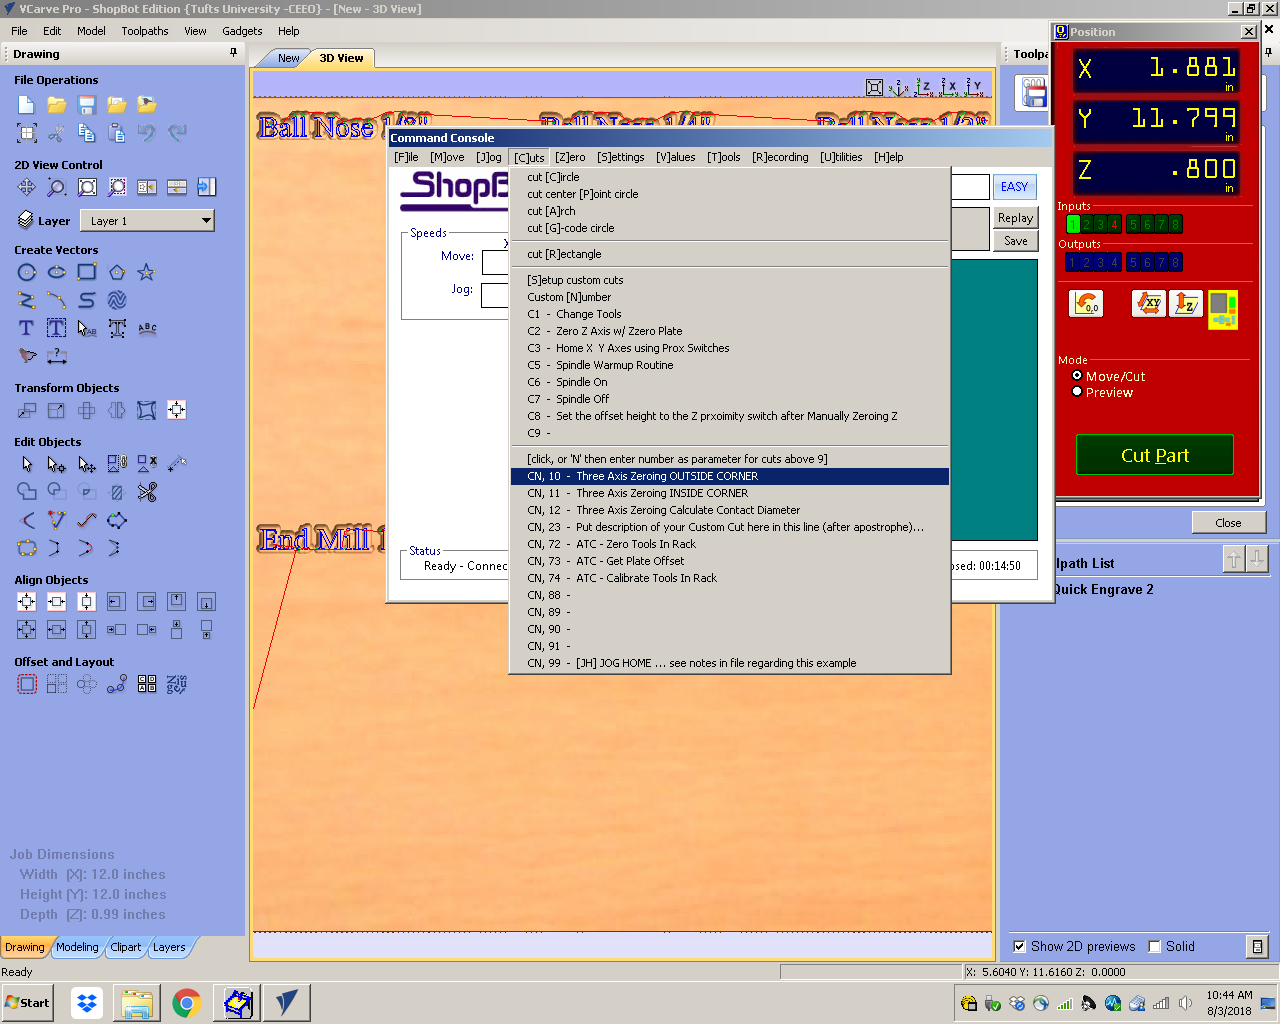
- In the Shopbot Command Console, select [C]uts CN – 10 Three Axis Zeroing OUTSIDE CORNER to start the zeroing routine.
- Follow the on-screen prompts to finish zeroing all three axes.
- Remember to put away the plate and clamp.
Zeroing to an Inside Corner

- To zero to an inside corner, place the zero plate at the corner of your material. The blue dot on the plate marks the origin where the bit will be zeroed to.

- Select the button that looks like a miniature version of the yellow keypad. Use the keypad’s arrow buttons to move the spindle over the top of the plate’s center (use black dot as reference).
- Exit the KeyPad.
- Clip the alligator clip to the neck of the spindle to ground it. Test the connection by touching the zero plate to the bit. The Input 1 on the red Position panel should light up green if the connection is good.
- You will need to hold the plate in place during the routine and the bit will touch off on the following locations on the surface of the plate. As long as you clamp or hold on to the plate outside of these areas, you will not interfere with the routine:
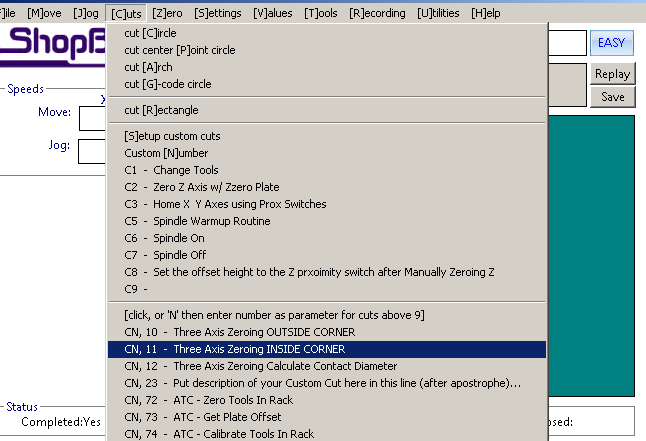
- In the Shopbot Command Console, select [C]uts CN – 11 Three Axis Zeroing INSIDE CORNER to start the zeroing routine.
- Follow the on-screen prompts to finish zeroing all three axes.
- Remember to put away the plate and clamp.

