After reviewing the sketch pages, our team decided to move ahead with three concepts for a new shop training project – a pen holder, model car, and picture frame. The pen holder has a lot of room for design capabilities, and uses an appropriate amount of material for a training project, involves the use of all yellow machines plus potentially the use of the DI Wire Bender, and is practical for a college student. These qualities made the pen holder a leading candidate for fabrication as a training module. The model car, on the other hand, will probably take longer and involve more parts, but adds an element of fun and therefore more excitement. There is also a lot of room for extra design features for the car project, such as building a ramp, racing the cars, and posting the results on a leader board, or building a type of ripcord or torsional spring feature to launch the cars forward. The excitement of the car may be attractive to students, especially considering that one of the biggest problems with the wall hook was that it was boring. Lastly, the picture frame is another practical design that can be built to involve the use of all machines and is also slightly more exciting than the wall hook. However, the excitement that comes from the picture frame doesn’t come from the “fun element” like the model car, but rather from the design’s practicality. The other big problem with the wall hook was that it couldn’t be used in a dorm room. We figured that our new designs had to be either fun or practical or both in order to draw more interest in using the shop.
The next step was to ideate and create different designs for each of the concepts. Unlike for sketching, which was done on generic 8.5″ x 11″ paper, we used big sheets of paper to draw out our ideations. The goal here was to tune our concepts so they can be modeled and built well in the shop. Therefore, we put an emphasis on understanding the dimensions of the materials that the students will be working with, so we could better visualize and create ideations of our concepts that could be realistic training projects. We spent a lot of time drawing, but we also spent a lot of time discussing and building off each other’s sketches. We also wanted to brainstorm features that went outside of the realm of the yellow zone tools to add more flare and interest to the projects, while being careful to not stray too far away from the main objective of shop training. For example, we sketched out ways we could incorporate wire bending into the structure of the pen holder, or laser cut acrylic for the picture frame or bonus materials (axles and wheels) in the model car. However, as mentioned previously, it’s important to not make the project too intimidating because most of the students who are fabricating these projects probably have never spent any previous time in the shop.
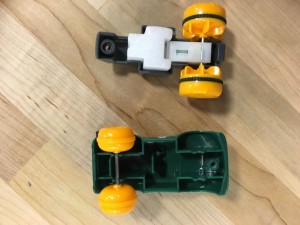
To help with our ideations, we also made a trip to Toys R Us to do some “advanced research” which involved buying and ultimately taking apart some model cars. The goal was to understand some of the more advance features of the car and to get a better sense of how we could model these features in the shop. We had a good time in the store, retrieved some heavy data from our research, and Ben even recognized some of the products he helped design. We ended up buying a few different car models, and each model had a different acceleration mechanism. Two models had a wind back and release feature meaning that when the car was rolled backwards it would propel forwards upon release, three models had a ripcord design, in which a grooved, plastic, cord would be inserted into a rotating gear that was fixed to the car’s wheel and when the cord was pulled backward, the wheel would spin forwards. The last car model had a charged acceleration method that worked by rolling the car a few times forward while keep it secure in hand, and then letting it go after a significant amount of torque was built up.
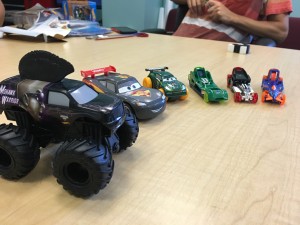
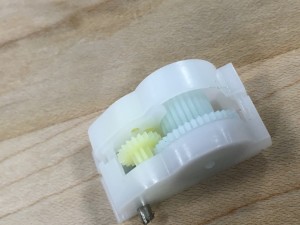
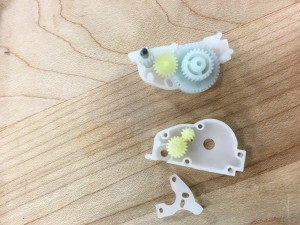
We took apart the models and examined the interior. We first looked at the two “Cars” models, which both featured the wind-back design. After breaking off the exterior shells we noticed that both models have a very similar design for their respective systems. They both featured a gearbox system that attached to a torsional spring. A gear was connected to a torsional spring on end and attached to more gears that ultimately connected with a fixed gear on the axle. When the car was released, the torsional spring would release, spinning the gear rapidly and propelling the car forward.
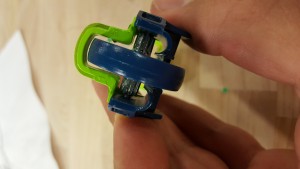
Above, we can see the gearbox system that is used to accelerate the car. The blue gear connects to the torsional spring and the green gears attach to the smaller blue gear which is fixed on the car’s rear axle. It is worth mentioning that the other “Cars” model had a nearly identical gearbox.
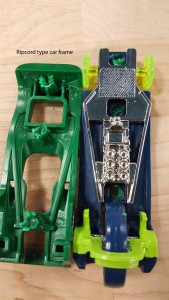
The next models we observed were the ripcord “Hot Wheelz” cars. These cars had a grooved gear attached to the rear axle. The ripcord would insert into the slot between the gear and frame, and when pulled back it would spin the back wheel, moving the car forward.
The car had a three wheel design, with a much larger wheel located in the rear of the frame. This design is something we could see ourselves emulating, because it would be relatively easy to create the gear and ripcord with the 3D printer and laser cutter and it would be a cool bonus feature to have the car accelerate without just simply pushing it forward. Creating the body of the car could be done with the use of all yellow zone tools so students could get all the appropriate training, which is the main objective of the project. This was an idea we liked, and definitely wanted to ideate further with the ripcord design in mind.
Today, there is still work to be done to create the final models of each design so they can be designed in CAD and we can begin prototyping them. This week will be spent doing just that – designing our models on Solidworks and hopefully we can begin fabricating them in the shop. Once we actually fabricate each model we will have a much better idea of the amount of materials, rigor, and time needed to build each project.
