This week saw great leaps forward on the picture frame, but ultimately proved something of a disappointment. The great leaps: a new design and two prototypes! The drawings showcased in last week’s post were prototyped, resulting in a proof-of-concept model that actually worked fairly well.
This design did turn out to have some issues, however. Most notably, it proved much more difficult than anticipated to accurately bend the frame’s aluminum legs; additionally, the bending process slightly warped the frame’s center sheet, preventing the picture from laying flat.
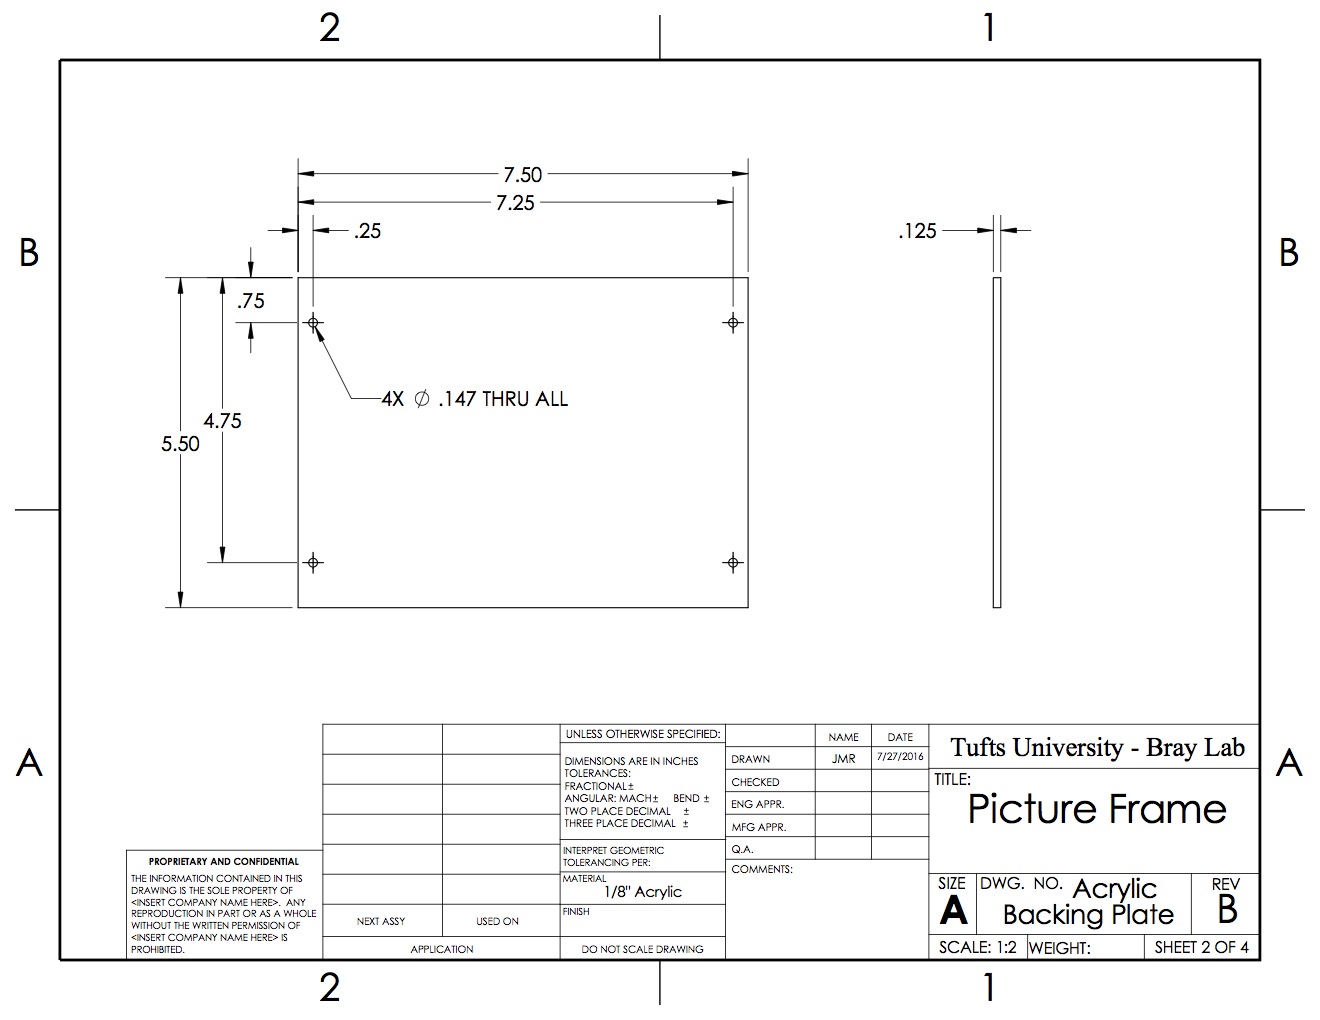
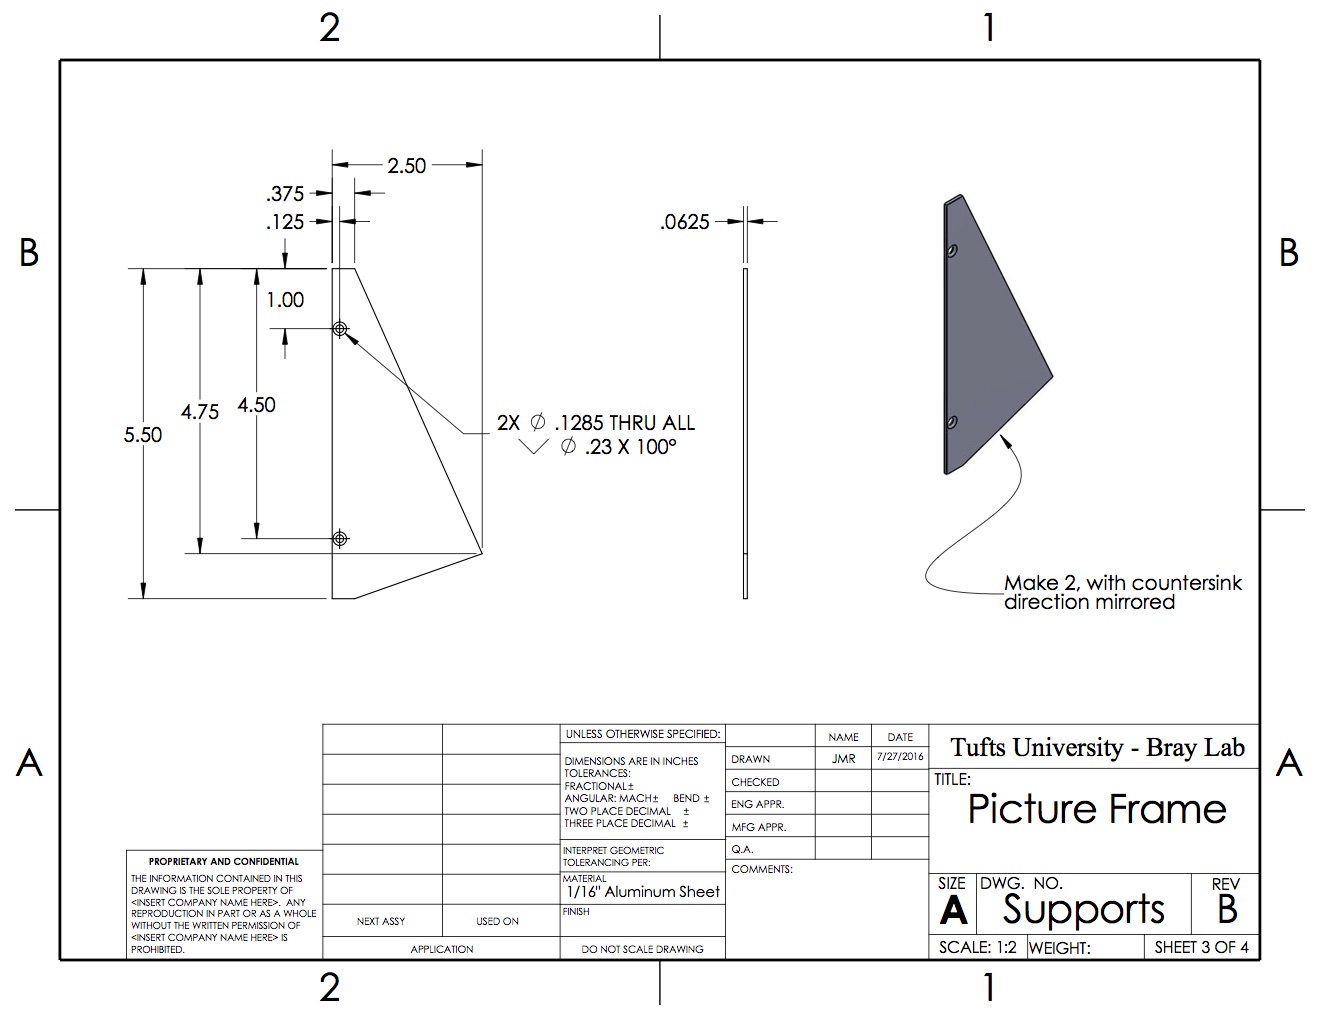
These considerations—difficulty bending and a warped image support—led to picture frame, rev. B, the designs for which are shown below. It replaces the single bent aluminum sheet frame with two aluminum sheet legs that are screwed into the vertical picture clamps, with the picture backed by a 1/8″ acrylic sheet.

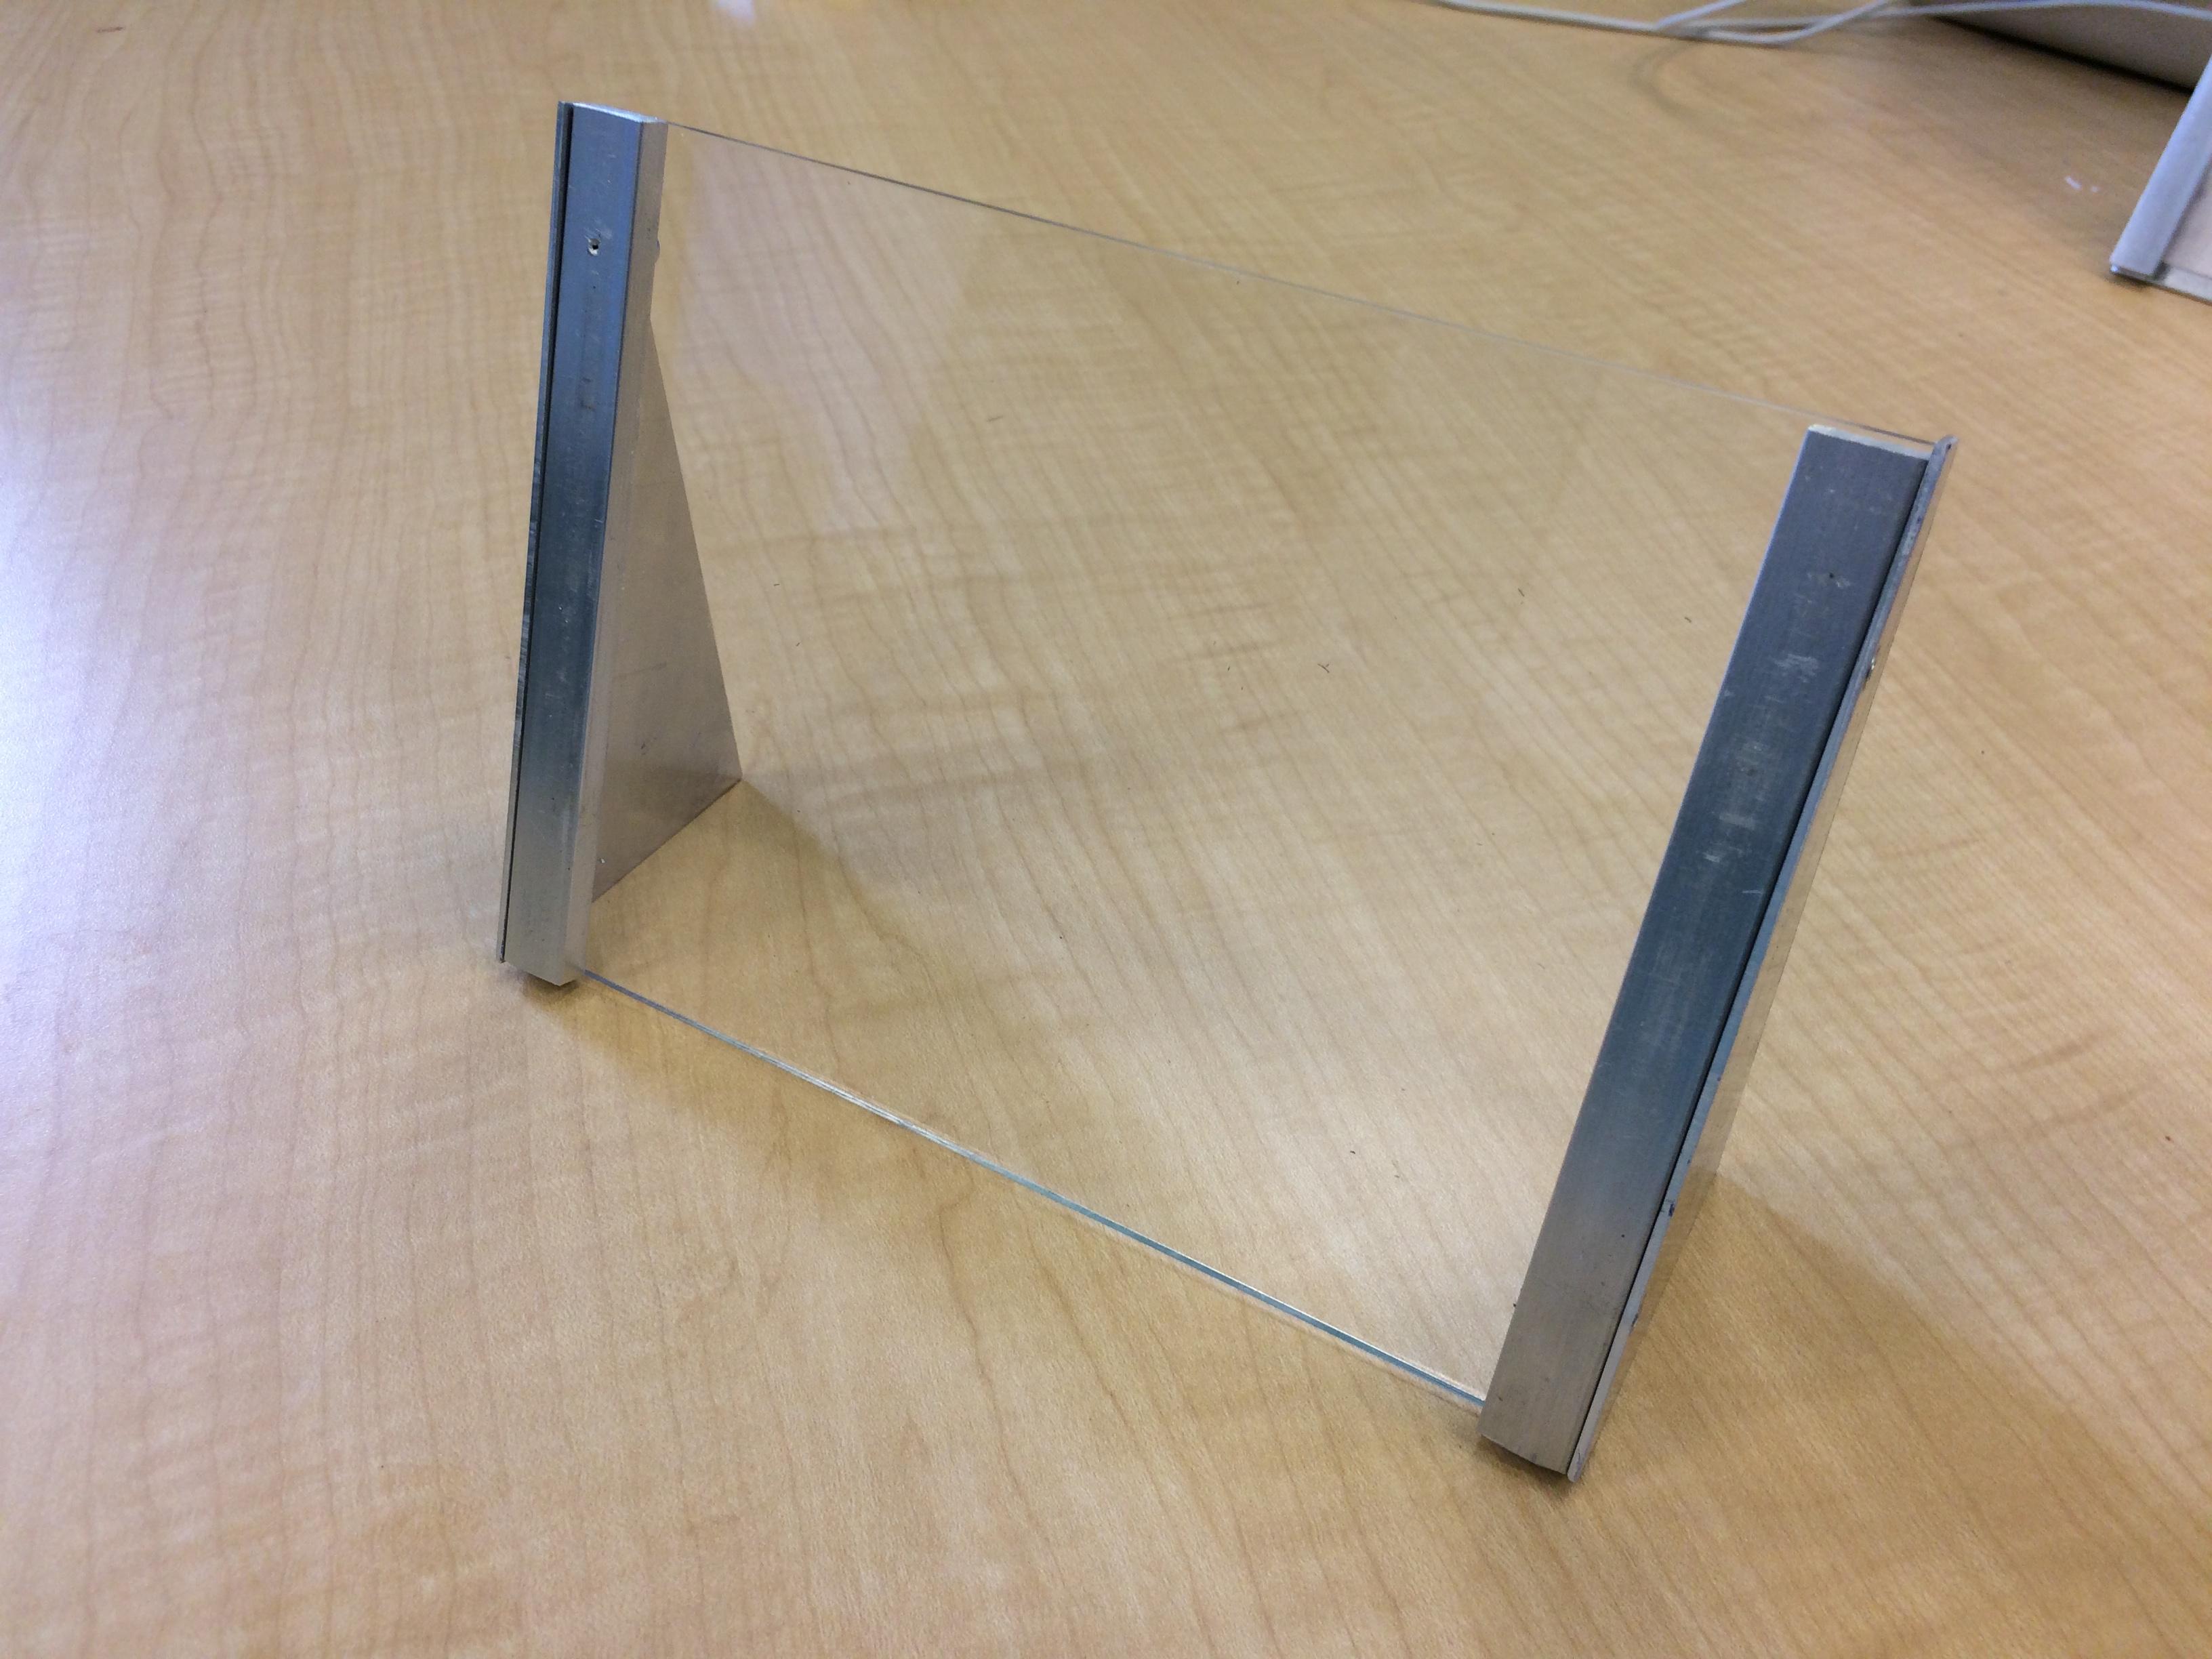
As this design did not include any sheet bending, it proved much easier to build using only the tools currently in the yellow zone than the initial design. This new design was prototyped as well:
As suspected, the new design proved much simpler to build. However, I still believe it fails on two counts. First, it incorporates two tools that are not used in the wall hook: the laser cutter (to cut the acrylic), and the hand drill (to drill the holes in the leg plates). Second, and more important, this design costs over $7 in raw materials, several cents more than the initial design and far more than the $0.50 wall hook. As such, if we were to proceed with this design, we might need to incorporate a “pay-to-play” model, where the wall hook is the default option, but students can pay a materials fee to make something larger.

