98 Developing Code for VUE
Building VUE From Sourceforge
WORK IN PROGRESS
PRE-CONFIGURATION CHECKLIST
- You’ll need to know whether your machine is 32 or 64 bit. If your machine is a mac, go tohttp://support.apple.com/kb/ht3696. If your machine is Windows, google it…
INSTALL ECLIPSE
- Go to http://www.eclipse.org/downloads/ and download Eclipse IDE for Java EE Developers. The latest version at the time of this writing is Indigo. Install it.
- You’ll need subversive or subclipse (we’ll assume subversive here), the plug-in for Eclipse that allows you to connect to subversion source.
INSTALLING SUBVERSIVE
In Eclipse, follow these steps:
- on the help menu, choose install new software
- paste “http://download.eclipse.org/releases/indigo” into the “work with” field
- click on “collaboration”
- choose Subversive SVN Team Provider
INSTALL SVN CONNECTOR
You’ll also need an svn connector, which for licensing reasons has to be installed separately
- help/install new
- paste in http://community.polarion.com/projects/subversive/download/eclipse/2.0/indigo-site
- choose all versions of SVNKit
I had difficulty getting the “Finish” button to enable. It seemed to be resolved by drilling
down in the tree of options and selecting all three versions of SVNKit and nothing else.
Setting Up VUE Project
- In Project Explorer, right-click and choose Import/Import…
- choose SVN/Project from SVN
- Next
- Choose Create new repository location
- Next
- enter URL https://tuftsvue.svn.sourceforge.net/svnroot/tuftsvue and click Browse…
- navigate to the root you want (I chose trunk/VUE2)
- click OK
- choose Use a custom label and enter VUE2
- type username & password and check Save password
- Next
- choose Head Revision (even though it’s already chosen — must choose again to enable Finish)
- Finish
- Choose Check out as a project configured using the New Project Wizard
- Finish
- Choose Java Project
- Next
- Type VUE2 as project name
- Finish
- check-out will take a while
- Once VUE has checked out right click the project and close it.
Building from the command line
Once you’ve gotten this far you must build VUE from the command line once to create Version.java which contains information about the platform where VUE is being built for debugging.
NOTE: You’ll need to have ant in your path.
To build, in Terminal cd to ~/Documents/workspace/VUE2/src and type ant all
For Mac, VUE.app will be found in build/MacDist/VUE.app
For Windows, VUE.jar will be found in build
FINISHING UP WITH ECLIPSE
With your Eclipse project still closed:
- You you want to replace the .classpath and .project file in the VUE2 folder with the ones attached in the tar file at the end of this page. You’ll definitely want to use these rather then figuring out what is and is not in the classpath on your own. The files you want to replace are located in the projects root folder, like this:

- Assuming you’ve succesfully replaced those two files with the files in the tar at the bottom of this page, and built VUE once succesfully using the ant script, you can now open the VUE2 eclipse project.
- You should now see no errors in the Problems View.
SETTING ECLIPSE UP TO RUN VUE
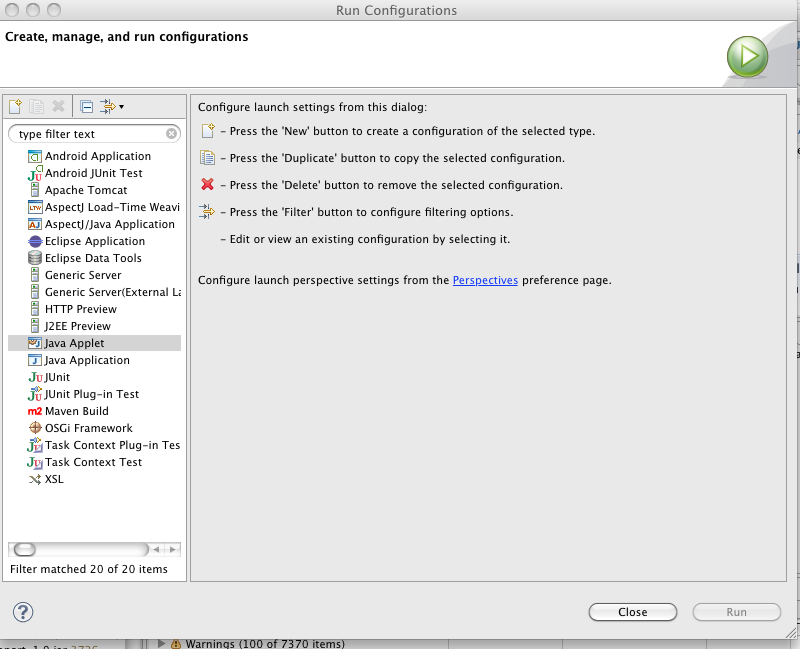
- Click the drop down arrow on the Green Run button in eclipse.

- Select Run Configurations
- Click ‘Java Applications’ in the left panel and then click the new button:
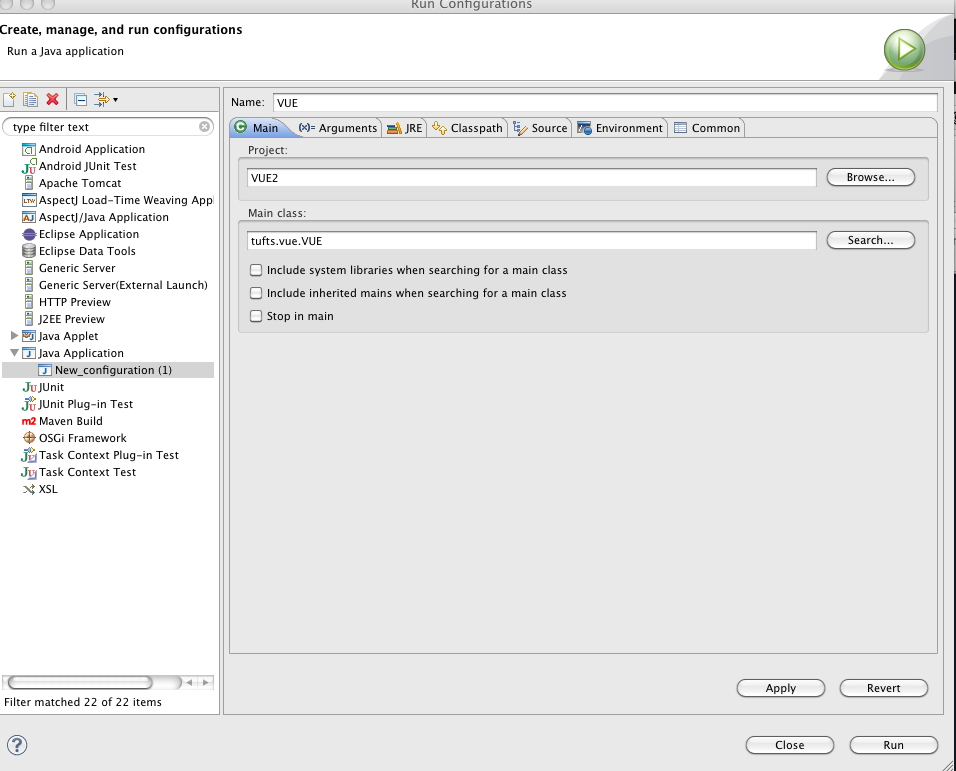
- Change the name to something meaningful, like VUE, and set the main class to ‘tufts.vue.VUE’, see the screenshot:
- Finally, click ‘Run’ and VUE should start up.
TROUBLESHOOTING IF YOU RUN OUT OF MEMORY
To get Eclise to check out VUE on my new MacBook Pro I modified eclipse.ini to increase the heap space
look at http://wiki.eclipse.org/Eclipse.ini for instructions:
right-click the executable and choose Show Package Contents, then locate eclipse.ini in the Contents/MacOS folder.
I set -Xmx512m to -Xmx1512m
then after that worked I set it back down to 1024m
ECLIPSE PROJECT FILES
These files work with VUE Head as of 6/19/2012:
eclipse-files.tar